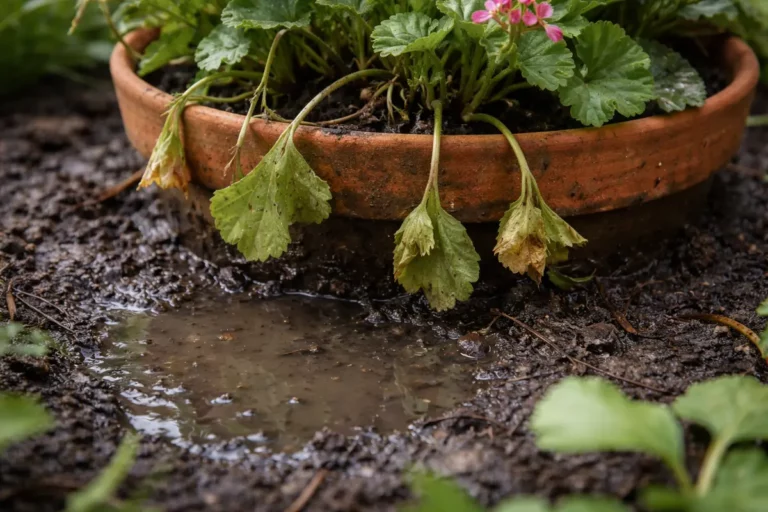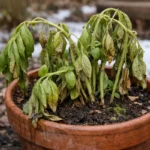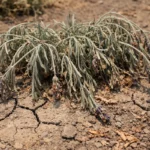
You notice yellowing leaves and wilted stems on your potted strawberries after heavy rainfall, prompting you to consider how to prevent root rot in potted strawberries after rain. The combination of excess moisture and poor drainage is damaging your plants, leading to root suffocation and potential death. Ignoring these signs will cause the problem to worsen and may lead to permanent damage, but taking action now can reverse the trend. You need to act immediately, as delaying intervention can significantly increase the risk of irreversible damage to your strawberries.
Step 1 – Remove Excess Water from Strawberry Pots
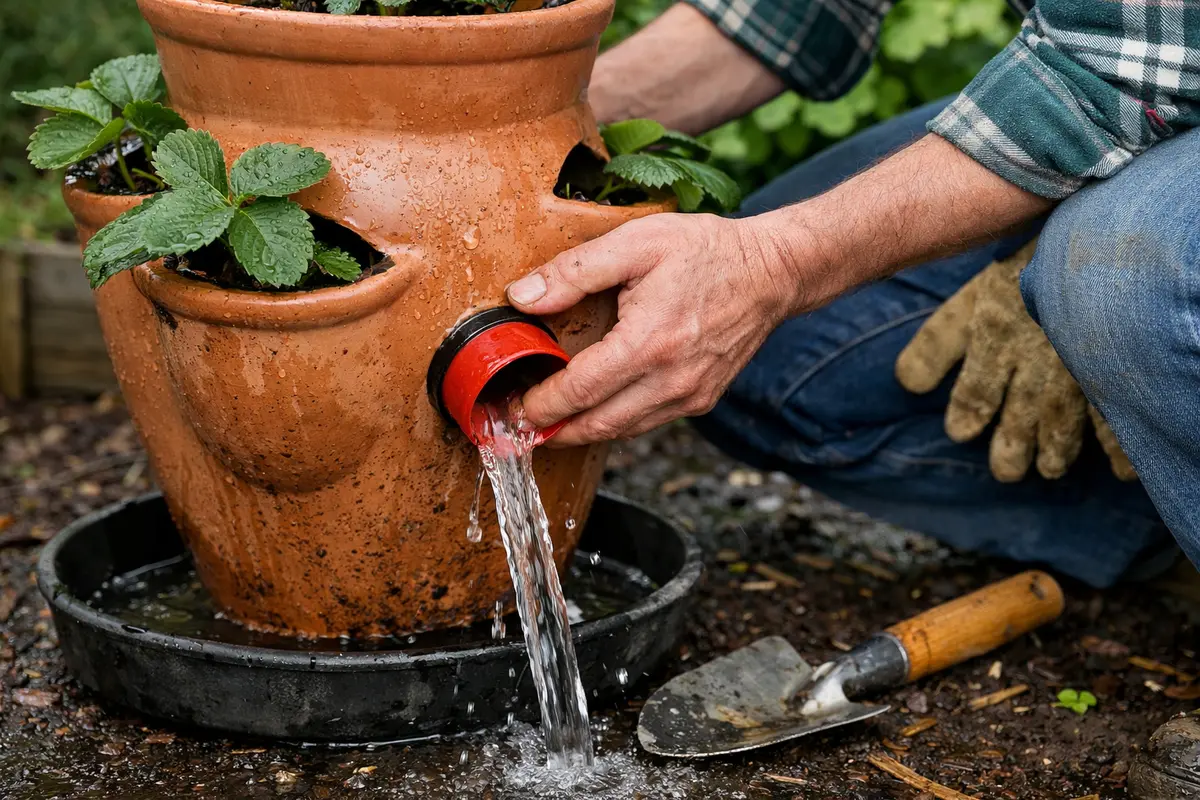
Begin by tipping the pots to drain excess water immediately. You will notice the soil level decreasing and moisture pooling, allowing air pockets to form faster within the soil mix. After this step, the water should no longer be visible on the surface, indicating that most of the excess has been effectively removed. If water continues to collect in the bottom of the pot after tipping, it could signal a more significant drainage problem, and you should prepare to inspect the drainage holes.
Excess water in the pots can quickly lead to root rot, as strawberry roots suffocate and die in saturated environments. Thinning the moisture around roots allows them to breathe and resume healthy function. Acting immediately prevents permanent damage that worsens over time and gives your plants a better chance for recovery. Monitor the pots; if you find that water continues to pool, this may indicate more significant drainage issues that require further inspection. After heavy rains, taking prompt action can make a noticeable difference in your plants’ health. Excess moisture often leads to problems like root rot in potted cacti.
A common mistake is to leave pots standing in water trays after heavy rain, where rot can begin. In my experience, many gardeners neglect this step, thinking the plants can handle the water; however, without adequate drainage, roots suffer quickly. If left unchecked, this scenario can lead to the rapid decline of your plants, causing not only root rot but also inviting pests that thrive in moisture-rich environments. Ideally, pots should be elevated or placed on draining surfaces that facilitate erosion and avoid moisture accumulation. If you regularly experience heavy rain, consider using pots with superior drainage designs, such as those with wider holes or built-in reservoirs, to mitigate further accumulation.
Step 2 – Check for Root Drainage Issues in Strawberry Plants
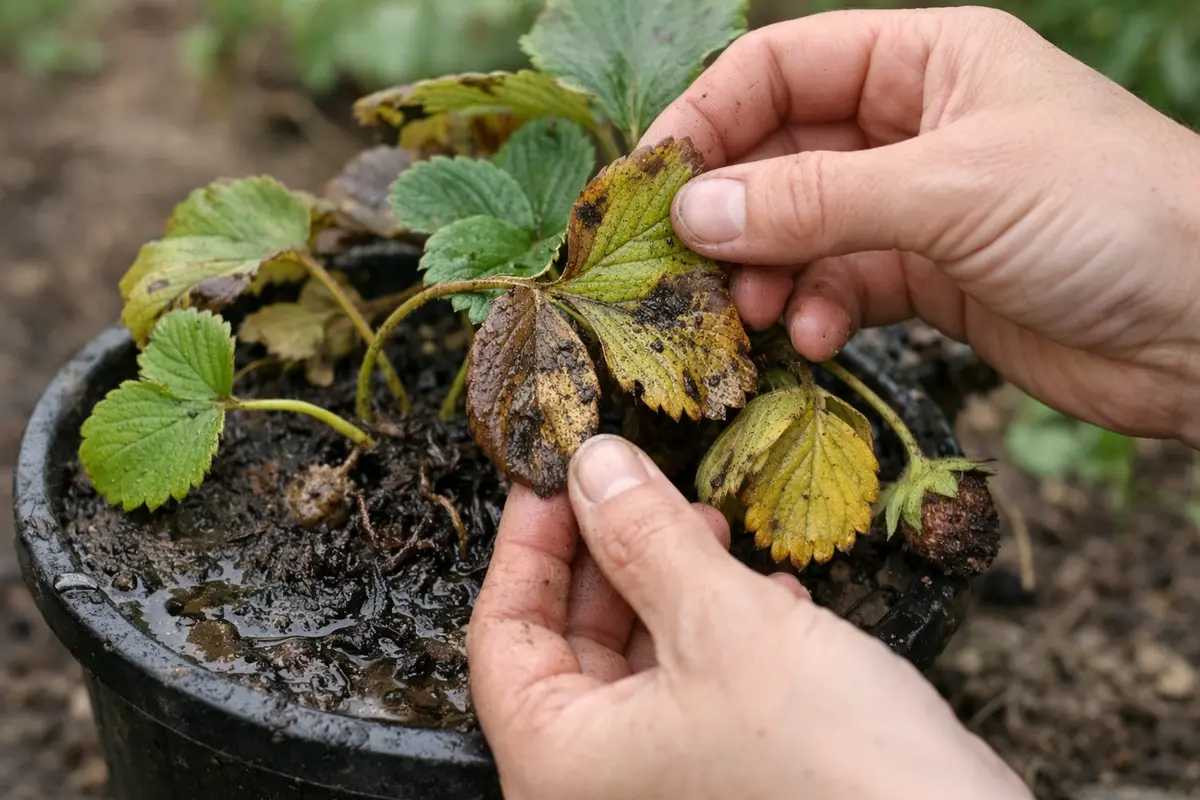
Start by inspecting your potted strawberries for signs of disease, particularly if the soil remains overly saturated post-rain. Look for wilted leaves, darkened roots, or any white fungal growth on the soil surface. If you identify these symptoms, remove affected plants immediately to prevent further disease spread and improve air circulation in the remaining healthy plants.
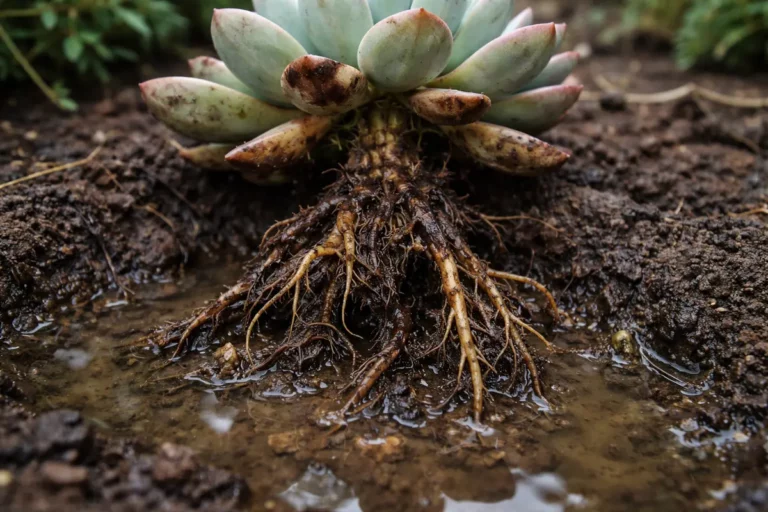
Root rot disease arises when pathogens, such as Phytophthora or Pythium, flourish in excessively wet soil conditions, leading to the breakdown of root tissue. This damage restricts nutrient uptake, resulting in symptoms like yellowing leaves and stunted growth. Healthy roots should appear firm and white, in contrast to the mushy, brown appearance of diseased roots, indicating immediate action is necessary. Additionally, be on the lookout for a foul odor emanating from the roots, a strong indication that decay is occurring. Excess moisture often leads to problems like root rot in potato plants.
If the soil smells sour or has a slimy texture, consider repotting your strawberries in fresh, well-draining soil. Alternatively, if you notice white mycelium but roots seem intact, adjust your watering practices to ensure the soil dries between waterings instead of maintaining constant moisture. This will inhibit fungal growth while promoting healthy root development. Recognize that watering practices should change with the seasons; during the wet season, reducing water frequency despite initial plant appearance can help maintain your plants’ health.
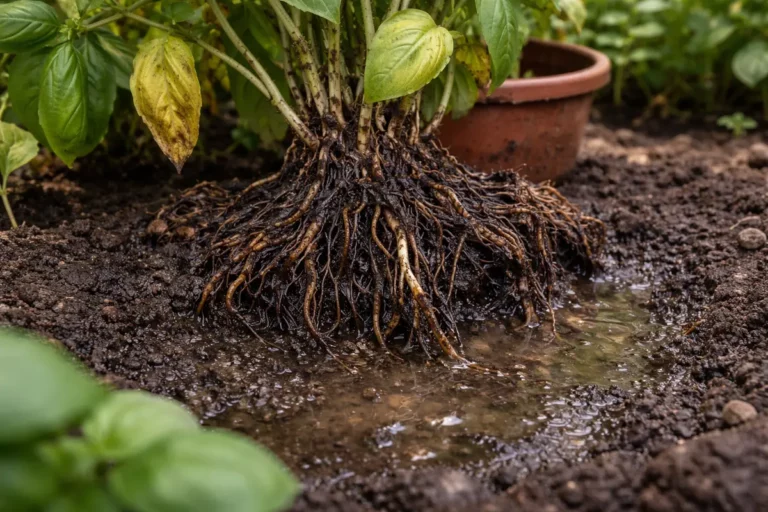
Roots need proper drainage to thrive; if they’re sitting in waterlogged soil, they can become mushy and start to rot. With potted strawberries, it’s vital to ensure that the growing medium drains well, especially after heavy rain. Insufficient drainage exacerbates root stress and can lead to a complete collapse of the plant. You can enhance drainage by incorporating additional perlite or vermiculite into your soil mix, providing better aeration around the roots. The choice of pot is also crucial; using pots made from breathable materials like terracotta can improve drainage and air circulation. Excess moisture often leads to problems like wilting tulips after prolonged rain.
If you discover blockages in the drainage holes, clear them out using a tool like a chopstick or a bent wire. If you note a foul smell, it indicates deeper rot, and you may need to repot the strawberries into fresh soil instead. Be cautious, as washing the pots thoroughly after clearing blockages is necessary to remove any residual pathogens. Furthermore, if you realize that roots were circling around the pot and are tightly packed, this condition—often referred to as root bound—could impede water and nutrient absorption, prompting the need for a larger pot to encourage healthy growth.
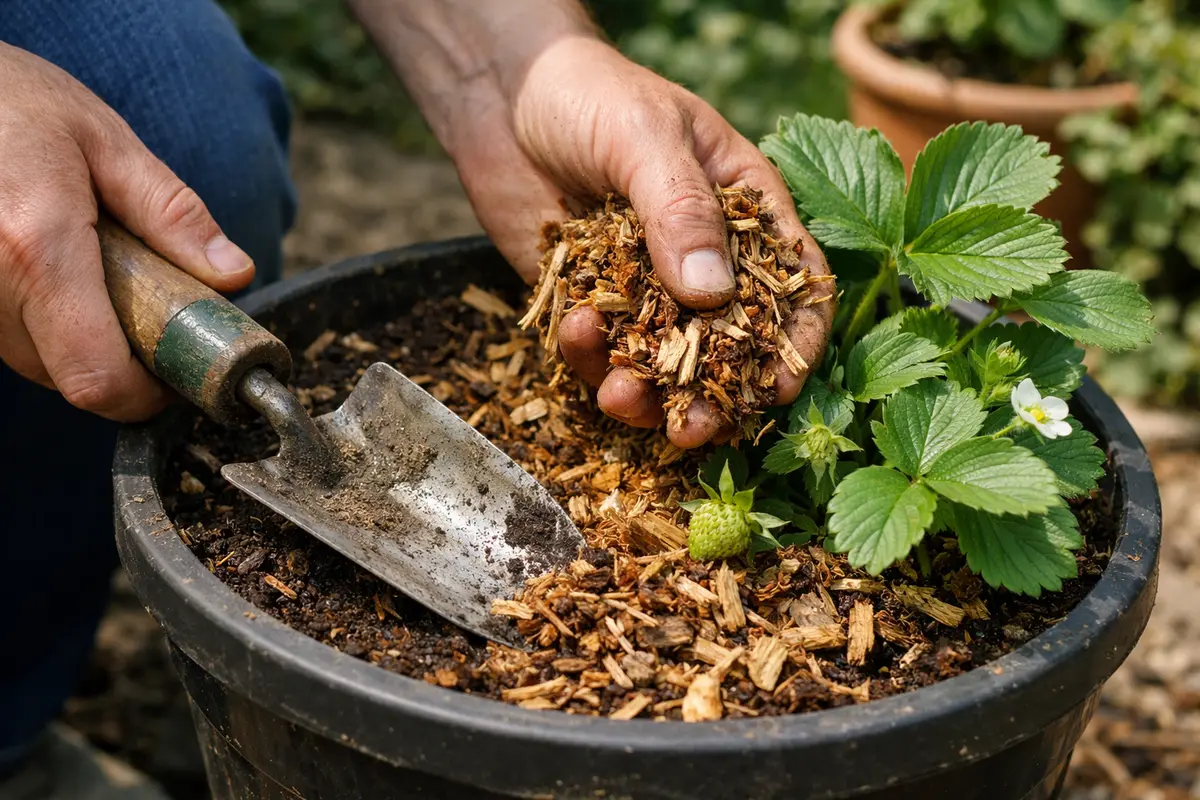
Step 3 – Replant Strawberries in Fresh, Well-Drained Soil
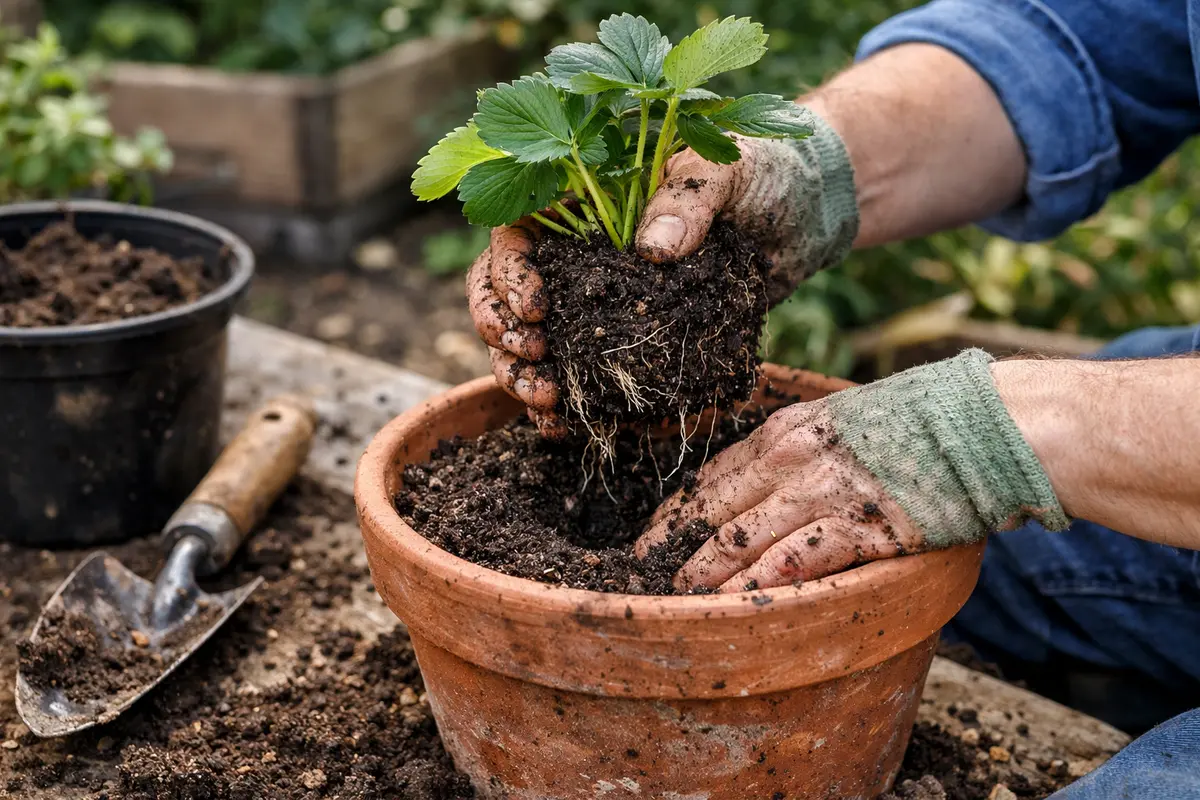
Replant your strawberries in a fresh, well-draining potting mix to aid recovery. You will see improved soil structure and moisture management within a few days, with leaves starting to perk up and colors returning to a vibrant green. Healthy new growth indicates that the roots are beginning to establish themselves better in the new media. Observe the root system closely; if you notice a significant number of excessively damaged roots, you might need to trim them before replanting to promote the growth of healthier roots.
Fresh potting soil contains essential nutrients and improves aeration around roots. When selecting a potting mix, aim for a blend that includes organic matter but is formulated specifically for container gardening. You should look for soil that lists ingredients like peat, perlite, and compost to enhance moisture retention while avoiding compaction. Make sure the new soil has good drainage potential without sacrificing moisture retention. The goal is to create an environment where the roots can recuperate from water stress without stagnation leading to further rot.
A common mistake at this point is overwatering, thinking they’ll require additional moisture to revive quickly. However, waiting for the top half-inch of soil to dry out before watering again is crucial. This allows for a healthier root system to develop without repeating past mistakes. Use a moisture meter to help manage watering, as it provides a precise way to determine the soil’s moisture levels and whether your plants need water. If you notice extended periods without signs of growth or an ongoing issue with leaf wilting despite proper watering, consider reviewing the soil for compaction or nutrient deficiency. In poor drainage conditions, plants may also develop jasmine droop after overwatering.
Additionally, keep an eye on the pot size; if the size is too small for the strawberry plant, it may hinder growth even with proper watering. A larger pot not only provides more room for the roots to spread but also assists in better moisture and nutrient distribution. After replanting, you can observe how quickly the topsoil dries out; if it remains damp for prolonged periods, it suggests that you need to evaluate drainage solutions further or potentially incorporate additives to help aerate the soil.
Step 4 – Mulch Strawberry Plants to Prevent Overwatering
Apply a 1-2 inch layer of organic mulch around the base of your strawberry plants. This will improve moisture retention while allowing for better drainage, ensuring an even moisture level in the soil. As you apply the mulch, ensure that it is not piled against the stems, as this can create damp conditions that invite pests or foster decay. Mulch should be adjusted based on environmental conditions; too thick a layer can encourage root rot, particularly after heavy rains. You may need to reduce the layer thickness during wet seasons to prevent excessive moisture accumulation around the roots.
Mulching helps prevent excess water from pooling and minimizes evaporation during dry periods, creating a balanced environment for strawberry growth. Additionally, it reduces weed competition that can further stress your potted plants, unlocking their full potential. With careful application, mulch can trap moisture in without encouraging rot, ensuring consistent moisture delivery to the roots. Organic materials like straw, shredded leaves, or wood chips not only work well but also improve soil quality as they break down over time.
Consider using materials like straw or dried leaves for mulch; both encourage a living soil ecosystem. In the rainy season, adjust the mulch thickness or type. For example, during heavy rainfall, consider shifting to a lighter mulch—this allows for faster drainage, ensuring the strawberries remain healthy and productive. Another option is to utilize gravel mulch, which prevents soil from becoming compacted while still allowing for moisture regulation. Notably, if you opt for a moss-based mulch, be aware that it holds more moisture, which might not be desirable after rainy spells. Always keep an eye on soil moisture levels and adjust accordingly, especially if you notice any exceptional moisture signs or fungal development around the base of the plants. This issue is often caused by lawn fungus evening watering.
Step 5 – Inspect Strawberry Leaves for Signs of Root Rot
Inspect your strawberry leaves, checking for any signs of stress or rot every 3-4 days. You should look for new leaf growth, vibrant colors, and firm textures as indicators that recovery is underway. When leaves start to regain their usual luster and firmness, it indicates that the roots are successfully absorbing nutrients again. Pay particular attention to any areas where leaf tips turn brown or edges curl—this can suggest that the plant is not receiving adequate moisture or nutrients despite appearing otherwise healthy.
Healthy leaves indicate that the root system is reestablishing its nutrient-absorbing capabilities. Firmer stems suggest that the plant is regaining strength. Early signs of the problem returning could consist of yellowing leaves or drooping, which means you may need to revisit earlier steps. If you see any clusters of small brown spots on the leaves, this could point to fungal infections that could further stress the plant. Consider removing any affected leaves promptly to limit the spread of the problem.
If signs of root rot return despite your interventions, consider checking for pests or fungus that may contribute to ongoing issues. Transplanting into a different container might also resolve drainage issues if they persist, ensuring the roots aren’t under excessive strain. Additionally, applying an organic fungicide can offer an extra layer of protection, particularly in wet weather. Keep in mind that ventilation is as crucial as moisture management; often, halting the problem requires adjusting the pot’s positioning for improved air circulation. Ultimately, actively managing the balance between moisture and good air circulation around the roots will be essential in preventing future problems, so regularly rotating the pots or checking their position for optimum sun exposure also helps mitigate moisture levels.
FAQ
How long does it take for strawberry plants to recover from root rot?
Recovery from root rot in strawberry plants can take anywhere from a few weeks to several months, depending on the extent of the damage. Factors such as environmental conditions, soil quality, and ongoing care significantly influence recovery speed. During this period, consistent moisture management and nutrient delivery are crucial; sudden changes can hinder recovery efforts. Be patient, as quick results are uncommon, and consistent care is necessary to allow for fresh root growth and nutrient absorption.
Can root rot spread to neighboring plants in the garden?
Yes, root rot can spread to nearby plants, especially if they share the same soil or are in close proximity. Proper drainage and spacing between plants can help mitigate the risk of spread; however, ensuring that all plants are monitored closely after an infestation is wise. If rot is detected in one plant, quickly remove it to limit any potential for contamination. Also, if using soil amendments, ensure they are free from pathogens to avoid inadvertently spreading rot to nearby plants.
Should I remove the affected roots when repotting strawberries?
Yes, remove any visibly rotting or mushy roots when repotting to prevent further spread of the rot. Healthy roots should feel firm and show no discoloration, ensuring the best chance for recovery. To protect newly healthy roots from future attacks, treating any remaining roots with a fungicide can provide further protection against potential rot returning. This protective measure is particularly important in environments that recently faced excessive moisture. Using a sterile knife for cutting can help prevent introducing additional pathogens during repotting and should not be overlooked as part of the process.