You may notice your tomato plants showing signs of distress when the ground is saturated after rain, which is why you need to know what to do when tomato plants turn yellow after rain. This yellowing often indicates stress or nutrient deficiency, a common issue that can lead to wilting or overall decline. If left unaddressed, the problem can worsen and weaken the plant, making recovery harder, so it’s crucial to inspect and adjust your watering and nutrient levels now.
Step 1 – Inspect Tomato Leaves for Symptoms

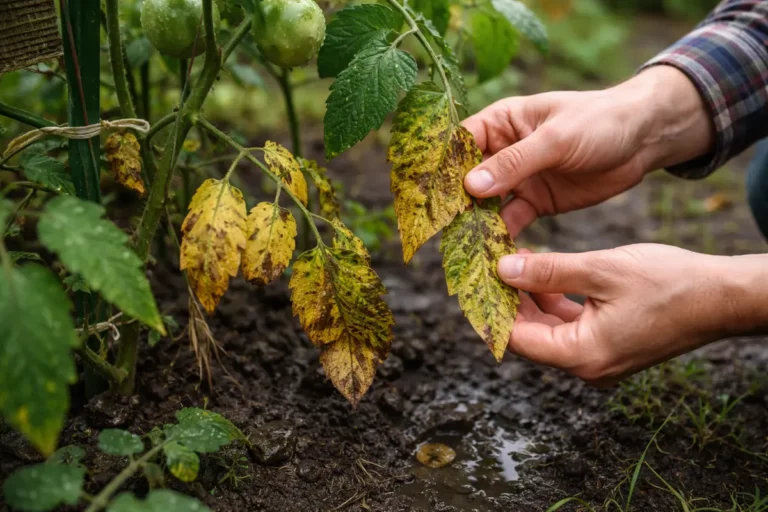
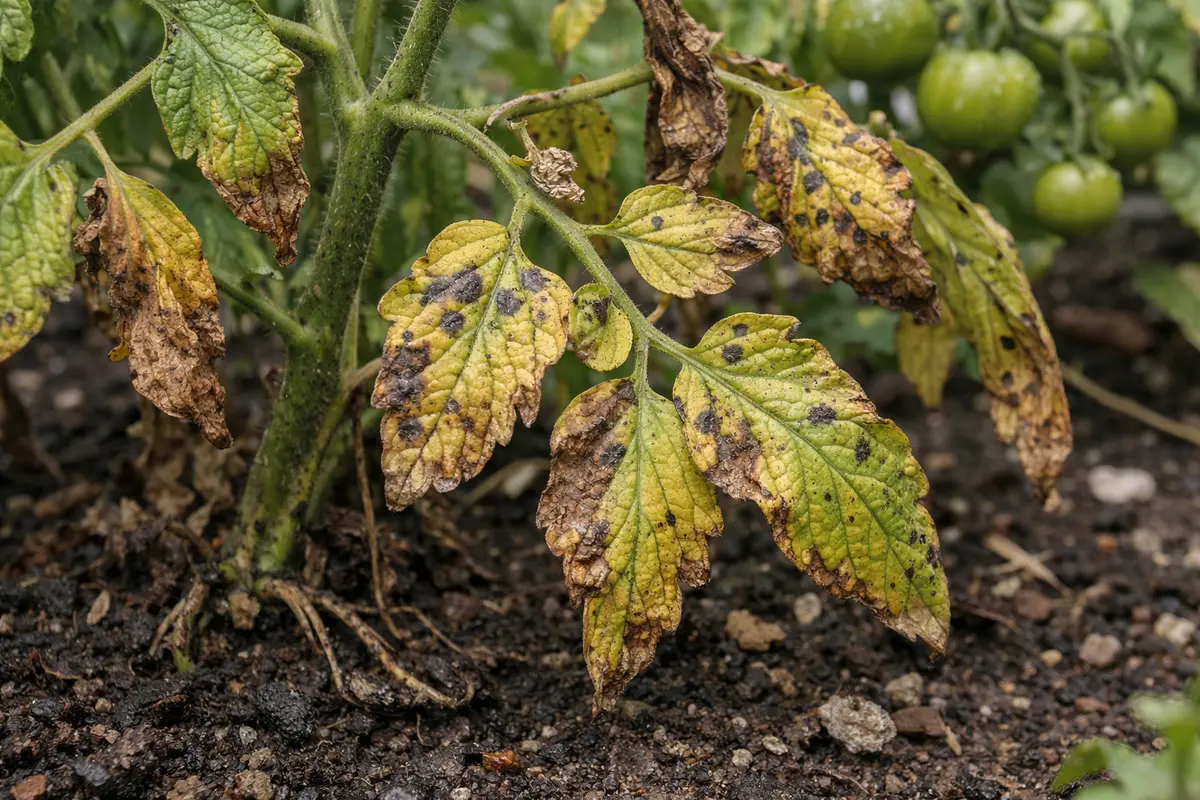
Start by checking the tomato leaves for visible symptoms, specifically looking for yellowing or wilting. You should observe distinct signs on the leaves that indicate stress, such as a light green color or browning edges within 48 hours of inspection. The presence of spots or a splotchy appearance on the leaves might also be a concern, indicating more serious underlying issues. If you notice a significant amount of new growth appearing pale compared to older foliage, that’s a clear sign of nutrient imbalance.
Inspecting your plants promptly helps identify issues before they escalate. Yellowing leaves can indicate several underlying problems, usually linked to waterlogging or nutrient deficiencies. Thorough checks can reveal changes like moisture retention in the soil or soft spots on the stems, both of which demand immediate attention. If the entire plant appears to droop or if recent growth feels soft, these symptoms necessitate urgent monitoring. Focusing closely on the base where leaves meet stems can uncover the early signs of potential disease, such as leaf mold or mildew.
A common mistake is not inspecting the leaves closely enough, leading to assumptions about other causes like pests or disease. Focus on the soil moisture level; if the soil feels overly saturated, this can be a sign of root rot beginning to set in. Always check for visible signs like limp leaves and explore deeper into the base of the plant. For instance, if other neighboring plants seem unaffected while just one plant shows yellowing, the issue might stem from localized water pooling around it rather than widespread nutrition issues. If only older leaves are affected while new growth remains vibrant, suspect nutrient-related issues; if all leaves are affected, a soil condition may be to blame.
Step 2 – Diagnose Root Rot From Excess Water
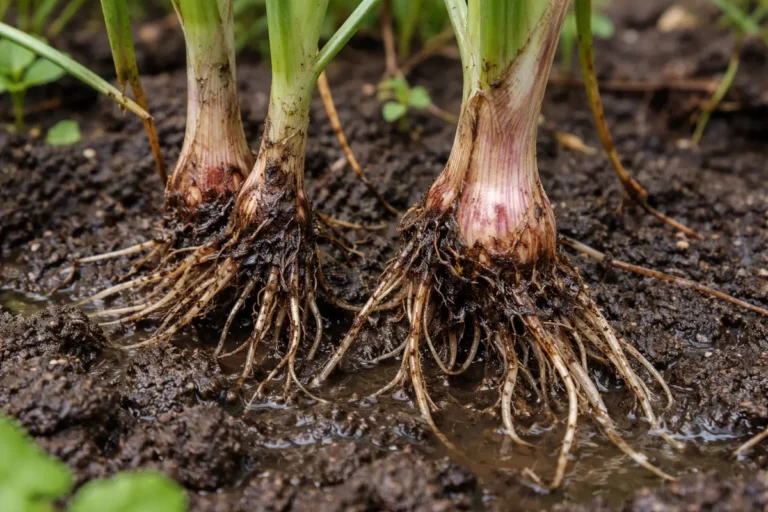
Next, check the soil quality and drainage to identify any signs of root rot caused by excess water. You should see that the soil consistency is either very wet or compacted and might emit a foul smell if root rot is present. If the soil adheres to your fingers very strongly and seems almost mud-like, that’s a strong indicator of excess moisture. Try to pull back the soil lightly with your fingers or a small garden trowel—if the structure is compromised and falls apart easily, root rot may have already begun affecting the roots.
Root rot occurs when soil remains soggy for extended periods, which suffocates the roots and predisposes the plant to nutritional deficiencies. The roots struggle to absorb essential minerals and moisture if they’re constantly submerged, leading to symptoms like wilting and yellowing leaves. Additionally, if you notice black, mushy roots upon gentle excavation of the root ball, this indicates severe root damage. This damage can spread quickly to other plants if not addressed. If the discoloration is primarily centered on younger leaves appearing closer to the base, this could indicate the plant’s inability to uptake necessary nutrients due to root destruction.
If the soil smells sour, this indicates a serious issue that could worsen if ignored. Adjusting your watering routine is necessary, especially after heavy rain events. It’s crucial to ensure that your watering schedule accounts for rainfall to prevent overwatering subsequently. If you find that the soil is moist but not actively rotting, allow it to dry for a couple of days before reconsidering your watering scheme. Be vigilant; if symptoms persist even after reducing watering, assess whether the pot/container has adequate drainage holes, as this could lead to waterlogging regardless of rainfall. If drainage seems adequate, introduce soil amendments like perlite or coarse sand to improve aeration and drainage capacity.
Step 3 – Fertilize Tomatoes to Support Recovery
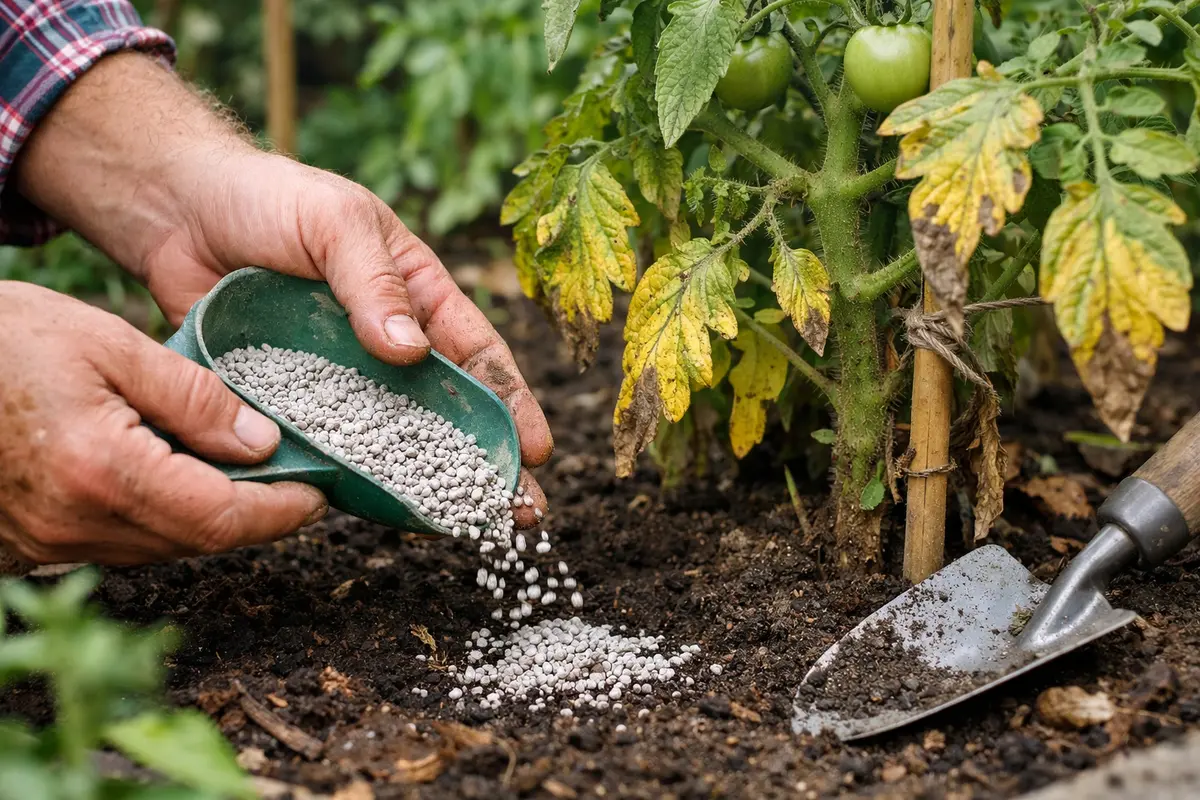
Apply a balanced fertilizer to the soil around the affected tomatoes to promote recovery. You will notice an increase in green growth within 1-2 weeks, signaling that the plants are responding well to the nutrients. Consider using a fertilizer low in nitrogen to prevent excessive foliage growth at the expense of root health. An example could be a 5-10-10 formula that allows roots to thrive while providing necessary micro-nutrients for tomato plants.
Fertilization replenishes essential nutrients that may have been washed away during heavy rain. Nutrient depletion can lead to weakened plants, making them susceptible to yellowing and disease. When applying fertilizer, be sure to follow the recommended rates printed on the package and distribute it evenly around the plant’s base; too much concentration can cause root burn, leading to more yellowing. If you find that your plants have an early fruit set, timing your fertilizer application accordingly can enhance overall yield as well as leaf vibrancy.
Be cautious not to over-fertilize, as this can further stress the plants and lead to nutrient burn. This often happens when gardeners anticipate rapid recovery and apply excessive products in hopes of quick results. It’s critical to observe how your plants react over a week; if they seem more droopy than before, reduce the frequency and amount of fertilizer applied. Remember, more nutrients don’t always equate to better growth—balance is key. If after a week your plants are still showing signs of yellowing despite fertilization, reconsider the nutrient composition as the tomatoes might require specific micronutrients like magnesium or iron to recover strong green foliage.
Step 4 – Water Tomato Plants Less Frequently
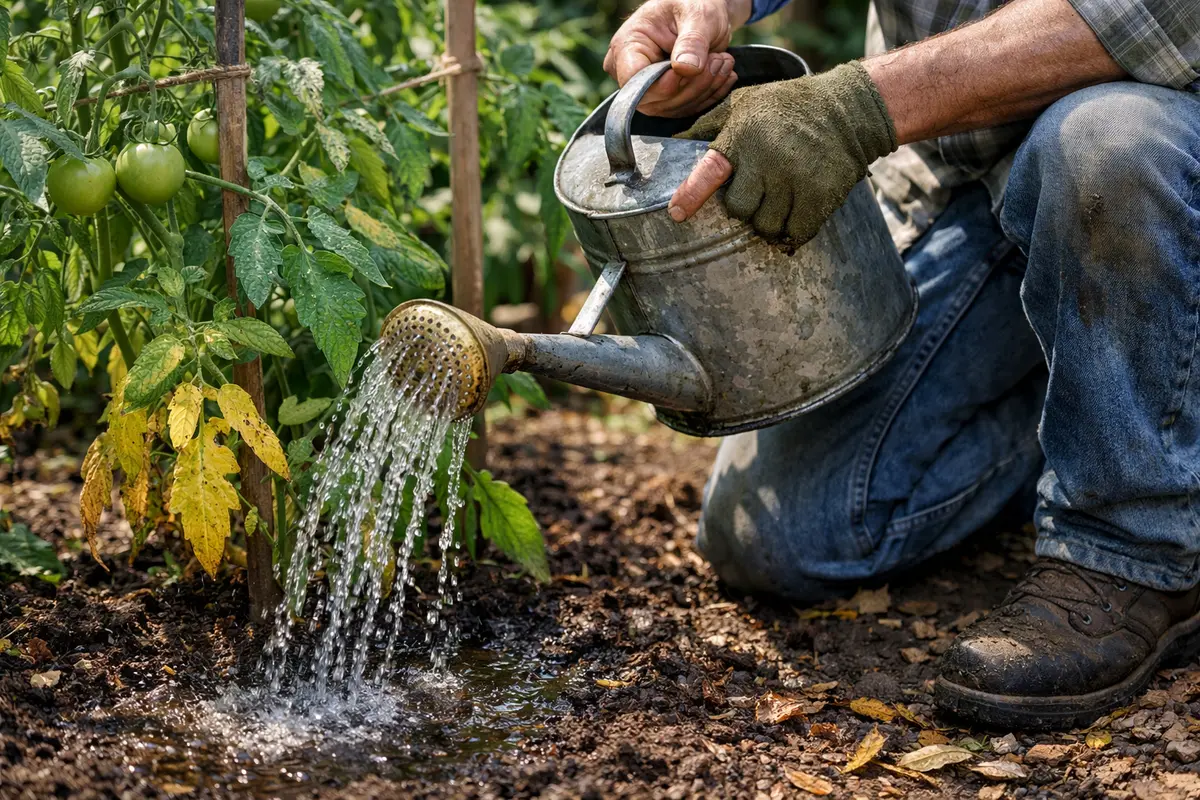
Reduce your watering frequency to ensure the soil has a chance to dry out between waterings. This action will help establish a more sustainable moisture level, encouraging healthier root growth and reducing the risk of future yellowing. Aim for soil that remains moist but never soggy—check the soil with your fingers to a depth of about two inches before watering. Watering based on observation means less risk of applying fertilizer when it could teeter the scales back toward yellowing.
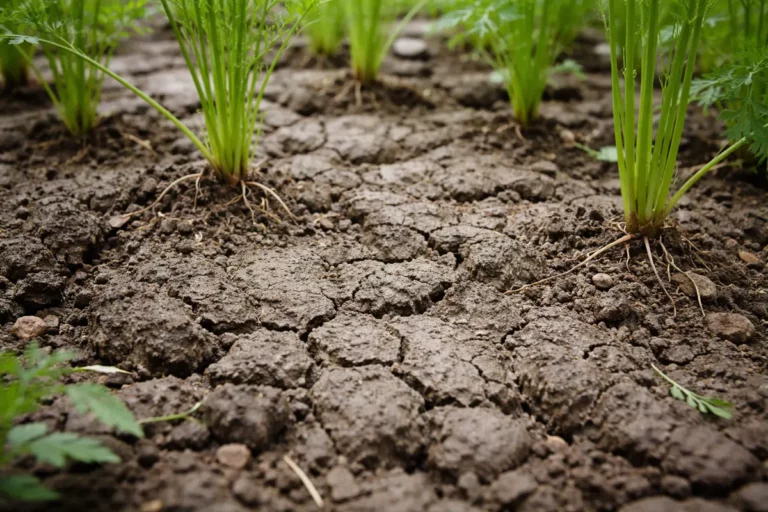
Tomato plants thrive better in well-drained soil that maintains moisture without becoming overly saturated. Consistently wet conditions encourage root rot and other fungal diseases, which can lead to plant decline. If excess rain leads to visible pooling around the bases of plants, consider creating slight mounds where tomato plants are planted to improve drainage. Adjusting your watering schedule can help your plants develop resilience and withstand environmental stresses. This adjustment can involve simply re-evaluating your water source—if your plants are in a low area of the garden prone to pooling, shifting them to a more elevated position can facilitate better drainage and air flow.
Consider shifting your watering routines based on environmental conditions, especially during periods of heavy rainfall. If summer storms frequently occur, modify your plan to accommodate them. Always check the top inch of soil for dryness before watering, providing a more tailored approach. If moisture levels remain high consistently, you may need to dig into adjustments such as incorporating organic matter to improve drainage and aerate the soil. Keep an eye during rainy spells; if you return to find the plants sitting in moisture after a storm, immediately assess soil compaction and consider deeper tillage if necessary.
Step 5 – Check for New Yellow Leaves Weekly
Start by checking the moisture levels in the soil and ensure adequate drainage around your tomato plants after rain. Look for signs of waterlogging, such as soil that remains soggy or compacted, which can lead to root stress. Revisit this observation daily until the soil feels evenly moist, not overly saturated.
A fully recovered tomato plant displays rich green leaves, firm stems, and robust growth, free from yellowing. In contrast, an early return of the issue may show leaves that begin to lose their color again, becoming pale or mottled, and stems that feel soft or droop. If you notice yellowing returning, check for soil drainage; if that appears fine, inspect for pest damage.
If the yellowing continues despite following these steps, consider adjusting your watering schedule to prevent future over-saturation from rainfall. Alternatively, apply a balanced fertilizer to replenish any nutrients that may have washed away. If the problem persists, escalate your response by consulting a local extension service for tailored advice on managing soil health and pests specific to your area.
A fully recovered tomato plant should show firm, vibrant green leaves, along with new growth at the tips of stems. Compare this to the presentation of symptoms, where older leaves may still show some residual yellowing if recovery is still underway. Regular checks will help you identify if the problem is returning or if it has been fully addressed. If you see any decline or resurgence of yellow leaves, it raises immediate concern for root health, signaling the need for a new round of investigations. Tracking any environmental changes—temperature shifts or added layers of mulch—could be essential if you notice new symptoms arising, as they could affect soil moisture retention heavily.
If you notice new yellow leaves appearing despite following the recovery steps, consider revisiting the watering and fertilization patterns. It may be necessary to consult an expert or undertake a soil test to determine pH levels and nutrient availability. This vigilance ensures that your plants remain healthy and productive. Soil testing kits are available at most garden centers and can provide quick insights into what amendments may be necessary for ongoing plant productivity. Learning to read the signs from soil assessments will contribute long-term to proper plant health and vigor.
FAQ
How long does it take for tomato plants to recover from yellowing?
Recovery can typically take between one to three weeks, depending on the severity of the yellowing. Adequate watering, nutrient replenishment, and sunlight exposure play key roles in speeding up the recovery process. Factors such as temperature and the specific variety of tomato can also influence recovery time.
Can overwatering spread yellowing to other plants?
Yes, overwatering can lead to root rot and fungal diseases, which can spread to nearby plants, worsening their conditions. Keeping an eye on watering habits and ensuring proper drainage is essential to prevent escalation. If you notice symptoms in surrounding plants, it may indicate that the root rot problem is systemic or that the soil conditions are promoting similar issues across your garden.
Should I remove yellow leaves from my tomato plants?
Yes, remove severely yellow or damaged leaves as they can still harbor diseases. Removing them encourages airflow and enables the plant to direct its energy towards healthy growth. Make sure to dispose of these leaves properly to minimize disease risks. When pruning, use clean, sharp tools to prevent further stress or injury to the plant itself.