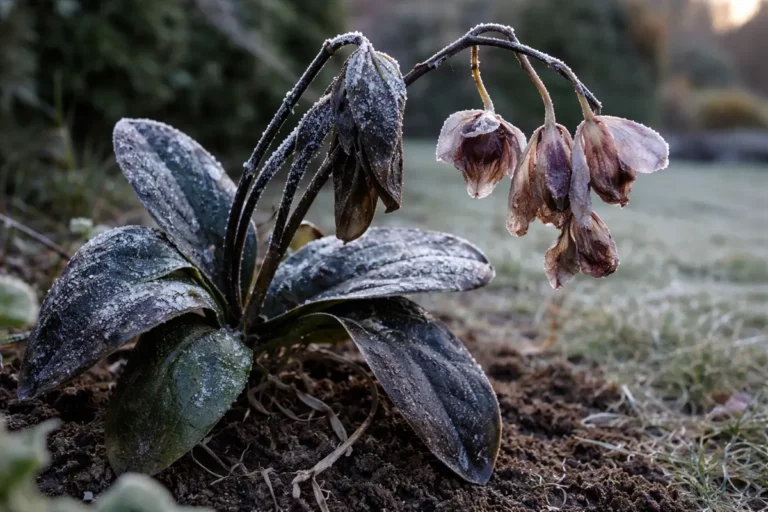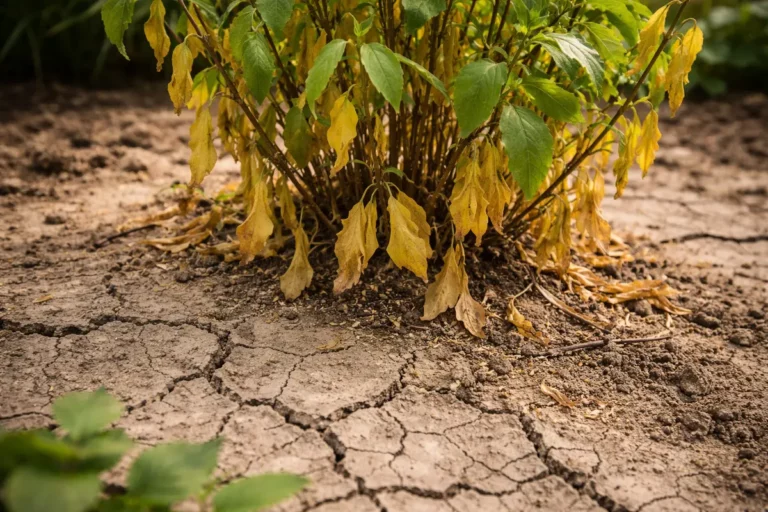
You may notice your orchids wilting during drought conditions, which is why you need to know how to prevent wilting in orchids during drought. This wilting occurs because the plant’s roots cannot absorb enough water, leading to drooping leaves and an overall weakened state. If neglected, the situation can worsen, ultimately weakening the plant and setting growth back, but you can fix it now by monitoring moisture levels and adjusting your watering routine accordingly.
Step 1 – Water Orchids Immediately to Revive
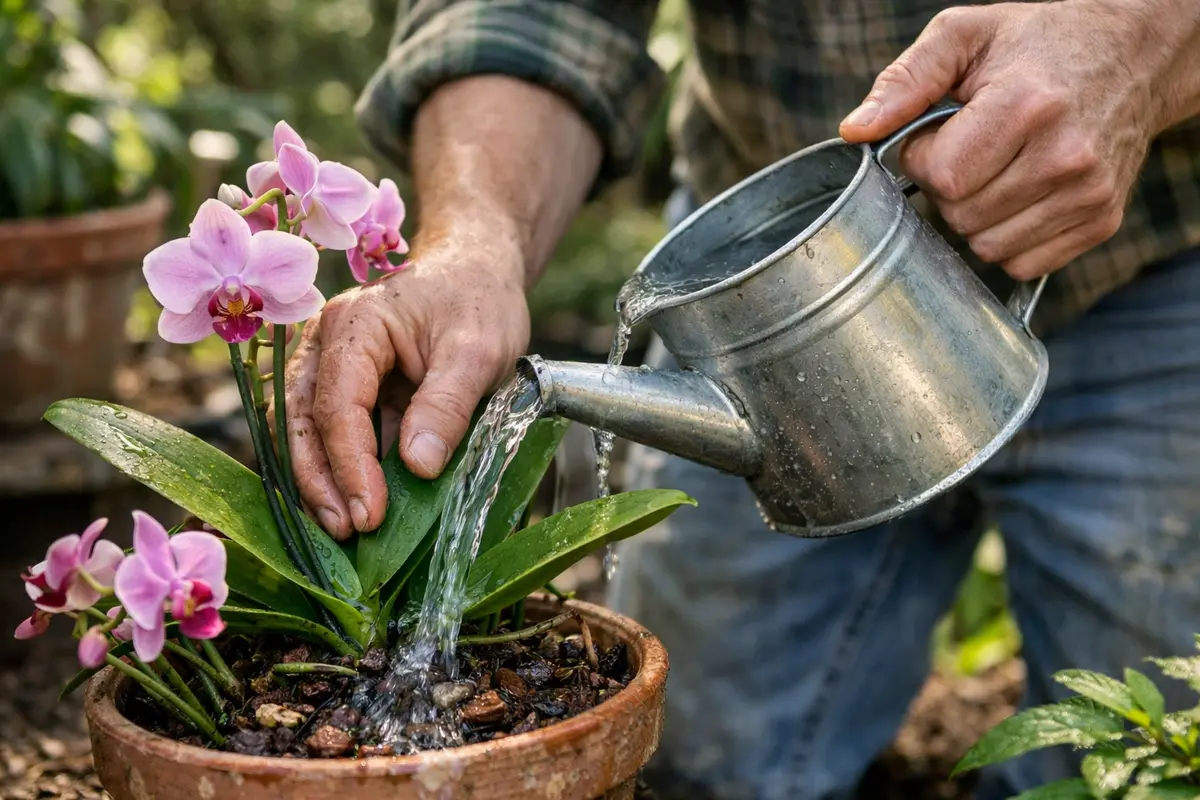
Water your orchids thoroughly to restore moisture levels as quickly as possible. You will see the leaves begin to perk up within hours, hinting at rapid recovery. This immediate action helps to rehydrate the plant and stabilize its health. Target around 1-2 cups of water depending on the pot size, ensuring the water drains out of the bottom to confirm thorough soaking.
Fast action is critical because orchids need moisture to facilitate essential functions like nutrient uptake and photosynthesis. Dehydration stresses the plant’s cellular structure, and within just a few days, irreversible damage to the leaves and root system can occur if not quickly addressed. Generally, drooping leaves or wrinkled leaf surfaces are early indicators of a drought condition.
The common mistake among many growers is assuming that a light misting or a slight sprinkle will suffice. In actuality, it’s essential to soak the pot until water drains out of the bottom. Doing this ensures that the roots absorb enough water and prevents further stress. Furthermore, be diligent in checking the soil moisture several inches down; if it’s dry to this depth, then a deep watering is necessary rather than a quick spritz. If the soil feels dry after just 3-4 days from previous watering, this indicates a need for more frequent irrigation during drought conditions. Ignoring these signs could lead to further wilting and damage to the plant.
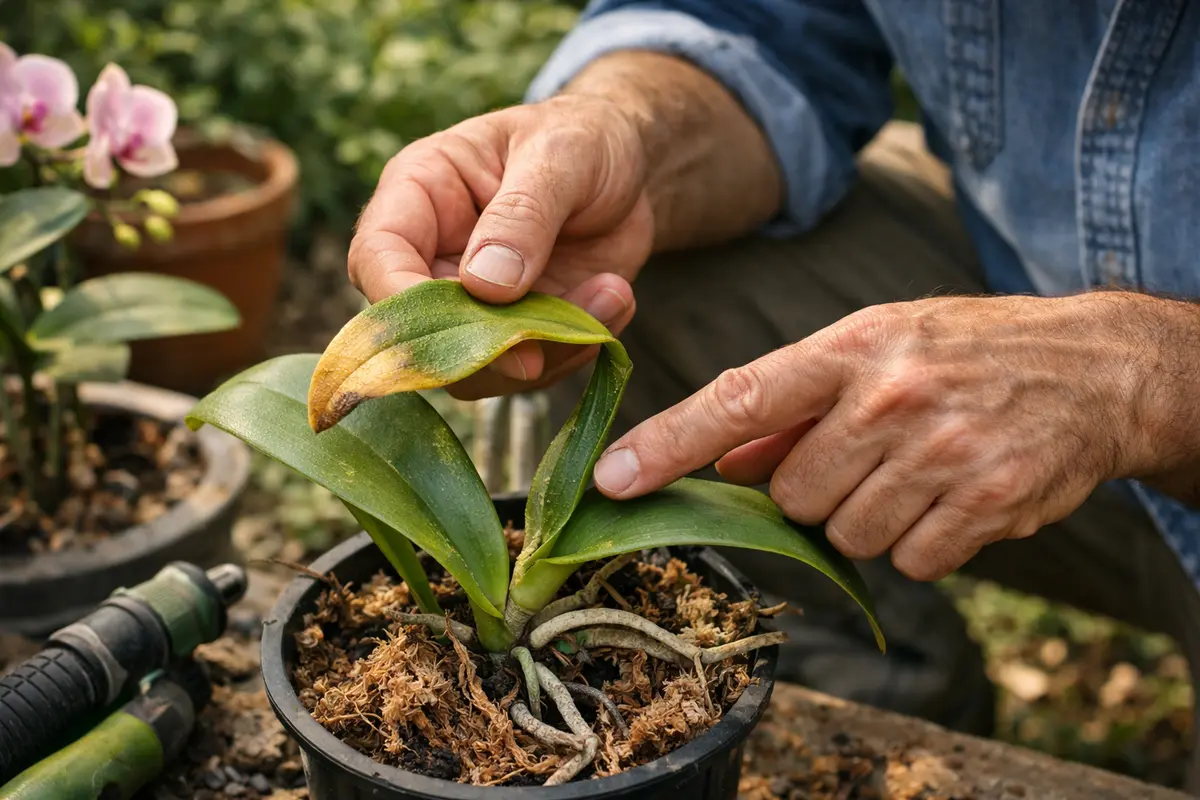
Step 2 – Test for Root Rot in Orchid Plants
Remove the orchid from its pot to check for root rot, an important step if your orchids are wilting severely. If the roots are dark brown, mushy, or give off a rotten smell, they likely have rot, signaling a need for immediate correction. Healthy roots should appear white or green and feel firm; this is a sign the orchid can still recover if caught in time.
Root rot often occurs when orchids sit in overly damp conditions or are planted in non-draining mixes. This blockage of air can suffocate roots, inhibiting their ability to absorb water and nutrients. Recognizing symptoms such as a sour smell or slimy texture in the potting medium is vital. Healthy roots demonstrate vigor by absorbing moisture and showing growth, while those affected by severe rot will be lifeless and sink in water, establishing a distinct contrast. This is why timely evaluation of the root system is crucial—waiting too long could prevent recovery.
After confirming root rot, there’s no point in trying to salvage affected roots; they should be trimmed away, allowing the healthier parts to flourish. Repotting in a fresh and well-draining medium will help restore the orchid’s health. You may consider a mix designed specifically for orchids, typically comprising fir bark, sphagnum moss, or a combination that allows excellent aeration and drainage. Be sure to monitor your watering routine closely after this action; it’s essential to allow the top couple of inches of soil to dry between watering sessions. Maintaining good airflow around the roots is equally critical to prevent rot from reestablishing. If this becomes a recurring issue, reconsider the type of potting medium or pot you are using.
Step 3 – Check Moisture Levels for Wilting Orchids
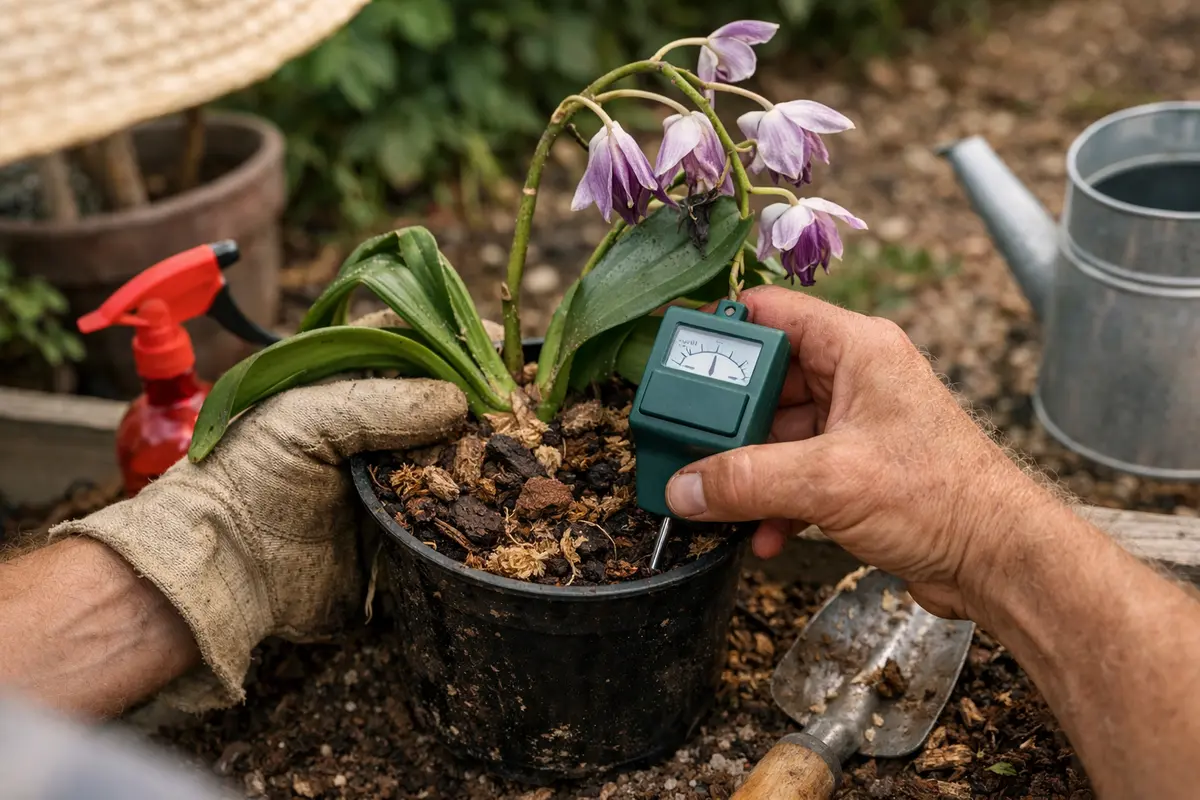
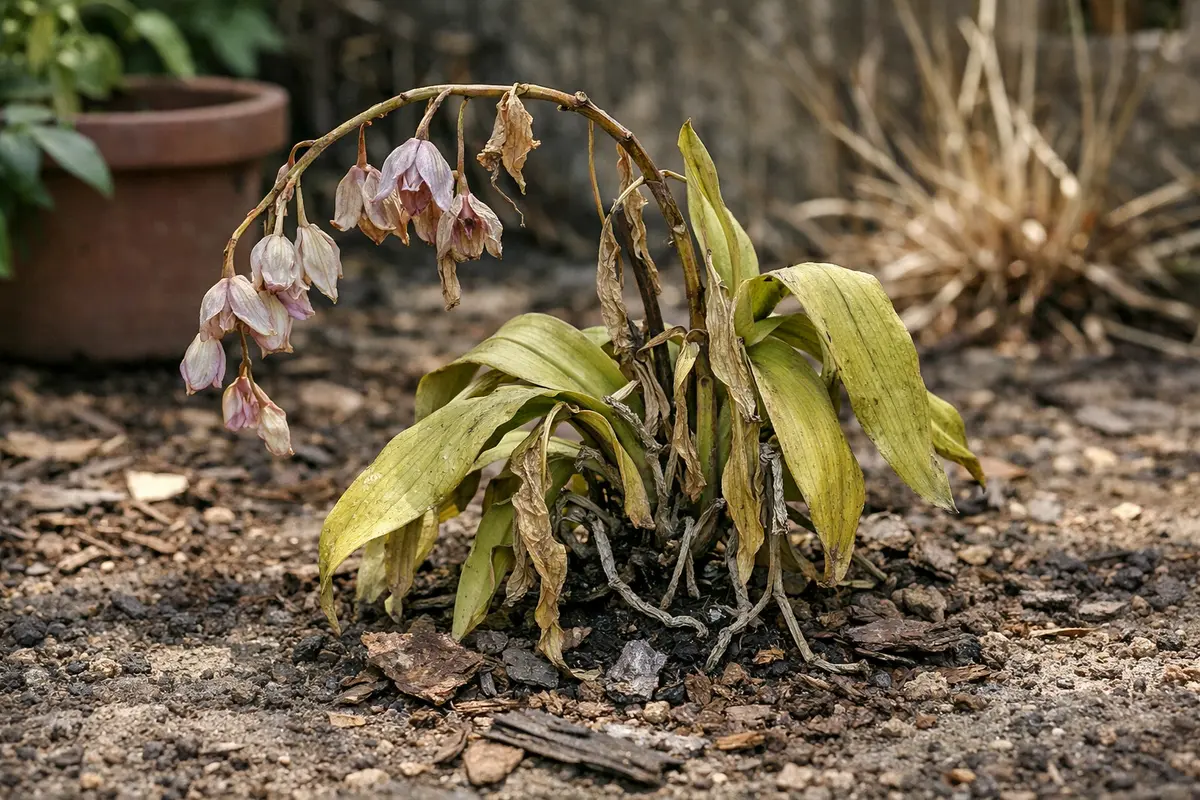
Start by inspecting your orchids for signs of wilting, such as drooping leaves, shriveling roots, or a general lack of firmness. Look for changes in the coloration of the leaves, as healthy foliage should be vibrant and firm. Once you confirm these symptoms, you’ll notice the texture of the leaves and roots changing to soft or limp, indicating stress from inadequate moisture.
Unlike wilting caused by overwatering, which typically presents with yellowing and mushy roots, wilting from drought is characterized by dry, wrinkled, and shriveled leaves. When neglecting water, the root system may become exceptionally dry and may take on a brownish hue, whereas overwatering will show signs of blackened tips and a squishy texture. If your orchid is simply browning from insufficient light, its leaves might be crisp but maintain a firm structure compared to a wilting orchid. Checking these contrasts can help you make a clearer diagnosis.
If you’re uncertain about whether the wilting is due to drought or another issue, observe your orchids over the next few days. Check the condition of the roots regularly; if they remain dry and the leaves continue to wilt, proceed with a watering regimen. If they appear over-saturated or the foliage shows additional discoloration, reconsider your watering schedule or potting conditions. Keep in mind that orchids can handle some drought but are sensitive to overwatering; thus, it’s essential to find a balance. If the orchid’s leaves begin to feel soft again after watering, it’s crucial to monitor the moisture levels closely within a few days to prevent a recurrence of wilting.
Overwatering and underwatering yield similar effects on orchid leaves, causing them to droop and lose vitality. Observing the soil texture helps distinguish between the two: dry soil will not clump, while overly wet soil feels dense and may emit an unpleasant odor. For instance, if the top inch feels dry but the bottom remains soggy, you might be dealing with a classic case of overwatering, which leads to root suffocation. Additionally, assess the conditions and adjust watering accordingly based on seasonal changes in temperature and humidity.
Allow the orchid some time to respond after watering; wait 2-3 days to check the moisture level again. Signs of improvement, such as leaves perking up or new shoots forming, indicate successful recovery. However, if the wilting continues without improvement, investigate further for deeper problems like root rot or pest infestation that could exacerbate the issue. Keeping a close watch can help address any new signs of distress quickly.
Step 4 – Provide Humidity to Recover Wilting Orchids
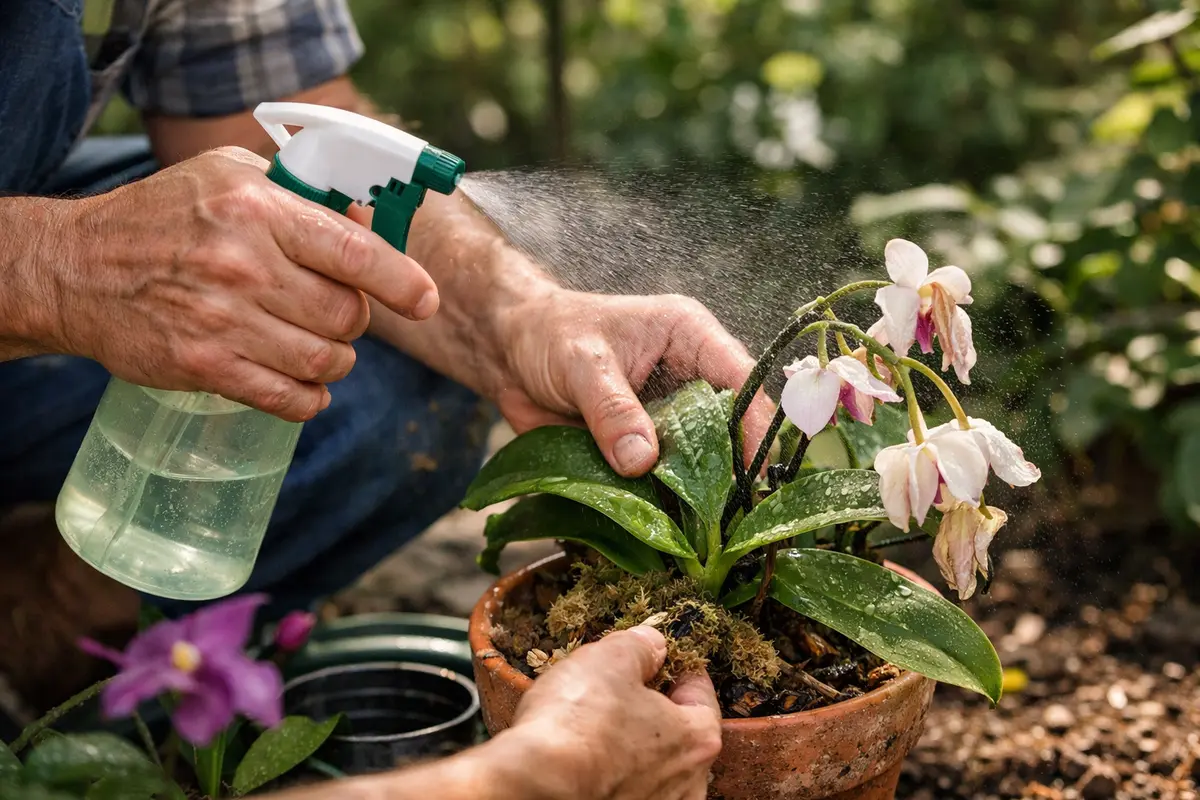
Increase humidity levels around your orchids by misting them daily or placing a humidity tray filled with pebbles and water beneath the pots. You should see the orchid leaves regain turgidity and perk up noticeably within a few days if the humidity levels are effectively raised. Misting should ideally be done in the morning to allow for water to evaporate and not create excess moisture overnight. Monitoring how long the misting lasts and making adjustments accordingly can also prevent fungal growth.
Orchids are tropical plants and thrive in humid environments; thus, a drop in indoor humidity can exacerbate wilting and stress. A stable humidity level can slow down water loss and ensure that the leaves maintain moisture content necessary for photosynthesis. Continuous monitoring of humidity levels using a hygrometer can provide critical information on whether additional measures are needed. If humidity falls below 50%, consider using a humidifier to create an oscillating airflow that mimics a natural environment.
While misting is an effective strategy, overdoing it can lead to fungal issues, particularly if the air circulation around the plants is insufficient. Always observe how much moisture is added and ensure good airflow around the plant’s leaves. For long-term prevention of drought conditions, incorporating a self-watering pot may also provide more consistent moisture without risking rot. If the leaves start exhibiting signs of mold, reduce misting frequency and improve ventilation around the plants.
Step 5 – Water Orchids at Root Level to Prevent Wilting
Start by regularly checking soil moisture levels and watering your orchids when the top inch of soil feels dry to the touch; this practice will help keep them hydrated and prevent wilting during drought conditions.
Humidity plays a crucial role in an orchid’s ability to thrive, as dry air is a common trigger for wilting, especially in warmer months. By establishing a consistent watering schedule, you directly combat the drying effects of low humidity, ensuring your orchids have the moisture needed to flourish. If you notice your orchids drooping despite regular watering, inspect the air humidity in your environment, as improper levels can lead to severe stress for your plants.
In summer months, consider increasing watering frequency or using humidity trays to bolster moisture levels around your orchids; this extra layer of care can further shield them from drought stress. If you are in a particularly hot area, adding a humidity dome for extra protection can prevent wilting and improve your orchids’ resilience during extreme weather fluctuations.
Environmental conditions like high temperatures and low humidity levels can trigger wilting in orchids, as they lose moisture faster than they can absorb it. By adhering to a regular watering schedule, you directly address water scarcity, helping the plant maintain its hydration and resilience against environmental stressors. For example, if you notice drooping leaves during hot spells, adjusting your watering habit can provide immediate relief; if wilting persists, check for signs of root rot that could interfere with absorption. A probe could help gauge moisture levels at root level for better timing.
During particularly dry seasons, such as late summer, incorporate a humidifier or pebble tray filled with water to enhance humidity around your orchids. This additional layer of prevention helps mimic their natural tropical environment, reducing moisture loss through evaporation. If daytime conditions fluctuate dramatically, consider misting the leaves weekly to supplement humidity, especially if leaves start to curl or show signs of dehydration. Always examine the frequency of these adjustments as too much moisture can also lead to rot.
Establishing firm habits in water timing—about once a week in moderate conditions—will guarantee your orchids have the moisture they need without saturating the root zone. Regular check-ins and watering according to the specific environmental conditions allow for adjustments as needed. For example, during hotter months, or when humidity is low, you may need to increase watering frequency to every 4-5 days. Keep in mind that diversifying watering methods—like incorporating a slow-release fertilizer in your watering schedule—can also energize growth while ensuring adequate moisture levels.
Be mindful of seasonal changes that affect your orchid’s watering needs; observe their response after adjustments, checking for leaves that remain firm and vibrant. If you’ve recently repotted in a more drought-resistant mix and notice prolonged wetness, you may need to recalibrate your watering approach altogether. Experimenting with moisture-retaining crystals in your potting mix may also aid in retaining the right level of moisture without adverse effects.
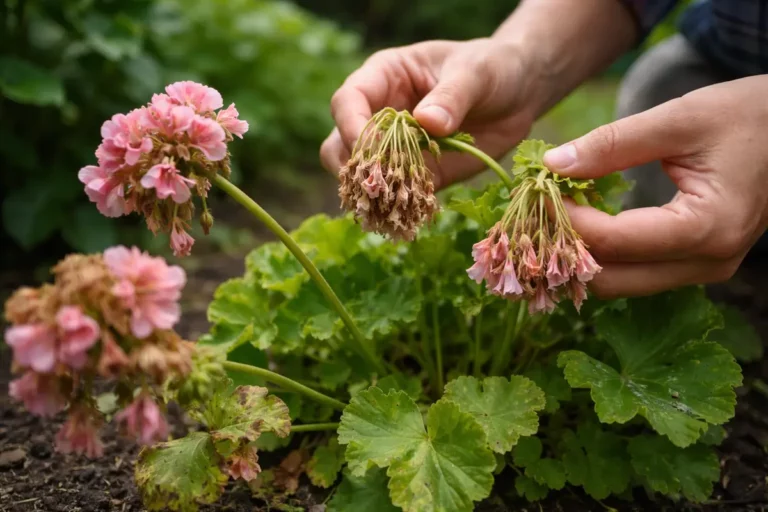
Step 6 – Inspect Orchid Leaves for Signs of Stress
Start by monitoring your orchids at least every two days during drought conditions. Check the moisture level of the potting medium using your finger to determine if it feels dry an inch below the surface. Observe the leaves and stems for signs of drooping; recheck these conditions daily until you see improvements in leaf firmness and vibrancy. Be aware of the impact of environmental changes around the plant—factors such as air conditioning or heating can alter the plant’s needs significantly.
A fully recovered orchid will display sturdy, upright leaves with a glossy texture and vibrant color, indicating sufficient hydration. In contrast, if you notice leaves curling or a dull appearance, these are early signs of wilting returning. If the plant exhibits a soft texture, it is a strong indicator that hydration is once again lacking. Pay attention to changes in leaf coloration—fading or spots on the leaves can indicate more serious issues beyond hydration.
If wilting returns despite your efforts, immediately adjust your watering schedule to provide more frequent hydration, ensuring not to overwater. Additionally, evaluate the environment for increased temperatures or drafts that might be exacerbating the issue. If frequent adjustments fail, consider repotting the orchid to improve drainage and aeration in the growing medium to enhance overall health. Each of these steps can significantly impact the longevity and health of the plant.
A fully recovered orchid presents vibrant green leaves that are firm and healthy, differing significantly from those that continue to droop. Frequent checks—looking for signs like discoloration or wilting—can help distinguish between potential issues quickly, allowing for prompt treatment. In cases of slightly curled leaves, for instance, this can signal an early drought condition or even pest pressure that warrants closer investigation. Taking immediate action can help catch these problems before they escalate.
If stress signs reappear despite high-quality care, conduct further evaluations of your watering routine, potting mix, and overall environmental conditions. Assess whether external factors like temperature fluctuations or proximity to heaters might be affecting humidity levels. The underlying cause needs rectification; addressing it before significant damage unfolds will save time and resources in orchid care. Keeping a close record of watering schedules and plant responses may also aide in troubleshooting issues quicker in the future.
FAQ
How long does it take for orchids to recover from drought?
The recovery time for orchids from drought conditions can vary, but generally, you will notice improvement within a week after you’ve provided adequate moisture. Leaves should start to perk up within a few days, indicating that the plant is responding positively. In some cases where root damage has been extensive, recovery may take longer but should still show gradual improvement.
Will wilting spread to other plants if not addressed?
If left unchecked, wilting can lead to diseases that may spread to adjacent plants, especially if they share the same potting medium. Keeping an eye on your plants’ health is essential to prevent any cross-contamination of issues. Monitor not only the wilting symptom but also the root health in surrounding plants, as rot can easily be passed on upon contact.
What should I do if my orchid leaves turn yellow after a drought?
If the leaves turn yellow post-drought, this often indicates either excess water from recovery efforts or that the plant suffered early root damage. Trim away any yellowed leaves, focusing on removing the parts that are irretrievably damaged, and continue providing optimal care like correct humidity and a proficient watering routine to create healthy new growth. Remember that patience is necessary in allowing recovery time for overwatered orchids as you adjust care routines accordingly.