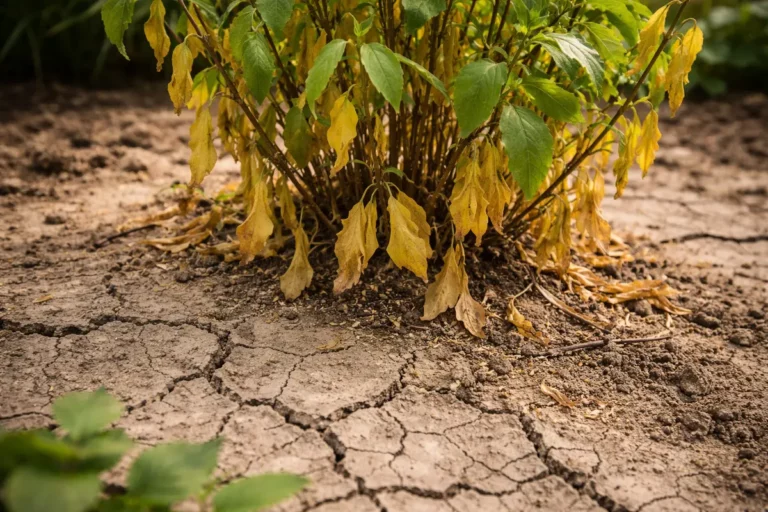
You may notice your peace lilies showing signs of distress during drought, which is why you need to know How to treat yellowing leaves on peace lilies during drought. This yellowing occurs when the plants are not receiving enough moisture, leading to wilting and potential leaf drop. If left unaddressed, the situation gets worse and can spread, weakening the plant and stalling growth, but fixing it is possible now; simply check the soil moisture and adjust your watering schedule to improve conditions for your peace lilies.
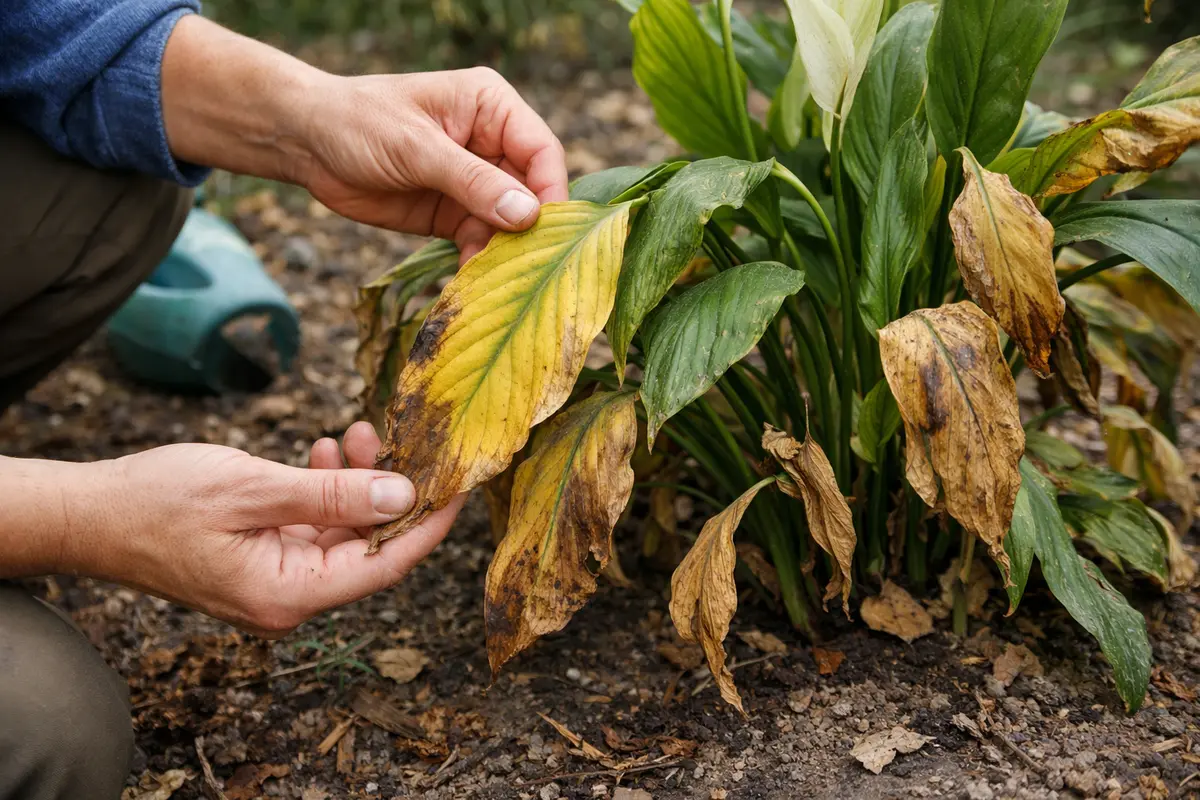
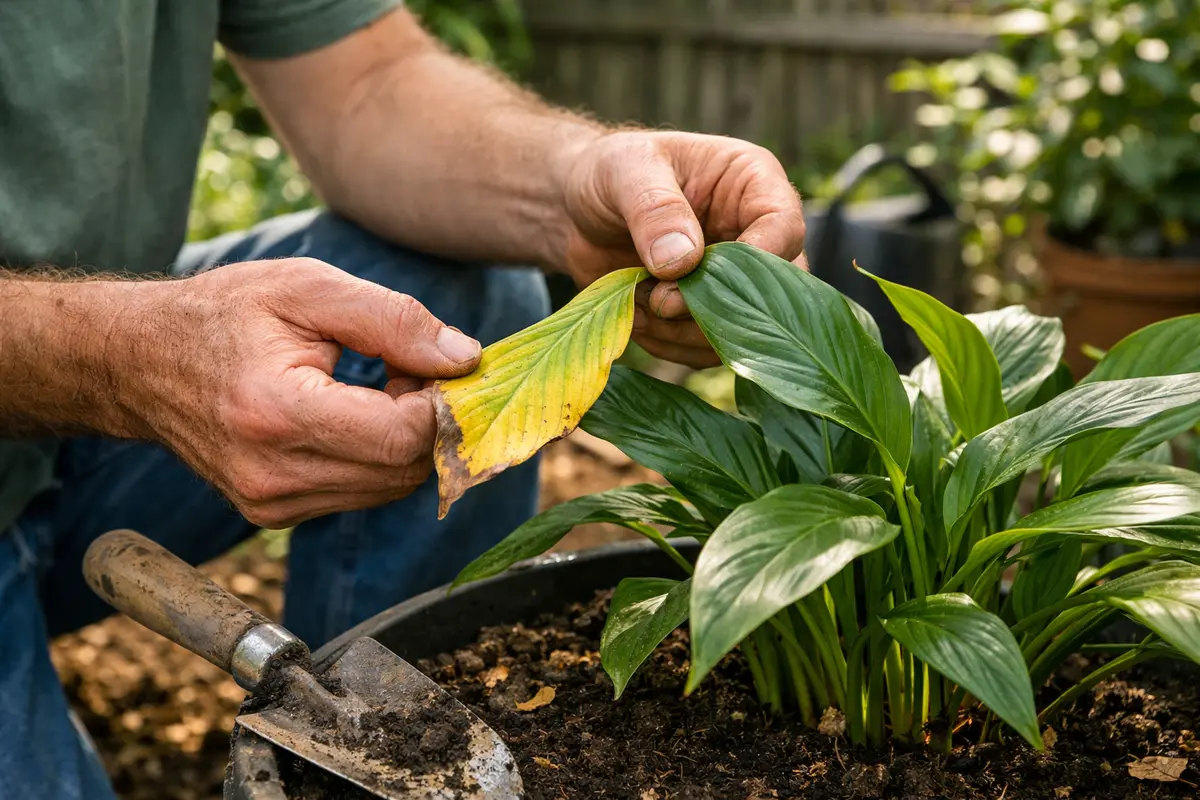
Step 1 – Trim Yellowing Leaves of Peace Lilies

First, check the soil moisture of your peace lily. Insert your finger about an inch into the soil; if it feels dry, immediately water the plant thoroughly, allowing excess water to drain from the pot. You should notice the leaves perking up within a few hours as they begin rehydrating, which can halt further yellowing.
Acting quickly helps the peace lily recover from drought stress since prolonged dryness can lead to cellular damage, which manifests as yellow leaves. When the plant receives water, it begins a process of re-establishing turgor pressure, allowing it to transport nutrients and water more effectively. If delayed, yellowing may worsen, potentially leading to less vibrant foliage or even leaf drop.
For instance, a gardener once noticed yellowing leaves after forgetting to water for a week. Their decision to wait for growth to improve only worsened the condition, requiring a longer recovery time. If you see leaves turning brown at the tips instead, check for salt buildup or root rot, indicating drainage issues instead of drought stress.
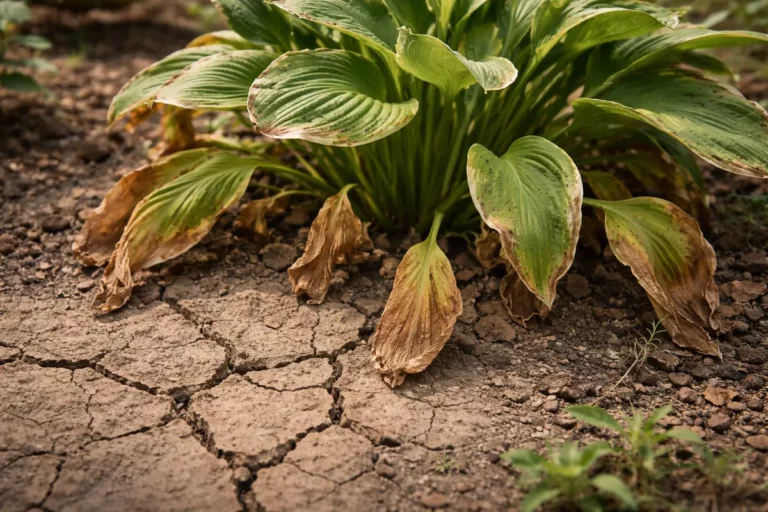
Trimming yellow leaves helps the plant redirect its energy to the healthier parts, promoting overall vigor. Yellow leaves indicate that the plant is struggling, often due to insufficient water or nutrients. Cutting them allows the rest of the foliage to thrive by preventing the risk of disease and allowing the plant to use its resources better. If you delay this action, those leaves can become a breeding ground for pests and diseases, which can complicate recovery. Remove the leaves just above where they meet the stem, as this ensures clean cuts that prevent possible infection and reduces stress on neighboring stems.
A common mistake gardeners make at this stage is to ignore yellowing leaves on the plant, thinking they will eventually recover. Ignoring this can hinder the peace lily’s health, leading to a decline that may not be easily reversible. Always assess the overall leaf condition: if significant yellowing occurs in multiple leaves, it is often a sign of more systemic issues, such as overwatering or nutrient deficiencies. If only a few leaves are yellowing, it may be attributable to aging foliage. However, if the yellowing spreads rapidly, it may indicate environmental stressors like temperature fluctuations or pests that need immediate attention.
Step 2 – Assess Root Rot in Peace Lily Plants
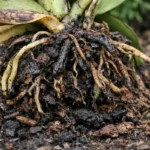
Next, inspect the roots to determine if root rot is affecting your peace lily. You will notice whether the roots are firm and white or mushy and brown, which indicates root health. Careful inspection is vital to ensure that your plant isn’t suffering from irreversible damage.
Root rot commonly occurs when the soil remains excessively wet for extended periods, often impacted by poor drainage. Healthy roots should have a white color and feel slightly firm, indicating that they can absorb moisture efficiently. If you notice mushy brown roots, this signifies they are rotting due to overwatering or a lack of fresh air circulation in the soil, necessitating immediate action. If rot is detected, remove the plant from its pot gently, being careful not to break the roots. Clean any affected roots with sterilized scissors — this prevents spreading rot or disease further into the plant. After trimming, consider sprinkling cinnamon powder on cut areas to provide a natural fungicide.
If the soil has a foul smell or feels overly wet, you must adjust your watering habits immediately. This could mean allowing the soil to dry a bit more between waterings or even repotting the plant into a fresh, well-draining potting mix if rot is confirmed. Use pots with drainage holes to facilitate water escape and prevent future occurrences. An easy way to confirm ongoing root rot issues is to monitor leaf performance: if even the healthy portions start drooping or yellowing again shortly after care, the roots might still be compromised. If you see soft, mushy roots that do not improve despite changes in watering practices, consider seeking professional help, as prolonged root damage may require expert intervention.
Step 3 – Test Soil Moisture Before Treating for Drought
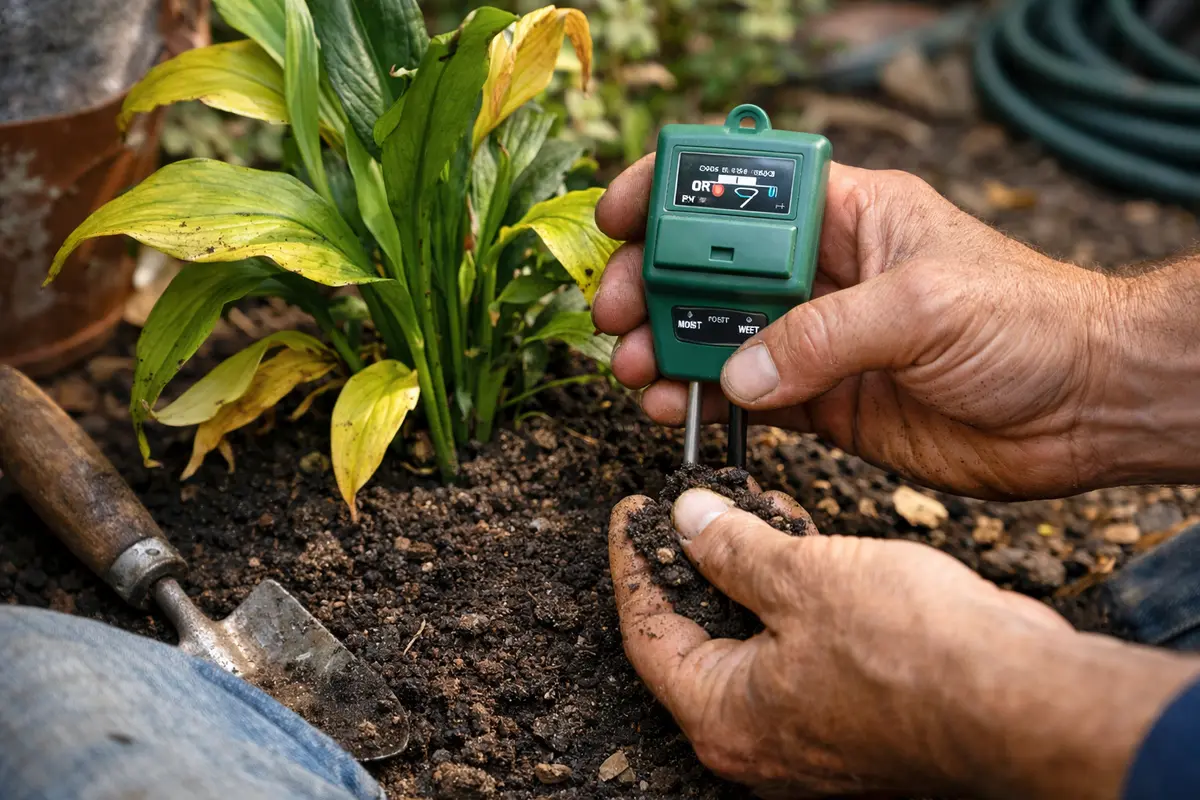
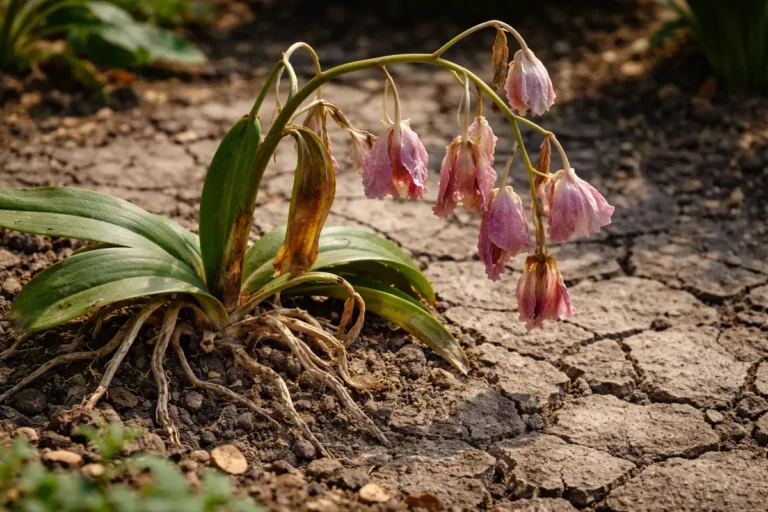
Start by inspecting your peace lily for yellowing leaves, which often indicates drought stress. Look for wilting or drooping leaves that exhibit a distinct yellow hue, particularly at the tips or edges. Addressing this issue quickly can result in improved leaf color and increased vitality over time. Conducting this test before watering will help ensure the plant has the right environment to thrive.
Yellowing leaves can also stem from overwatering or nutrient deficiencies, two conditions with different visual indicators. Overwatering usually results in soft, mushy leaves that may also exhibit dark spots, while nutrient deficiencies often present as a more uniform yellowing across the leaf. If the leaves feel papery or brittle, it’s more likely a sign of underwatering rather than overwatering — an important distinction that will inform your next steps. By knowing what signs to watch for, you can tailor your care more effectively. To gain more insight, it is critical to observe any changes closely after watering.
If your diagnosis is uncertain after the initial inspection, observe the plant for a few days while monitoring its environmental conditions. Look for signs of recovery or further decline in leaf color to better determine the root cause. If the yellowing persists or worsens, consider adjusting your watering routine or assessing your fertilization practices before implementing further recovery actions. You can determine the soil’s moisture level by inserting your finger about 2 inches into the soil. If it feels dry at this depth, you likely have drought stress. However, if the soil feels moist but the leaves are still yellowing, this could indicate overwatering issues or root problems instead. Differentiating between these conditions is critical to applying the correct treatment. Another method is to use a moisture meter, which can definitively tell you the moisture level in your soil without guesswork.
If you find that the upper layer is dry but the deeper layers are still moist, consider switching to a more suitable watering method such as bottom watering. This method allows the soil to draw moisture from below, promoting healthier root habits and encouraging deeper root growth. If the soil shows consistent dryness at all levels, begin a new watering schedule to rehydrate your peace lily properly, which should include thoroughly soaking the plant and then allowing excess moisture to drain away. A common misstep is watering despite the top level feeling dry when the roots are still saturated below, worsening existing issues. To ensure adequate absorption, follow a routine of checking moisture depth regularly, adjusting timing based on seasonal temperature changes.
Step 4 – Repot Peace Lilies with Fresh Soil Mix
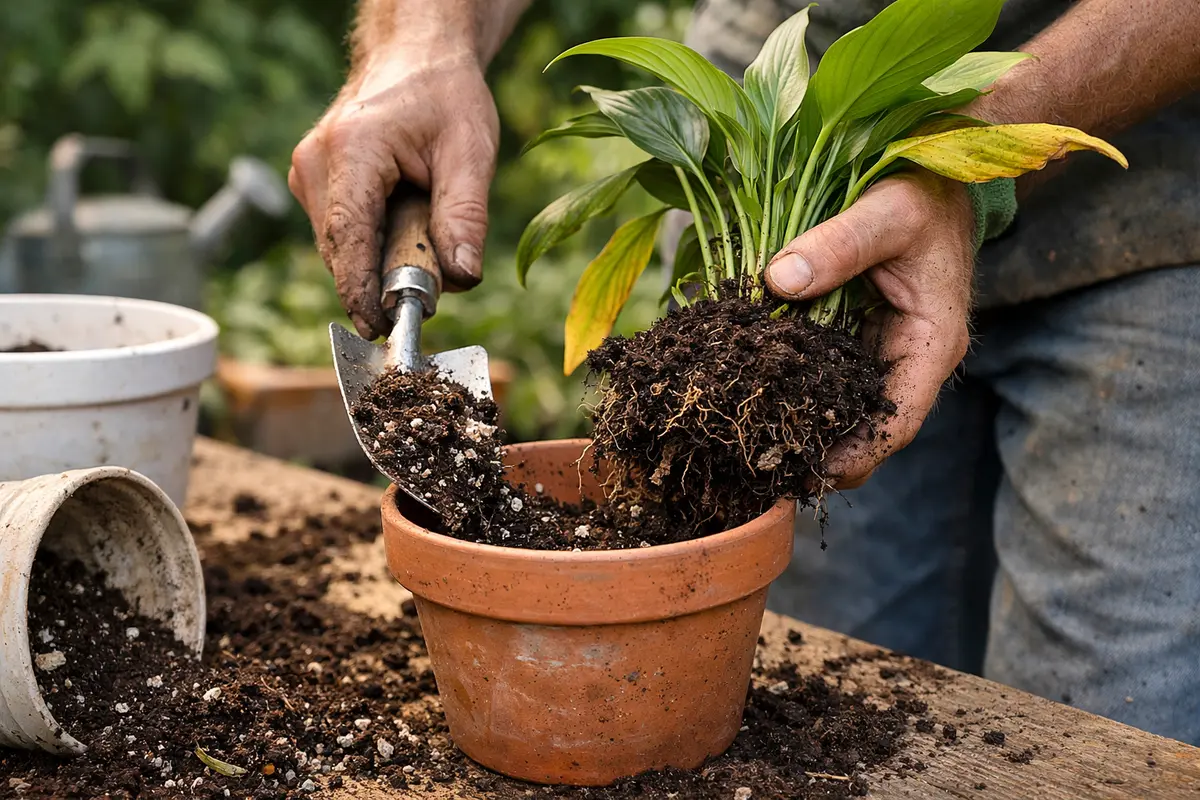
Start by thoroughly watering your peace lily to ensure the soil is evenly moist, focusing on good drainage. Within a few days to a week, you should start to see the yellowing leaves perk up and new green growth emerging from the base of the plant. A fresh mix can make a significant difference in the nutrient availability and water retention balance.
Recovery from drought stress may take a few weeks to a couple of months. Healthy regrowth can be identified by the emergence of fresh green leaves that are firm and upright. Conditions that speed up recovery include consistent moisture and indirect sunlight, while excessive heat or poor soil drainage can delay progress. If the leaves continue yellowing despite watering, check for root rot. Avoid overcompensating by watering too frequently or adding fertilizer hastily, as this can lead to further stress and potential root damage.
Peace lilies thrive in evenly moist soil; ensure you allow the top inch to dry out before the next watering to prevent drowning the roots in moisture. If you notice wilting leaves instead of growth, reassess your watering schedule to prevent further harm. Using a fresh soil mix not only provides better drainage but also replenishes any lost nutrients, which can help the plant bounce back effectively from drought stress. This process rejuvenates the roots, allowing them a chance to access moisture and nutrients without the interference of old, damaged soil material. Opt for a mix specifically designed for peace lilies or houseplants to ensure appropriate drainage while retaining some moisture, which these plants require.
Be careful not to water the plant immediately after repotting; doing so can disturb the newly settled roots and lead to destabilization. Instead, wait for a week or until the fresh soil feels dry to the touch before resuming normal watering practices. Overwatering at this stage can lead to new issues, such as root rot, a common mistake for gardeners who wish to rush the recovery process by providing water too soon. If within a week the plant seems limp or wilted after following these steps, check for water retention in the drainage tray and adjust your care accordingly. Noticing stunted growth post-repotting is a signal to re-evaluate moisture levels, as excessive saturation can hinder recovery.
Step 5 – Water Peace Lilies Strategically During Drought
Water your peace lilies when the soil has dried out significantly to a depth of about 2 inches. This will allow the roots to absorb moisture efficiently, and results take shape in about 24 hours. Monitoring soil conditions accurately will assist in adapting your watering schedule to the plant’s needs throughout the year.
Strategic watering involves giving the plant a thorough soak until water drains from the bottom of the pot, ensuring the roots are adequately hydrated without remaining soggy. Peace lilies prefer consistently moist but not soggy soil, and balancing this moisture is key to preventing future yellowing. Additionally, consider the environmental conditions; during particularly hot or dry spells, you may need to adjust your watering routine more frequently to compensate for increased evaporation. If it’s consistently hot, checking moisture daily can prevent stress far more effectively than once a week.
A mistake often made here is to water on a fixed schedule rather than adjusting according to soil conditions. This mindset can lead to either drought stress or overwatering, depending on the weather. Regularly checking the soil moisture as a trigger will help maintain a healthy routine. One useful strategy is to schedule watering after verifying soil dryness, rather than adhering to a strict week-long interval. Additionally, observing the weather forecast can give you guidance on whether to skip an upcoming watering session depending on forecasted rain or humidity levels. If you observe the leaves remaining droopy despite adequate watering, it necessitates a deeper inquiry into potential root issues or drainage problems.
Step 6 – Inspect Leaves for Improvement Over Weeks
Monitor the leaves for signs of recovery over the next few weeks, specifically looking for new growth and firmer leaves. You should notice some new leaves starting to sprout within a couple of weeks or existing yellow leaves turning a greener hue as the plant regains health. This monitoring phase is essential to assess the efficacy of your care adjustments.
As your peace lily recovers, you will see signs like firm leaves, fresh new growth, and a lack of new yellowing in the existing foliage. If yellowing persists, this may indicate other underlying issues such as nutritional deficiencies or an insect problem that needs further investigation. Healthy plants will begin showing signs of rejuvenation, indicating that previous stress caused by drought or rot is being overcome. Adjusting your care — like adding a diluted liquid fertilizer every couple of weeks — can help accelerate growth as the plant recovers. However, proper monitoring must continue to avoid an overload of nutrients.
If the symptoms return despite proper care, consider checking for improper lighting conditions or further pests that may affect the leaves. Yellow spots could hint at spider mites, while consistent browning edges could signal low humidity. Getting professional advice may be necessary if issues persist after all these steps have been taken. Additionally, an overall evaluation of your plant’s environment — like drafty windows or too much direct sunlight — can yield improvement opportunities, significantly aiding in the recovery of your peace lily. This holistic approach to plant care is crucial for separating new yellowing from existing stress signs.
FAQ
Can yellowing leaves spread to other parts of the peace lily?
Yes, yellowing leaves can indicate underlying problems that might affect other parts of the plant. If not addressed quickly, environmental stressors can lead to more severe leaf damage and potentially affect neighboring leaves or stems. Regular monitoring of leaf conditions can help catch early signs and prevent this spreading. Quick intervention not only protects new growth but also ensures a healthier overall plant structure.
How long does it take for peace lilies to recover from drought stress?
Typically, recovery can take anywhere from a few days to a few weeks, depending on the severity of the drought stress and the actions taken. Initial signs of recovery, such as new green leaves, should start appearing around one to two weeks after proper care is implemented. Daily checks on soil moisture can expedite identifying the right care adjustments to facilitate their recovery, allowing you to modify approaches based on visible plant responses.
Should I remove all yellowing leaves immediately?
It is best to remove the most damaged yellowing leaves, but wait to assess the overall health of the plant before removing every yellow leaf. Leaves that are slightly yellow might recover, and trimming only the severely damaged ones can help save the plant’s energy while still looking aesthetically pleasing during recovery. Regularly observing the plant’s response can guide future trimming decisions, ensuring you don’t inadvertently stress the plant further. Tracking the development of new growth can also indicate the plant’s health trajectory in response to your care efforts.