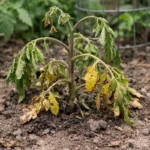
You may notice your ferns developing yellowing leaves after a period of heavy watering, which is why you need to know how to fix yellowing leaves on ferns after overwatering. This yellowing occurs due to excess moisture in the soil, causing root rot and preventing the plant from absorbing essential nutrients. If left unaddressed, this condition can worsen and lead to significant decline in the plant’s health, ultimately weakening the ferns. Thankfully, fixing it is possible now if you check the soil moisture, reduce watering, and improve drainage.
Step 1 – Trim Yellowing Fern Leaves Immediately
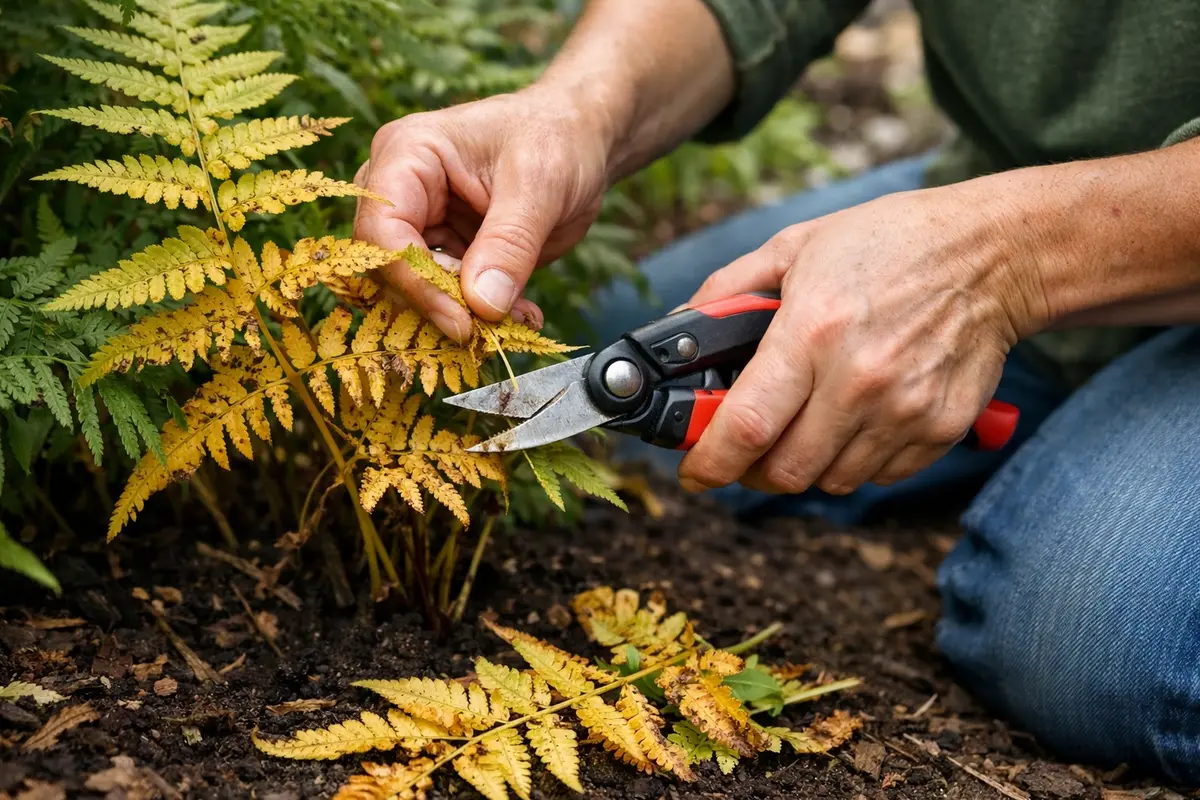
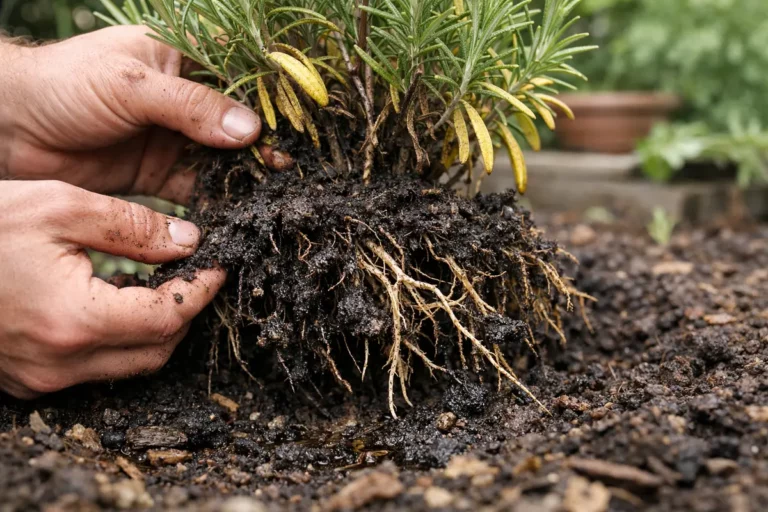
First, remove your fern from its pot to check the root system. Trim away any dark, mushy roots and place the fern in a new pot with fresh, well-draining soil, ensuring it does not sit in water. In just a few days, you should notice the yellowing leaves beginning to stabilize and new growth emerging.
Acting quickly is vital for ferns because prolonged overwatering leads to root rot, which deprives the plant of essential nutrients and oxygen. When root health declines, leaves lose their chlorophyll and turn yellow as photosynthesis becomes impaired. If not managed promptly, this can escalate, resulting in further leaf loss and permanent damage.
A gardener I know mistakenly waited too long after noticing yellow leaves, resulting in a complete loss of the fern’s root system. In contrast, a swift intervention of repotting and adjusting watering habits allowed her friend’s ferns to bounce back with vibrant new fronds in just a few weeks. If leaves are drooping and yellow, check for compacted soil next; if you see pooling water, immediate action is crucial. Recently moved plants are also prone to yellowing leaves peace lily.
Acting quickly is crucial for ferns because they are sensitive to root health. Overwatering leads to oxygen deprivation in the root zone, causing them to rot and diminishing their ability to absorb nutrients and water. If not addressed promptly, yellowing leaves will become more widespread, and there is a risk of losing the entire plant if root rot advances.
For example, a gardener who delayed repotting their fern found that the yellow leaves progressed to brown and crispy edges, indicating extensive root rot. In contrast, another gardener who acted swiftly saw their fern’s leaves gradually turning green again, demonstrating the efficacy of immediate intervention. If you notice a sudden drop in leaf turgor, check the roots immediately to prevent further decline.
Acting fast is crucial because ferns are particularly sensitive to overwatering, which can lead to root rot. If addressed promptly, the fern can quickly redirect its energy towards the surviving roots, promoting new growth. Delay this process, and the rotting damage can spread, risking the entire plant, as compromised roots struggle to absorb water and nutrients effectively.
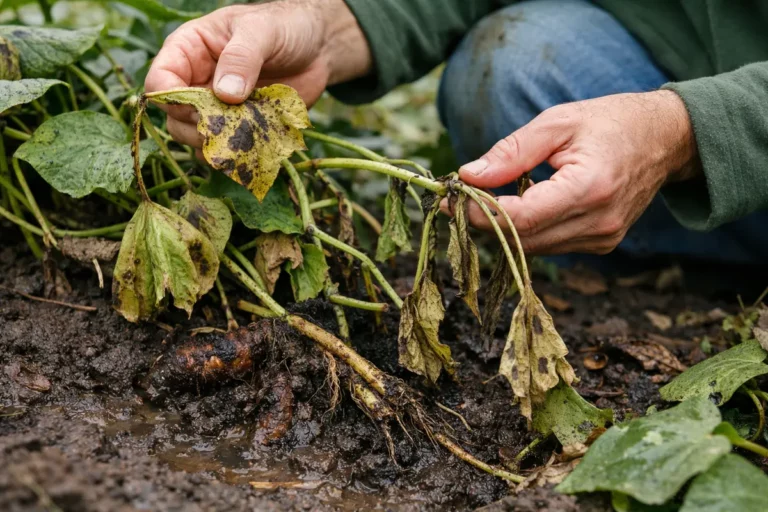
A common mistake occurs when gardeners overlook the signs of overwatering, allowing the fern to remain in soggy soil. For instance, a gardener who waits too long may face a complete loss of the fern, while another who acts swiftly might only need to replace a few roots. If your fern’s leaves are not only yellowing but also wilting, check for root rot by inspecting the roots closely. Excess moisture often leads to problems like wilting tulips after prolonged rain.
Acting quickly helps prevent further root decay, which can lead to a cascade of issues in ferns, including reduced nutrient uptake. When roots are damaged by overwatering, the plant struggles to transport water and nutrients, leading to more yellow leaves and eventual death. If the leaves don’t return to a healthier shade within a week, check the level of moisture in the new soil; it should be moist but not soggy.
A gardener who immediately restrained their watering and repotted their fern within days observed a complete recovery within weeks, while another who delayed action watched their plant succumb to root rot and die. Often, gardeners mistakenly believe that trimming away the yellow leaves is enough, while the underlying problem of root health remains unaddressed, risking further decline.
Acting quickly to address overwatering is crucial because ferns are particularly sensitive to excess moisture, which can lead to root rot, limiting the plant’s ability to absorb nutrients and water efficiently. If you delay, the damaged roots cannot regenerate, leading to further deterioration, which results in a rapid decline in leaf vitality and drooping stems. If the leaves have started turning yellow while the roots remain healthy, check the soil moisture level to confirm your diagnosis.
A common scenario occurs when gardeners fail to repot an overwatered fern promptly, allowing the root rot to spread throughout the entire root system. For example, a gardener noticed yellowing leaves but waited too long to take action, eventually leading to the loss of the entire plant. By recognizing symptoms early and acting swiftly, you can prevent such devastating outcomes and encourage a full recovery.
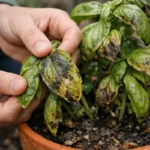
Trimming these affected leaves is crucial because the plant is directing energy toward declining parts instead of healthy growth. By cutting away the damaged foliage, you not only promote a healthier appearance but also minimize the risk of pests that love to infest dying leaves. Be mindful of sharp tools to prevent crushing the tender remaining stems of healthy fronds. If you discover more than a few yellow leaves but the rest of the frond looks green, it may indicate insufficient pruning. If left untrimmed, the overall health of the fern may decline further, attracting pests like aphids or developing diseases.
A common mistake many gardeners make at this point is pruning too aggressively or too late. If ferns are heavily infested with yellow leaves, they might forget to assess the overall plant condition first. Always check for underlying issues before excessively cutting back greenery. For instance, if the yellowing is localized at the base of fronds alone, some ferns can rebound from selective trimming rather than total removal. If you find that numerous leaves are yellowing and realize that your shears are dull, replace them to prevent further stress or damage. If you notice new brown spots on healthy leaves after cutting, it signals ongoing stress or possible pests that need immediate attention, meaning it’s time for further inspection and adjustment of care practices.
Step 2 – Diagnose Overwatering Issues in Fern Soil
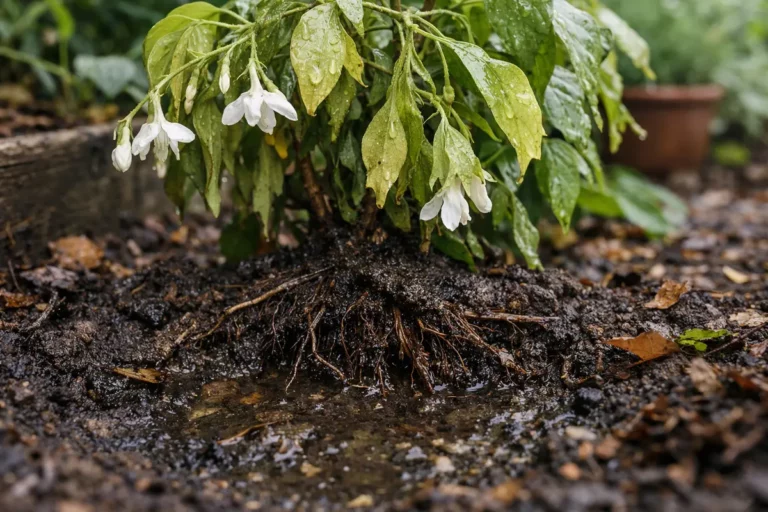
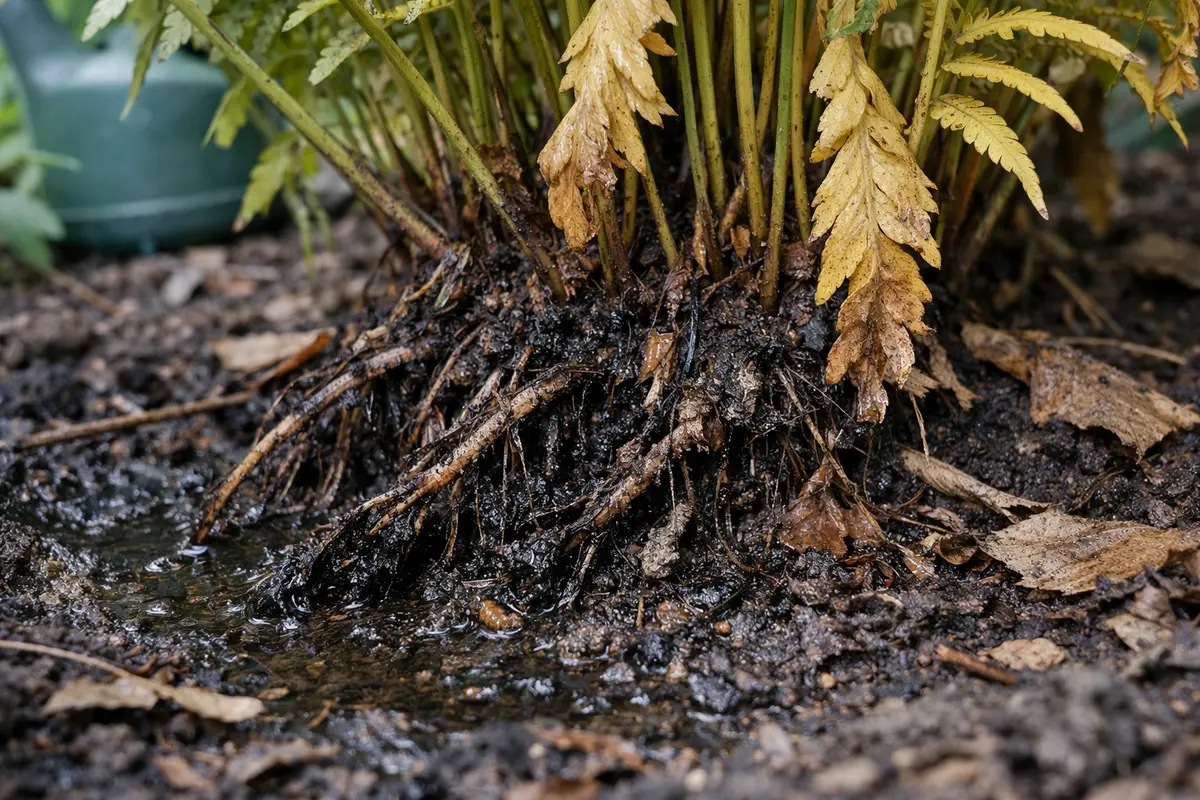
Start by examining the soil around your ferns to identify overwatering issues. You should see whether the soil is waterlogged, soggy, or firm and dry. Probe two inches into the soil with your finger; if you feel consistent moisture, you are likely dealing with overwatering. Recognizing these signs early can prevent detrimental impacts on your plants. Additionally, a soft touch that springs back is not a good sign; rather, it indicates saturation.
This happens because overwatering saturates the soil, leading to a lack of oxygen for the roots, which impairs nutrient uptake. Fern roots require good drainage and aeration; when sitting in overly wet conditions, they become susceptible to root rot. Observing soil conditions promptly allows you to address issues before they escalate to severe problems that could lead to plant mortality. A clear sign of overwatered soil can be mold growth on the surface, indicating a lack of air circulation and high risk of rot. When you see white mold forming, it’s a definite sign of excess moisture that necessitates immediate action. In poor drainage conditions, plants may also develop succulent turning mushy heavy rainfall.
Correct this by considering replanting the fern in fresh, well-draining soil if the soil smells sour, indicating anaerobic bacteria have developed. Remove the plant from its pot to check if the roots are healthy or beginning to mush together — healthy roots will feel firm and appear white or light tan. If the soil feels dry yet the leaves remain yellow, check your watering frequency and adjust it as necessary. Always assess the moisture needs of the fern based on environmental factors such as humidity and temperature before watering; even though some ferns can tolerate a slight dryness, they all require careful monitoring according to seasonal and room condition changes. If you notice drainage holes in the container are blocked or insufficient, that could cause water to stagnate and worsen the conditions.
Step 3 – Revitalize Ferns with Appropriate Fertilizer
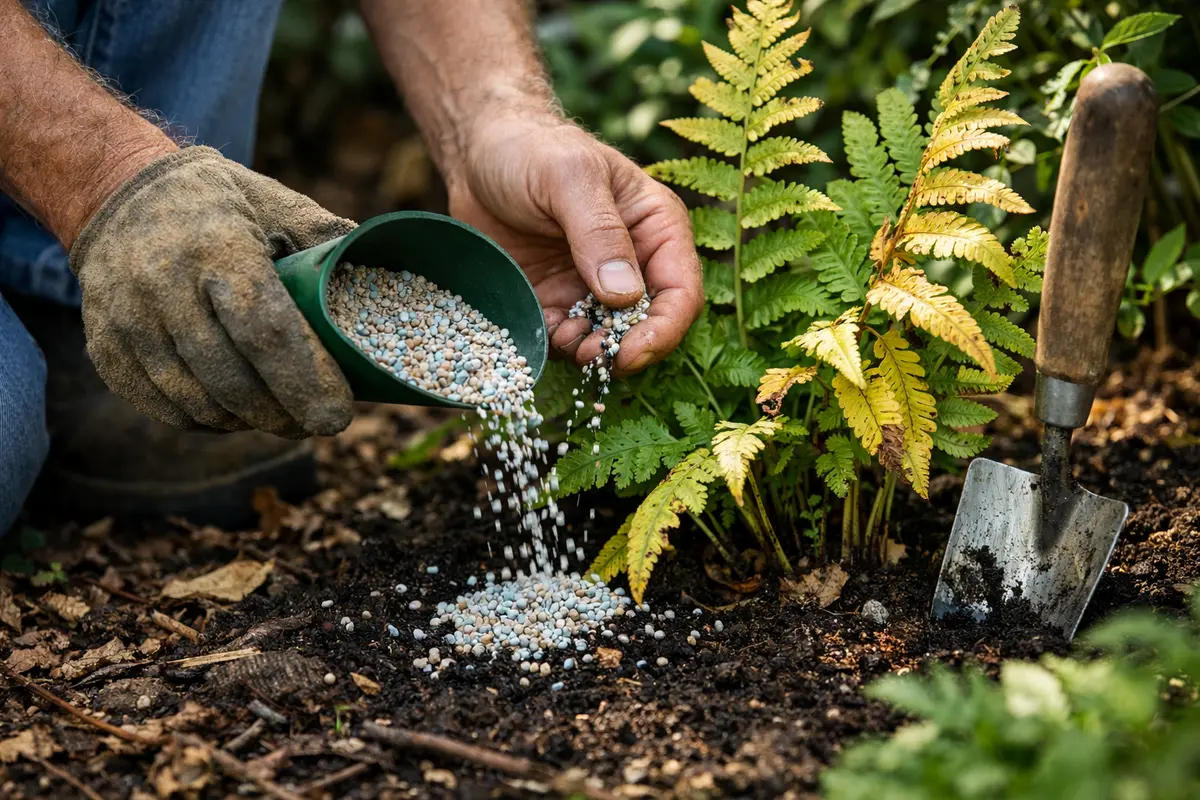
Begin by applying a well-balanced fertilizer specifically designed for ferns to replenish lost nutrients. You will notice healthier-looking fronds and improved overall vigor as the ferns begin to recover. Ensure you follow the label instructions for the recommended dosage, as moderation is crucial to avoid further stress to the plants.
Recovery progresses as the ferns regenerate fresh green growth while shedding their damaged yellow leaves, which can take several weeks. If new foliage isn’t emerging as expected, it may be a sign of persistent root issues, so check if the soil is overly compacted or if drainage is inadequate. To prevent future occurrences of yellowing leaves, establish a routine of checking soil moisture regularly and only fertilizing during active growth periods, typically in spring and summer.
From here on, ensure that you monitor your fern’s watering schedule closely. Wait until the top inch of soil has dried out before watering again, adjusting your routine with the seasonal shifts in humidity and temperature. Watch for signs of recovery, such as the appearance of new fronds, and if yellowing recurs, reassess the watering practices or the health of the roots. Use an organic fertilizer during the growing season to provide consistent nutrition without the risk of chemical burn. When watering is too sparse, plants often develop yellow leaves eggplant drought.
For the next few months, continually observe your ferns as they respond to these changes. Keep in mind that if you encounter crusting or build-up on the soil surface, it might signal an excess of salts due to over-fertilization. If you spot this, consider a thorough flush of the soil with water until it drains freely; this will help remove the excess salts that can hinder recovery.
If your ferns still show signs of distress after implementing these habits, inspect the roots and ensure that other environmental factors, like light conditions, are optimal. Adjusting care protocols based on visual cues will play a significant role in your ferns’ recovery and long-term health.
Step 4 – Inspect Ferns for New Yellowing Weekly
Next, monitor the ferns every few days for changes. Look for improvement such as new green fronds emerging or the existing leaves regaining their vibrant color. If yellowing persists, assess the soil moisture level; it should be damp but not soggy. Additionally, recheck the humidity around the plant to ensure it remains suitable for ferns, ideally between 40-60%. Excess moisture often leads to problems like root rot in potato plants.
A fully recovered fern should display rich green leaves that are firm to the touch, contrasting sharply with the earlier yellow, limp leaves struggling to maintain structure. Observe that new fronds develop without discoloration, showing signs of healthy growth like a glossy surface and a lush appearance. If you notice any pale or browning spots reappearing, that signals overwatering may still be an issue.
If yellowing returns despite following previous steps, reduce watering frequency significantly and improve drainage by repotting in a mix tailored for ferns. Watch for a drastic change in frond texture; firm and pliable leaves are a good indicator, while wilting and browning edges indicate too much water again. If not this, adjust the ambient humidity or consider using a humidity tray to assist in moisture regulation.
A healthy fern should show signs of recovery; fresh, vibrant green leaves should appear within a few weeks as the plant adjusts to improved conditions. If you notice the new growth remains soft and frail or yellowing persists despite timely care, it may indicate that underlying issues have not been resolved—such as broken drainage or continued overwatering. Keep in mind that some stress may manifest several weeks after the original incident, which may offer an illusion of progress while the roots remain compromised. Establish a routine of observation to prevent any cycle of deterioration, checking both moisture levels and leaf conditions regularly.
If the yellowing returns despite following your care steps, inspect your watering schedule and the drainage conditions closely. It might be time to repot the fern in a more porous soil mix or choose a container with better drainage holes. If your pot is solid plastic without air holes, consider switching to a terracotta option that allows proper airflow. You may also need to evaluate the fern’s location—if it is receiving too much direct sunlight, this can stress the plant and exacerbate yellowing leaves. Monitor light exposure in the early morning and late afternoon, too, which differs from harsh midday rays. Monitoring helps catch these problems early before they become severe, so keep an eye on any changes in your care regimen, as an adjustment now can significantly impact the long-term health of the plant.
FAQ
How long does it take for ferns to recover from overwatering?
Ferns typically begin to show signs of recovery within a week after implementing corrective measures. Depending on the severity of the overwatering, you might see new growth and firmer leaves within two to four weeks. However, if improvement is not visible after this period, reevaluate your watering habits and soil conditions to ensure they align with the fern’s needs. It’s also helpful to note any environmental changes that may have affected drainage.
Can yellowing leaves spread to healthy ferns?
Yellowing leaves can spread issues to healthy ferns if caused by pests or disease. If you are treating one fern and it shows signs of infestation, inspect all your ferns closely. A common pest, like spider mites, can jump from one leaf to another, so take care when handling affected plants to avoid cross-contamination, and regularly inspect nearby ferns to prevent widespread problems, especially if you move plants around often. Managing ventilation in your space can also limit pest populations.
Should I remove affected leaves immediately?
Yes, it’s crucial to remove yellowing leaves as soon as you notice them. This action helps the fern refocus its energy on healthy growth and minimizes risks from pests or potential diseases. Timing is key; doing this immediately can prevent further decline and allow the plant to redirect resources toward recovery. If you observe areas remaining damp near where the fronds were cut, ensure proper airflow to these spots to decrease the chance of rot.