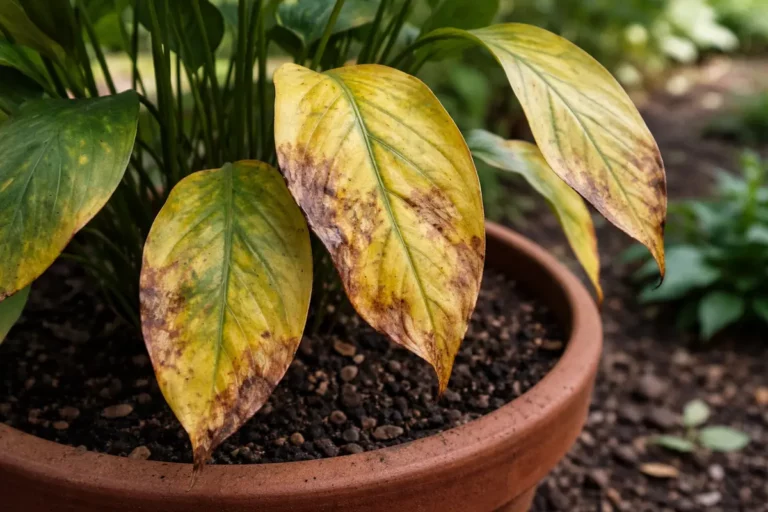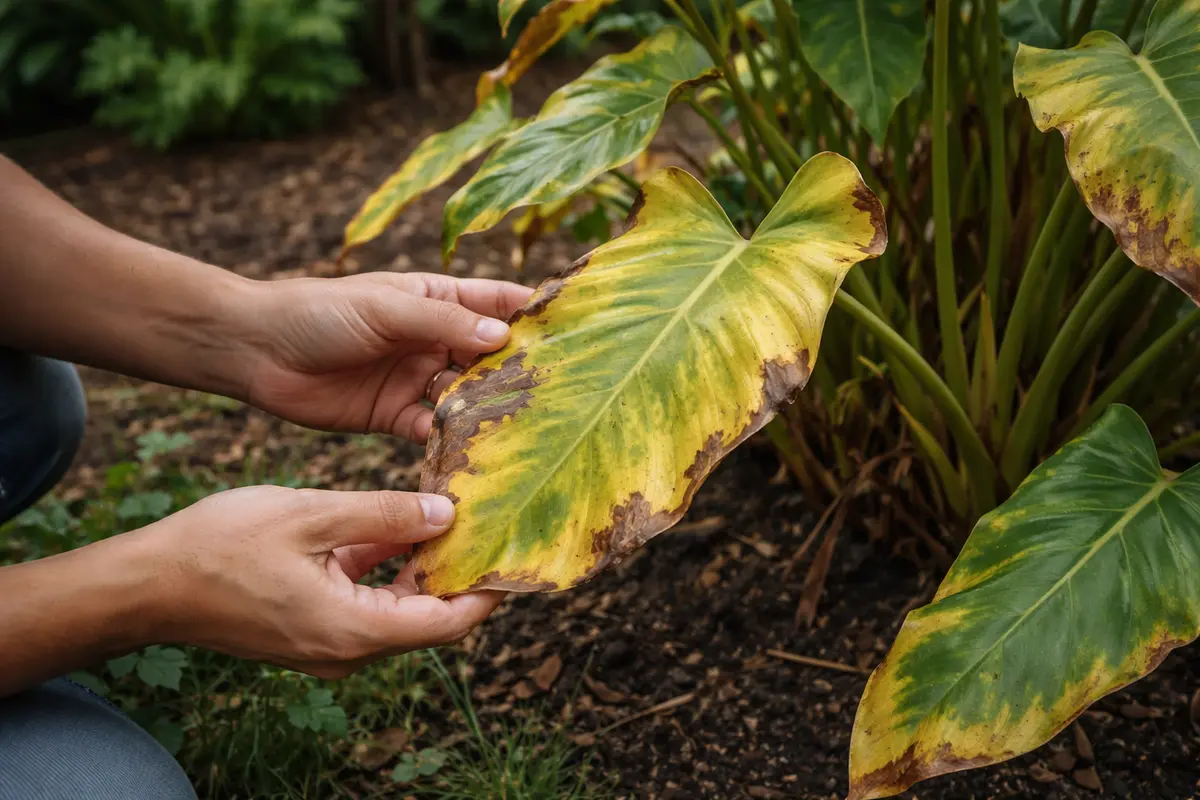
You may notice your philodendron’s lush green leaves starting to turn an alarming shade of yellow after a recent fertilizer application, which is why you need to know how to treat yellowing leaves on philodendrons after fertilizer overload. This yellowing often indicates nutrient burn or excess salts damaging the roots, causing stress and potential leaf drop. If left unchecked, the condition can worsen, weakening the plant and making it harder to fix, but by adjusting your fertilization routine and inspecting the soil, you can restore your philodendron’s health.
Step 1 – Flush Philodendron Soil to Remove Excess Fertilizer
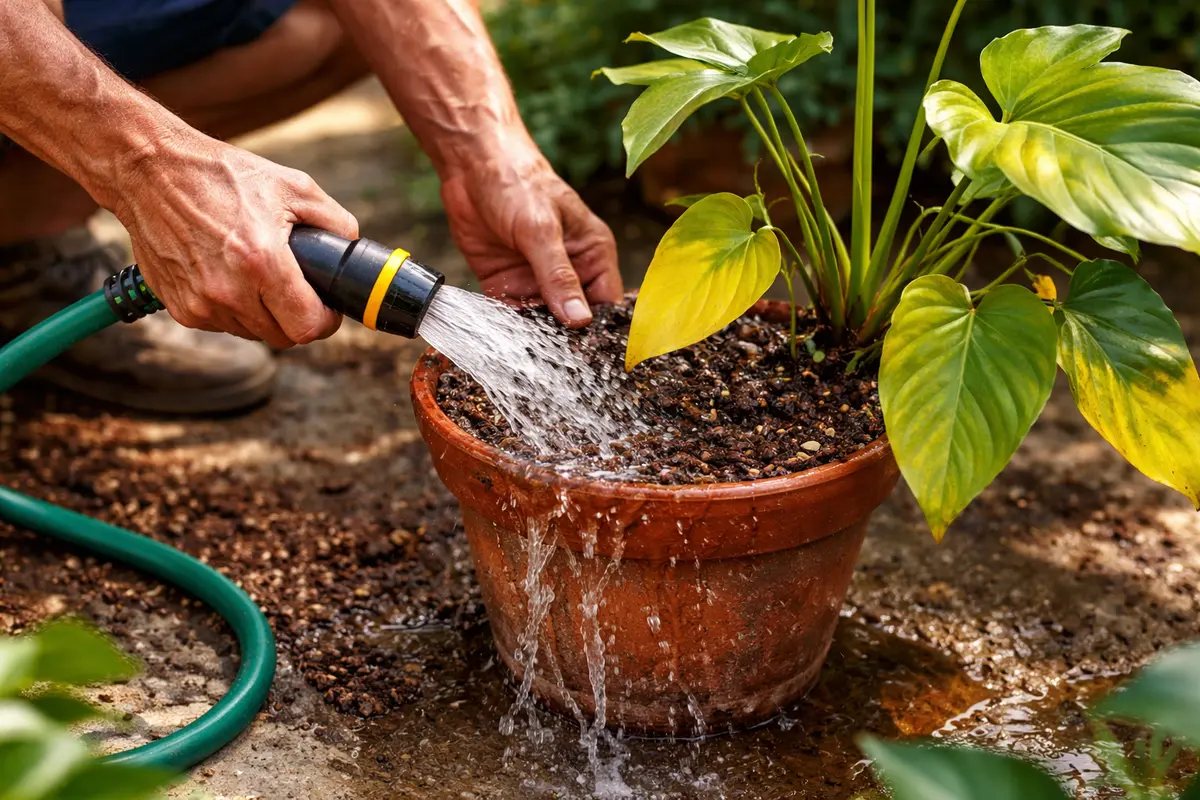
Start by thoroughly flushing the soil with water, using a process called leaching to remove accumulated salts. You will see the excess fertilizer begin to leach out within a couple of hours—this is indicated by the water running clear from the drainage holes at the bottom of the pot, leading to cleaner soil. This immediate action is critical because it helps alleviate the symptoms of fertilizer burn by diluting and washing away harmful salts and chemicals that have accumulated in the soil. Aim to use at least three times the volume of water compared to the potting mix. For example, if you have a 1-gallon pot, flush it with about 3 gallons of water. The visual indicator will be clear water with no cloudiness, confirming that the harmful fertilizers have been sufficiently flushed out.
When you notice yellowing leaves, it indicates that the plant is struggling to absorb necessary nutrients due to the high concentration of salts. Regular watering will help push through the layers of soil to flush out these compounds, which can otherwise inhibit root health and further affect leaf color. Ensuring soil does not sit in waterlogged conditions is essential, as this promotes aerobic processes that support healthier root systems. As the water flows through the pot, pay attention to the time it takes to drain. A slow flow, exceeding 10 minutes for typical houseplant soil, might suggest that soil compaction is inhibiting drainage, necessitating a light loosening of the top layer.
A common mistake gardeners make at this stage is not using enough water or not allowing it to flow through adequately, leading to insufficient flushing and ongoing issues. Additionally, failing to check drainage holes can cause the soil to remain overly saturated, exacerbating the yellowing issues. If the water pooling on the surface smells sour or if the soil feels heavy, it indicates improper drainage or a root problem that needs addressing. After flushing, give the plant a day to dry slightly before re-evaluating moisture levels to avoid over-saturation. An observable shift in the plant’s stability might occur if drainage improves, as roots become more capable of respiratory functions. During this drying period, monitor the soil’s texture and structure, keeping in mind that a healthy mix will provide some crumbliness instead of a sticky or overly dense feel.
Step 2 – Diagnose Nutrient Buildup in Philodendron Roots
Inspect the roots for nutrient buildup by gently removing the plant from its pot and carefully shaking off excess soil. Observe if the roots appear brown and mushy. Healthy roots should be white or light tan and firm; if you see signs of decay, you need to prune back affected roots to encourage healthy growth. Cut away any roots that are not pliable and have a dark, mushy texture, as these will not recover. Aim to remove about 20-30% of the affected roots to provide the plant with a chance to rebound. This drastic step, while daunting, will help redirect the plant’s energy towards new, healthy growth.
Understanding the root’s condition is vital because it connects directly to how well the plant can absorb water and nutrients. Fertilizer overload can cause roots to become overwhelmed, leading to symptoms like yellowing leaves. Healthy roots efficiently transport nutrients and moisture from the soil to the leaves, while stressed roots contribute to the plant’s decline. Ensure that when you inspect, the roots have a pleasant earthy smell; a strong odor indicates rot. A solid root system will also feel firm when lightly squeezed, indicating healthy turgor pressure. If roots feel slimy or too soft, the potting mix might be retaining too much moisture, further complicating recovery. Taking note of how the roots feel can provide immediate indicators about underlying soil conditions and guide your next steps effectively.
In some cases, if the potting mix retains too much water or does not drain properly, roots may also begin to rot, and regrowth will not occur even if you prune. If you find that the soil remains soggy several hours after watering, consider repotting the plant into a well-draining mix that allows for adequate aeration, attempting a blend of equal parts perlite, peat, and pine bark. Conversely, if roots are healthy but the yellowing persists, this could indicate a different issue, such as insufficient light or temperature fluctuations. Always inspect environmental factors when diagnosing root health. Should root damage be extensive, a root-inhibiting treatment may foster regrowth and deter fungal intrusion. It’s also advised to take note of existing moisture levels and expose the roots to air for at least an hour post-pruning before repotting to promote a stronger healing response.
Step 3 – Trim Affected Leaves for Philodendron Recovery
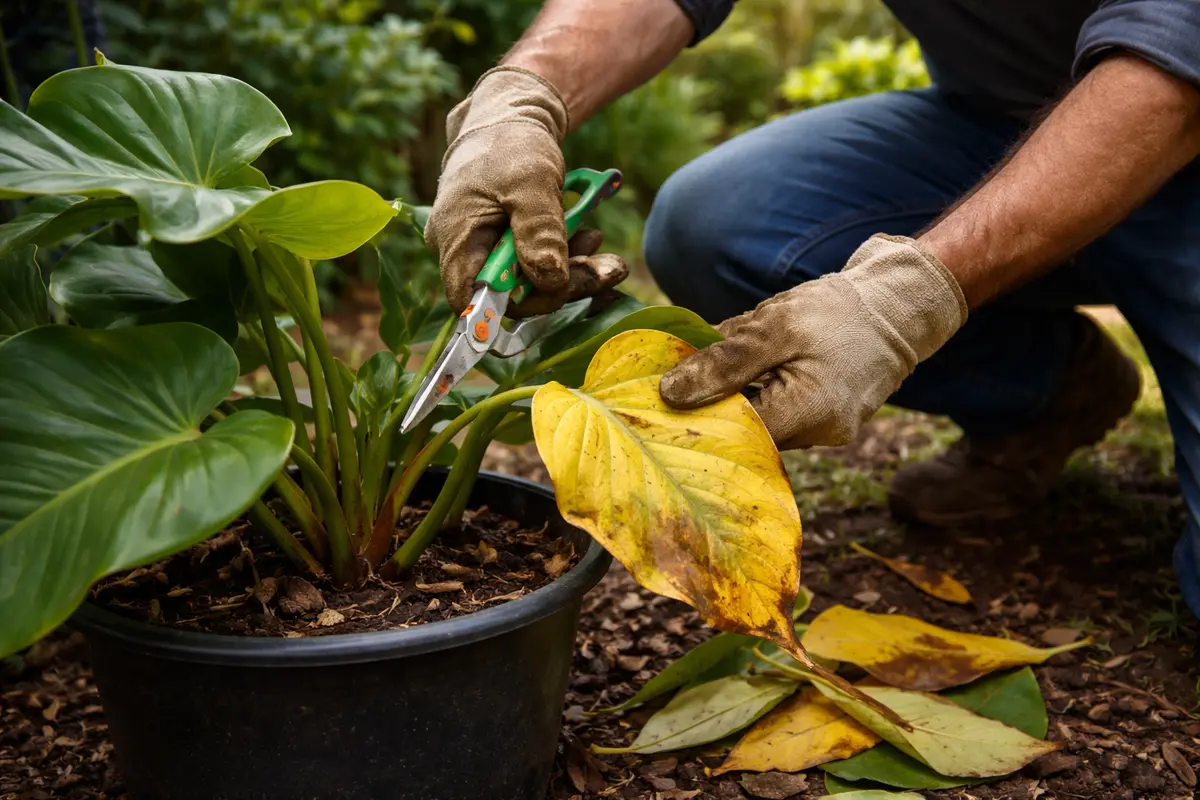
Prune away any yellowing or dead leaves immediately using clean, sterilized scissors or pruning shears. You should notice new leaf growth within a few weeks as the plant begins to recover from the nutrient stress. Aim to cut just above the leaf node to allow for potential new growth. Cutting away these affected leaves not only improves the plant’s overall appearance but also allows the remaining healthy foliage to receive more nutrients and light, contributing to recovery. Be diligent about keeping your cutting tools sanitized, as using unclean tools can introduce pathogens to the plant.
By trimming the dead or damaged leaves, you enable the plant to redirect energy toward producing new growth, thereby strengthening its health. Pruning helps ensure that the remaining leaves can photosynthesize effectively, improving resilience against future stresses like over-fertilization. Cultivating good pruning habits leads to a more vigorous plant, as it removes potential disease risks from decaying foliage. Ideally, leave at least 4-5 healthy leaves on the plant to support its recovery during this vulnerable time. Assess the overall shape of your philodendron during trimming; often, a well-defined shape facilitates better light exposure to the remaining leaves, ensuring that all have adequate space to thrive. Additionally, keep an eye on the slightest new growth from the leaf nodes after pruning; if you observe any, it indicates that the plant is responding positively to your care.
Many gardeners mistakenly shy away from pruning, fearing they might further harm their plants. However, not taking action on yellowing leaves can lead to superficial issues escalating into more severe damage. If left untrimmed, these leaves can harbor pests or diseases that spread to other parts of the plant. If yellowing continues after trimming, evaluate your watering and fertilization habits for signs of continuing nutrient imbalance, which often arises from either excess fertilization or insufficient light. In practice, slight adjustments to the lighting regimen might prompt changes in new leaf formation and overall health. If light levels are insufficient, consider moving the plant to a brighter spot with indirect sunlight to allow for optimal recovery. Striking the right balance is critical since even minor changes in light can significantly influence growth patterns.
Step 4 – Inspect Philodendron Health for Yellowing Leaves
Next, monitor the soil moisture level and drainage capacity to prevent excess fertilizer buildup. Check for any signs of wilting or drooping leaves, which indicate stress from nutrient overload. Regularly recheck these conditions weekly; if the leaves begin wilting again shortly after watering, it indicates that water is not reaching the roots effectively. The health of the root system will directly correlate with the affixed moisture levels, dictating how well the plant recovers from prior stressors. Keep an accurate watering schedule; if your plant usually requires water every seven days but begins struggling again, adjust your routine accordingly.
A fully recovered philodendron showcases vibrant green foliage with visibly firm, glossy leaves. In contrast, early signs of the problem returning include a dullness in leaf sheen and the appearance of brown tips, suggesting the plant is still struggling. Soft or mushy leaf stems indicate that there’s still an imbalance in nutrient absorption, requiring immediate assessment of the water and nutrient balance. This phase is crucial; ideally, you should re-evaluate the potting mix to ensure it is proper for philodendrons and not retaining excess moisture. Keep in mind that in warmer seasons, plants typically require more frequent watering; adjustments should be made based on climate as well as indoor temperature.
If yellowing returns despite your care, take immediate action by reducing fertilization frequency and flushing the soil with water to remove excess salts. Should the issue persist, consider repotting the plant in fresh, well-draining soil to reset its nutrient balance and provide a better environment for recovery. In extreme cases, if yellowing spreads to new leaves within a few weeks of taking corrective action, it might indicate a deeper systemic issue, such as a disease moving through the plant. As watering routines are adjusted, monitor the soil moisture levels closely; the top inch of soil should dry out between waterings to promote strong root growth. You may notice a quicker bounce-back if the soil remains relatively dry before the next watering phase begins. If prolonged dipping into soggy conditions still occurs, additional amendments, such as incorporating coconut coir or changing to clay pellets, might be necessary to enhance drainage.
If the yellowing continues despite your vigilance, reassess your approach by checking the root zone for signs of rot or nutrient buildup and considering a change in the environmental setup. This could involve moving the plant to a location with better indirect sunlight or adjusting the watering schedule to give the roots a chance to recover effectively. Early intervention is key, as prolonged neglect can lead to increased stress and possible loss. If environmental adjustments are necessary, avoid sudden changes in conditions to prevent shocking the plant. Maintaining consistency in care will cultivate not only root health but also a desirable growth environment. Additionally, observe any changes, as minor modifications can yield significant results with appropriate timing, ensuring the philodendron’s environment closely matches its needs.
FAQ
How long will it take for my philodendron to recover from fertilizer overload?
Recovery can take anywhere from 3 to 6 weeks after correcting the issues. During this time, monitor for any signs of new leaf growth emerging, indicating a return to health. The timeline can vary based on how well each corrective step is implemented; for example, if substantial root trimming was needed, it may take longer for the plant to bounce back. If improvements aren’t visible within that window, consider reevaluating the environmental conditions and care routine to better support recovery.
Can yellowing leaves spread to other parts of the plant?
Yes, if nutrient imbalances or environmental stress remain unaddressed, yellowing can spread throughout the plant. Keeping a close eye on the philodendron after corrective actions is essential for preventing worsening issues, and consider isolating it to prevent potential pest spread. Additionally, disease can spread more rapidly in dense, humid conditions, so maintaining good air circulation around your plant is crucial to its overall health.
Should I remove all yellowing leaves at once?
It’s generally advisable to remove the most severely affected leaves first to encourage recovery and health. Gradually monitoring new growth allows you to remove additional yellow leaves as needed to help maintain overall vigor and appearance. Patience is necessary during this phase, as removing all at once could stress the plant further, impacting its ability to recover effectively. Additionally, assess the plant after each pruning session to ensure that energy is being conserved for healthier foliage rather than depleting resources too quickly.