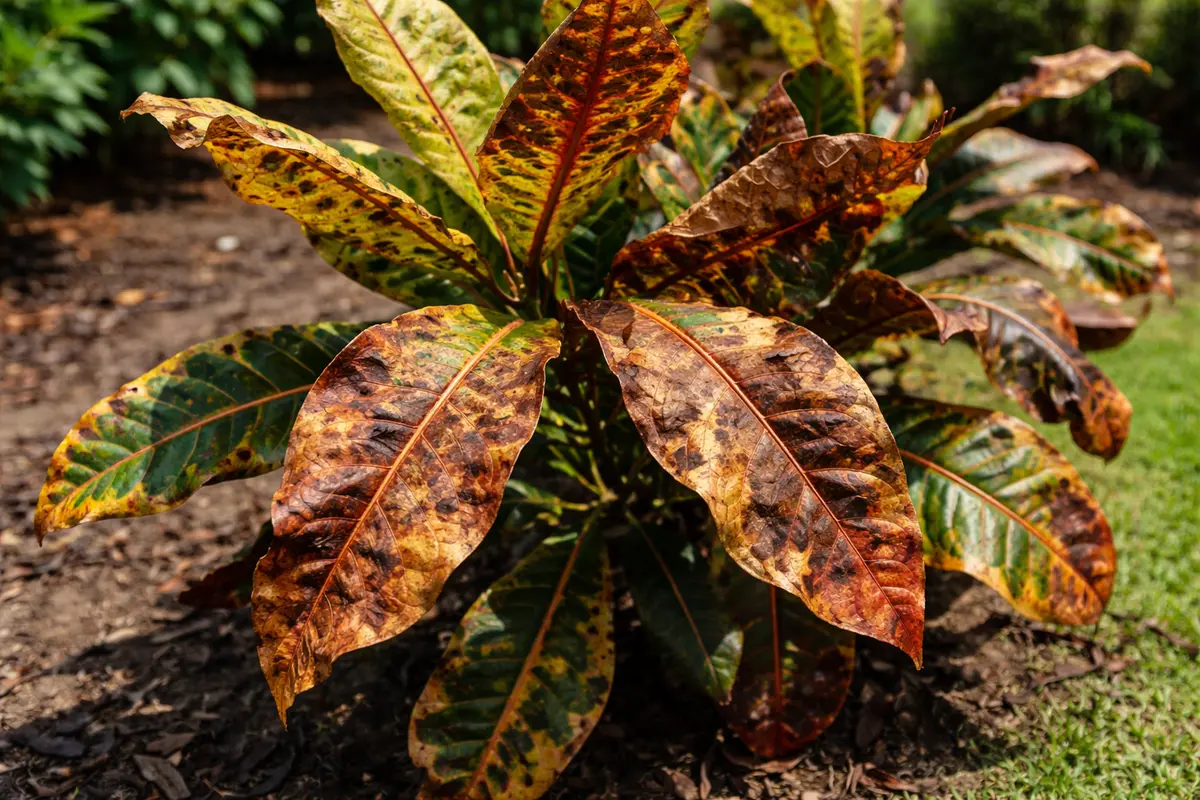
You may notice your croton’s vibrant foliage starting to brown during hot afternoons, which is why you need to know why is my croton turning brown during hot afternoons. This browning is often caused by leaf damage due to intense sunlight and heat, leading to unsightly spots and wilting on the leaves. If left unchecked, the condition can worsen, ultimately weakening the plant and leading to more damage, but fixing it is possible now by adjusting its light exposure and regularly monitoring moisture levels.
Step 1 – Check Croton Leaves for Immediate Browning
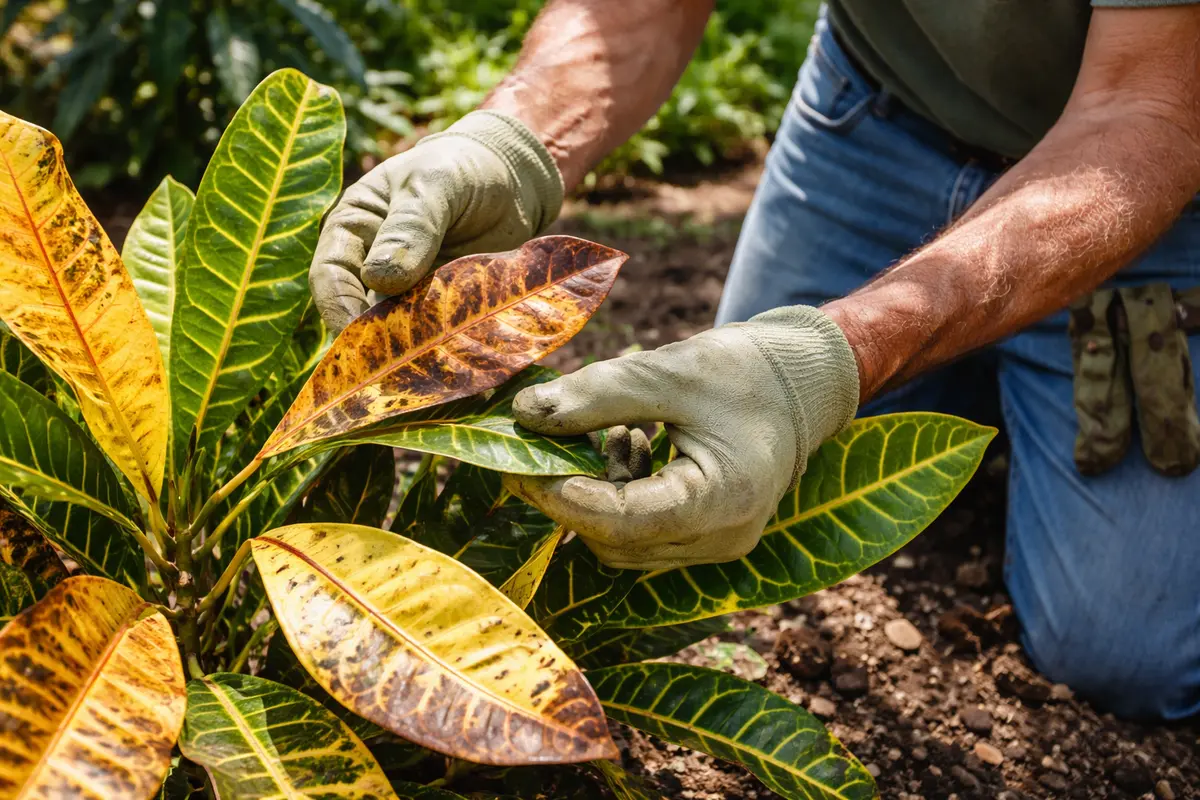
Inspect the leaves closely for signs of browning. You will notice if the tips or edges of the leaves are darkening within a few hours of this inspection. Focus on both the appearance and texture of the leaves, as softening or curling may also coincide with browning. If the color is noticeably fading into a dull brown, this is often an indication of stress due to heat and dehydration.
Identifying these changes quickly is crucial, as crotons can experience rapid damage during high temperatures. The browning is typically a reaction to excessive heat and inadequate moisture, leading to dehydration symptoms. If leaves continue to brown unchecked, they may eventually die, which can result in reduced energy production for the plant, further exacerbating its health decline. In instances where browning is severe, you may notice a change in leaf shape and size, as malnourished crotons fail to thrive and produce lush foliage.
A common mistake at this stage is to overlook the moisture level in the soil, assuming simply that watering will fix the issue. Checking the moisture content before adding water is essential; if the soil is already saturated, overwatering could exacerbate root rot, which would compound the browning problem. Always ensure you’re dealing with the right issue first. If browning appears mainly at the tips or edges, it’s indicative of potential watering problems. Maintaining healthy roots and leaves is crucial to recovery, especially as stress is exacerbated when external conditions are not managed.
Step 2 – Diagnose Hot Afternoon Sunlight Effects on Croton
First, check the moisture level of the soil around your croton. If it’s dry to the touch several inches down, thoroughly water the plant until excess drains from the bottom. You should see the leaves start to perk up within a few hours, indicating they are rehydrating and recovering from stress.
When the soil is too dry, the roots of your croton fail to absorb enough water, leading to brown leaf edges and tips. This occurs because insufficient moisture prevents the plant from maintaining its necessary turgor pressure, resulting in visible stress during hot afternoons. In contrast, if the soil retains moisture yet the leaves remain brown, it may indicate root rot instead of drought.
If you notice a sour odor from the soil, this could suggest root rot due to overwatering. In that case, immediately reduce watering frequency and consider repotting in fresh soil to promote drainage. If not this, check for pests that may also cause browning, requiring a separate treatment approach.
Hot afternoons can overwhelm crotons, especially when tied to direct sunlight, causing them to lose water more rapidly than usual. This rapid loss leads to dehydration and wilting, demonstrating why checking the plant’s light exposure is critical. Creating filtered sunlight or shade during peak afternoon hours can provide a more favorable environment for your croton’s metabolism and health, significantly reducing the stress response that leads to browning. If leaves start to feel crisp and dry to the touch, this is a strong indicator of moisture loss exacerbated by sunlight.
If relocation is not possible, consider increasing watering frequency but be cautious. If the soil feels dry at 2 inches below the surface during hot weather, increased watering should be your first step. Observing the plant’s reaction to the new conditions will guide your next actions: if brown tips persist, deeper investigation into soil quality is warranted, which might include checking for compaction or poor drainage. Root health is vital for nutrient uptake, and if roots are struggling due to compaction, hydrating the topsoil won’t solve the underlying issues. If hot conditions continue as summer progresses, a rotation of outdoor pots or planters may be beneficial to better manage light exposure.
Step 3 – Water Croton Deeply for Thirst Recovery
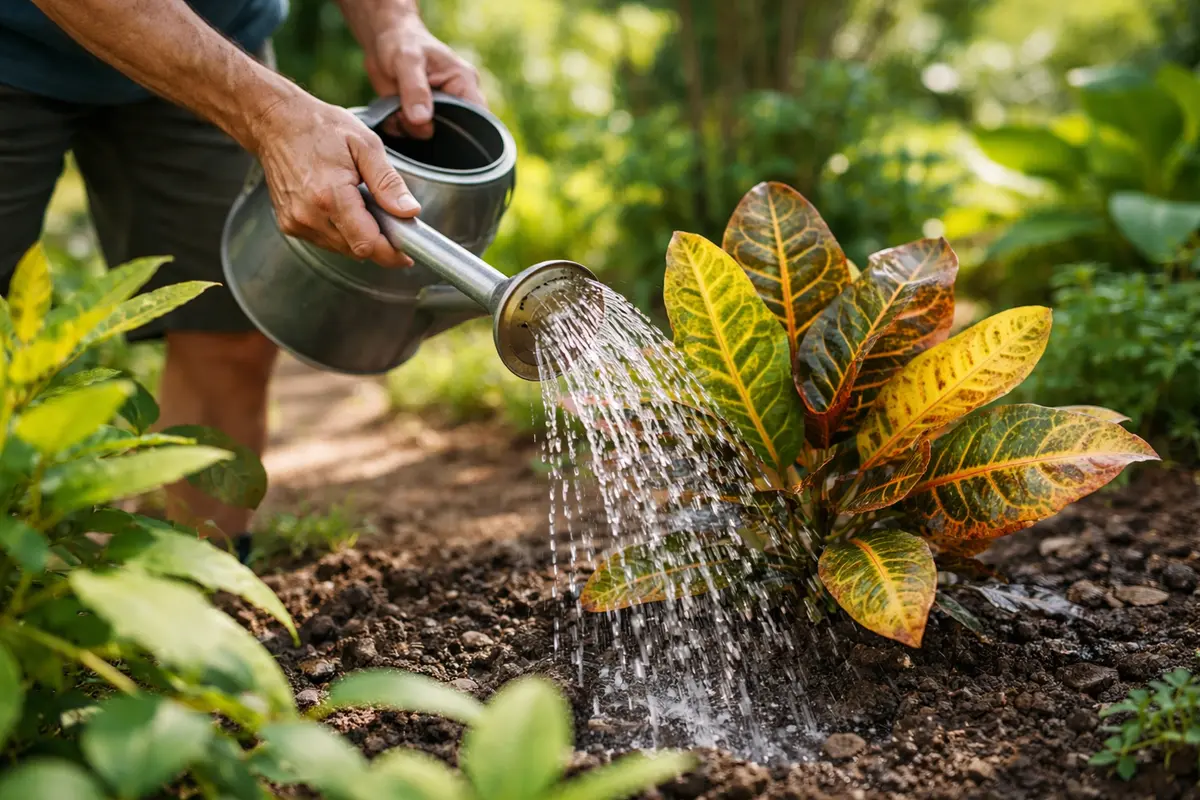
Water the croton deeply to replenish its moisture supply, ensuring the water reaches six inches down in the soil. This depth is crucial to raise the water level in the root zone. Within 24 hours, you should observe leaves beginning to firm up and moisture retention visibly increasing, with the plant appearing more alert and vibrant. Look for signs of drooping to subside as hydration levels improve. If leaves regain a glossy appearance, this is an excellent indicator of recovery.
This recovery phase is critical because crotons thrive in moist, well-drained soil. A sudden dry spell can severely hinder their growth, leading to permanent leaf loss and other complications. Healthy watering practices restore hydration and invigorate nutrient absorption, while also aiding in the metabolic activities essential for vibrant leaf color. Complementing deep watering with appropriate sunlight will accelerate recovery, as the plant can photosynthesize effectively when hydrated. Keeping the top layer of soil moist but not soggy is essential to promoting healthy root growth, allowing the root system to expand and better absorb remaining nutrients in the soil.
During this phase, beware of overwatering — brown or mushy roots are not uncommon if the plant receives too much water too quickly. A common overcompensation error includes frequent watering without measuring soil dryness first. If browning persists alongside damp soil, cutting back on watering may be necessary to prevent further root decline. The emergence of foul odors from the soil often signals overwatering or root rot, indicating the need for immediate adjustment. Implementing a system of checking soil moisture with a moisture meter can help avoid guesswork and guide effective watering schedules.
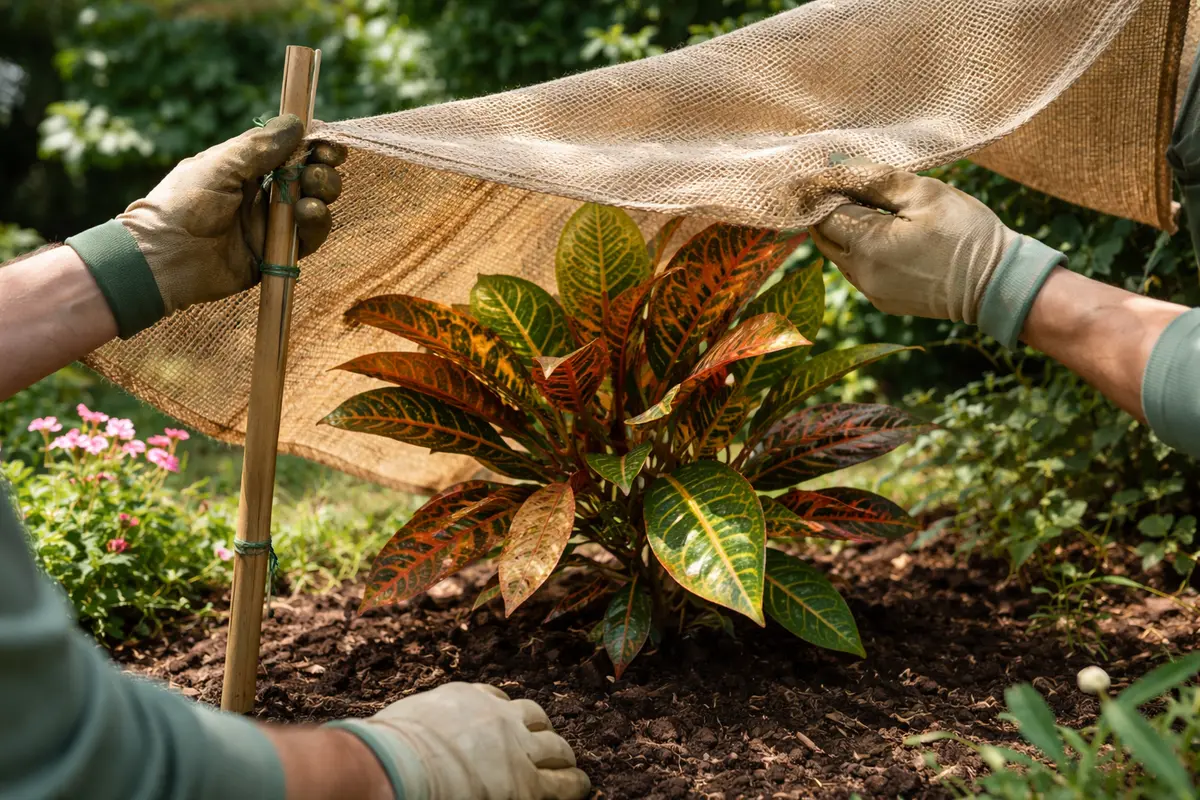
Step 4 – Prevent Leaf Browning with Afternoon Shade
First, increase humidity around your croton by placing a humidifier nearby or grouping it with other plants. After a few days, you should notice a reduction in browning leaves, leading to a more vibrant plant appearance.
High temperatures combined with low humidity levels are key contributors to browning leaves in crotons. When the air is dry, it exacerbates moisture loss, making the plant more susceptible to stress. Establishing a routine of maintaining humidity will address this moisture deficit at its source, preventing recurring issues.
In hotter months, increase humidity frequency to daily misting if temperatures exceed 85°F. Alternatively, if you notice browning still occurring despite added humidity, check for drafts or direct heat sources nearby that might be affecting your plant’s environment.
Browning tends to recur if exposure to harsh sunlight goes unaddressed, as crotons are sensitive to high temperatures without adequate moisture. Sliding into midday shadows shields them from intense heat and helps maintain stable soil moisture levels, effectively reducing stress triggers. Moving the pot or applying temporary shade can contribute to a resilient routine against severe sun exposure. As seasons change, consistent afternoon management becomes crucial — re-evaluating light patterns will support long-term health.
It’s particularly effective to apply this habit in late spring and summer as the temperatures rise. Seasonal adaptation to sunlight is crucial; you can rotate pots to provide even exposure throughout different seasons. If you live in a region prone to heatwaves, consider adjusting shade placement every month. This practice can counteract prolonged damage and improve the overall robustness of your croton. Moreover, utilizing reflective surfaces, like light-colored rocks or bricks around the pot, can help mitigate heat by reflecting rather than absorbing sunlight, which adds a layer of protection in extreme conditions.
Step 5 – Inspect for New Browning After Care
Inspect your croton’s leaves every 2-3 days to monitor for any new signs of browning or dehydration. You should observe whether the new growth is coming in green and healthy, indicating that your care methods are effective. Focus on new leaf development, noting any changes in size, color, or firmness — these aspects can reveal the effectiveness of your adjustments. If you notice new growth coming in robust and fully formed, it’s a good sign that your interventions are working.
During this monitoring phase, mark improvements or fresh damage carefully. Leaf firmness and rich color signal your croton is recovering effectively, while persistent discoloration alerts you that prior strategies may need re-evaluation. Small signs, such as curling or wilting of new growth, may indicate that browning issues are either ongoing due to unregulated exposure or factors not yet addressed. Regular observation gives you valuable insights about the croton’s overall health and environmental challenges, making it easier to adapt care strategies quickly.
If browning resumes despite your efforts, it’s time to assess other potential concerns such as pests or root diseases. In such cases, inspect the soil for any foul odors or visible pests that indicate deeper issues. Focusing on root health at this point is critical; particularly pay attention to the texture of the roots as you may find them to be mushy or discolored, necessitating immediate corrective actions. Routine checks around the base of the stems for sticky residue or webbing can also signal infestations. Re-assessing watering habits or root health may need escalating if signs continue to persist, as these factors can often lead to lasting damage that requires dedicated solutions.
FAQ
How long does it take for my croton to recover from browning?
The recovery period for a croton affected by browning due to heat stress typically ranges from a few days to several weeks. The time it takes varies significantly based on the degree of damage and the care measures applied, including appropriate watering schedules and light adjustments. Consistent monitoring during this time can help gauge recovery effectively and also indicates proper re-hydration and sunlight exposure balance.
Can I prune the brown tips off my croton?
Yes, pruning brown tips can improve its appearance, but only after ensuring the plant is stable. Removing dead sections helps the croton redirect energy to healthier growth, but avoid excessive trimming, as this may induce additional stress. Pruning should focus on sections that are fully brown — cutting just above a green node can promote new growth. Always use sterilized tools for pruning to prevent infection, as fresh cuts can become entry points for pathogens.
Why do my croton leaves still feel limp after watering?
If your croton leaves remain limp even after watering, this may indicate root rot, especially if the soil is soggy. It’s crucial to check if the roots are mushy or smell foul; in this case, you might need to repot with fresh, well-draining soil. Be prepared to cut away any blackened or rotten roots to promote new growth. Consequently, improving drainage and adjusting watering frequency becomes necessary to restore plant health.