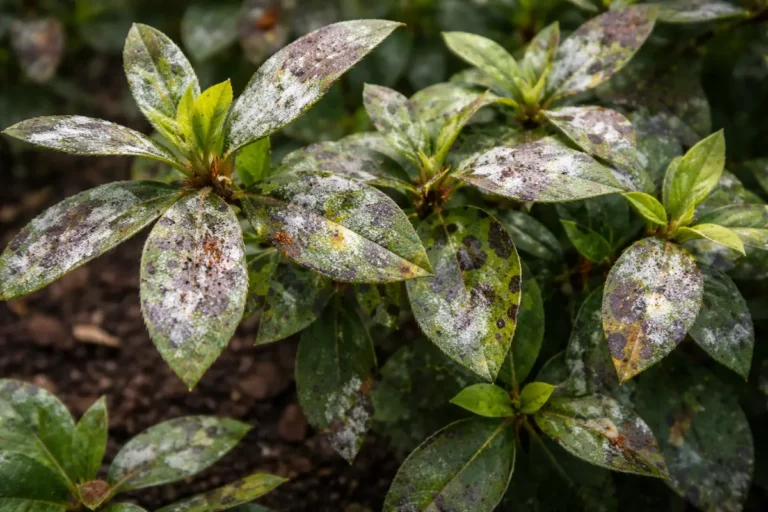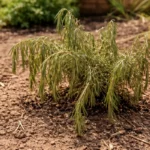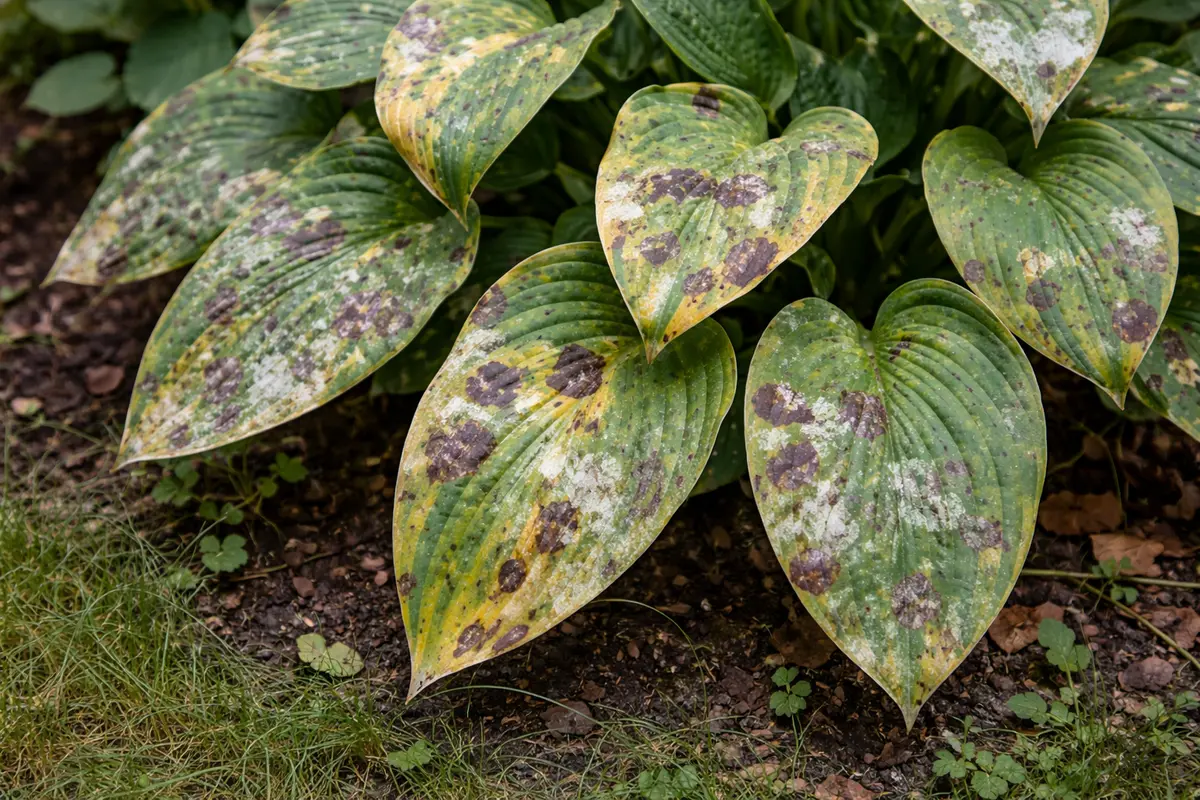
You may notice unsightly dark spots on your hosta leaves during humid weeks, which is why you need to know How to treat fungal spots on hostas during humid weeks. This discoloration is often caused by high moisture and poor airflow, resulting in plant damage and reduced leaf vitality. If left untreated, the condition gets worse and can spread to surrounding plants, making it harder to fix. You can improve the situation by inspecting the leaves and removing affected areas promptly to prevent further complications.
Step 1 – Prune Infected Hosta Leaves Promptly
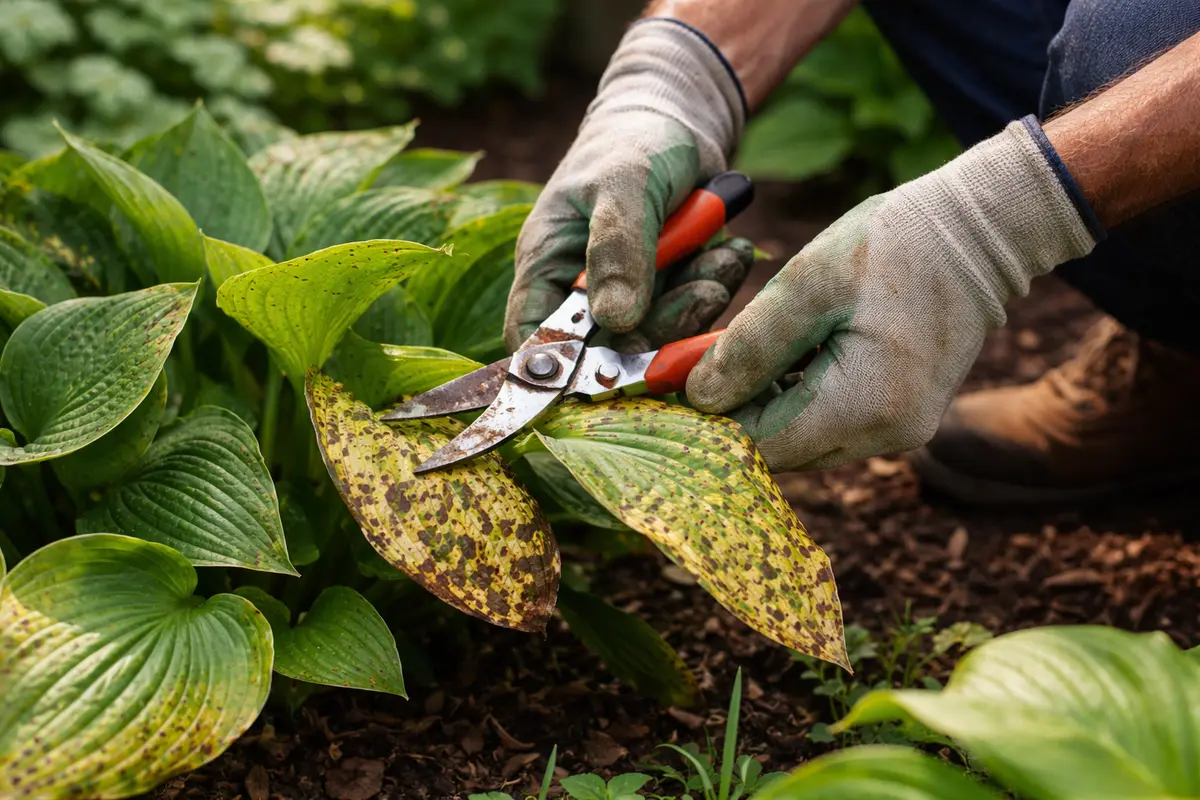
Start by inspecting your hostas for any fungal spots and promptly remove the affected leaves using clean, sharp scissors. Make sure to eliminate all visibly infected material and dispose of it away from your garden, as this will help prevent the spread of the fungus. Within a few days, you should see a reduction in the number of new spots forming on the remaining leaves as the air circulation improves.
Acting quickly is vital because fungal diseases on hostas thrive in humid conditions, leading to rapid deterioration if left unchecked. When you remove infected foliage promptly, you interrupt the life cycle of the fungus, allowing your plants to focus their energy on healthy growth. If you delay, you may notice the spread of the fungus causing entire leaves to wilt and die, which could have been avoided.
In one case, a gardener waited too long to remove affected leaves, resulting in widespread infection throughout their hosta bed, leading to a total loss of plants within weeks. A common error is thinking that just trimming the edges of affected leaves will suffice; however, this often allows the fungus to persist, ultimately exacerbating the problem. If new spots appear after removal, check for underlying moisture issues in the soil.
Pruning the infected leaves is essential as it removes not only the visible symptoms but also helps minimize the likelihood of the fungus spreading to other parts of the plant. A visible improvement can often be observed within days; however, ensuring that you cut at least half an inch below the visible spots helps reduce the chance of spores remaining on the plant. During humid weeks, fungal spores can proliferate quickly, leading to more severe infections if not promptly dealt with. Pruning helps improve air circulation around the remaining leaves, which is critical to slowing down any further fungal growth. If your hostas have become overly dense, consider thinning them out to allow better light penetration and airflow, which are important in reducing humidity levels around the plants.
A common oversight at this stage is waiting too long to take action, allowing the fungal infection to spread onto healthier leaves. Many gardeners mistakenly think that simply waiting will resolve the issue, but this often leads to a greater problem where multiple leaves become affected. Keeping a close eye on your plants after heavy rain can help you catch any emerging issues early. If you notice new fungal spots extending past the initially affected leaves, promptly remove those as well to prevent further damage. Not acting in time may lead to the need for more drastic recovery measures later, increasing the overall intervention time.
Step 2 – Diagnose Humidity Effects on Fungal Spots
Inspect the affected areas and check the humidity levels in your garden environment. You might notice that the remaining leaves are still damp, even after two days of no rain, indicating poor air circulation and high humidity, which encourages fungal growth. Notably, humidity levels above 60% significantly heighten the risk of fungal problems. If you have a hygrometer, use it to track humidity levels daily, as fluctuations can often be subtle yet impactful.
High moisture levels, especially in shaded areas where hostas thrive, can create an ideal breeding ground for fungi. When coupled with high temperatures, these conditions can facilitate rapid fungal spread, leading to more significant damage. Addressing this is vital; without adequate airflow, waterlogged conditions may linger and worsen the fungal spots. Implementing measures such as allowing enough spacing between plants can greatly enhance air circulation during humid periods. Additionally, if your garden is prone to these conditions, consider using fans or portable aerators to increase air movement around your hostas.
If you detect a sour smell in the soil around the affected hostas, it may indicate root rot or an advanced fungal disease that requires a different approach. In such cases, consider improving drainage by amending the soil with perlite or sand to enhance aeration. The soil should feel moderately moist but not soggy when you check it; this will help promote healthy root systems. Regularly checking the moisture level of your soil will further help you maintain appropriate watering habits and reduce the chances of recurrence. When inspecting, make sure to dig a few inches down to assess the soil moisture accurately; if you pull out soil that clumps and holds water, it’s time for adjustments.
Step 3 – Treat Hostas with Fungicide for Recovery
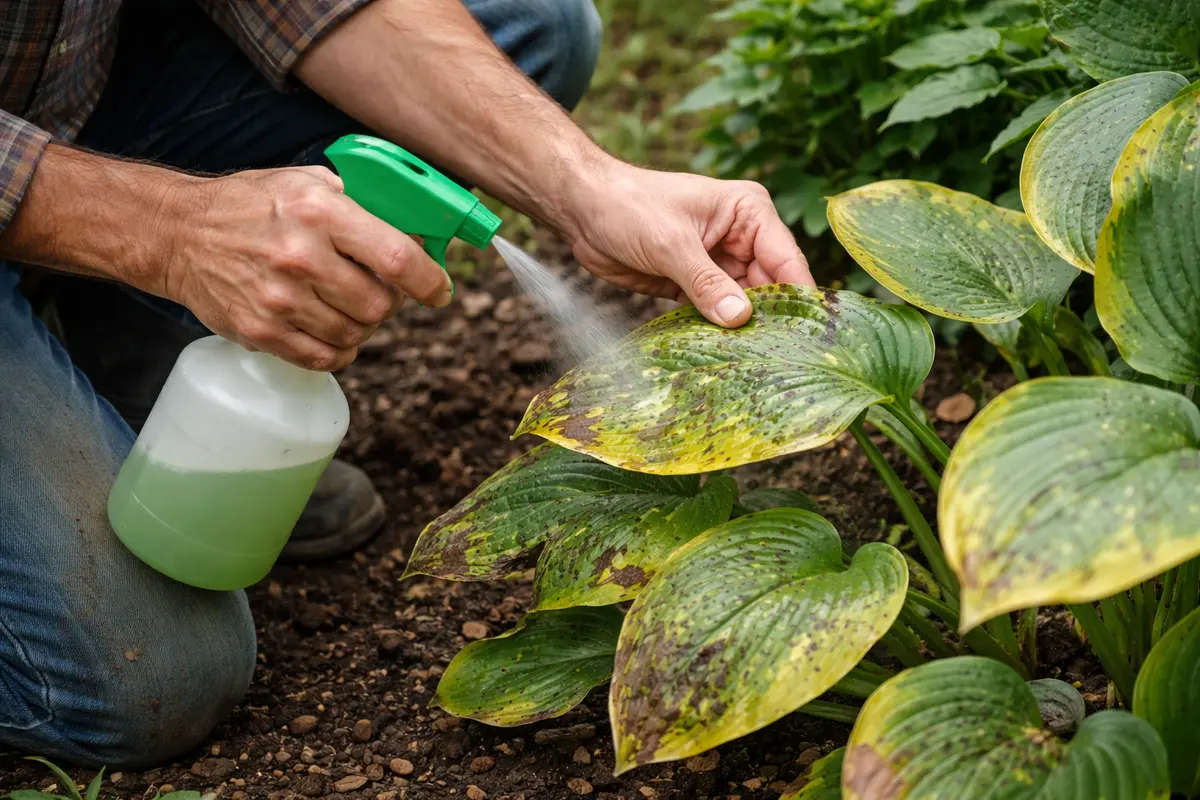
Apply a suitable fungicide to the affected hostas to promote recovery. You should observe the spots beginning to fade and the new growth emerging within a week, provided you adhere to the application instructions closely and consistently. It’s crucial that the fungicide is compatible with hosta plants, so checking product labels before application is essential.
Using a fungicide works by targeting the fungal spores that cause the lesions on the leaves, preventing them from causing further damage. Fungicides contain active ingredients that disrupt the lifecycle of the fungi, ensuring that your hostas can recover effectively if applied correctly at the onset of infection. Adequate application timing is crucial; applying it during cooler hours can increase absorption and efficacy, so consider applying in the early morning or late afternoon. Make sure to cover the undersides of the leaves well, as this is where many fungal spores thrive. For deeper penetration, aim for a thorough coat that makes the leaves slightly damp but not dripping with the solution.
One mistake to avoid during recovery is to overwater the hostas. Though it may seem beneficial to give them extra moisture after treatment, too much water can suffocate the roots and exacerbate fungal conditions. Instead, focus on ensuring that the soil remains moderately moist but well-draining to encourage healthy regrowth. If conditions remain humid, use a soil moisture meter to check for overly wet conditions that could hinder recovery efforts. I’ve noticed that when I keep the moisture levels just right, my hostas recover faster and stronger, resulting in more robust, healthier leaves. Conversely, if you notice the leaves still curling or wilting after fungicide application, it may suggest that the root systems are not receiving sufficient oxygen, and a reevaluation of soil moisture levels is necessary.
Step 4 – Water Hostas at Base During Humid Periods
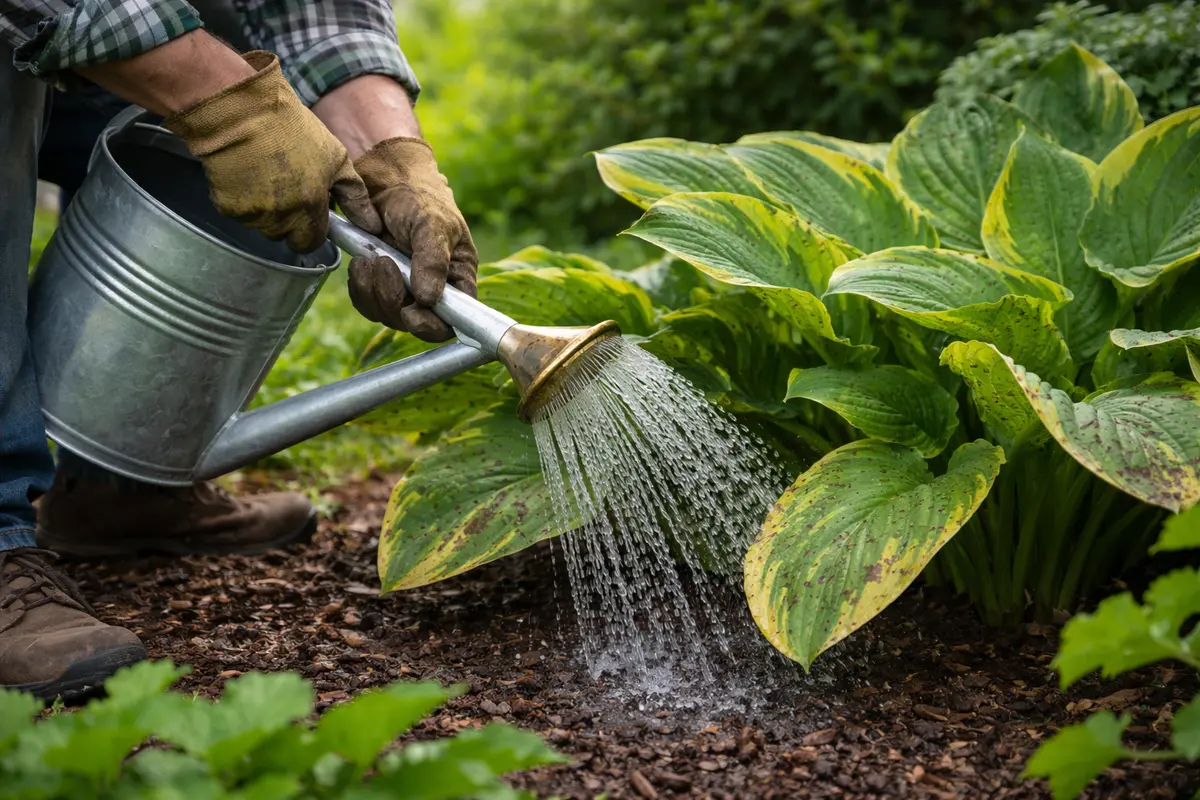
Water your hostas directly at the base instead of overhead during humid conditions. You will notice that this reduces surface moisture on the leaves, which helps discourage further fungal growth. Typically, watering at the soil level should help keep the foliage relatively dry, which is crucial in preventing moisture-related issues.
Direct watering is essential in humid situations as it minimizes water accumulation on the foliage where fungi thrive. Instead of spraying water from above, applying it directly at the plant’s base allows moisture to soak into the ground where roots can utilize it without splash-back creating wet foliage conditions. This practice not only helps prevent fungal issues but also encourages deeper roots and overall healthier plants. As a guideline, aim to water until the soil is moist to a depth of about 6 inches, ensuring effective root hydration without saturating the surface. If the soil remains compacted or if it appears to be resisting water absorption, consider loosening it with a garden fork to allow better penetration.
Seasonal weather changes can influence how you water hostas. During prolonged humid periods, consider adjusting your watering schedule to allow for greater drying times between watering sessions. This habit will help reduce fungus sensitivity, particularly if your hostas are planted in areas with poor air circulation. If the ground feels consistently moist or frequent rain is expected, delay watering and monitor leaf responses. Observing leaf color and texture during these periods can help gauge whether the plants require further moisture or if conditions are ideal for reducing water input. If the leaves develop a dull appearance or begin curling inward, that’s often a sign of overexposure to moisture—a signal for watering moderation.
Step 5 – Inspect Leaves for New Fungal Growth Regularly
Check the hosta leaves for new fungal growth every few days to monitor recovery. You should look for signs of improvement, such as the absence of new spots and the emergence of fresh growth. Aim to inspect leaf surfaces and the undersides, where fungi may be silently reactivating. Aim for inspections at least twice a week for the first couple of weeks after treatment, as early detection can save your plants.
A fully recovered hosta will display vibrant green leaves without blemishes or signs of wilting. It’s also crucial to distinguish between healthy recovery signs—like fresh, firm foliage—and early indicators of a returning problem, such as new dark spots or wilting leaves, to take immediate action. Diligently monitoring will aid in preventing reoccurrences and provide early indicators of distress. If the tips of new leaves begin to yellow or there are white colonies of fungi forming, this indicates that stressors are still present, and further measures may be needed to stabilize growing conditions.
If you see signs of the problem returning despite your efforts, consider reevaluating your watering technique or applying further treatment with fungicide as needed. Watching out for these signs will help you control the issue at the beginning, ensuring your hostas remain healthy through the humid weeks ahead. Regular inspection will maintain the plant’s health and help you catch problems early before they escalate into more significant issues. Keeping a garden journal will assist with tracking plant responses to conditions, providing a reference for future interventions. Log details such as humidity levels or watering patterns to better understand what works over time.
FAQ
How long does it take for fungal spots to clear up after treatment?
After applying fungicide, you can typically see improvements in your hostas within a week. The discoloration may start to fade, and new growth should appear by that time, indicating recovery. However, keep monitoring the plants, as some conditions may require repeat applications for complete resolution. Make sure to note any changes in weather conditions during treatment, as those can further influence recovery times.
Can fungal spots spread to other plants nearby?
Yes, fungal spores can easily spread to nearby hostas or other plants if the affected leaves are not handled properly. It’s best to prune and dispose of the infected leaves immediately to minimize the risk of spreading spores. Additionally, sterilizing your pruning shears between cuts will prevent cross-contamination, reducing the chance of infecting healthy plants nearby.
Should I remove all the infected leaves from my hostas?
Remove only the severely infected leaves while leaving the healthier foliage intact to promote recovery. This approach helps maintain the plant’s overall structure and encourages new growth from the unaffected parts. Before removing, inspect surrounding leaves for any minor discolored spots as they may need attention too. If you notice a few leaves with light spotting, consider monitoring them closely rather than removing, as sometimes it may only indicate an early stage of fungal onset.