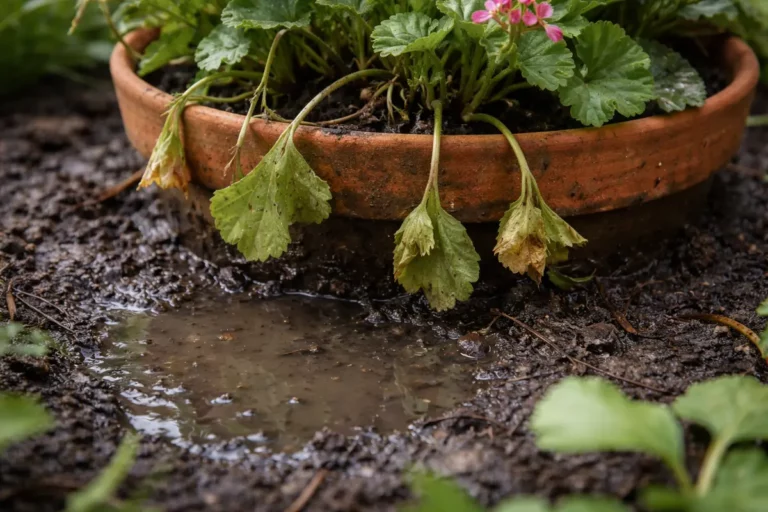
You may notice your potted strawberry plants wilting and developing brown spots after heavy watering, which is why you need to know how to stop root rot in potted strawberry plants after heavy watering. This damage occurs when excess moisture at the roots creates conditions for fungal growth, leading to mushy roots and overall plant decline. If left unchecked, this probably means the problem gets worse, ultimately weakening the plant and resulting in more damage, but fixing it is possible now if you inspect, adjust your watering habits, and remove any affected roots.
Step 1 – Remove Overly Wet Soil from Strawberry Roots
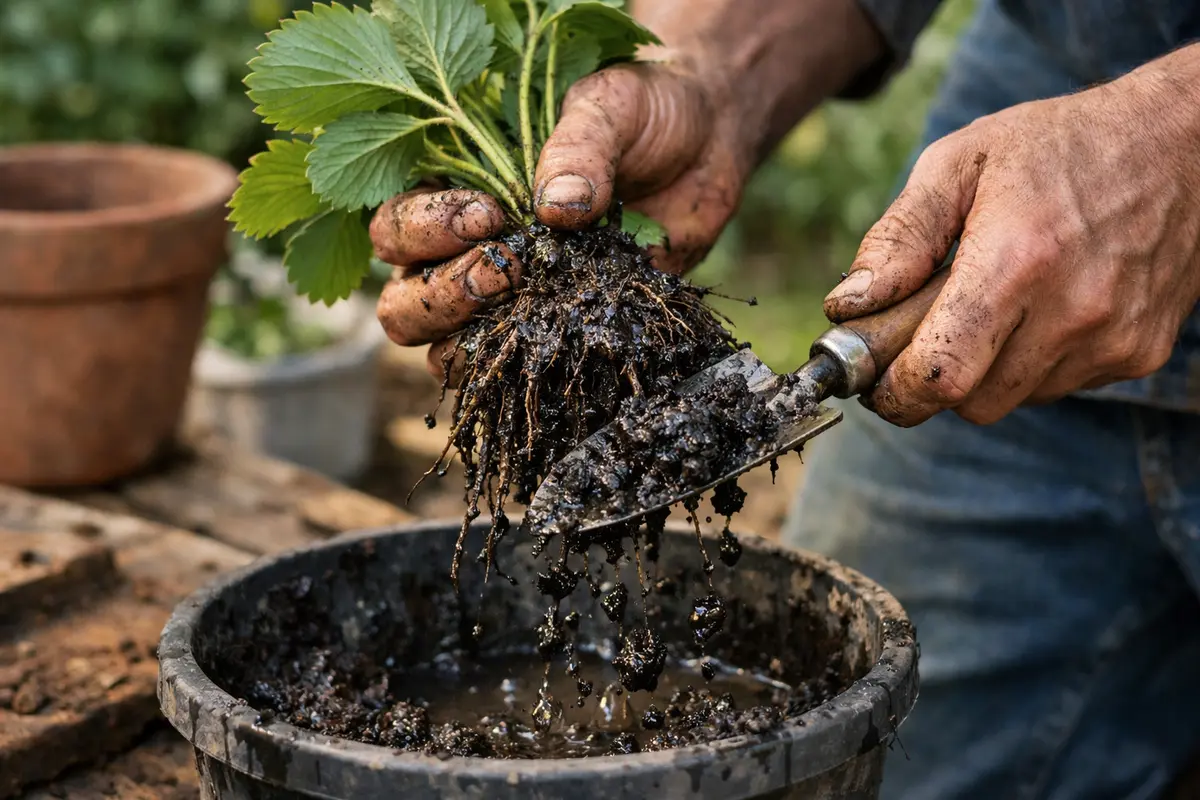
Start by carefully removing the pot from its base and gently extracting the root ball. You will notice excess water pooling in the bottom of the pot, which indicates the urgent need for intervention. Quickly draining this excess moisture is crucial before further root damage occurs. If the water level remains too high, roots will continue to drown, exacerbating the rot.
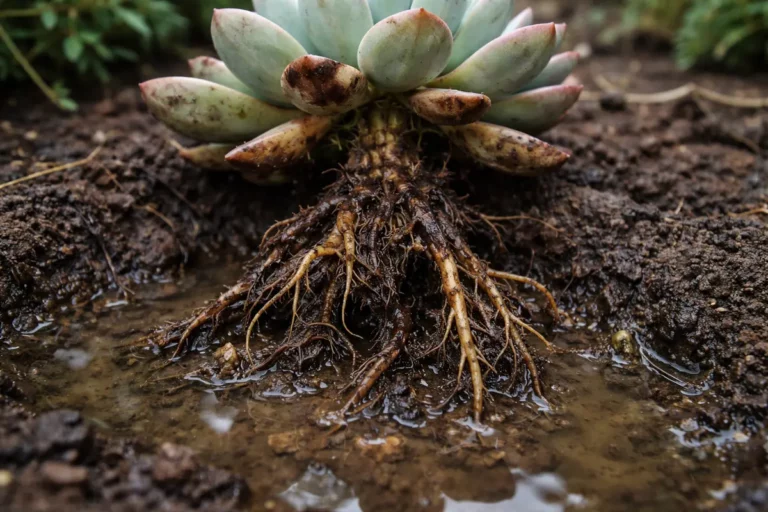
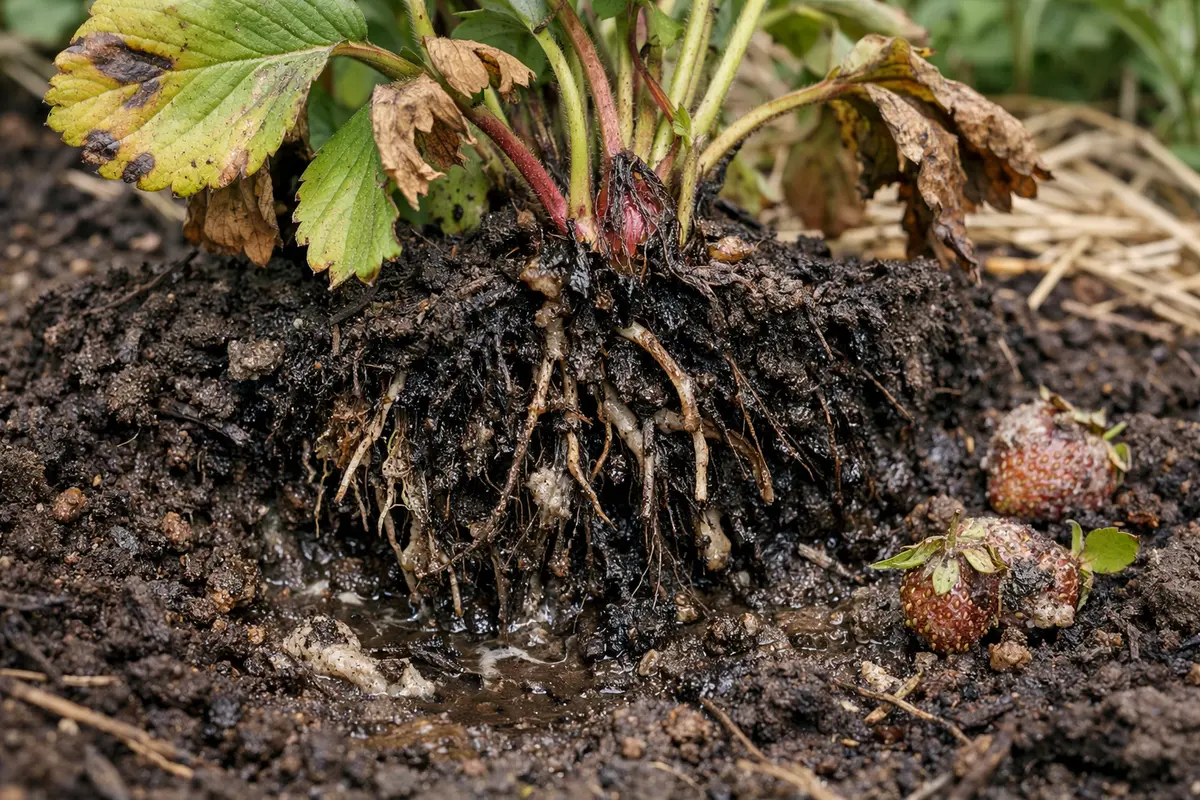
This action helps to prevent further waterlogging, which damages strawberry roots and exacerbates rot conditions. Strawberry roots, when submerged in water for extended periods, cannot absorb oxygen, causing them to become mushy and discolored. If you observe roots that are brown or feel like mush instead of firm and white, immediate intervention is critical. Healthy roots should feel firm to the touch, while unhealthy roots often exude a foul odor indicative of decay.
Many gardeners misstep by pouring additional water to compensate for how dry the topsoil appears, without acknowledging the existing root saturation. This approach leads to further accumulation of moisture at the bottom of the pot. If roots are visibly slimy or dark, the planter is in a serious state, necessitating immediate and decisive action. Additionally, take care to remove any overly saturated soil while disturbing the roots as little as possible, as excessive agitation can further jeopardize recovery efforts. Aim for a balance: if the topsoil feels dry but the roots are still wet, wait before adding any water.
Step 2 – Check for Root Drainage Issues in Strawberry Pots
Inspect the drainage holes at the bottom of the pot and confirm they are clear of blockage. You should observe improved drainage as excess moisture escapes during this process, signaling that the roots can begin to breathe and recover. Ensuring that water flows freely when you water again is vital, allowing the roots to interact with oxygen-rich air rather than drowning in water. A well-draining pot not only prevents future rot but also promotes overall health.
Root rot often occurs when water cannot escape because of clogged drainage holes or compacted soil. Without proper drainage, the risk of fungal pathogens taking hold increases significantly, leading to further deterioration of your plants. This issue can be particularly prevalent in pots made from lightweight plastic, where drainage holes may not be adequately marked or visible. If potting mix compacts over time, consider replacing it with a more porous soil blend that enhances aeration and promotes root health. If you discover persistent pooling of water at the base, thin layers of gravel can sometimes alleviate surface drainage issues.
If you find that water remains pooled even after checking the drainage, repotting might be necessary. This is essential if the soil texture has turned into a dense, muddy mass that hinders moisture flow and oxygen penetration to the roots. In contrast, if your drainage is adequate and water flows freely, you may need to inspect the roots for signs of rot further. Checking for proper drainage after each watering is crucial. If the water consistently doesn’t escape, it may indicate an ongoing root health issue that needs immediate attention.
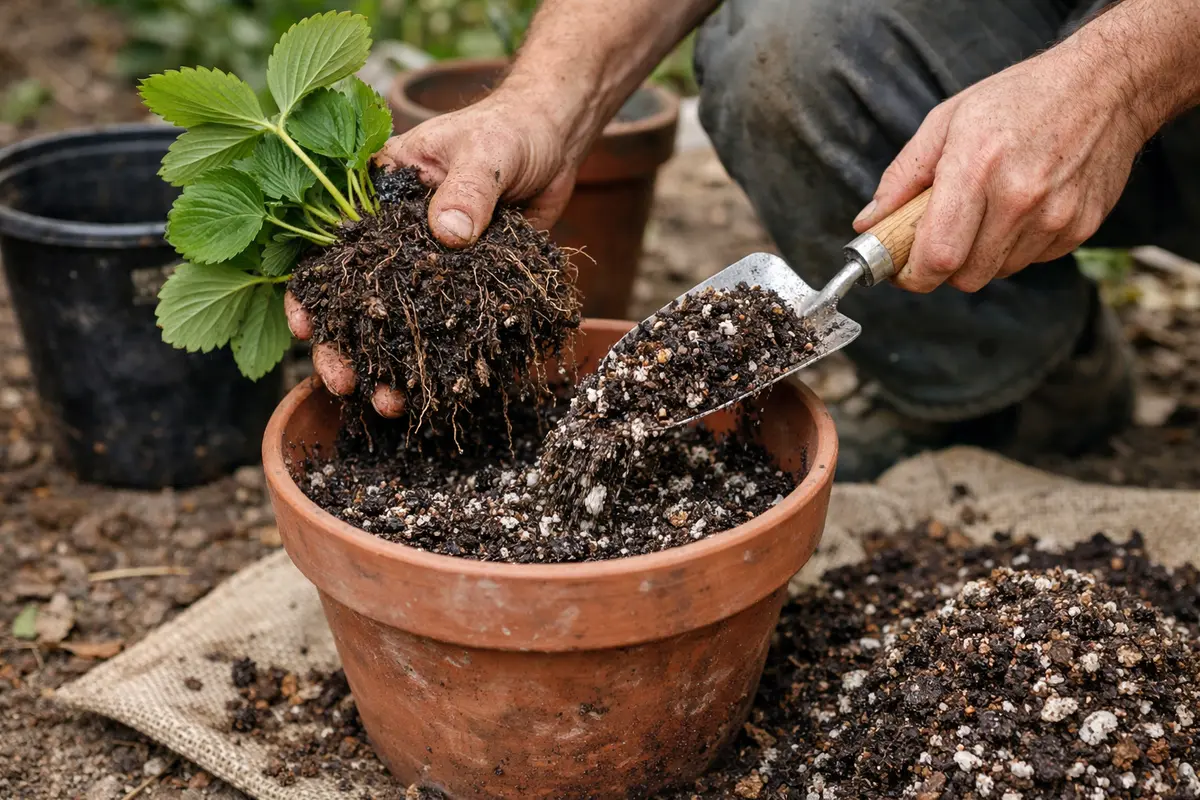
Step 3 – Repot Strawberries with Airy Soil for Recovery
Start by removing any affected roots that show signs of blackening or mushiness, and replace the soil with sterile, well-draining potting mix. After a few days, look for new white root growth emerging from healthy parts of the plant, indicating that the disease is receding.
The recovery timeline for potted strawberry plants varies significantly; you may see signs of new growth within a week, while full recuperation can take several weeks based on environmental conditions. Favorable factors such as warm temperatures and bright, indirect sunlight can hasten recovery, while cool, dark conditions may impede it. If you see wilting despite new growth, check for excessive moisture accumulating in the pot.
Avoid overcompensating with excessive watering or fertilizer during recovery, as this can exacerbate rot rather than promote healing. While strawberry plants might show urgency for water, stick to a careful schedule; overwatering when recovery begins might lead to additional root diseases. If you notice that the leaves yellow, check the root system for signs of new rot rather than adding more nutrients.
Realistically, recovery from root rot can take several weeks, during which time you may see new leaf growth or even flowers starting to form as signs of health. However, if your strawberries are still wilting or yellowing despite your efforts, you may need to adjust their sunlight exposure or ensure the potting mix has adequate aeration. Conditions such as consistent warmth and proper light will speed up recovery, while cold temperatures can hinder regrowth.
Avoid the mistake of overwatering during recovery, as this can lead to further disease development and root decay. Instead, focus on checking soil moisture levels; if the top inch of soil is still wet, wait longer before watering again. If you see blackened tips on the leaves, reduce fertilizer application, as excess nutrients can stress a recovering plant.
A repotting action introduces much-needed ventilation and provides the plants with a fresh supply of nutrients. Fresh, nutrient-rich soil allows any recovering roots to grow more effectively without the hindrance of remaining rot. Healthy strawberry plants generally show new leaf growth or a strong green color as symptoms of recovery, signaling that the roots are starting to thrive in their new environment. Monitor the foliage closely; the transition from yellowing to bright green can signify healthy recovery, as this indicates the plant is successfully absorbing nutrients.
A common mistake during this stage is over-fertilizing, thinking that more nutrients will expedite recovery. Instead, provide balanced care—gentle watering only when the top inch of soil feels dry to prevent a resurgence of rot while maintaining the health of the plants. Fertilizing too soon or excessively can lead to root burn, especially if the roots are already stressed from rot. In this recovery phase, err on the side of caution; if soil testing reveals nutrient-swollen conditions, refrain from adding any additional nutrients. Always conduct a small test before using new soil or fertilizers extensively, as this can help prevent larger issues from developing.
Step 4 – Water Only When Topsoil is Dry for Prevention
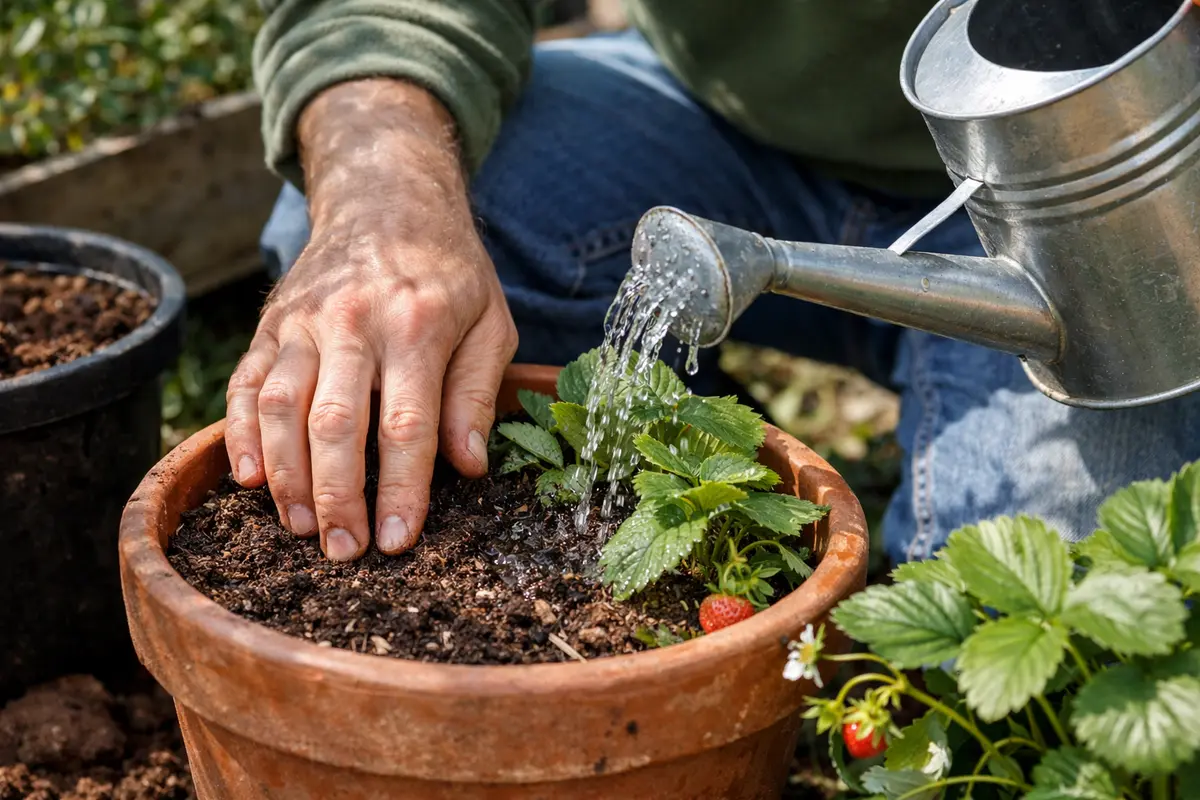
Start by ensuring your potted strawberry plants are in well-draining pots with drainage holes. This will prevent excess water from accumulating, reducing the risk of root rot and promoting a healthier root system.
Root rot often recurs because of stagnant water in poorly drained soil, which creates ideal conditions for pathogens. By using well-draining pots, you address this issue directly, allowing excess moisture to escape, unlike plants sitting in a tray of water that can quickly become oversaturated.
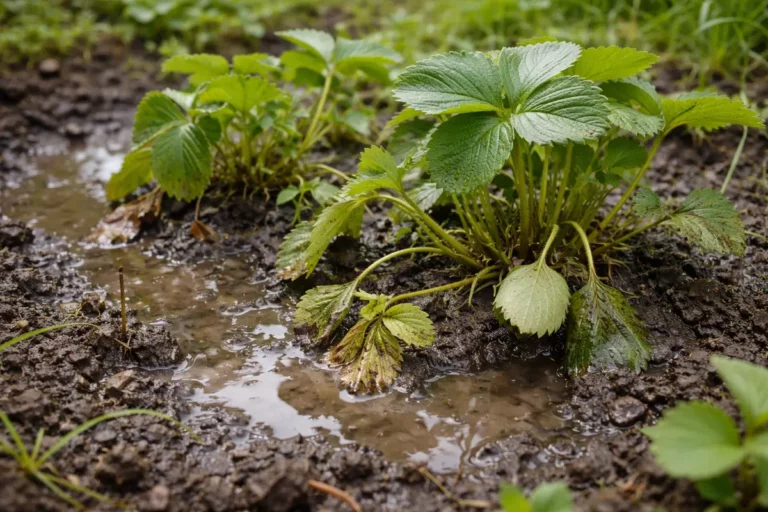
During the rainy season, monitor soil moisture levels more closely as heavy, prolonged rainfall can saturate the potting medium faster than normal. If conditions are exceedingly wet, consider moving your strawberry plants to a covered area or under a patio to minimize excess water exposure.
This strategy is crucial, as it enables the roots to absorb moisture without the risk of drowning in waterlogged soil. If constant moisture conditions are allowed to return, mold and root rot are likely to resurface, undermining the efforts taken during the recovery process. Using moisture sensors can provide a more reliable method to gauge the soil’s moisture, helping to alleviate guesswork in watering routines. For larger berry planters or those needing more job-specific testing, these tools can be a practical investment for monitoring moisture levels effectively.
As seasons change, monitor rainfall and adjust your watering habits accordingly. In spring and summer, lighter, more frequent watering might be necessary, while in fall and winter, the frequency can often decrease due to cooler temperatures and reduced evaporation rates. This adaptation is essential; for instance, watering every three days in summer may need to shift to every five to seven days in winter based on the climate needs. If extensive rainy weather is present, water less but observe the moisture content of the soil—too much rain can lead to reoccurrences of root rot.
Step 5 – Inspect Strawberry Leaves for Signs of Stress
First, monitor the moisture levels in the soil daily using your finger or a moisture meter to gauge the dampness. Look for signs of wilting or drooping leaves as they can indicate stress from excess water. Recheck the moisture two to three days after heavy watering to assess whether the top inch of soil has dried out adequately.
A fully recovered potted strawberry plant displays bright green, perky leaves and robust, white roots peeking through the drainage holes. In contrast, early signs of root rot include yellow leaves that feel limp and mushy, coupled with dark, waterlogged roots that emit a foul odor. If your plants aren’t flourishing in vibrant green foliage, check for root texture and color; firm, white roots are a good sign, while dark and soggy roots indicate ongoing issues.
If root rot returns despite following previous steps, consider repotting the plant with fresh, well-draining soil and breaking apart any rotted roots. If symptoms persist, raising the pot off the ground can enhance airflow and further prevent moisture accumulation at the base. Alternatively, apply a fungicide specifically formulated for root rot to address persistent soil pathogens.
A fully recovered strawberry plant typically showcases lush and vibrant foliage with new growth sprouting free from attachment to past symptoms. Conversely, signs like browning edges or drooping leaves may indicate that the issue hasn’t been resolved and that further adjustments are required. In cases where recovery appears sluggish, minor adjustments in light exposure or nutrition may be necessary; not enough light can hinder growth while excessive exposure can add stress to the plants. Pay attention to how these environmental factors impact recovery as they can dictate watering cycles and nutrient absorption, further affecting plant health.
If there are already signs of rot returning, a thorough inspection of roots and soil may be required, and a second repotting could be the next step. Ensure that the environment remains conducive for growth, avoiding cramped conditions and excess moisture. If leaves continue to curl or discolor, consider the environmental factors affecting recovery, such as current wind exposures or humidity levels. Sometimes adjusting the plant’s location to enhance indirect light exposure improves recovery while avoiding harsh direct sun.
FAQ
How long does it take for strawberry plants to recover from root rot?
The recovery timeline can vary, but generally, you will start to see signs of improvement within 1-2 weeks after taking appropriate corrective actions. If conditions are right, new leaf growth should emerge within a month, but maintaining optimal watering and sunny conditions is essential to fostering a full recovery.
Can root rot spread to other plants in proximity?
Yes, root rot can spread to nearby plants, particularly if they share soil or water sources. Taking prompt action to isolate affected plants and improve drainage can help mitigate this risk. To further protect your plants, consider individual watering methods as well as avoiding disturbance of shared soil between plants to eliminate the possibility of pathogen transfer.
Should I remove the affected parts of the strawberry plants?
Yes, it’s advisable to remove any visibly damaged or mushy roots during the repotting process. This helps to prevent any potential spread of rot to the healthy sections of the plant and allows for better recovery. Remember to maintain sterilization on any tools used for pruning, as unclean tools can inadvertently introduce new pathogens into the repotted area.