You may notice that your sweet potato plants are struggling to take off after transplanting, which is why you need to know how to fix stunted growth in sweet potatoes after transplanting. This stunted growth often manifests as wilting leaves and poor root development due to transplant shock or poor soil conditions. If left unaddressed, this issue can spread and weaken the plant, making it harder to fix later on. However, you can improve the situation now by adjusting your watering practices and inspecting the soil quality regularly.
Step 1 – Water Sweet Potatoes Immediately After Transplanting

First, remove the sweet potato plants from the soil with care, ensuring you disturb the roots minimally. Assess the roots for any signs of rot or damage, and if present, trim them back to healthy tissue before replanting them in fresh, well-draining soil with adequate space for root expansion. After replanting, the leaves should start to perk up noticeably within a few days, displaying a more upright posture instead of drooping.
Acting quickly is crucial for sweet potatoes because their roots are susceptible to anaerobic conditions that can lead to rot if left too long in suboptimal soil. Once roots experience damage, the plant quickly loses its ability to uptake nutrients and moisture, leading to further stunting and potential death. If things worsen instead of improving after replanting, check for excess water in the soil to ensure that rot isn’t setting in.
In a case where a gardener procrastinated replanting stunted sweet potatoes, they noticed a sharp contrast between two patches: one where they promptly intervened showed significant growth within a week, while the other remained stagnant and eventually withered. Delaying action can lead to irreversible issues, as was seen when a nearby gardener waited too long, ultimately losing half their crop to root rot, while others thrived just by addressing the stunting early.
Acting quickly is crucial because sweet potatoes are sensitive to root congestion, which can lead to poor nutrient uptake and stunted growth. When plants are tightly packed or deprived of proper airflow, they struggle to absorb water and nutrients, resulting in yellowing leaves and slower growth rates. If not addressed promptly, the stunted growth can progress to more severe issues like root rot or pest infestations.
In one case, a gardener delayed moving their sweet potato plants despite noticing early signs of crowding, resulting in progressively weaker plants that failed to thrive. Conversely, another gardener who promptly spaced out their transplants witnessed a significant improvement in growth and yield. If you see yellow leaves → check if there’s adequate spacing between the plants.
When transplanted, sweet potato roots are often disturbed, leading them to struggle with moisture uptake. If the soil is too dry, the plants will not be able to absorb necessary nutrients, causing yellow leaves and stunted growth. Ensuring the soil is adequately moist right after transplantation creates a conducive environment for roots to recover and settle in effectively. Aim for soil moisture that is consistent and resembles a damp sponge; this is conducive for healthy root growth and absorption. If you notice crusting on soil surfaces within the first hour of watering, this can indicate evaporation too quickly or insufficient watering.
A common mistake gardeners make is underestimating the moisture needs of newly transplanted seedlings. Many assume the roots will immediately adapt; however, it can take several days for roots to start functioning fully again. Water the sweet potatoes until the top layer of soil feels damp to the touch, but avoid waterlogging, which can lead to rot. If by the end of the day, the leaves appear droopy or marginal burn patterns emerge, check the soil moisture. An ideal approach is to rate severity on a scale of one to ten; if your soil feels dry and crumbly at just a quarter inch beneath the surface—it’s time to water again. Furthermore, if wilting occurs shortly after watering, reevaluate your drainage situation, as it could indicate root damage from saturation.
Step 2 – Diagnose Nutrient Deficiency in Sweet Potatoes
First, check the soil moisture level and ensure that it is consistently moist but not waterlogged. If the soil feels dry and crumbly beneath the surface, water the sweet potatoes deeply and regularly, which should begin to stimulate new growth within days.
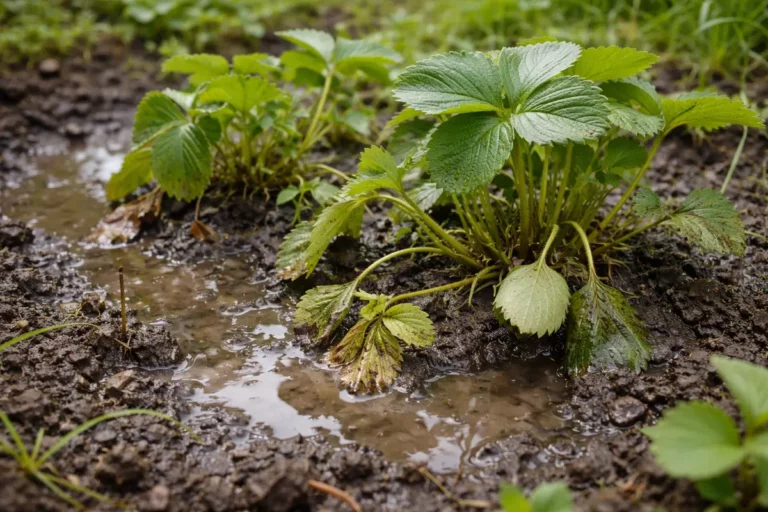
When soil moisture is insufficient, the plant roots struggle to absorb essential nutrients, leading to stunted growth. Conversely, overly saturated soil can suffocate roots, causing them to rot, which also results in growth issues. Adjusting the moisture level helps the plant access nutrients more effectively, fostering improved growth as the roots recover.
If the soil appears excessively wet and has a sour smell, it likely indicates poor drainage; in this case, improve drainage by adding organic matter such as compost. Alternatively, if the soil is dry yet the plant appears yellow and wilted, check for nutrient deficiencies and consider a balanced fertilizer to restore vigor.
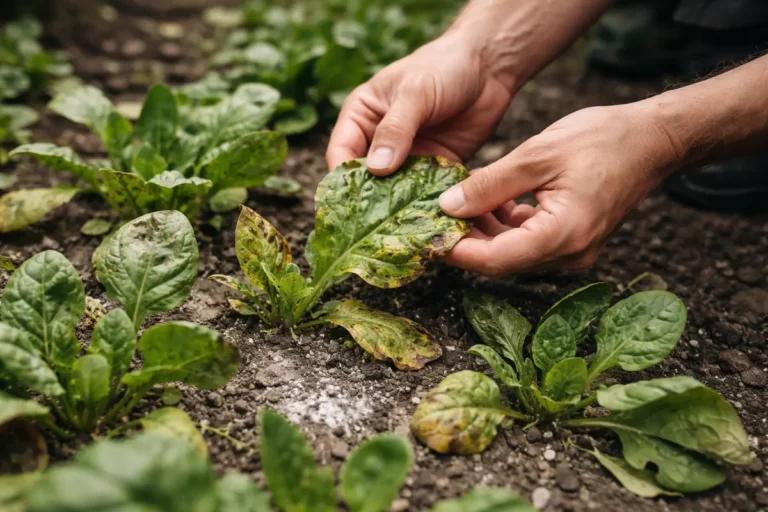
Nutrient deficiencies can manifest through visible symptoms like yellowing leaves or stunted growth, with specific deficiencies often having distinct appearances. For instance, yellow leaves with dark green veins can indicate a nitrogen deficiency, while light green leaves with purple undertones often signify deficiencies in phosphorus. Sweet potatoes thrive best in well-draining, nutrient-rich soil; any imbalances can hinder optimal development. Testing your soil will allow you to provide targeted amendments, such as adding compost or a slow-release granular fertilizer, to restore nutrient balance. Incorporating well-composted farmyard manure can also add a suite of micronutrients essential for robust growth.
If you find a specific nutritional shortfall, like low nitrogen levels, apply a balanced fertilizer according to the results from your soil test. However, if your sweet potatoes exhibit other visual signs such as browning leaf tips alongside nutrient deficiency, adjusting only the nutrients might not work effectively. Hence, it’s critical to also evaluate other factors like drainage and root condition. If the soil test shows high pH levels, consider incorporating sulfur to lower the pH, as overly alkaline conditions can impede nutrient uptake. Furthermore, if deficiencies occur repeatedly, consider rotating crops annually to maintain soil health and nutrient levels.
Step 3 – Fertilize Sweet Potatoes to Stimulate Growth
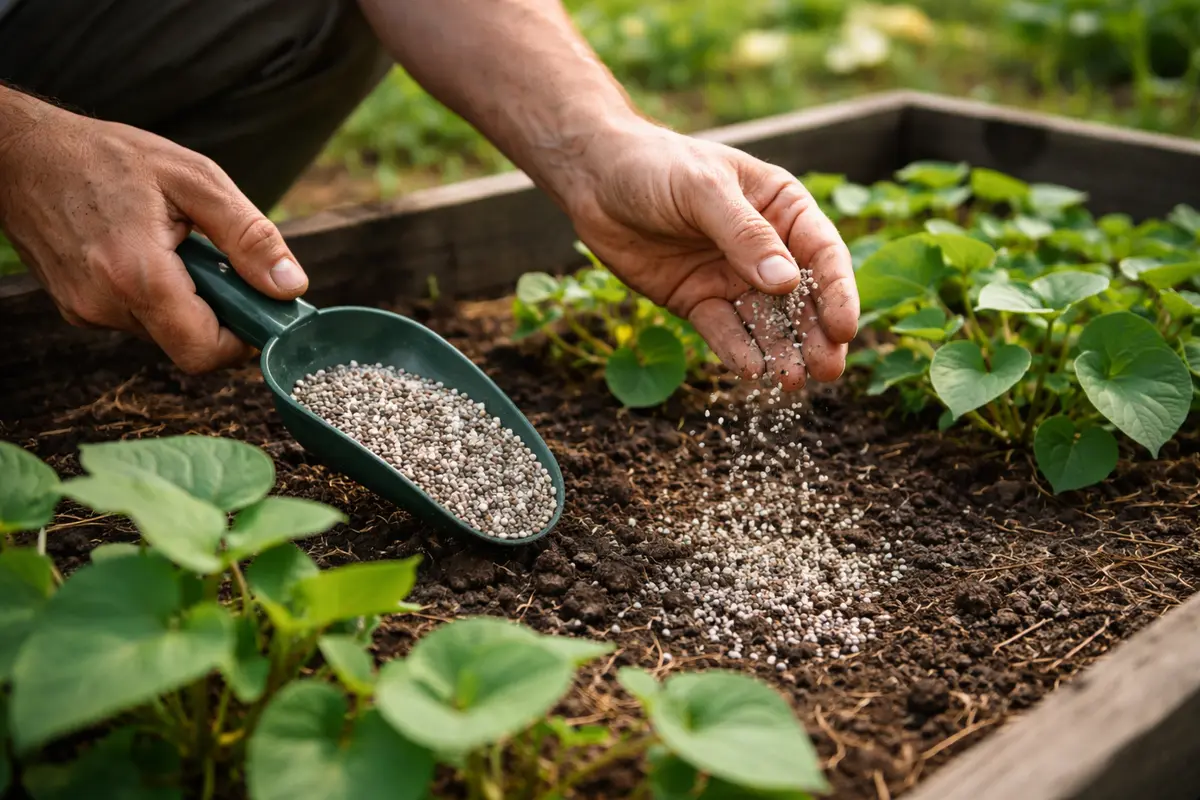
Apply a balanced fertilizer suitable for root vegetables, such as a product labeled for sweet potatoes, to your sweet potato plants to foster vigorous growth. After fertilizing, you should notice new leaf growth within a couple of weeks, a promising sign that your plants are responding well. This growth reinforces the importance of timely nutrient applications, particularly during key growth periods in spring and summer.
The fertilization process supports a steady growth trajectory from the moment you apply the nutrients. Balanced fertilizers typically encourage leafy growth initially but play a pivotal role in swelling the developing tubers later in the growth cycle. Moreover, using organic materials in your fertilizer not only provides essential nutrients but also improves soil texture and promotes microbial activity, ultimately enhancing nutrient uptake. Opt for a fertilizer with a higher phosphorus content—like a 5-10-5 formulation—to encourage strong root development while maintaining a balanced ratio to support overall plant growth.
Be cautious not to overdo fertilization, as too much can lead to an overwhelming amount of leaf growth at the expense of root development. In my experience, fertilizing every four to six weeks during the growing season is ideal for replenishing nutrients without overwhelming the plants. Additionally, if your plants seem excessively tall and spindly within a few weeks of applying fertilizer, the nitrogen levels may need recalibrating. In such cases, consider reducing the fertilizer rate or switching to a formula with a balanced composition of nutrients. If new growth shows signs of nutrient burn, such as crispy leaf edges, reduce feeding to allow the plants to recover.
Step 4 – Watering Method to Avoid Sweet Potato Stunt

Start by ensuring your sweet potatoes receive consistent moisture by watering them regularly, aiming for about an inch of water per week. This will encourage robust root development and can significantly improve their growth rate after transplanting.
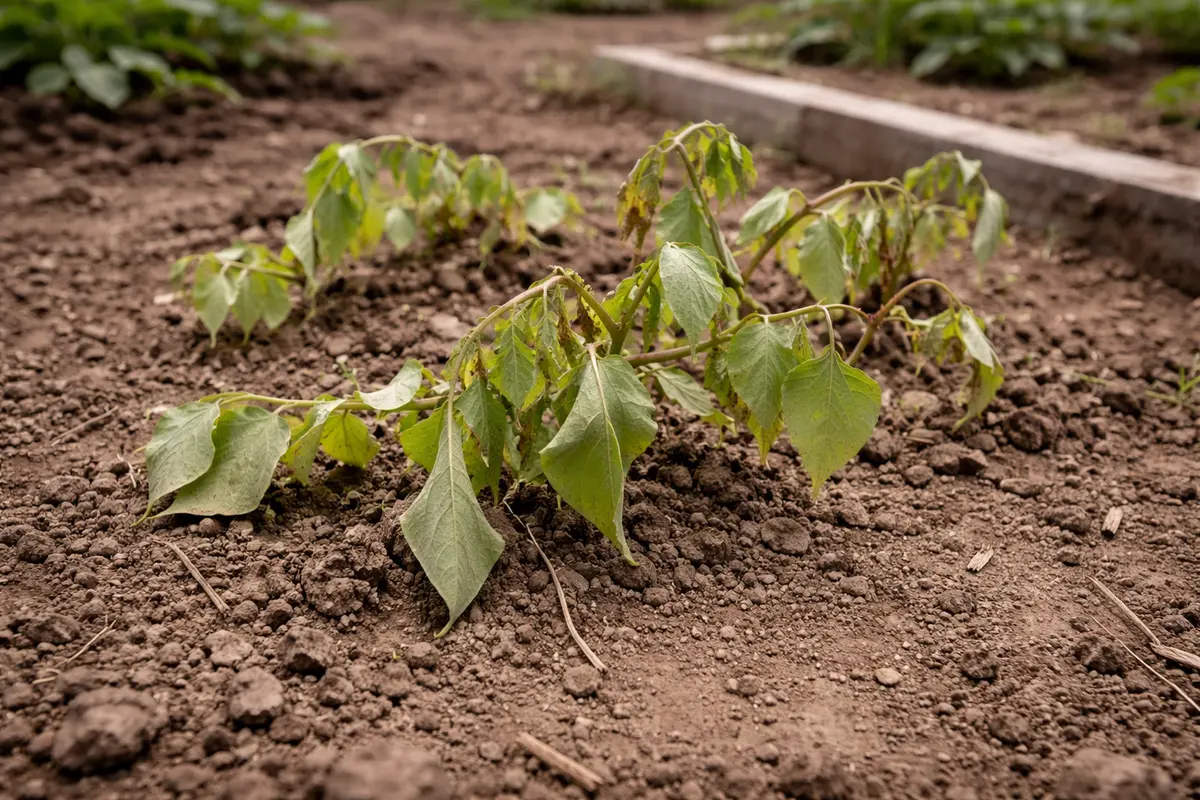
Stunted growth often results from inconsistent watering, particularly in dry conditions that stress the plants. By establishing a routine watering schedule, you reduce the likelihood of fluctuating soil moisture, which can cause stress that inhibits growth. If you observe wilting or yellowing leaves, check for dry soil conditions or poor drainage.
During the peak of summer, adjust your watering routine by increasing frequency, as higher temperatures can lead to rapid soil drying. Additionally, mulching around the plants can help retain moisture and mitigate heat stress, providing a secondary layer of protection against drought conditions.
Sweet potatoes require specific moisture levels to grow properly, with too much or too little leading to stunted growth. Inconsistent watering can result in drought stress, reflected in wilting leaves, or overhydration, indicated by sodden soil conditions that can suffocate roots. Additionally, during rapidly changing weather patterns—like unexpected heatwaves or prolonged rain—it’s critical to adapt your watering strategy. To ensure accuracy, utilize a rain gauge or measuring cup to monitor your weekly water intake for your sweet potatoes, adjusting your frequency based on evaporation rates and precipitation.
For instance, if you live in a dry climate, consider increasing your watering frequency to twice a week during prolonged hot spells without rainfall. On the other hand, during rainy seasons, reduce watering to prevent soggy conditions that could lead to root rot. As the plants develop, you may also want to consider mulching around the base of your plants. This method can help conserve moisture and regulate soil temperature, which is especially beneficial for tuber development. Monitor the soil regularly; if the top couple of inches feel dry consistently, it indicates a need for immediate watering, while visibly wet soil may suggest conditions that warrant cessation or adjustment of your usual watering routine.
Step 5 – Inspect Leaves for Growth Progress Weekly
Check the leaves of your sweet potatoes at least once a week to monitor growth progress. You should see fresh green growth and firm leaves, indicating recovery after addressing earlier issues. Regular inspection allows you to catch any signs of distress early and take appropriate action before problems escalate. Establishing a weekly routine not only aids in spotting issues but can also inform future planting decisions based on what worked or didn’t work well previously.
Healthy sweet potato plants typically feature vibrant green foliage and strong, sturdy stems. Conversely, if leaves become yellow or show signs of wilting, that indicates potential nutritional deficits or lingering watering issues. Additionally, if you notice new growth but leaves turn soft or squishy, this could indicate overwatering despite other signs appearing healthy. Staying proactive in monitoring these cues can mean the difference between a bountiful harvest and subpar returns. If all appears well, consider keeping a log of changes in leaf size or color for future reference—a practical choice that will aid in future decision-making.
If you notice that the signs of stunted growth have returned despite following the previous steps, reassess the soil condition immediately. Check for water-logged roots, as excessively saturated conditions can indicate poor drainage or root rot, or inspect for pests like root-knot nematodes that might be causing hidden problems underground. Identifying these issues early is crucial for mitigating long-term damage; some pests can lead to significant reductions in yield if not addressed quickly. If you find root damage or denser than normal soil, further soil amendments may be needed, such as incorporating perlite or sand to improve drainage for future planting. Moreover, consider implementing crop rotation or companion planting strategies with your sweet potatoes to break pest cycles and promote beneficial interactions in the garden.
FAQ
How long does it take for sweet potatoes to recover from stunted growth?
After implementing corrective measures, sweet potatoes may take approximately 2 to 3 weeks to reveal noticeable recovery signs. Growth will initially occur in the leaves, so look for firm, green foliage before tubers start to form properly beneath the surface of the soil. Patience is key; sometimes the plant needs more time to establish before showing visible signs of recovery.
Should I remove leaves suffering from stunted growth?
Removing wilted or yellowing leaves can help prevent potential disease spread; however, ensure the plant has enough healthy foliage to photosynthesize effectively. Generally, only remove leaves if they are severely damaged and not contributing to the plant’s growth, as this can help channel energy to healthier parts of the plant. If removal seems necessary, be sure to prune only a small percentage to avoid shock, as overly aggressive pruning can stress the plant further.
Will sweet potatoes grow faster if I fertilize more frequently?
While regular fertilization can support overall growth, over-fertilizing may lead to excessive foliage development at the expense of healthy tuber formation. Stick to a balanced fertilization plan and monitor the plants closely for signs of nutrient uptake, adjusting as needed based on their growth response. Be cautious; applying fertilizers too close together may lead to salt build-up in the soil, which can harm root development and water absorption.