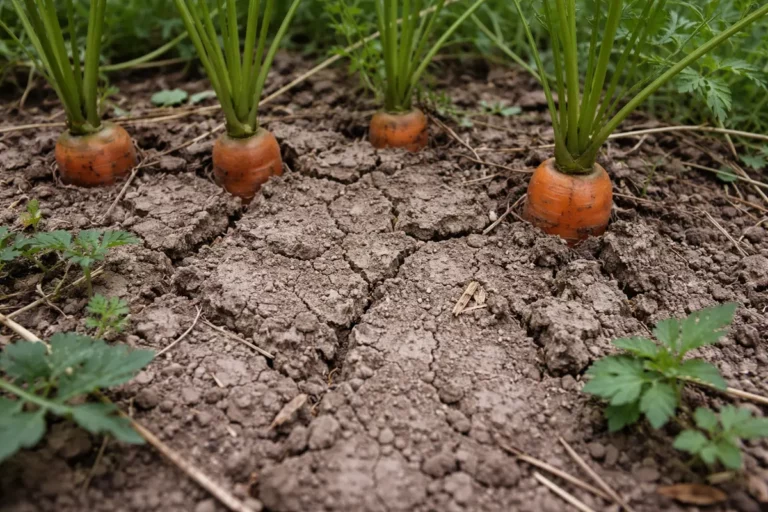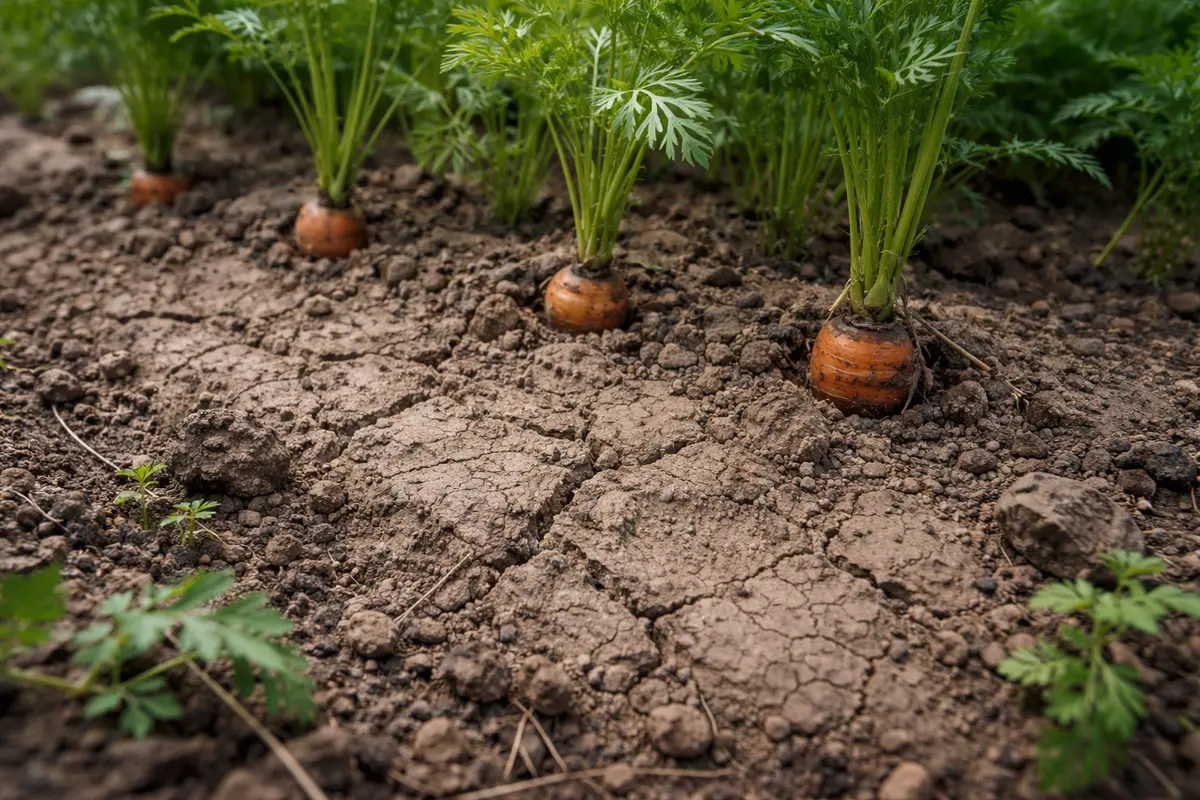
You may notice your carrot tops looking limp and droopy during heavy rain, which is why you need to know how to fix compacted soil around carrots during heavy rain. This condition typically results from waterlogging, causing root suffocation and leading to yellowing and mushy spots on your plants. If left unaddressed, the issue gets worse, weakening the plant and setting its growth back, but you can improve the situation now by aerating the soil and adjusting your watering schedule. Prompt action is essential; otherwise, prolonged saturation will inhibit root development and exacerbate the compaction problem, diminishing your harvest potential.
Step 1 – Aerate Soil Around Carrots Immediately
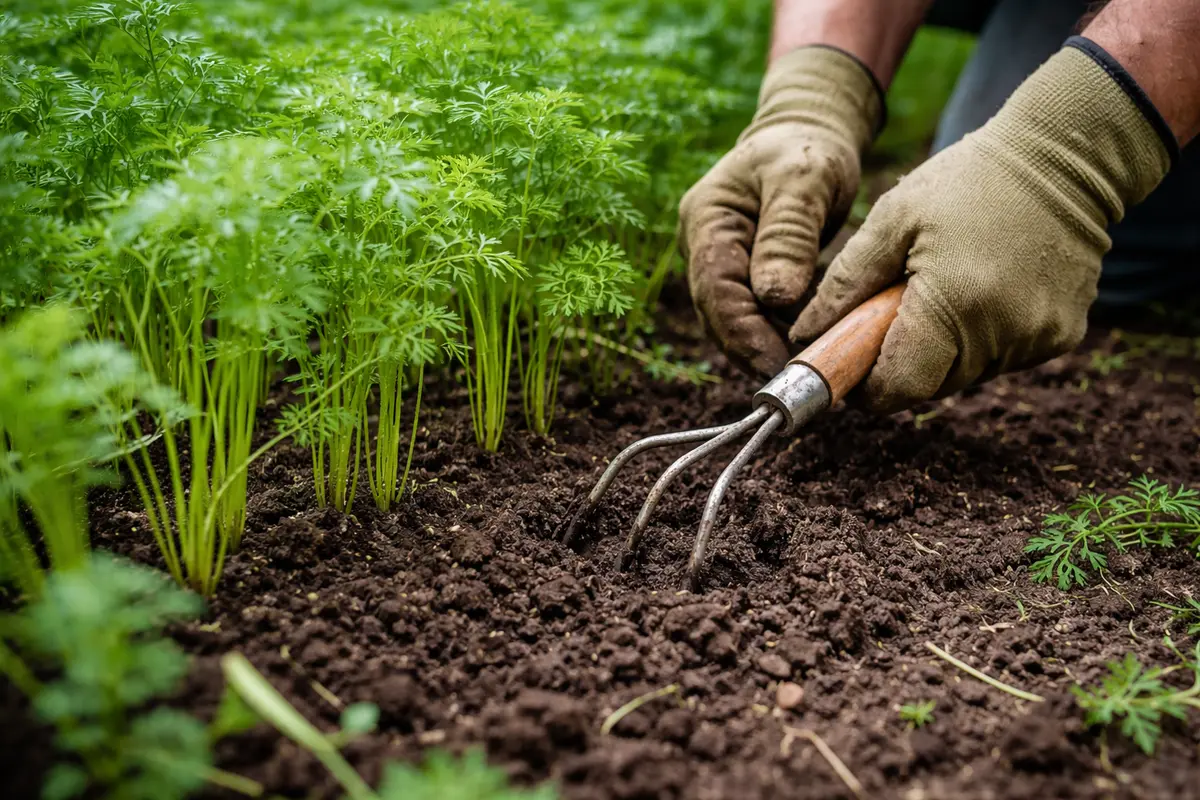
Start by gently loosening the soil around the carrot plants using a garden fork or hand cultivator. You will observe the soil loosening and becoming less compact in texture right away, which promotes better drainage and root access to important nutrients. Make sure to work carefully to avoid damaging the carrot roots below the surface; you can identify their location by lightly probing the soil with your fingers or a small trowel. Pay close attention to the sensation of the soil—if it feels overly hard, it’s a strong indicator of compaction. If there are clumps that don’t break apart easily, focus on those areas during aeration.
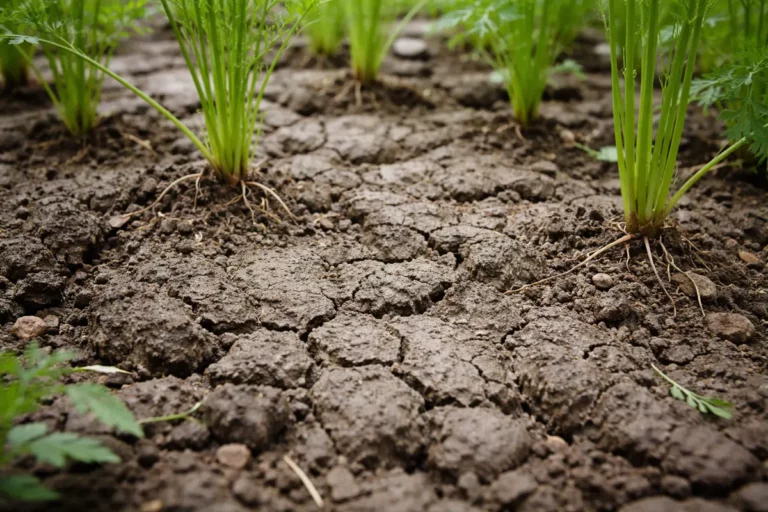
Quick soil aeration helps to break apart compacted areas, crucial for allowing water and air to reach the root zone of the carrots. If you delay this action, roots can develop stress symptoms such as wilting or discoloration. This situation often occurs in clay-heavy soils that retain moisture, causing roots to suffocate and suffer from anaerobic conditions. If you’ve noticed spots where the soil holds excess moisture, these areas are likely where compaction is greatest. Check moisture levels by squeezing a handful of soil; if it clumps and doesn’t crumble easily, compaction is the issue. Aim for a crumbly texture that allows water to infiltrate effectively, as this clear change signals progress.
A common mistake at this stage is over-agitating the soil, inadvertently causing further compaction at the root level. For example, if you attempt to aerate soil that feels soggy, you’re risking the drive of tools deeper and compacting the ground around the roots more. Ensure you allow the surface layer to dry for at least 24 hours after heavy rainfall before aerating to prevent driven-in tools from creating unintended damage. If the soil feels overly wet, refrain from aerating immediately. Instead, assess the moisture levels first—verify by checking if water pools on the surface after rainfall. This waiting period is crucial; aerating while the soil is saturated could lead to more harm than good by embedding air pockets that disrupt root health.
Step 2 – Assess Drainage Issues Impacting Carrots
Inspect the drainage conditions around the carrot patch and ensure excess water is not pooling around the base of your plants. You should see water moving away from the root areas rather than remaining stagnant after a rainfall. One effective way to determine drainage quality is to dig a small hole approximately 6 inches deep in the carrot patch. Fill it with water; if it drains away efficiently within a few hours, you’re in good shape. If it takes more than 4 hours to drain, you likely have severe drainage issues, necessitating deeper investigation into soil composition.
Poor drainage often results from compacted soil, preventing water from moving through effectively. Checking drainage is vital because stagnant water can lead to root rot, ultimately harming your carrot crop. Roots need both water and oxygen to thrive—compromise one, and the whole plant suffers. If you see a significant difference in growth patterns, such as healthier foliage on one side of the patch compared to another, this reflects underlying drainage issues that need to be addressed. If carrots on one side appear to flourish in contrast to the other, take note of the watering habits specific to each substrate.
If you find that the soil has a sour smell, indicating anaerobic conditions, amend the soil with organic matter such as peat moss or compost to improve drainage and nutrient retention. Add about 2-3 inches of organic material mixed into the topsoil layer, ensuring you gently work it in without further compacting the soil. Consider the moisture balance as you do this; if the organic material retains too much moisture, it will reduce the effect of proper drainage. In particularly heavy rains, it is beneficial to use a fork to create small drainage channels within the soil, allowing excess water to escape effectively, particularly in areas that seem excessively wet.
Step 3 – Apply Organic Matter for Carrot Recovery

Start by carefully loosening the soil around the carrots using a hand trowel or a garden fork, working in gently to avoid damaging the roots. Look for signs of progress like soil texture turning crumbly and improved drainage, which will help the carrots access more oxygen and nutrients.
The recovery timeline varies based on conditions; it typically takes one to two weeks for improved drainage and early signs of growth to appear after addressing compaction. During this period, expect to see the carrots beginning to push upwards as they access deeper soil, while soggy conditions could slow progress, leading to stunted growth or rot if not rectified soon. If there is no visible green top development after two weeks, check for standing water or an overly acidic environment.
Avoid the mistake of overapplying water or fertilizer during recovery, as excessive watering can contribute to root rot, especially in already saturated soil. For carrots, focus on maintaining consistent moisture—if the soil feels dry an inch below the surface, it’s time to water lightly. If carrots exhibit yellowing and wilting when conditions are wet, rethink your irrigation practices to promote balanced moisture levels.
In the following days, monitor the growth of your carrots, as you should start to see more vibrant green tops emerging, indicating healthy regrowth. A realistic timeline for recovery can vary; in warm temperatures, you may notice significant progress within a week, while cooler weather can slow down the process considerably. Ensure you are watering adequately but not excessively—if roots remain submerged, soggy conditions can still lead to rot. If you find the roots continue struggling, consistently check the soil moisture levels, ensuring it is not overly saturated from the rain.
Avoid over-compensating by adding excessive water or fertilizer too soon, as this can lead to root rot or nutrient burn, hampering recovery. Instead, focus on balancing moisture levels; if you overwater, check that the soil drains adequately, and if roots appear blackened and mushy, it’s vital to stop watering immediately. Moreover, adding organic matter enhances soil structure, making it less prone to compaction and improving nutrient availability. When organic material decays, it creates air pockets within the soil, promoting both better drainage and root accessibility. If your carrots are recovering well, expect new shoots and firm leaves within a fortnight; clear signs that they are responding positively to your intervention.
A common pitfall during recovery is applying too much fertilizer, believing it will speed up the healing process. Instead, focus on maintaining consistent moisture levels and monitoring the soil’s physical condition, as healthy roots and measurable growth will validate your efforts more effectively than any chemical boost. Over-fertilization can lead to root burn and greater stress for your plants. Healthy carrots should have plump, firm roots and vibrant foliage, showcasing effective recovery; if you notice leaves becoming excessively dark in color or larger in size without corresponding root growth, it may indicate nutrient burn from too much fertilizer. Therefore, keep fertilizer use minimal during this recovery phase, concentrating on compost to rebuild healthy soil biology.
Step 4 – Mulch to Prevent Compaction After Rain
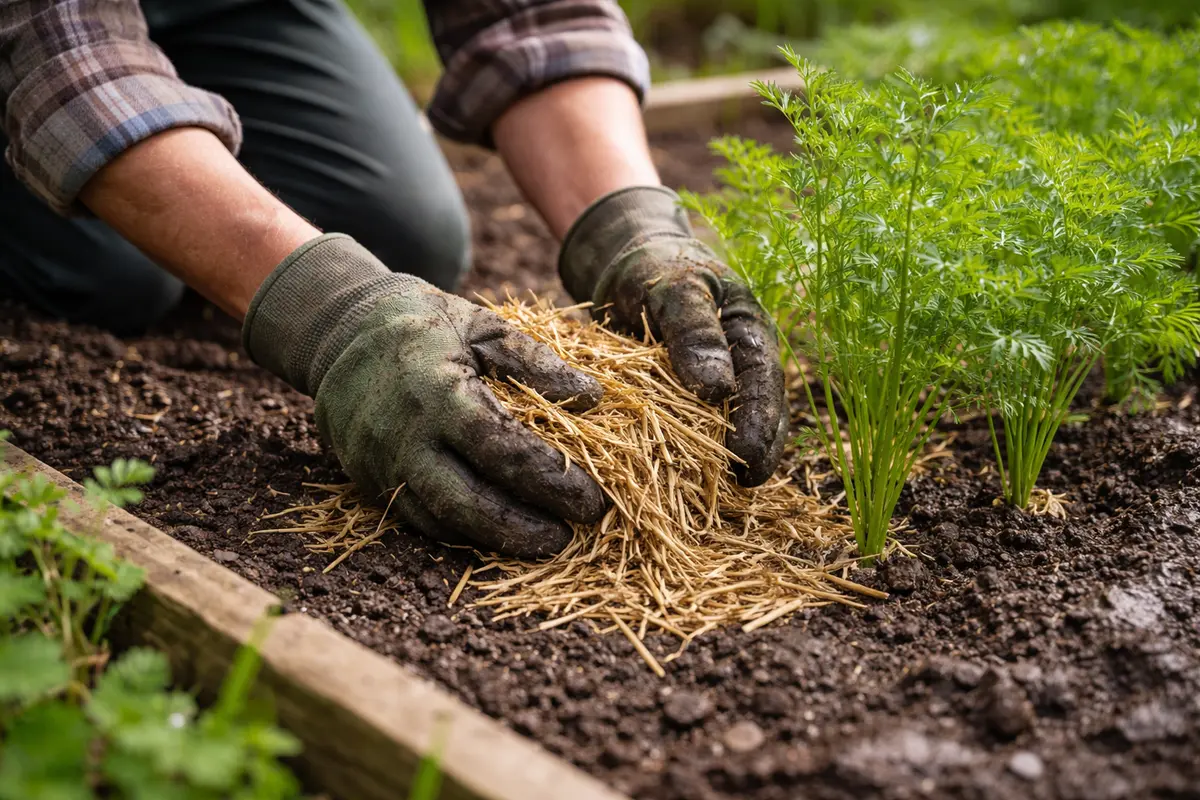
Apply a layer of organic mulch, such as straw or wood chips, around the base of the carrot plants. This will help retain moisture while preventing soil compaction from heavy rains, resulting in a stable ground layer that promotes healthy growth. Aim for a mulch depth of 2-4 inches, ensuring that it is distributed evenly around the plants without piling directly against the stems, as this can cause rot. Regularly inspect the mulch layer; if it becomes too compressed, add fresh mulch as needed to maintain adequate thickness.
Mulching works by regulating soil temperature, reducing evaporation, and protecting the soil structure against the impacts of heavy rainfall. This effective practice minimizes the likelihood of compaction recurring, which protects the root environment over time. Additionally, thicker mulch layers during heavy rain protect soil structure while they breakdown into necessary nutrients—allowing your carrots access without the risk of erosion. Keep an eye on mulch decomposition; if too much moisture collects, it can quickly become a breeding ground for root pathogens.
Consider changing your mulching material based on seasonal weather patterns. During particularly wet months, using thicker layers can provide better absorption of excess rainfall and act as a buffer against soil erosion; this can be particularly significant if your area experiences rapid downpours that cause runoff. In drier seasons, switch to thinner layers to promote evaporation without encouraging mold or rot around the roots. Acting adaptively prevents nutrient loss and avoids overwhelming the soil—monitoring mulch conditions post-rainfall is vital. This layered approach can create a protective buffer for your carrot plants during unpredictable weather conditions; if mulch retains too much moisture, however, it can hinder growth—now is the time for an attentive approach.
Step 5 – Check Carrot Leaves for Stress Signs Regularly
Start by checking the soil around your carrots every few days after heavy rain. Look for signs of moisture retention, such as water pooling or soil that remains muddy and compact. Also, observe the carrot tops for new growth and greener leaves, rechecking weekly to monitor improvements or ongoing issues.
A healthy carrot plant will exhibit vibrant green foliage, reach a full height without stunted growth, and have firm, smooth roots beneath the soil surface. In contrast, early signs of compaction returning include yellowing leaves, wilting stems, or roots that feel gritty or uneven. If you notice the leaves drooping but the roots seem firm, check for excess moisture around the base.
If the issue persists despite your efforts, consider loosening the soil around the carrot base with a garden fork to aerate it further. If compaction doesn’t improve, you might want to elevate the surrounding beds with organic matter to improve drainage or even consult a soil specialist for assistance.
A fully recovered carrot plant exhibits bright green foliage and strong upright growth, with firm, even-textured roots developing underground. In contrast, early signs of the problem returning include drooping leaves or a sticky soil surface, which suggests water is pooling around the roots again. If the foliage turns yellow but the soil feels dry, check the roots visually for signs of stress, like darkened or mushy tissues that indicate lingering moisture issues.
If the problem recurs despite following the previous steps, consider applying a layer of organic mulch to improve drainage and reduce soil compaction further. Escalate your response by aerating the soil with a garden fork or investing in a soil aerator tool to prevent future issues. If these methods don’t help after a week, it may be time to consult a local gardening expert for tailored solutions that address underlying soil problems. If the key indicators of health—vibrant green leaves and robust root growth—fail to materialize over successive weeks, it may warrant a more in-depth analysis of your garden’s health.
A fully recovered carrot plant will display deep green leaves with consistent leaf patterns, indicative of efficient nutrient uptake and root health. If the leaves start reverting to a yellowish hue or drooping again, it may signal that additional waterlogging or compaction issues persist. It’s essential to take immediate action if such symptoms reappear; ignoring them could escalate the problem, leading to diminished growth or permanent damage. Measure the leaf length regularly and compare it with previous observations—the expected progression in growth will aid you in assessing the recovery status more effectively. If growth appears stagnant, consider retesting soil pH levels for an additional check against nutrient absorption and overall health.
If you observe symptoms returning despite well-implemented remedies, consider re-evaluating the soil composition and drainage capacity. An alternative action could include more frequent soil aeration combined with additional organic amendments to enforce recovery. Monitoring your environment continuously allows for timely interventions; should plants appear stunted after several cycles, a deeper investigation into environmental factors, such as sunlight exposure, irrigation methods, or soil amendments, might be warranted to ensure your carrots are getting what they need for ongoing, healthy growth.
FAQ
How long does it take for carrots to recover from soil compaction?
Carrots typically show signs of recovery within two to four weeks after implementing soil aeration and the addition of organic matter. Consistent care and monitoring can accelerate this recovery timeline, especially if you provide balanced moisture and avoid over-fertilization. However, in cooler temperatures or prolonged rainy spells, a longer recovery may be needed as the roots strive to regain their strength.
Should I remove damaged carrot leaves?
Yes, it’s advisable to trim away any severely damaged or yellowing leaves to redirect energy toward healthy growth. Removing these leaves can help the plant focus its resources on root and healthy leaf development, which is crucial during the recovery phase. Observing how the plant reacts post-trim can confirm that energy is effectively redirected toward new growth.
Can heavy rain cause permanent damage to carrots?
Yes, heavy rain can cause significant stress and even permanent damage if compacted soil leads to root rot. Timely action to improve soil conditions is crucial to minimize long-lasting effects on your carrot crop. Consistent observation and proper interventions can help prevent serious repercussions from inclement weather; however, maintaining balance is often the key to avoiding soil excesses that can hinder root health later on.