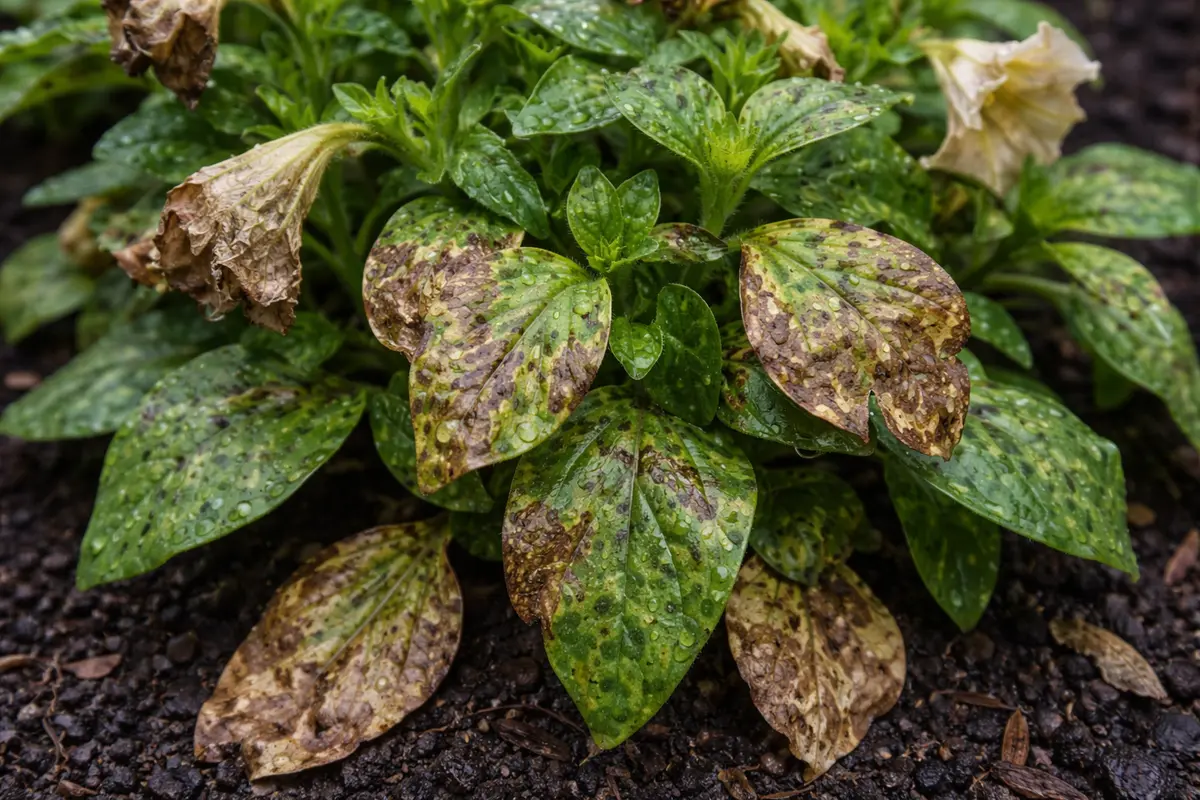
You may notice your petunias looking distressed, with some parts turning brown after a heavy downpour, which is why you need to know why are my petunias turning brown after a heavy downpour. This browning often indicates damage caused by excessive moisture, leading to wilting, spots on the foliage, or even leaf drop. If left unchecked, this issue can worsen significantly, weakening the plant and making recovery more difficult. Immediate action is crucial — check the soil drainage, trim any damaged leaves, and address the underlying issues to enhance the health of your petunias.
Step 1 – Trim Brown Petunia Leaves Right Away
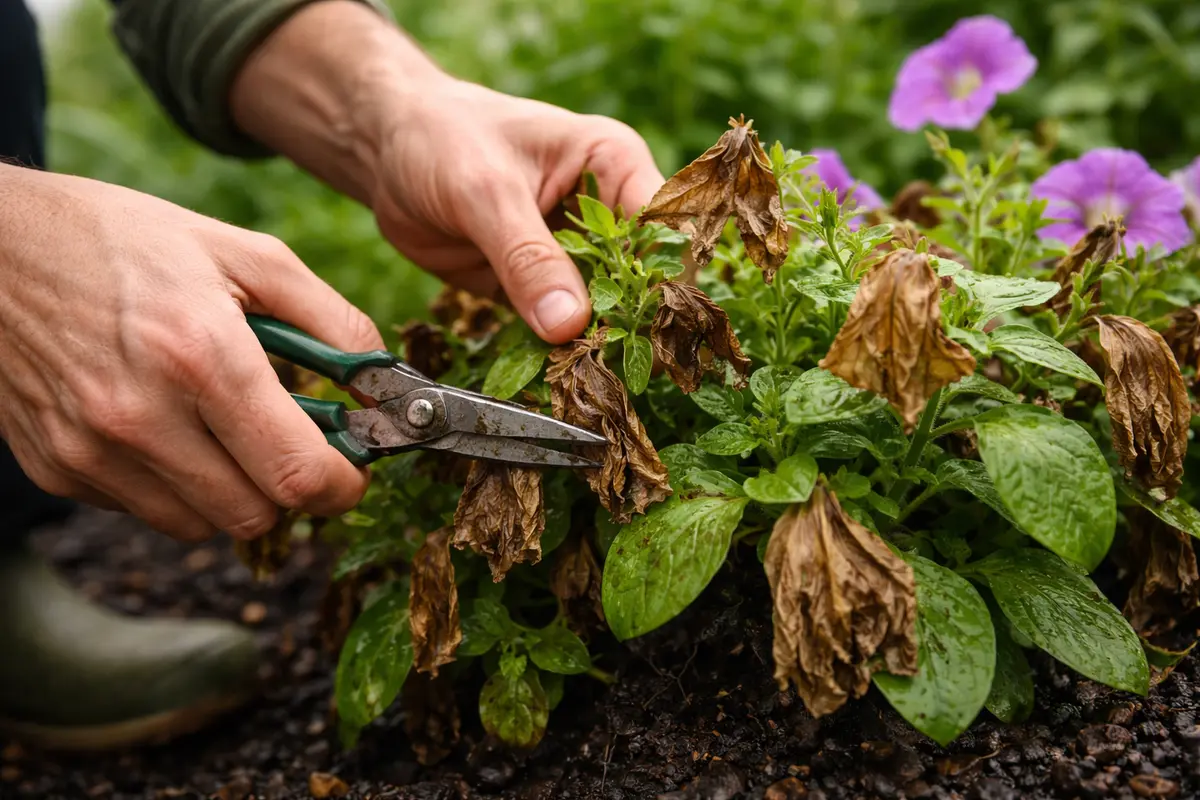
Remove all visibly brown leaves from your petunias immediately. You will see the plants appear cleaner and less stressed, establishing a better overall appearance right away. This action serves to reduce the plant’s energy expenditure on damaged foliage, thereby enhancing its chances for recovery. Additionally, trimming back necrotic tissue allows for increased airflow around the plant, which is critical for preventing fungal infections that can thrive in moist conditions. If you notice a decline in vigor across several plants, that might signal one of several issues stemming from your care practices.
Trimming off brown leaves helps prevent the spread of decay and allows the plants to focus energy on healthy foliage. Petunias are sensitive to excess moisture, and any brown parts indicate damage that may lead to further complications if not dealt with. By acting fast, you limit the risk of diseases taking hold within the plant tissue, and you help maintain the aesthetic appeal of your garden. A practical observation here: if one plant shows significant browning, it is wise to inspect nearby plants as well; they may be exposed to similar conditions affecting their health.
A common mistake at this stage is delaying the trim until signs of rot become more apparent, which can further damage the plant. If some gardeners overlook this initial fix, they will likely find that their plants succumb to rot faster than anticipated. In severe instances, unchecked decay can spread from one plant to adjacent ones, impacting a larger area than necessary. Always grab your pruning shears promptly to mitigate these risks. Consider taking care to cut cleanly at the base of affected leaves rather than tearing them, as jagged edges can also promote infection. If browning extends to multiple leaves or stems, it could also indicate deeper root or systemic issues that require more than just surface trimming.
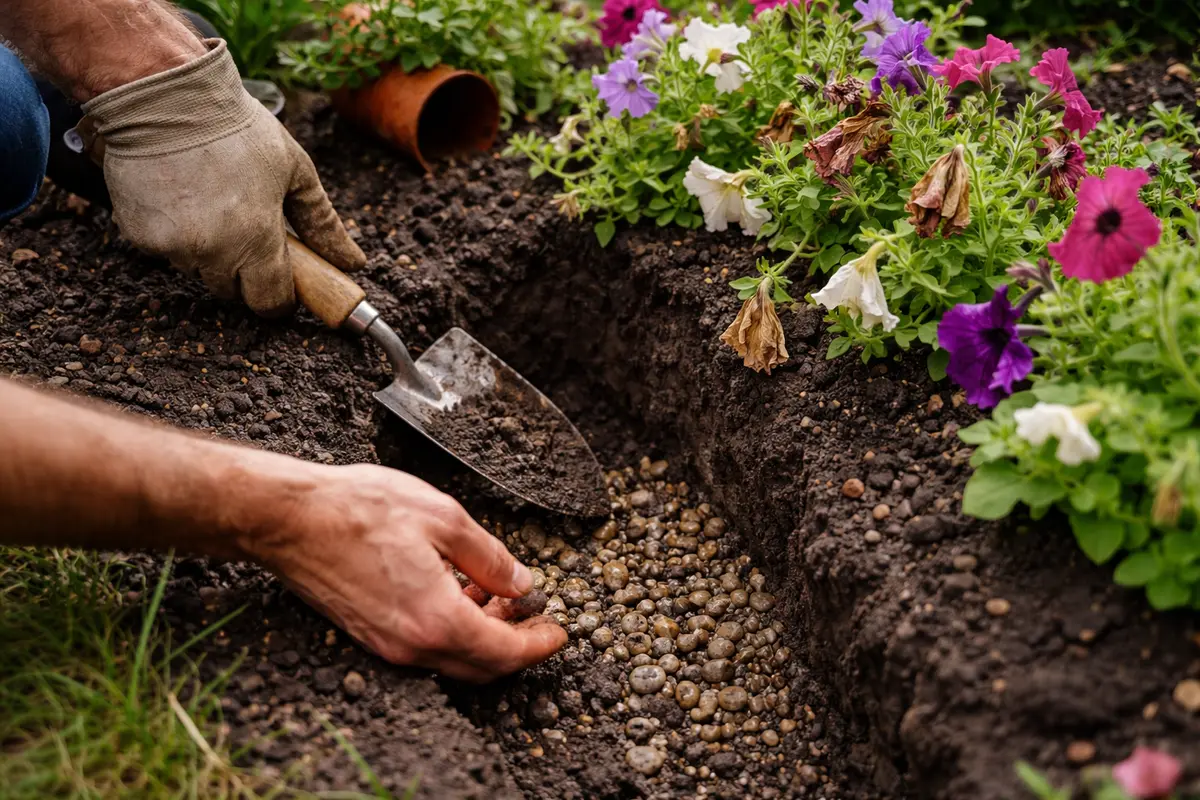
Step 2 – Diagnose Causes of Wet Petunia Roots
Inspect the soil moisture levels around your petunias right away. You will observe if the soil is overly saturated or retaining water, which indicates drainage issues. Feel the top few inches of soil; it should be moist but not soggy. If it feels like a saturated sponge, immediate corrective action is warranted. You could even stick your finger in the soil up to the second knuckle to get a better idea of moisture levels deeper in the root zone. Should the soil feel slimy or emit a sour odor, these are strong indicators of root rot.
Heavy downpours can cause soil to become waterlogged, preventing the roots from getting the oxygen they need. Petunias prefer well-draining soil, and if the roots stay wet for too long, it can trigger root rot, causing further browning of leaves and stunting plant growth. A yellowing at the tips of healthy leaves can also suggest that the adjacent roots are rotting from over-saturation. Observe any wilting or drooping of leaves, which indicates that roots are struggling to function properly due to excess moisture. If you experience these symptoms regularly, it can signal a need for systematic adjustments in your soil amendments or watering approach.
If the soil smells sour or feels mushy, indicating it’s retaining too much water, consider improving drainage by amending it with sand or compost. On the flip side, if the soil feels dry and crumbly like a desert, your plants may have been overwatered previously. Adjust your watering schedule accordingly to avoid compounding drainage issues. Heed this step carefully; if you notice water pooling at the base of your petunias even days after rainfall, it likely signifies a pressing need for intervention. If you suspect compacted soil is at fault, digging up the plant and mixing in more aerating materials like perlite can enhance drainage. Alternatively, observe areas in your garden where the water may pool unexpectedly due to landscape grading; sometimes, substantial rerouting of runoff can prove highly effective.
Step 3 – Fertilize Petunias to Encourage Leaf Recovery
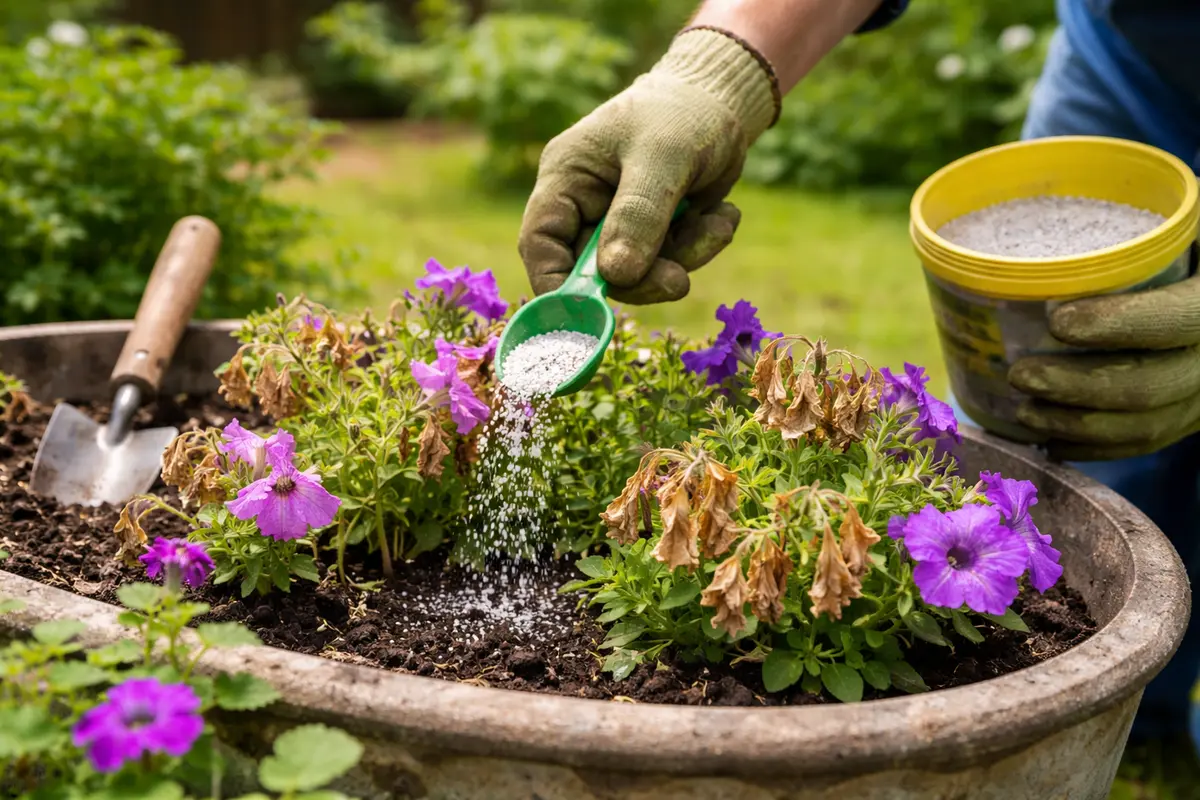
Apply a balanced, water-soluble fertilizer to your petunias to promote recovery. You should begin to notice new leaf growth and an overall greener hue within a few days after fertilization. The right blend will boost the necessary nutrients absorbed during the significant rain. Select a fertilizer with equal parts nitrogen, phosphorus, and potassium (like a 10-10-10 formula) to help offset any nutrient depletion caused by water runoff and enhance overall plant vigor. If leaf recovery appears sluggish, consider evaluating your fertilizer application methods closely and adjust accordingly.
Fertilizing supports healthy regrowth by providing essential nutrients that may have been washed away during the heavy rain. This step is crucial for rejuvenating plants after they have experienced stress from too much water and potential root damage. High-nitrogen fertilizers can be particularly effective in stimulating new leaf growth, leading to a more vibrant plant. The timing of application also matters; early mornings or late afternoons when temperatures are milder are ideal to prevent fertilizer burn. Observe any newly sprouted leaves closely, as these will be strong indicators of recovery potential; a lush green color will signify effective nutrient absorption. If you fail to notice any improvement and instead see curling or crispy leaf edges, it could signal fertilizer burn due to excessive application or incorrect watering practices.
Be cautious not to over-fertilize, as this can lead to salt build-up, which may harm the plant. It’s often tempting to boost nutrients to speed up recovery, but excessive fertilizer application can lead to leaf burn and further issues down the line. Regularly assess the moisture and nutrient levels in your soil for better management. If browning continues even after fertilization, consider testing soil pH to ensure it’s within the optimal range for petunias, ideally between 6.0 and 7.0. When evaluating your soil, utilizing a pH tester can provide a quick confirmation of whether nutrient absorption is inhibited due to the acidity of the soil, often revealing hidden nutrient deficiencies that cannot be rectified through standard fertilization.
Step 4 – Maintain Proper Drainage for Petunia Beds
Start by improving drainage around your petunias by loosening the soil and adding organic matter such as compost. This action will help prevent water from pooling around the roots, resulting in less browning after heavy rain. If drainage is properly managed, you should see improvements within a few days as the moisture levels stabilize.
Heavy downpours can saturate the soil, leading to root rot when waterlogged conditions persist. By enhancing drainage, you reduce the likelihood of water collecting, which can cause petunias to turn brown due to oxygen deprivation in their roots. If you notice browning leaves yet have adequate drainage, check for pest infestations such as spider mites that can also harm petunias. In certain cases, heavy pests can create stress similar to over-watering, worsening the wilting appearance.
During rainy seasons, consider using mulch to manage soil moisture levels, as it can help regulate excess water while providing nutrients. If the weather shifts to prolonged dry spells, remember to adjust your watering routine to prevent stress, as insufficient hydration can also cause petunias to brown. Improper drainage, particularly following heavy rainfall, can cause continued root problems and leaf discoloration. Incorporating materials like perlite or vermiculite can enhance soil texture and drainage capability, preventing water from pooling around the roots. When doing so, mix a generous portion into the top several inches of your soil, ensuring thorough distribution for optimal effectiveness.
By ensuring that water flows away from the base of the plants, you reduce the chance of disease and stress-induced damage in the future. Consider also the importance of spacing; overcrowding petunias can lead to moisture retention in the foliage and base, creating a higher risk for disease. By planting with enough space for air circulation between them, not only do you mitigate potential health hazards, but you create opportunities for visually lush arrangements in your garden. During different seasons, especially when heavy rains are frequent, consider raising the planting beds or choosing slightly elevated areas to prevent saturation. This practice will help maintain health during wet spells, allowing your petunias to thrive in conditions that support their growth while minimizing the risk of brown leaves.
Step 5 – Inspect Petunia Foliage for New Browning Weekly
Check your petunia plants’ foliage for any signs of new browning every week. You should expect to see new growth and vibrant colors reinstated as indicators that your plants are recovering. Regular inspections will help you catch any decline early and adjust your care accordingly. New growth should ideally be sturdy, rich green, and rapidly expanding, signaling a successful recovery. If you neglect this monitoring process, you may miss subtle symptoms that could point to underlying issues.
An effectively recovered petunia plant will show fresh, green leaves and new flower buds forming as a result of proper care. If browning appears again, especially near the bottom leaves, it may indicate that the soil is saturated once more or there are still underlying issues with drainage or nutrient levels. Keeping detailed notes will allow you to establish a comprehensive care timeline, providing insights into how environmental changes affect plant health. Patterns of browning could point to specific watering practices or residual issues in the soil that need addressing.
If you notice return browning despite following the previous steps, re-evaluating your watering schedule and soil amendments is crucial. This situation may signal the need to potentially move your plants to a better-draining location or check for pests that may be causing symptoms similar to overwatering. If garden pests are indeed present, implementing integrated pest management strategies will allow you to address more than just the symptom of browning leaves; this holistic view often yields the healthiest plants. Being vigilant in this regard and having an agile response will often determine the difference between minor setbacks and serious decline; the timeliness of diagnosis is key.
FAQ
How long does it take for petunias to recover after heavy rain?
Recovery times can vary, but you may begin seeing signs of improvement within a week if appropriate care is taken, such as proper trimming and fertilization. The results often hinge on the severity of damage and environmental conditions, including ongoing weather patterns. Keeping track of daily maintenance can provide insights into how well your plants adapt to corrective practices.
Can root rot spread to other petunias after heavy rain?
Yes, root rot can spread quickly if not controlled and is often caused by pathogens in the soil that thrive in saturated conditions. Immediate action is necessary to trim affected plants and improve drainage to protect any nearby healthy plants. Isolation of infected plants also allows you to monitor the remaining vegetation more closely, often leading to a healthy recovery in adjacent specimens. Remember that continuously monitoring the moisture levels in your garden can also prevent a recurrence of these conditions.
Should I remove all affected leaves from my petunias?
It’s advisable to remove all visibly damaged leaves to prevent further decay and to redirect the plant’s energy into healthy growth. However, be cautious not to over-prune the plant, as it may need some foliage to photosynthesize effectively during recovery. Observing the overall health of your plant and keeping track of new growth is essential to ensure you’re aiding recovery while also preserving its ability to thrive. Strategic removal balances the need for rejuvenation without risking starvation from excessive loss.