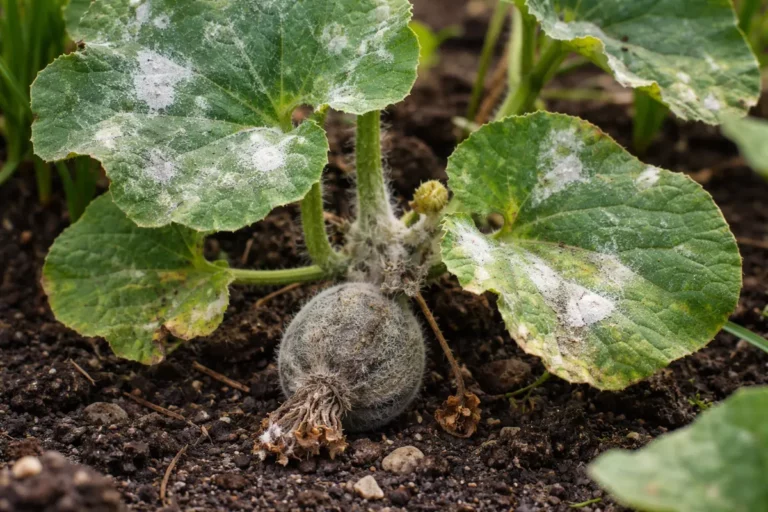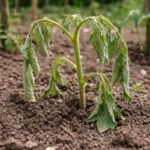
You may notice a fuzzy white coating on your orchids during particularly humid days, a clear sign that you need to know how to treat mold on orchids in humid air. This mold develops as a result of excess moisture combined with poor air circulation, leading to unsightly spots and potential damage on the leaves. If left unchecked, the issue only gets worse, making it harder to fix and weakening the plant’s overall health. Thankfully, you can remedy the situation now by inspecting the affected areas closely and adjusting your watering practices to improve air flow.
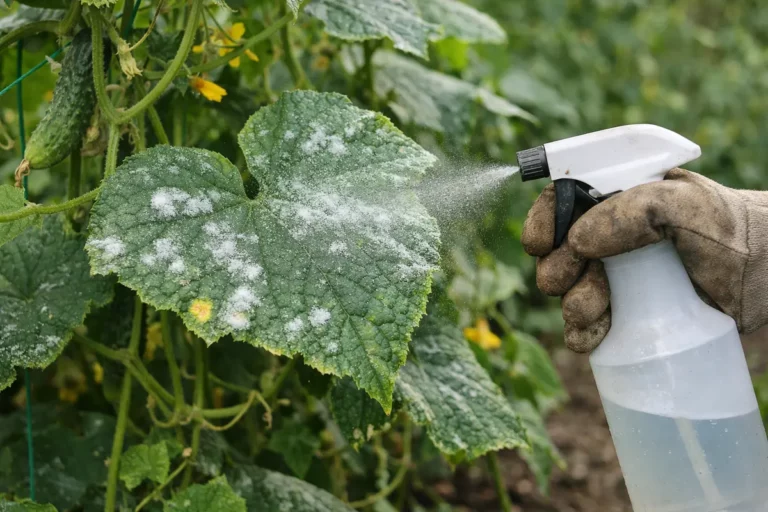
Step 1 – Scrape Mold Off Orchid Leaves Immediately
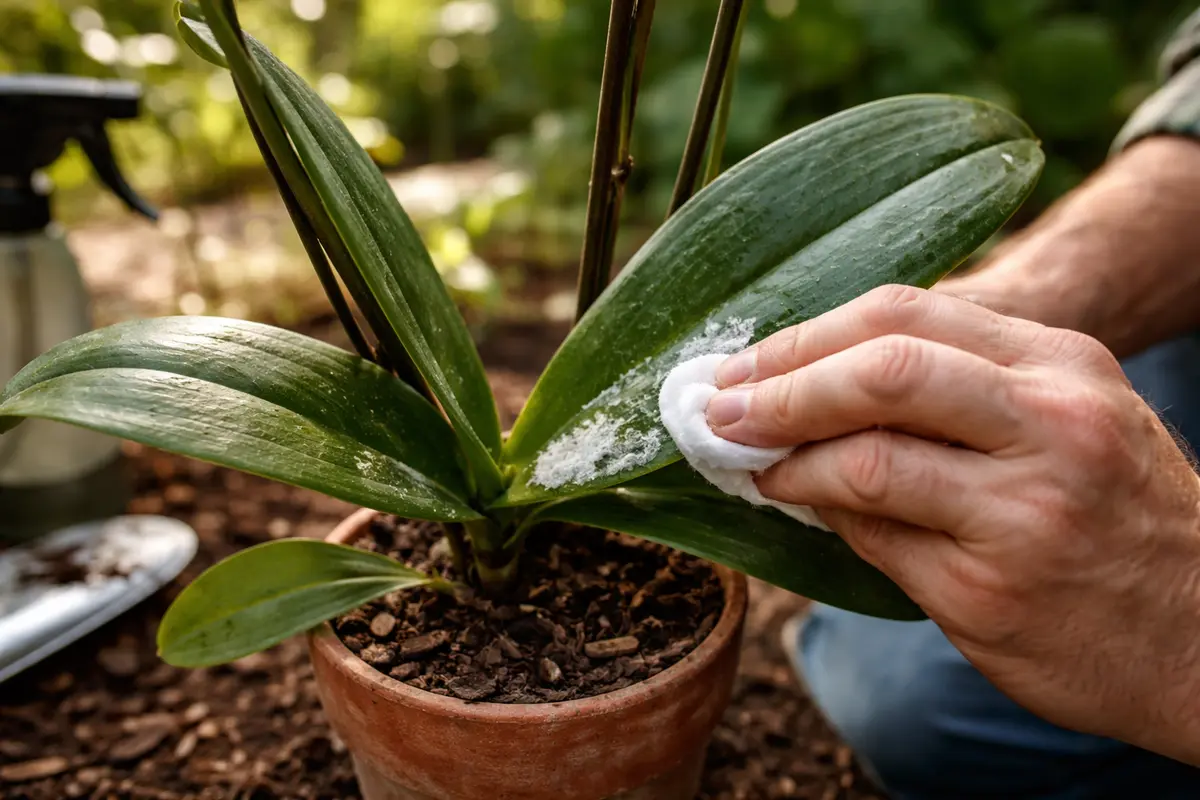
Begin by gently scraping the mold off the affected orchid leaves with a soft, clean cloth or surgical scalpel. You should see the removal of the fuzzy patches and an overall clean appearance of the leaves almost immediately. Make sure to inspect each leaf carefully, as mold can appear in different spots and on multiple leaves. If two leaves approximately a quarter inch apart show mold, this may indicate mold spores have settled extensively across the plant.
Removing visible mold promptly helps prevent its spores from spreading to healthy parts of the plant. Mold can block sunlight absorption for the leaves, leading to decreases in photosynthesis, which is essential for the plant’s health. When you take immediate action, the chance for the mold to settle deeper into the leaf tissue is limited; this is crucial since mold that penetrates leaf tissue becomes increasingly difficult to treat.
A common mistake is to underestimate the importance of immediate action when mold appears, thinking it might resolve itself. For instance, in previous experiences, I’ve seen cases where gardeners wait too long, resulting in more extensive damage, including entire leaves dying off. The longer mold stays, the more embedded in the leaf tissue it becomes; this often leads to subsequent problems like poor nutrient absorption and even stunted growth. If the mold reappears rapidly after initial removal, it may signal an underlying issue that needs further investigation and immediate attention.
Step 2 – Diagnose Air Circulation Issues in Orchid Care
Next, inspect the area where your orchids are placed to ensure there is adequate air circulation. Once you improve airflow around the plants, you will notice the humidity around them decreasing, which helps inhibit mold growth. If their leaves start to dry out, that is a tangible sign the environment could be improving. Pay special attention to any areas where air may be stagnant, such as corners of rooms or cramped spaces among other plants.
Orchids thrive in environments that do not trap moisture around their foliage for extended periods. Stagnant air creates pockets of high humidity that are perfect for mold growth. By understanding this connection between airflow and moisture, you can create a healthier environment for your orchids, significantly enhancing their ability to thrive. If you notice brown tips on leaves, that could indicate poor air circulation coupled with excess humidity.
If your orchids are placed too close together or in too dark of a location, airflow blockages often occur that hinder evaporation and circulation. For example, I’ve observed that orchids placed close to other plants frequently develop mold because they compete for the same air pockets; a tight arrangement can create a humid microclimate conducive to mold growth. Consider rearranging plants for optimum light exposure and airflow. If mold persists, even in well-ventilated spaces, your next focus should be checking temperature; warm air can hold more moisture, exacerbating mold problems.
Step 3 – Apply Orchid-Safe Fungicide for Recovery
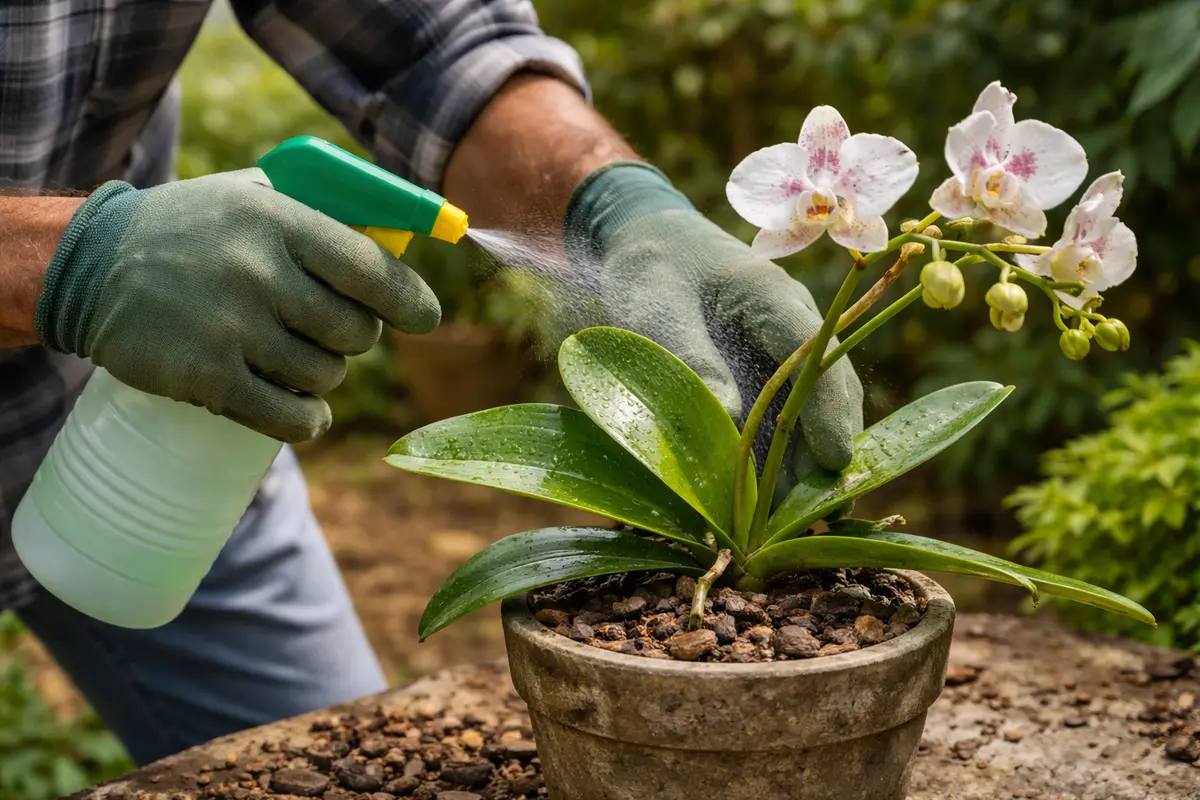
Apply an orchid-safe fungicide according to the product’s instructions to help eliminate any remaining mold spores. After treatment, you should see improved leaf color and a decrease in the visible mold within a week. Ensure that the spray covers both the top and undersides of the leaves as spores may lurk in less visible spots. An even coating is crucial; if you miss spots, mold might re-emerge in those areas, resulting in frustrating setbacks.
Fungicides work by targeting and killing spores that may remain even after scraping. They can also offer protection against new mold growth if applied consistently and correctly, helping to establish a healthier environment. Follow the manufacturer’s application schedule closely; skipping doses can compromise the treatment. Most orchid-safe fungicides should allow reapplication every 7–14 days, particularly in high-humidity conditions that favor fungal growth.
One key mistake during recovery is over-watering the plant right after treatment, thinking it is essential for recovery. Instead, reducing water allows the plant to dry out and diminishes the chance of new mold growth. Proper timing is critical; if you notice the surface of the growing medium remains too wet three to four days post-treatment, it’s best to hold off on watering until it dries adequately. Keep in mind that watering should be cautiously resumed based on the plant’s clear recovery signs. If you begin to see new growth, vibrant leaves, and root signs, it may be time to gradually reintegrate your regular watering schedule. Without these observations, you may inadvertently promote further moisture issues leading to mold recurrence.
Step 4 – Prevent Mold Growth with Humidity Control
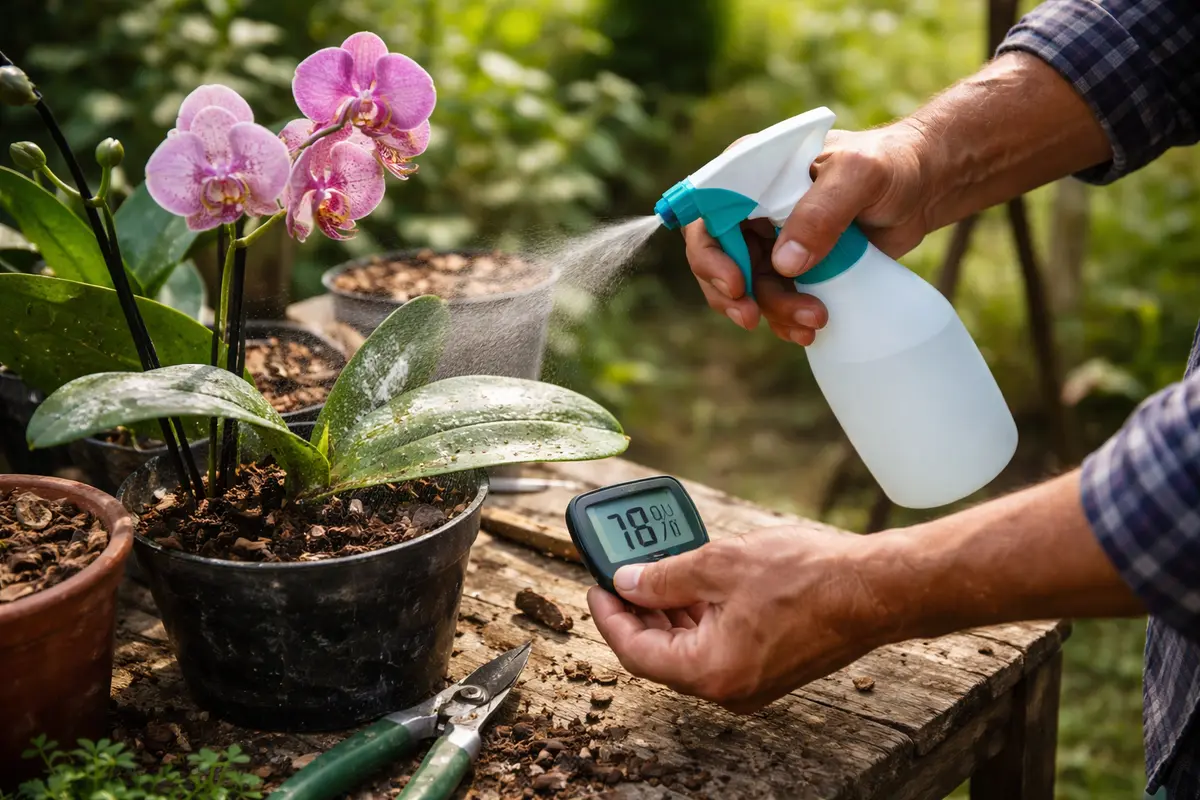
Start by improving air circulation around your orchids by using a small fan set on low. This action will reduce humidity levels around the plants and help prevent the occurrence of mold, creating a drier environment that discourages fungal growth.
Excessive humidity, particularly in poorly ventilated spaces, triggers mold growth on orchids, especially when leaves remain wet for extended periods. By enhancing airflow with a fan, you directly combat these ideal conditions for mold, ensuring that your orchids’ leaves dry swiftly after watering. If you notice consistently moist leaves even after care, check the air movement in the room to adjust as necessary.
As the seasons change, particularly during the rainy season when humidity levels soar, consider adjusting the fan’s position or speed to accommodate fluctuating conditions. Additionally, placing a dehumidifier in the vicinity can act as a secondary prevention layer, effectively keeping mold at bay by lowering overall humidity in your orchid’s environment.
Utilizing a dehumidifier or placing silica gel packets nearby can help absorb excessive moisture, eliminating the conditions that foster mold growth. By ensuring that moisture levels remain constant and not extreme, you can create an inhospitable environment for mold while promoting stronger plant health. If the air feels too damp consistently or condensation forms on surfaces, it signals that humidity is likely too high; adjusting plant position can help mitigate this.
During particularly humid periods or rainy seasons, it’s beneficial to adjust plant placement—consider relocating them to areas with better air circulation. Additionally, during winter, indoor heating can lower humidity drastically, requiring vigilance. One of the simplest strategies is to regularly check humidity levels with a hygrometer; if they rise beyond the optimum range, it is time to take action immediately. Look for condensation forming on leaves—which often indicates high humidity—this is a key warning sign that can lead back to mold issues if left unaddressed.
Step 5 – Check Orchid Roots for Health After Treatment
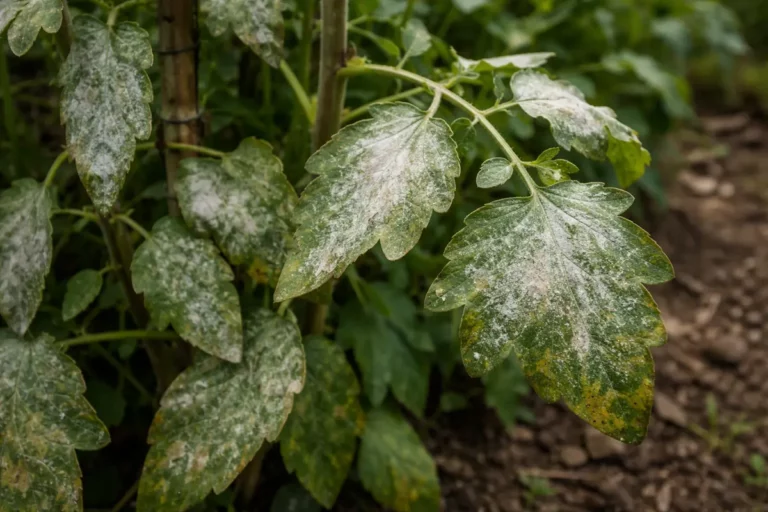
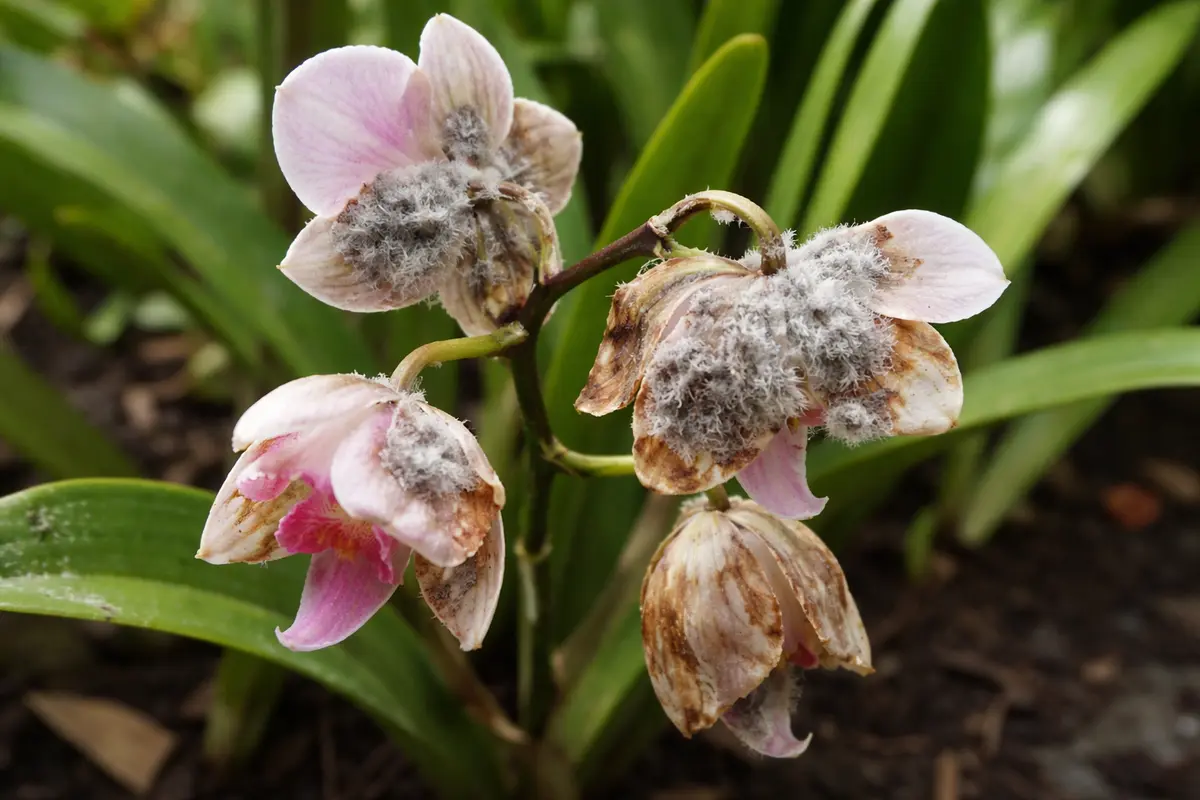
Next, monitor your orchids closely at least every few days for any signs of mold. Look for fuzzy, white or gray patches on the leaves or the medium that may indicate mold growth. If you spot any issues, recheck the plants within 48 hours to determine if the mold is spreading or if preventive measures have helped reduce its presence.
A fully recovered orchid will display bright, vibrant leaves with a smooth, unblemished surface, free from any moldy texture. In contrast, if early signs of mold return, you might notice slight discoloration or a powdery coating developing on the foliage. If the leaves begin curling or bending, or if the surface appears sticky, these are additional indicators of mold resurgence.
If mold persists despite your treatment efforts, increase air circulation around the orchids by repositioning them or utilizing a fan. Additionally, consider changing the potting medium to a more breathable one if mold continues to appear. Lastly, if mold returns rapidly after these adjustments, you may need to treat with a fungicide specifically designed for orchids as a last resort.
Observing healthy roots confirms that the plant is effectively re-establishing its nutrient and moisture absorption capabilities. However, mushy or brown roots—which may feel slippery or slimy—indicate serious problems. When dealing with such issues, immediate action such as repotting is essential to save the orchid. Utilize a medium that allows for both moisture retention and airflow; traditional potting soil is generally too dense for orchids, hindering their growth.
If you notice signs of decay or mold returning on the roots, it may be necessary to repot the orchid with fresh, well-draining media. This action is critical, especially if you observe recovery signs stagnating, which indicates deeper problems in the root zone. During repotting, be meticulous in selecting a medium designed specifically for orchids, like a fir bark or sphagnum moss blend; these materials allow proper aeration and drainage. Consider using a pot with ample drainage holes to facilitate water escape. Watch for any signs of stress following repotting, as the plant may take time to acclimate; signs such as drooping leaves or wilting indicate that further environmental adjustments may be needed.
FAQ
How long does it take for orchids to recover from mold?
The recovery time for orchids affected by mold can vary but typically takes 2-4 weeks for noticeable improvements. With the right care and consistent monitoring, you should start to see better leaf health and reduced mold within the first week. Expect gradual improvements, as it often takes time for orchids to respond to treatment. If you don’t see signs of recovery after two weeks, reassess your growing conditions, particularly humidity, airflow, and watering practices.
Can mold spread to other plants nearby?
Yes, mold can easily spread to other nearby plants if not contained due to spores drifting through the air or water. To prevent cross-contamination, ensure you isolate the affected orchids immediately and maintain proper hygiene practices while handling them, including sterilizing tools after use. Regular inspections of nearby plants can help catch any spread before it becomes severe; look for similar fuzzy patches on leaf surfaces or signs of wilting that signal potential mold presence.
Should I remove all affected leaves immediately?
You should remove severely affected leaves, as they can compromise the plant’s overall health and become sources for new infestations. However, lightly affected leaves can be treated with fungicide instead of full removal, allowing the plant to retain its foliage while it heals. Consistently monitor these treated leaves for signs of recovery; healthy foliage typically exhibits new growth at the base, which is a positive indicator of healing and resilience.