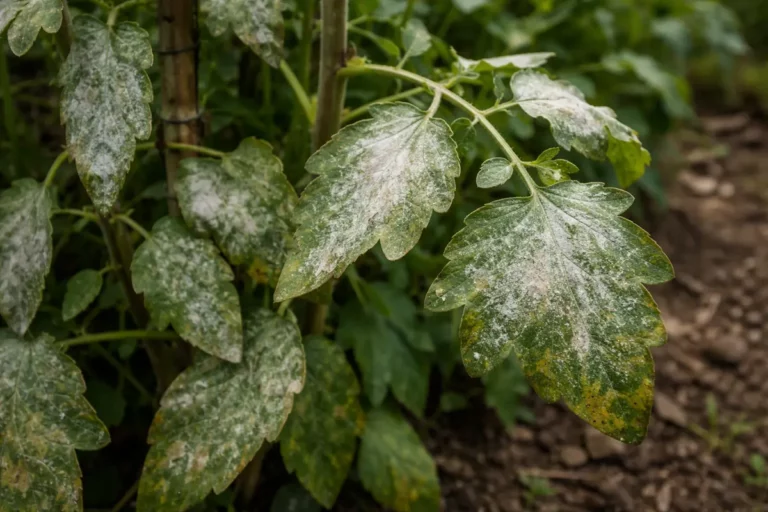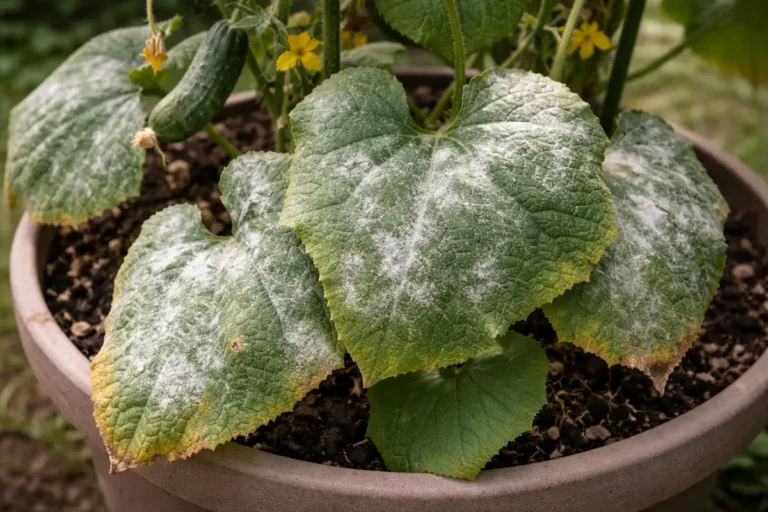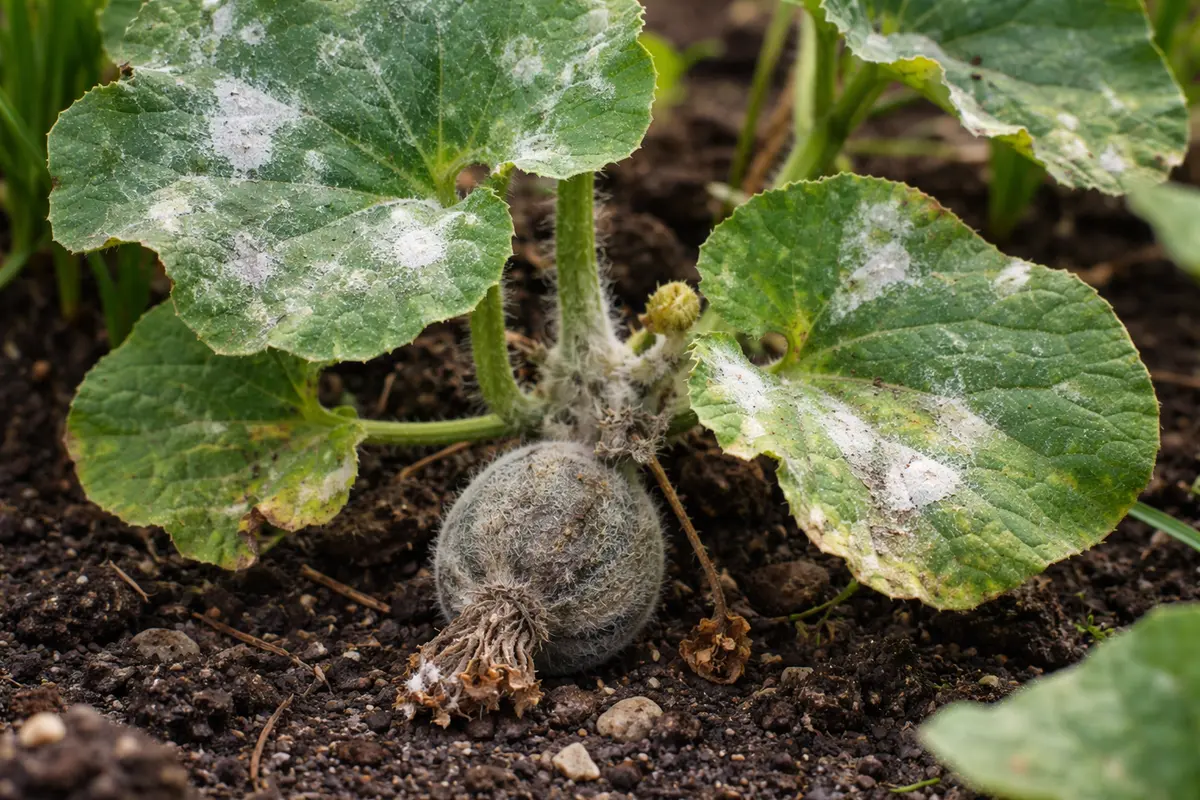
You may notice a white, fuzzy layer appearing on your melon seedlings when humidity levels soar, which is why you need to know how to prevent mold on melon seedlings during high humidity. This mold can cause yellowing leaves and rotting stems, leading to significant damage if left unchecked. Ignoring the problem only weakens the plant and can lead to more damage, but fixing it is possible now—just monitor your seedlings closely and reduce excess moisture. Regularly inspect your plants and improve air circulation to keep them healthy and thriving.
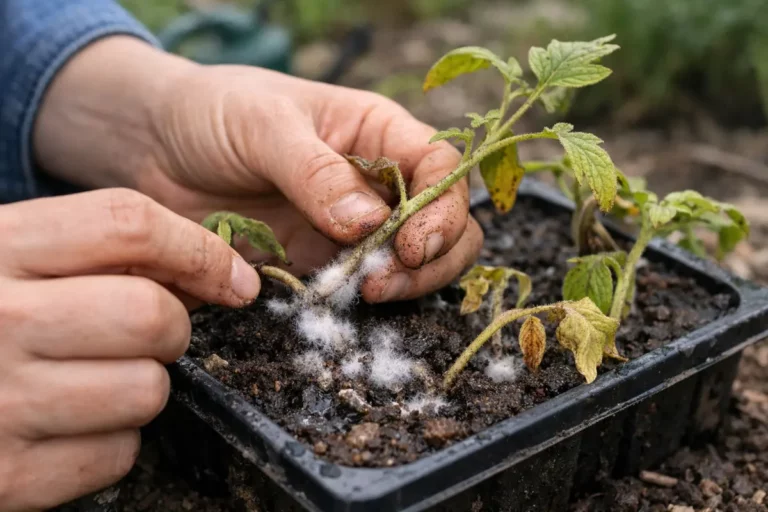
Step 1 – Remove Affected Melon Seedlings Immediately
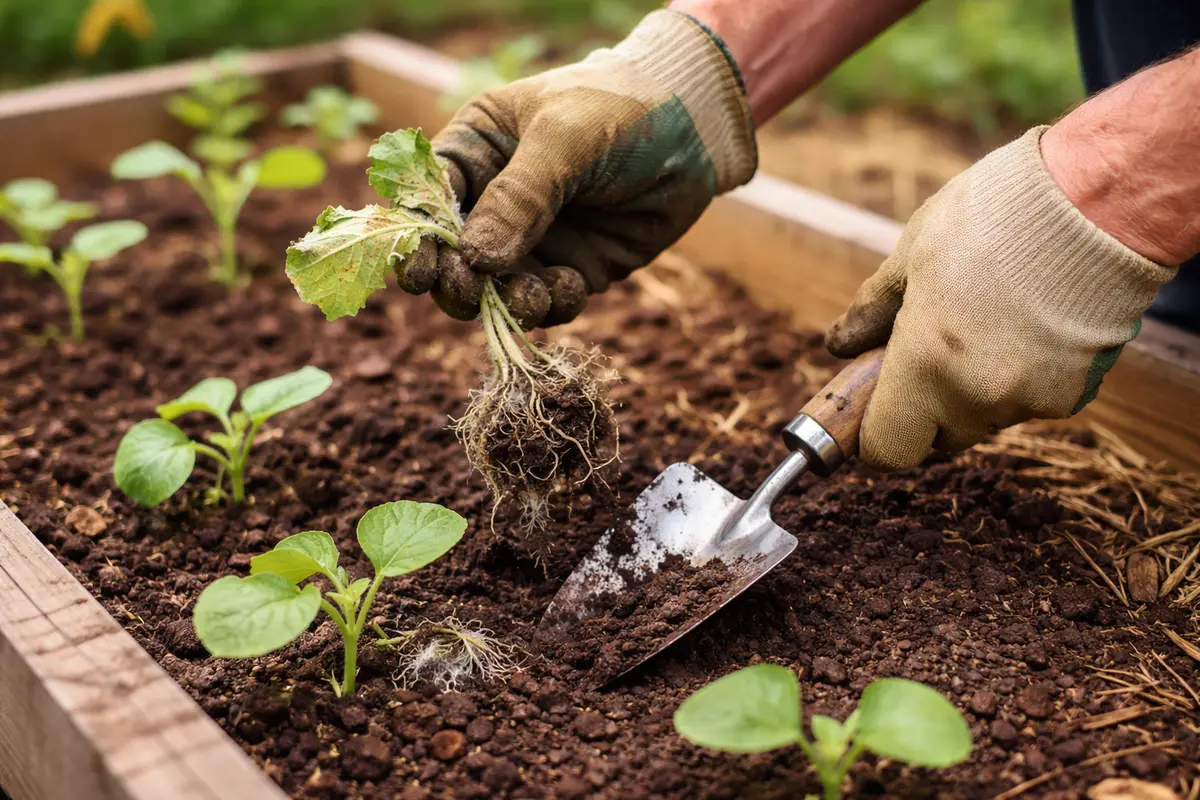
Start by removing any visibly affected melon seedlings right away. You will see an immediate reduction in spore spread, which protects healthier plants nearby and allows essential airflow in the garden space. As the mold weakens the infected seedlings, their nutrient uptake is compromised, making it critical to remove them to ensure the survival of the more robust plants. Properly dispose of the infected seedlings to prevent the spread of spores to the surrounding environment.
Acting quickly is critical because mold thrives in high humidity environments, rapidly spreading and weakening affected seedlings. The mycelium from the mold penetrates plant tissue, restricting nutrient uptake and leading to wilting and eventual decay. If left unattended, this can escalate into a larger outbreak, threatening all your plants. Removing infected seedlings leads to improved moisture levels, as the surrounding seedlings no longer face the same struggle for nutrients and air. This reduction in competition allows the remaining seedlings to channel resources towards healthy growth, which is essential during the delicate early stages of development. If seedlings remain tightly packed, the risk of mold recurrence increases significantly due to retained moisture in the cramped conditions.
A common mistake many gardeners make is waiting too long to address visible signs of mold. For example, I’ve seen plant health deteriorate significantly in just a few days when infected seedlings were left in place. In contrast, removing them promptly allows the remaining seedlings to grow stronger and healthier. This juxtaposition highlights the benefit of immediate action—the outcome of a healthy surrounding environment far outweighs the loss of a few seedlings. Conversely, if you hesitate, you may find entire rows of seedlings succumbing to mold, requiring drastic measures like complete replanting. If you notice any seedlings beginning to wilt or display unusual discoloration, take that as a sign to check for mold and act swiftly.
Step 2 – Diagnose Humidity Impact on Melon Health
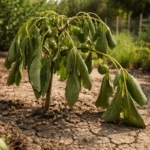
Inspect the remaining seedlings to determine the level of humidity affecting their health. You will start to see more clearly the extent of moisture retention in the soil and leaves, which is vital for making necessary adjustments. Digging around the roots can clarify how wet the soil is, and observing the leaf texture helps assess if they’re holding excessive moisture. If you feel a slimy consistency around the roots, this indicates anaerobic conditions that can suffocate your plants. Checking moisture levels through finger testing—by digging into the top inch of soil—beyond the surface can give you immediate insight into whether further action is necessary.
Diagnosing humidity issues helps identify whether excessive moisture is being retained in the soil, contributing to mold growth. High humidity causes water to collect not only in the air but also in the soil, leading to anaerobic conditions that inhibit root health. This imbalance can result in symptoms such as yellowing leaves or root rot if not addressed effectively. You might notice that healthy seedlings have firm, vibrant leaves, while those struggling appear droopy or seem to curl. These signs can often occur within days of a spike in humidity, making early diagnosis essential. If the leaves feel soft and mushy, it suggests overwatering that’s caused by the increased humidity, hence it’s better to err on the side of under-watering until moisture levels stabilize.
If you discover that the soil is overly saturated—evident if it feels like mud or water seeps when squeezed—adjusting your watering routine will be crucial. For instance, if the soil feels soggy when touched, decreasing the frequency of watering while ensuring better drainage can be essential steps. Additionally, implementing a moisture meter can provide more accurate readings, allowing you to measure the soil’s moisture level regularly. Conversely, if the soil feels dry or crusty despite high humidity, try misting your seedlings lightly or temporarily covering them with a breathable cloth to balance moisture levels. This careful calibration can help prevent both drowning and desiccation, setting your plants up for success. A decision tree can help simplify this process: if moisture meter readings are high, cut back on watering; if humidity is high while the soil feels dry, adjust your misting accordingly.
Step 3 – Treat Melon Seedlings to Combat Mold Growth
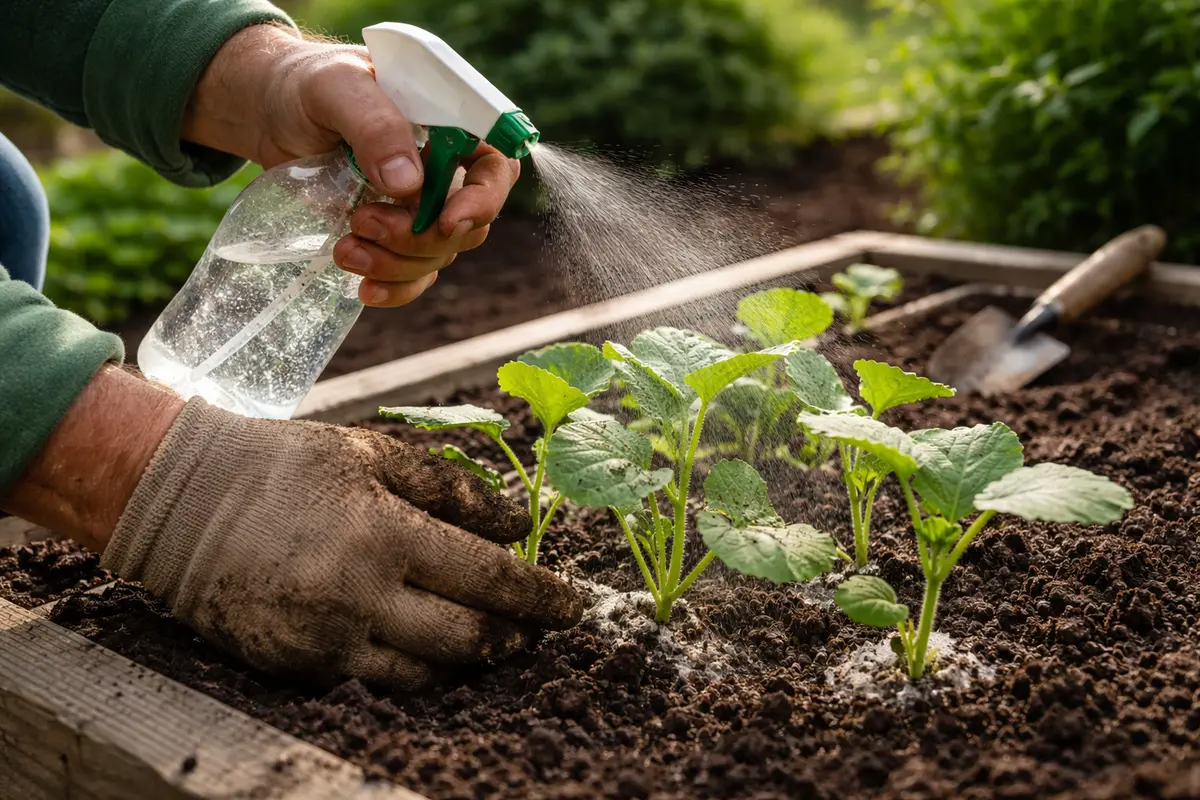
Apply a natural fungicide effective against the specific mold impacting your seedlings. You should observe signs of improvement, such as healthier new growth and a reduction in mold recurrence, within about a week’s time. It’s crucial to apply the fungicide during early morning or late afternoon when the sun isn’t too strong, as this prevents rapid evaporation and allows for better absorption. Ideally, apply it in a shaded area to avoid any heat stress on the plants. Timing is critical; for best results, wait until the sun is low, as intense sunlight can negate treatment effectiveness.
Treating your plants with fungicide helps eliminate existing spores and prevents new fungal growth from taking hold. When administered correctly, these treatments create a protective barrier against mold, allowing your melon plants to regain vigor and resilience. Healthy seedlings will start to display rich color in their leaves and new shoots by the week’s end, indicating a successful recovery. However, failure to carefully adhere to the manufacturer’s instructions regarding dosage and timing can lead to phytotoxicity—plant burn resulting from chemical mishandling—thereby compromising your recovery efforts. An immediate visible indication of misapplication might include leaf curling or discoloration, suggesting that the balance is off. Continuous monitoring after treatment is recommended to catch any adverse reactions early.
A critical mistake during recovery is overcompensating with water or fertilizer, which can further stress the plants. Excess nutrients can lead to competition among seedlings, creating an environment ripe for further mold growth. Instead, focus on maintaining balanced moisture levels. If your seedlings continue showing signs of distress after treatment—like persistent wilting or pale leaves—reevaluate your watering habits, adjusting both the quantity and frequency to ensure they match current conditions. Apply fungicide uniformly to prevent any areas from becoming hot spots for mold resurgence. If symptoms persist despite optimal care, consider consulting local gardening experts who may offer tailored advice based on your specific situation. Consistent soil testing can help prevent nutrient overload and maintain a fine balance that keeps your seedlings thriving.
Step 4 – Optimize Airflow Around Your Melon Plants
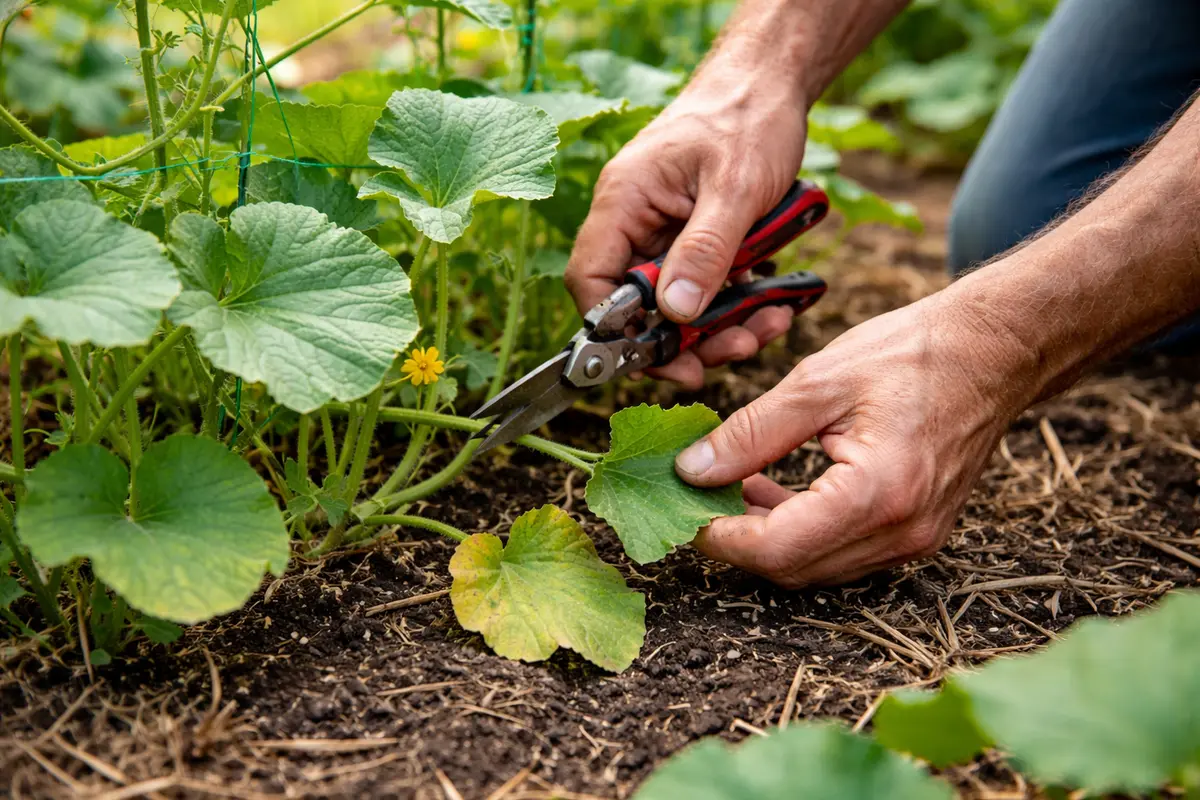
Increase air circulation around your melon seedlings by repositioning them to ensure adequate spacing. This change will result in improved airflow, which is essential for reducing humidity buildup around the plants. Aim for at least 18–24 inches between seedlings to provide ample space for air movement. Better airflow not only decreases humidity but also promotes even heat distribution across the plants, thereby supporting their overall growth. Adding stakes or bamboo poles to elevate seedlings can also assist in directing airflow through the canopy. If your seedlings are tangled together or closely planted, transplanting them can yield better results.
Proper airflow prevents excessive moisture accumulation on the plant surfaces, significantly lowering mold risk. To achieve this, thinning out crowded plantings is vital to ensure that each seedling has enough space to breathe. By allowing winds to pass through, you mitigate stagnation and cultivate a healthier environment. If your seedlings are in a greenhouse, verify that vents are functioning properly and consider installing passive airflow systems. During seasons where humidity is high, placing seedlings near open windows can introduce fresh air circulation that flushes out humid air, further assisting moisture control. An environmental monitor can aid in acquiring data on humidity and air changes to gauge if adjustments are indeed effective.
Seasonal adjustments to your routine might include placing seedlings in locations that receive more sunlight during the growing season. For example, seedlings positioned in direct sunlight for 6 to 8 hours daily can dry out faster, which is vital during the damp mornings and evenings typical of high humidity conditions. Moreover, consider adjusting your watering schedule to later in the day to allow seedlings to dry before cooler nighttime temperatures settle in. If humidity levels remain consistently high, incorporating a dehumidifier can significantly improve conditions and prevent future outbreaks of mold. Alternatively, using oscillating fans to gently circulate air can also be beneficial in larger planting areas.
Step 5 – Inspect Seedlings for Mold Signs Twice Weekly
Check your melon seedlings for any signs of mold or other issues at least twice a week. You should observe improvements, such as no new mold growth, firmer stems, and vibrant leaves. During these inspections, thoroughly inspect the undersides of leaves and around the base of the plants, as these are common areas for mold to thrive unnoticed. A gentle magnifying glass can be invaluable for spotting early signs of infestation or mold development, as some issues can begin at a micro level and worsen before they are visibly apparent. Consider keeping a gardening journal to track observations and actions needed for each inspection.
Regular inspection allows you to catch any recurrence early, ensuring your seedlings remain resilient and healthy. Maintain vigilance for indicators like wilting leaves or dark spots that suggest heightened moisture and possible mold return. Healthy plants will exhibit robust growth without visible signs of disease within a few weeks of established care routines. If minimal amounts of mold are detected during inspections, promptly treating with fungicides can stave off a more significant outbreak. It could be beneficial to mark a calendar or set reminders on your phone, creating a consistent schedule for these critical checks. Ensuring thorough standard operating procedures for these inspections can enhance the overall gardening regimen.
If any recurrence of mold is detected, enhance drainage immediately and consider reapplying treatment as necessary. Proper monitoring after initial recovery is paramount; otherwise, it becomes easy for underlying humidity issues to rear their heads and threaten your crop’s survival. If high humidity conditions persist in your garden environment, adjusting your planting location, or timing your plantings to avoid peak humidity times of the year may yield better results. Also, take time to analyze the overall layout of your garden to ensure that you have optimized drainage and airflow, particularly if some seedlings thrive while others struggle. Regularly checking the irrigation frequency and rain forecasts can also help manage moisture effectively.
FAQ
How long does it take for mold to spread on melon seedlings?
Mold can spread rapidly within 24 to 48 hours in high humidity. If conditions remain damp, it can quickly cover healthy seedlings, jeopardizing their growth. The key is to act quickly at the first sign of mold, as prevention is much easier and more effective than attempting to reverse extensive damage.
Should I remove seedlings with minor mold growth?
Yes, it’s advisable to remove any seedlings showing minor mold growth immediately to prevent it from spreading to healthy plants. Quick decisions can save your overall crop; allowing any amount of mold to thrive increases the risk that spore-laden air will affect neighboring seedlings, so swift action is crucial.
Will my melon seedlings recover if mold has been removed?
Yes, if mold is removed and humidity levels are managed properly, seedlings can recover well within a few weeks. Look for fresh growth as a positive sign of improvement, ensuring good airflow and drainage to promote health. In some cases, you may even notice seedlings rebound and produce fruit more vigorously if given the right conditions.