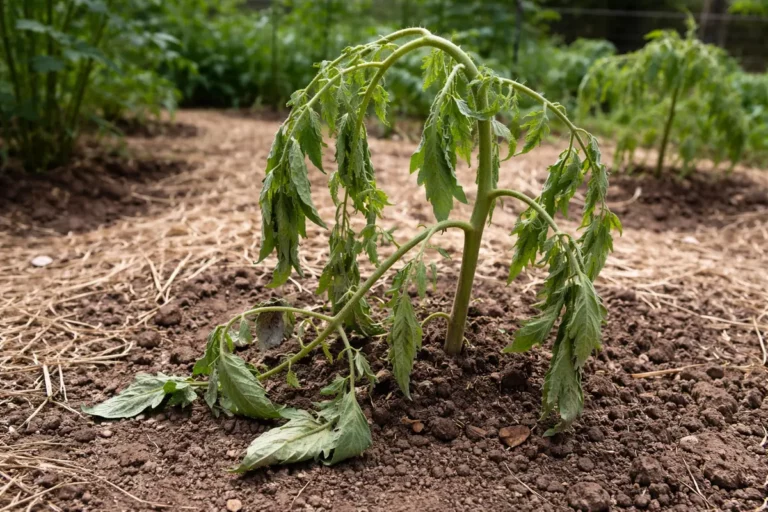
You may notice your tomato plants droop after transplanting during the heat of summer, which is why you need to know what to do if your tomato plants droop after transplanting. This drooping is often caused by transplant shock, which leads to wilting and stress in the plant. If ignored, the condition can worsen, leading to stunted growth and further damage, but fixing it is possible now—just water, inspect, and adjust your care routine.
Step 1 – Assess Tomato Plants for Wilting Signs
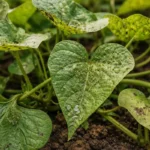
Check for any signs of wilting on your tomato plants immediately. You should see whether the leaves are drooping, turning yellow, or curling inwards within a few hours of inspecting. If you notice leaves that are limp and hanging down loosely, it’s a clear indicator that urgent action is necessary.
Acting quickly on these signs is essential; drooping indicates that the plant is under stress and may be losing vital moisture. If you postpone your assessment, the plant’s condition can worsen, leading to compromised root systems. The longer the drooping persists, the more challenging it can be to revive the plant. Healthy tomato plants depend heavily on vigorous root systems for water and nutrient uptake—if roots are damaged by neglect or stress, recovery becomes increasingly difficult.
A common mistake at this stage is simply dismissing minor drooping as a normal reaction to transplanting. In reality, if the soil is too dry, the roots can’t absorb enough moisture, leading to wilting. Alternatively, overwatering can cause roots to become waterlogged, which also leads to drooping leaves. Always inspect the soil moisture before making any corrective actions to avoid further stressing your plant. If the soil is dry to the touch more than a few inches below the surface, it’s a strong signal that the plant is dehydrated. Similarly, if you notice a soggy surface that barely absorbs water, this indicates overwatering; take immediate corrective actions by adjusting your watering frequency and methods.
Step 2 – Investigate Soil Issues Around Tomato Roots
Examine the soil conditions around your tomato plants closely. If the soil feels too dry or incredibly soggy, it will affect the plant’s ability to absorb essential nutrients and water. Take a handful of soil and squeeze it; if it crumbles apart easily, it’s likely too dry. Conversely, if it clumps together and feels excessively wet, those conditions can impede proper rooting.
Proper soil conditions are vital for healthy root development. Tomato plants prefer well-drained soil that retains moisture without being overly saturated. Soil that compacts easily or has poor drainage can lead to a suffocating environment for roots, which results in drooping. Determining if the soil is dry, wet, or has an unusual odor will help identify necessary remedies. You should also be aware of the soil temperature; excessively cold or hot soil can further stress the plant. If you notice that the soil feels unusually cool, it may be impacting root function and delaying recovery.
If you discover the soil is too dry, water immediately. If the soil is dry beyond an inch deep, add water incrementally—try to saturate it evenly without creating water pools. Conversely, if the soil smells sour or is mushy, it may signal root rot, which prevents water absorption. In this case, consider retracting water entirely and improving drainage if it seems compromised. Notably, plants in clay-heavy soils are particularly at risk for root suffocation, and they require more attentive care regarding moisture levels. You might need to amend such soils with organic materials to improve drainage and air circulation. On the flip side, if you approach soils that are heavily root-bound, consider transplanting the affected plants into looser, more nutrient-rich soil to facilitate recovery.
Step 3 – Hydrate Transplanted Tomatoes Thoroughly
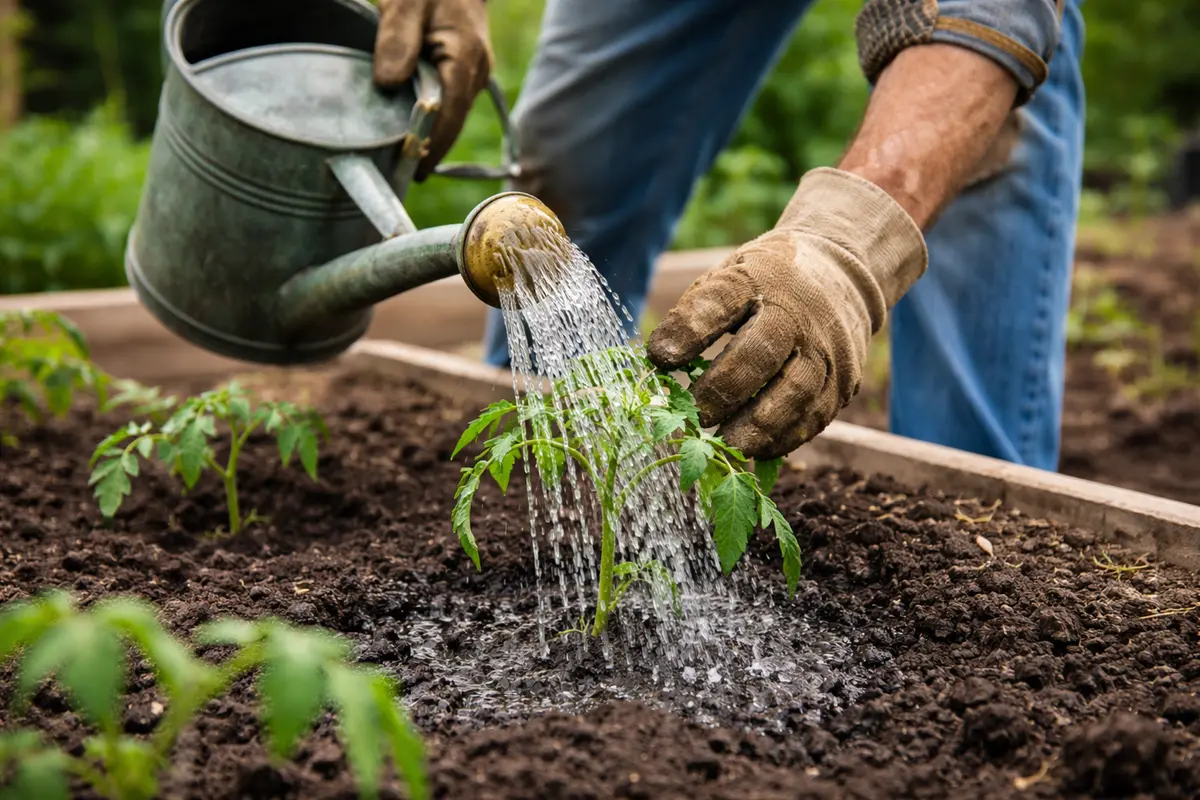
Water your transplanted tomato plants deeply until moisture reaches at least 6 inches into the soil. Doing this should noticeably perk up the leaves within a few hours. Snag a moisture meter to get precise readings about soil hydration, ensuring your plants have a consistent moisture level without drowning.
This action provides the needed moisture to the roots, rekindling their ability to absorb nutrients and synthesize energy correctly. Hydration crucially helps ease transplant shock and encourages recovery. When plants receive the appropriate amount of water, they will gradually return to an upright position and brighter color within just a few hours after watering. Be on the lookout for signs of recovery; typically, plants should start to perk up by the evening if adequately hydrated. Visible changes you may notice include newly perking leaves and an increased vibrancy in their color, signaling a successful rehydration.
However, be cautious to avoid overwatering simultaneously. Providing too much water can lead to another round of stress from waterlogged soil, which can cause root rot. If after a couple of hours you note that the soil remains overly saturated, it is imperative to refrain from further watering and enhance drainage as necessary. Establishing a routine that balances watering is crucial; perhaps incorporate a moisture gauge to assess the soil’s wetness. If you find that the plants don’t show signs of recovery within 48 hours after watering, it may require adjusting watering techniques or checking for other underlying issues. If the leaves continue drooping despite adequate watering, examine for pest infestations or fungal issues that could be further impacting your tomato plants.
Step 4 – Safeguard Against Future Transplant Shock

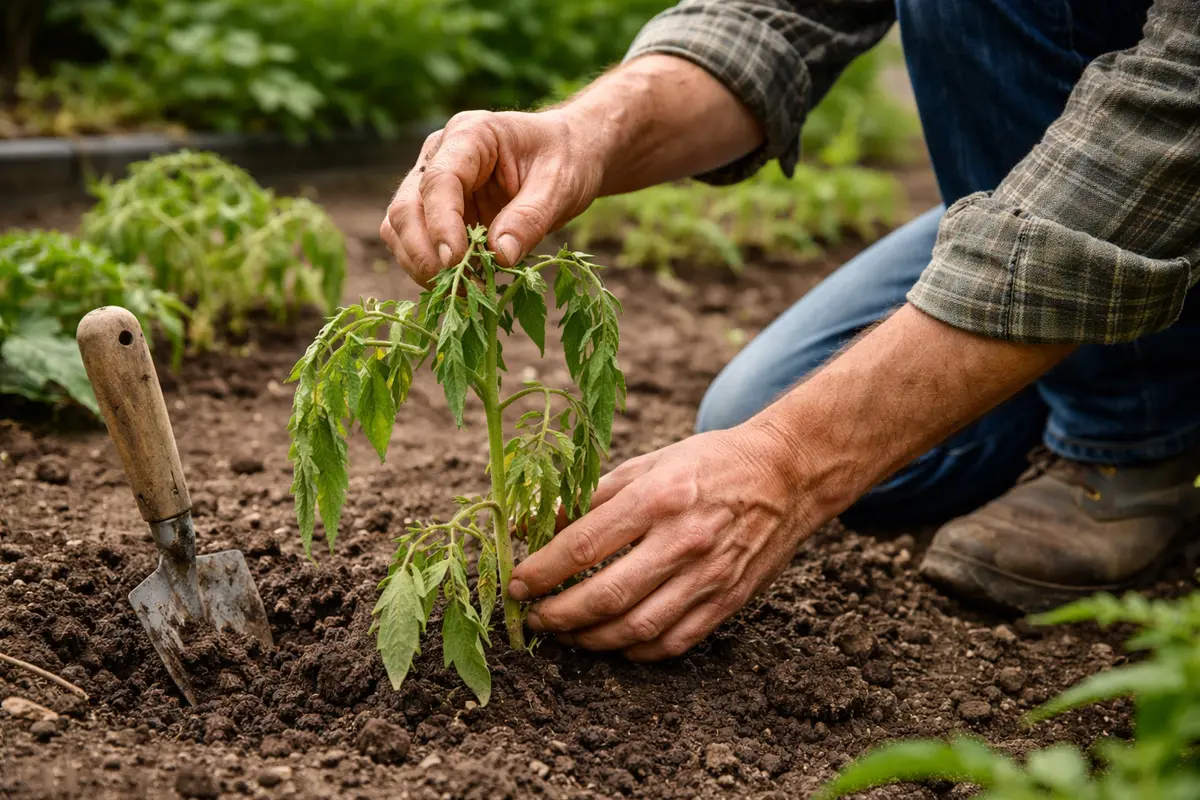
Start by watering your tomato plants deeply right after transplanting, ensuring the soil is saturated but not waterlogged. This consistent moisture will help them stabilize, minimizing drooping and encouraging robust root establishment.
Tomato plants often droop in response to stress factors such as soil dryness or nutrient deficiency shortly after transplanting. When you establish a routine of deep watering, you not only alleviate immediate hydration needs but also promote deeper root growth. Conversely, if the soil remains too dry despite watering, check the watering frequency and the soil texture to confirm that it retains moisture well.
As the growing season progresses, particularly during hot summer months, adjust your watering schedule to accommodate increased evaporation and plant uptake. Incorporating mulch around the base of the plants can provide insulation and moisture retention, preventing them from drooping during peak heat. If the weather has been unusually cool or wet, be ready to adapt your approach – consider reducing irrigation to prevent root rot.
Tomato plants can droop after transplanting due to shock from sudden exposure to a different environment, especially if they were grown indoors. Transitioning them gradually helps their cells adapt to changes in sunlight and temperature, preventing shock-related drooping. If your plants droop despite acclimation, check for extreme temperature swings or improper watering.
During hot summer months, you may need to extend the acclimatization period, ensuring your tomatoes gradually adjust to higher temperatures. If cool weather arrives unexpectedly, consider providing shade during the hottest part of the day to reduce stress. If they droop after such changes, check for signs of sunburn or underwatering.
Transplant shock can occur when tomato plants are exposed to sudden changes in soil conditions, moisture levels, or environmental stress. By developing a robust watering plan and ensuring proper drainage, you significantly reduce the chances of dehydration or suffocation, thereby promoting better root establishment. Inside your plan, incorporate mulching techniques to help retain moisture and regulate soil temperature. Organic mulches can decompose slowly, contributing nutrients back to the soil while combating heat stress during extreme temperatures.
Consider adjusting your plan seasonally, as tomatoes may require more frequent watering in the hotter months. Additionally, planting young tomatoes in an area with a bit of afternoon shade can help lessen initial transplant stress. A seasoned gardener knows that each plant’s needs may change over time; being adaptive to these changes ensures a stronger garden overall, preventing a recurrence of transplant issues. Recognizing the patterns of moisture loss during different weather conditions will enable you to provide timely care for your plants, such as watering more frequently during hot and dry spells. Furthermore, understanding how different tomato varieties handle moisture stress is beneficial; some may thrive in drier conditions compared to others that prefer consistent moisture.
Step 5 – Look for Leaf Recovery Signs in Tomatoes
Start by checking the soil moisture around your tomato plants; it should be consistently damp but not waterlogged. Observe the leaves closely for signs of wilting, particularly at the tips or edges, which indicates water stress. Recheck the moisture levels daily for the first week after transplanting to monitor improvements or further decline.
A fully recovered tomato plant will display vibrant, upright leaves with a firm texture, indicating healthy water uptake. In contrast, if drooping returns, the leaves may exhibit a limp and soft feel, signaling ongoing stress. If the color shifts to a dull green or yellow, investigate nutrient deficiencies or root damage.
If wilting persists despite proper care, assess the plant’s root system by gently digging around the base. If roots appear blackened or mushy, consider reshaping or repotting to allow for better drainage. Alternatively, try lightly fertilizing with a balanced solution to reinvigorate nutrient uptake.
A fully recovered tomato plant will exhibit firm and vibrant green leaves, standing upright without wilting. In contrast, if the drooping reappears, the leaves may show signs of wilting and a light yellow tint. If the plant feels soft and spongy, check the root zone for rot. If the soil appears dry but the plant retains color, consider increasing your watering frequency.
If drooping persists despite adequate soil moisture and sunlight, consider adjusting the transplanting timing, as extreme heat or cold can affect recovery. Furthermore, if the leaves continue to droop and develop spots, inspect for pests or diseases that may have emerged post-transplant. In such cases, you might need to apply an organic fungicide or pesticide to mitigate further damage.
A healthy tomato plant, once recovered, should show upright leaves, vibrant green color, and noticeable new growth—these indicate that it has resumed proper functioning. Regularly checking for these signs is crucial in determining if your care measures are having the desired impact. In certain cases, plants can show signs of recovery within one to three days, but be patient—some may require longer adjustments before vibrant health is restored. A potential indicator that plants are at risk for relapse could be if you notice a lack of new leaf formation; this suggests that deeper root problems may need to be addressed.
If you notice returning drooping or yellowing, re-evaluate soil and watering conditions. Keep in mind that multiple factors can contribute to poor recovery, such as nutrient deficiencies and pest infestations, so a thorough investigation of environmental conditions may be warranted. The integrated approach of assessing leaf development alongside soil moisture takes into account the complex interactions that affect transplant recovery. It’s vital to recognize the timing of your monitoring routine; ideally, check every 2-3 days during the recovery phase to identify setbacks promptly. If issues persist, consider soil tests to check for nutrient levels or consult with a local extension service for tailored advice.
FAQ
How long does it take for drooping tomato plants to recover?
Recovery can take anywhere from a few hours to several days, depending on underlying issues and soil conditions. After watering and addressing environmental factors, you should start seeing signs of improvement within 48 hours. Persistent lack of improvement may signal the need for further diagnosis of potential issues.
Should I remove leaves that are already drooping?
It’s best to wait before removing any drooping leaves, as they may still recover once the plants stabilize. However, if the leaves are dark or mushy, they should be trimmed to prevent further stress. Timing this action is crucial; immediate removals can postpone recovery efforts as the plant focuses on repairing itself.
Can overwatering cause drooping in tomato plants?
Yes, overwatering is a common issue that can lead to drooping. If the soil is waterlogged, it can suffocate the roots and hinder their ability to absorb necessary nutrients and moisture, worsening the drooping over time. Checking the condition of the soil before watering is vital; if it appears wet on the surface, it’s often a good idea to delay watering.