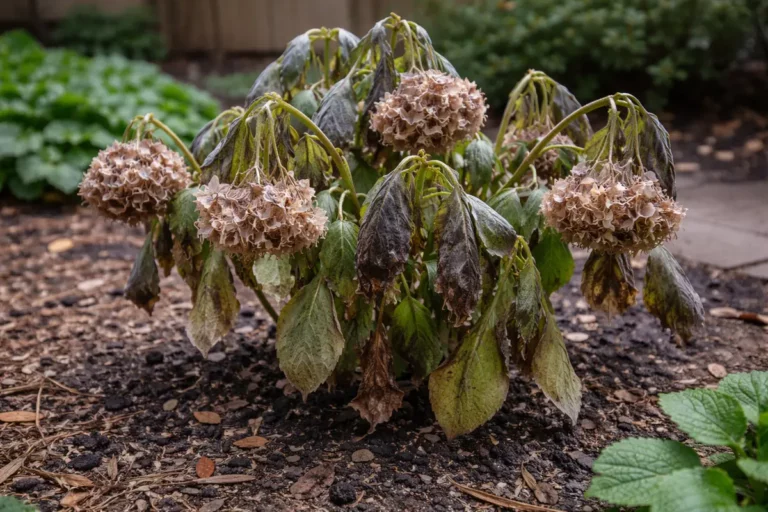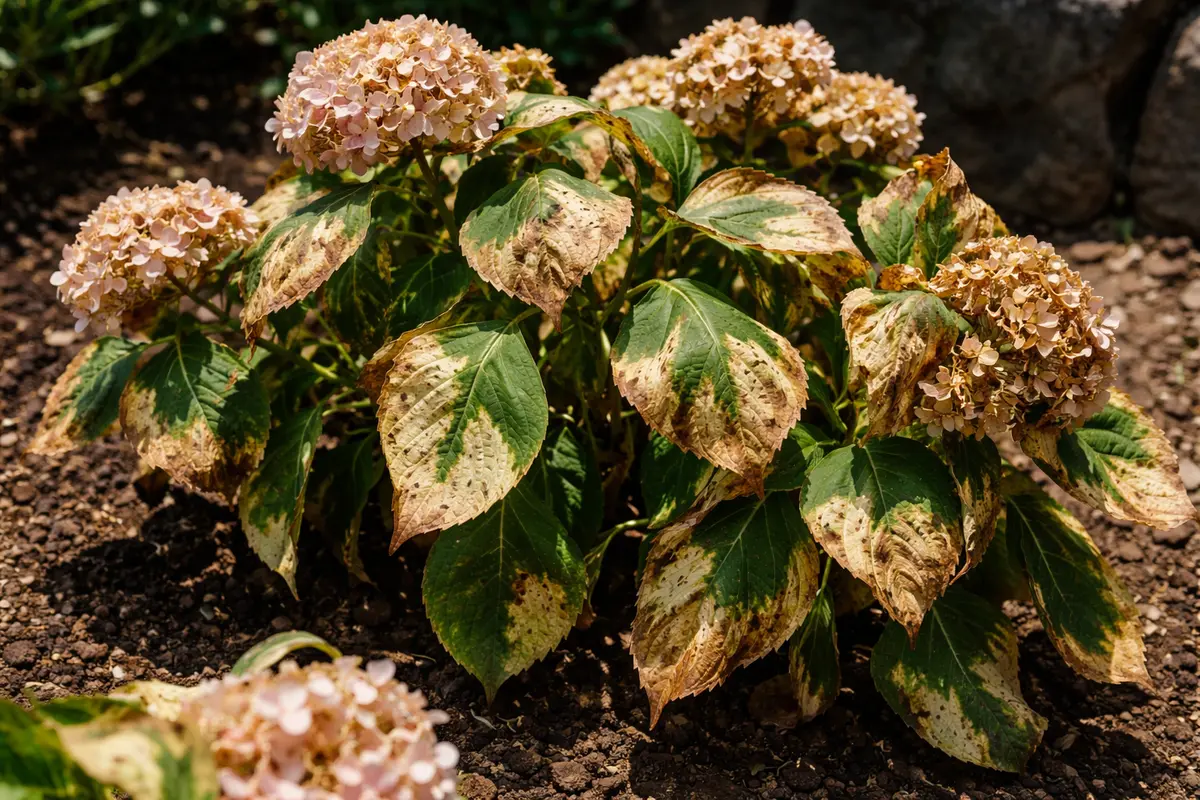
You may notice that your hydrangeas are looking particularly sad and limp during a heatwave, which is why you need to know why are my hydrangeas drooping during a heatwave. This drooping occurs due to the plants’ struggle to retain moisture under extreme temperatures, leading to wilting and stress. Ignoring this issue can weaken the plant and lead to more damage, but fixing it is possible now with some careful watering and shading adjustments.
Step 1 – Water Hydrangeas Deeply to Revive Wilting
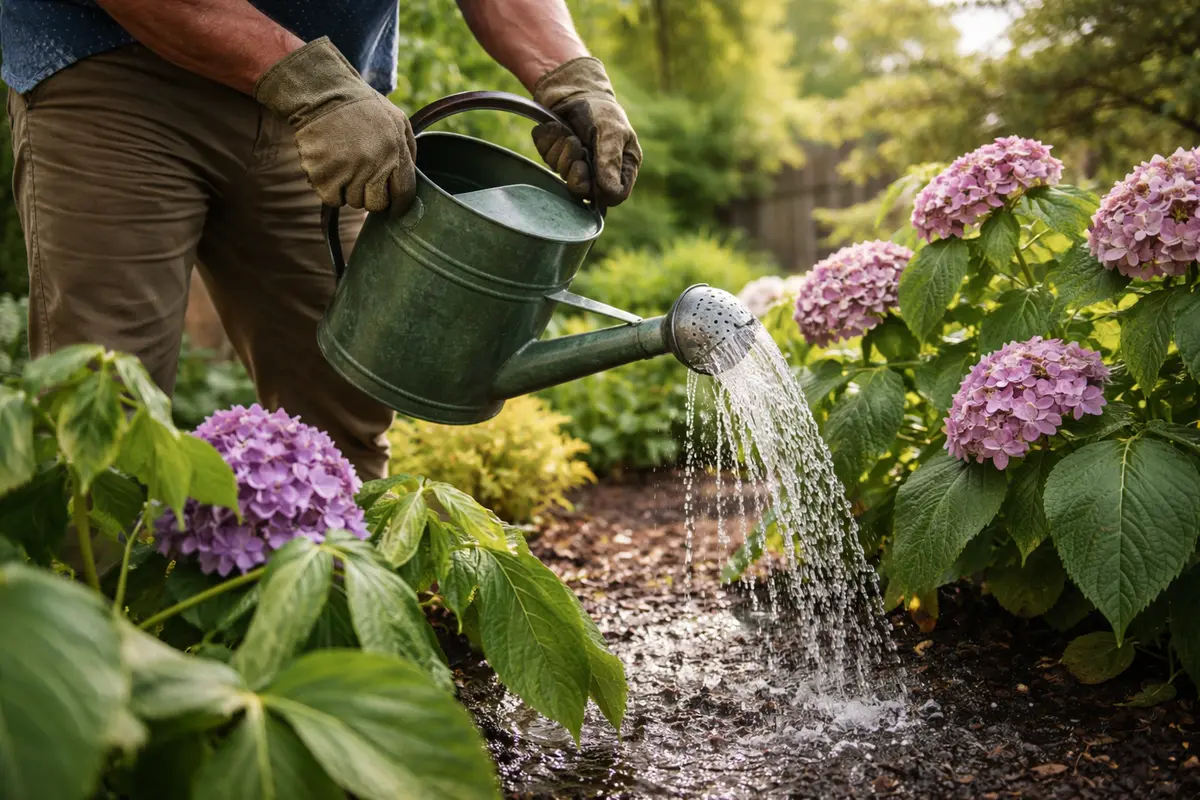
Water your hydrangeas thoroughly right away, ensuring each plant receives at least two to three gallons of water, depending on its size. Look for signs of revival within a few hours as they begin to absorb moisture. Aim to ensure the water penetrates at least six inches deep into the soil, a crucial depth for reaching the hydrangeas’ root zone. If you’re unsure, a simple way to check is by digging down with your fingers or a small trowel; if it feels dry beneath the surface, those roots are not getting the hydration they need. Watering less deeply may only hydrate the top layer of soil, which is insufficient for recovery. Hydrangeas generally can withstand some level of drought but require deep hydration to bounce back effectively during the stress of a heatwave.
Hydrangeas are particularly responsive to deep watering after suffering from heat stress, which promptly restores their hydration levels. The extreme heat causes moisture to evaporate quickly from the soil, leading to wilting and drooping if not addressed immediately. Intensive watering replenishes the roots, enabling the plant to function normally again. If you notice a significant boost in foliage firmness within hours, it indicates that the watering was effective and the roots are beginning to rehydrate. Conversely, if they remain droopy or limp after watering, this can signify compromised root health, which may require further attention.
A common mistake gardeners make is watering too superficially, mistakenly assuming a quick splash is sufficient. Instead, focus on ensuring that water penetrates deep enough. This helps avoid the situation where only the upper soil appears moist while deeper roots remain dry. If the plants still seem droopy after thoroughly watering and showing no signs of recovering within 6 to 12 hours, it could indicate a deeper issue with root health. At this point, you may want to prepare for further investigation to ensure they are not suffering from problems such as root rot or soil compaction. If the drooping persists, assess your watering technique to avoid excessive surface irrigation in the future, which often leads to recurring wilting.
Step 2 – Investigate Soil Moisture Levels for Hydrangeas
Begin by checking the soil moisture around your hydrangeas. Water them deeply if the top inch of soil feels dry, and ensure to do this in the early morning or late afternoon to avoid evaporation. After proper watering, you should observe the leaves perk up within a few hours, indicating relief from heat stress.
When hydrangeas droop during a heatwave, it’s often due to inadequate water uptake, as the roots struggle to absorb moisture from dry soil. The high temperatures increase evaporation rates and can cause the plant to lose water faster than it can be replenished. In contrast, if the soil remains consistently moist and the plant still droops, look for root rot, which can also hinder water absorption.
If the soil smells sour or appears waterlogged, it’s crucial to adjust your watering habits and improve drainage to prevent root rot. Alternatively, if your hydrangeas are receiving too much direct sunlight despite being well-watered, consider relocating them to a spot with partial shade during the hottest part of the day to alleviate stress.
Hydrangeas droop primarily due to a lack of water during heatwaves, leading to a loss of turgor pressure in their cells. When soil moisture is low, roots struggle to absorb enough water to keep the leaves firm, causing wilting. If the soil remains dry, the plant will continue showing signs of stress, unlike well-watered plants that retain their shape and vitality. If you notice that the top inch of soil feels dry but the roots remain wet, the situation may require a different approach, such as improving soil drainage or aeration.
If the soil is dry but your hydrangeas are still drooping, check for root rot by gently pulling on the plant; if it resists substantially, inspect the roots for a foul odor, which is a sign of decay. In contrast, if the plant easily comes out of the ground, then root damage may have occurred, necessitating repotting and proper root care. Take note of competing weeds nearby that could siphon off moisture at critical times, exacerbating the drooping condition. If the soil is consistently dry, consider checking the type of soil in which your hydrangeas are planted; soil that is too sandy may drain moisture too quickly, while clay can suffocate roots by retaining too much water. Properly analyzed soil conditions can lead to better watering techniques to prevent drooping.
Furthermore, hydrangeas thrive in well-drained, consistently moist soil, and too little moisture directly leads to drooping. A soil texture that appears bone dry indicates that the roots may not receive the necessary water to function optimally, thus causing wilting. Conversely, overly wet and compacted soil could similarly lead to root rot, causing drooping as well. To avoid these contrasting scenarios, assess the moisture retention capability of your soil mix and amend it wisely to benefit your hydrangeas. This might involve incorporating organic matter to improve moisture levels and help regulate soil pH.
Step 3 – Test for Root Damage in Drooping Hydrangeas
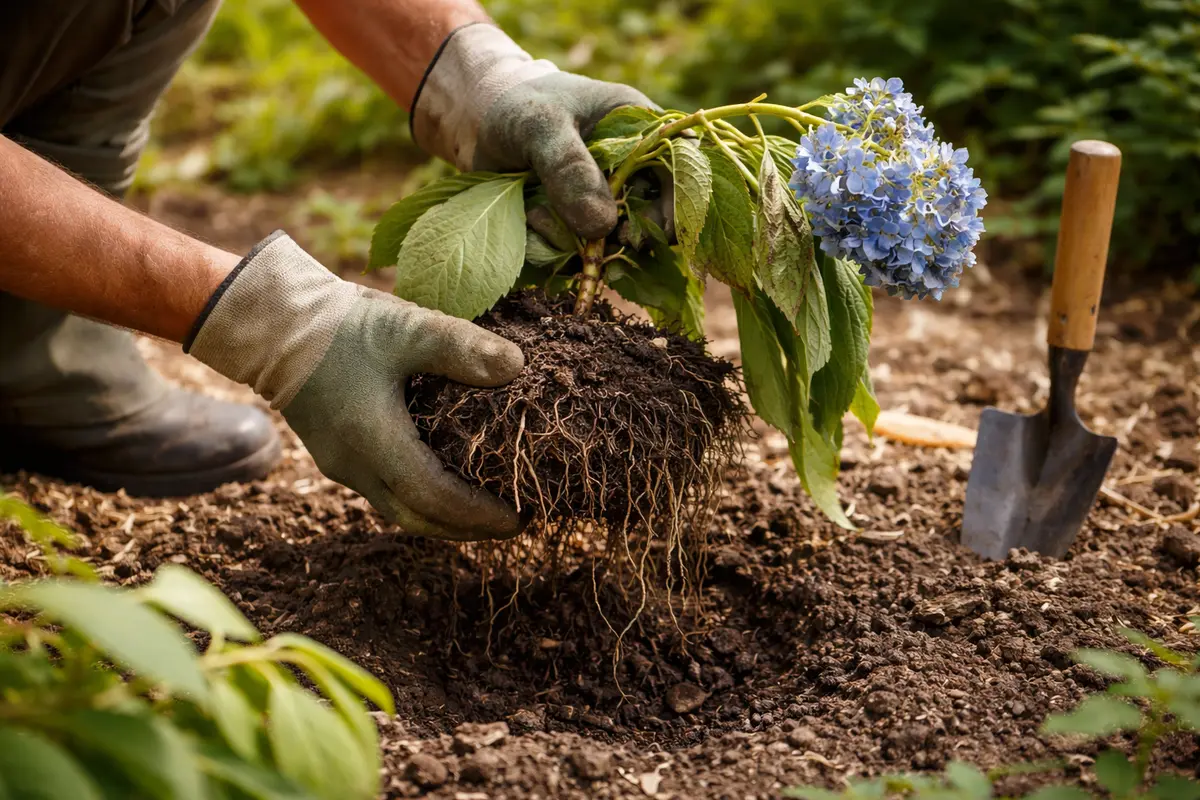
Inspect the roots of the hydrangeas to check for damage. Healthy roots should appear white and firm, whereas damaged roots will be brown or mushy. Identifying these conditions early on helps clarify the next steps for recovery. If root systems are compromised, this directly correlates to the plant’s ability to absorb water and nutrients effectively, leading to drooping.
When roots are mushy, it generally indicates root rot, which can be triggered by waterlogged soil without sufficient airflow for extended periods. Conversely, if the roots feel firm but exhibit some browning, it suggests stress, which could be reversible with proper care, such as adjusting your watering schedule. If you notice a clear distinction between healthy and unhealthy roots, trimming away the damaged parts may be necessary to encourage new growth. If the plant exhibits minimal vitality post-trimming, re-evaluating its placement to ensure it does not receive excess afternoon sun may further support recovery.
If you’re uncertain about the health of the roots, allow the plant to stabilize with consistent watering and monitor its response over a few days. If no signs of recovery appear within a week, consider trimming away any affected roots and repotting the plant into fresh, high-quality soil. This approach provides a healthier growing medium for the remaining healthy portions of the root system, allowing for greater moisture and nutrient absorption. Should symptoms still persist after repotting, it might signal the need to consult a professional, especially if the drooping continues unabated. Recurring symptoms often suggest that factors such as pH imbalance or pest infestations might also require examination.
Step 4 – Apply Mulch to Hydrangeas for Heat Recovery
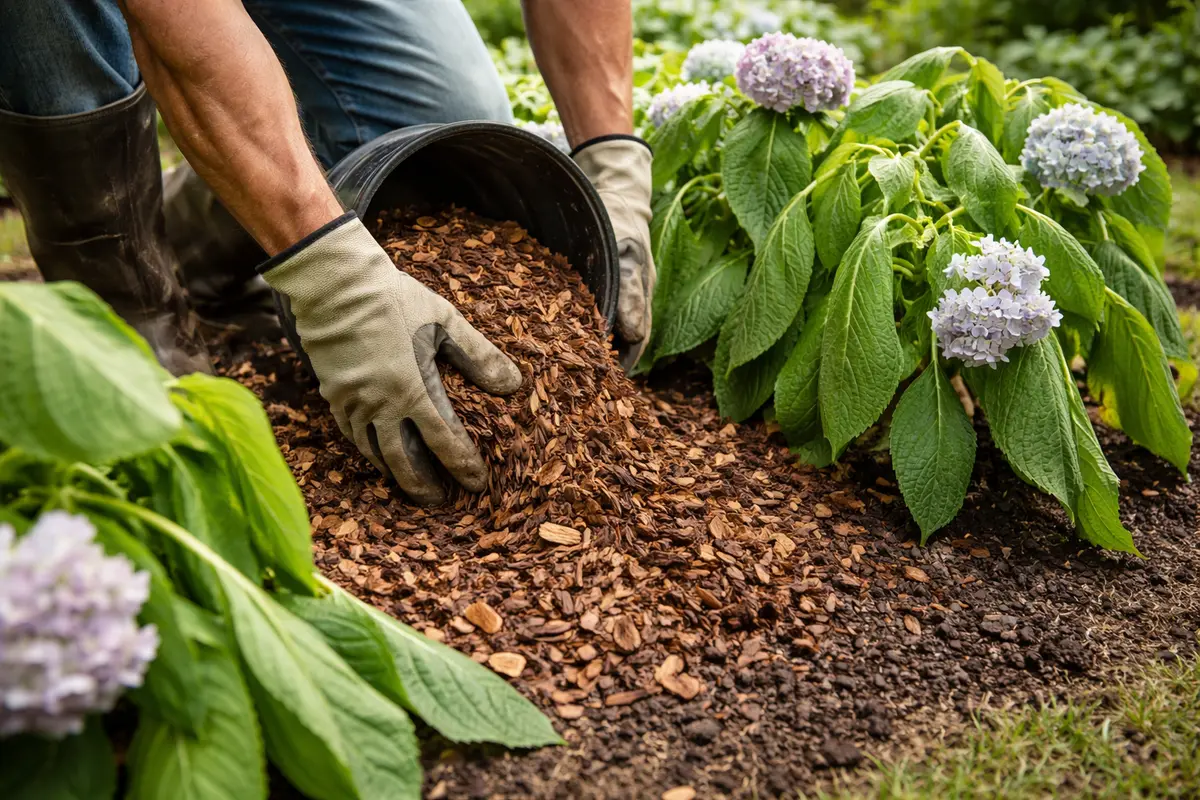
Apply a layer of organic mulch around the base of the hydrangeas to help retain moisture effectively. You should observe a more stable moisture level in the soil as this layer prevents excessive evaporation by creating an insulating barrier against sunlight. Additionally, optimal mulch conditions regulate soil temperature, which is crucial during hot weather. Aim for a thickness of about two to four inches of mulch, striking the balance between moisture retention and airflow.
Adding mulch keeps the soil cool and improves its moisture retention capabilities. This becomes especially important during heatwaves when rapid soil evaporation can dry out roots quickly. As such, maintaining consistent soil moisture will assist in recovery from prior wilting. Furthermore, as the mulch decomposes, it gradually releases nutrients back into the soil, providing ongoing benefits for the hydrangeas. Regularly check the mulch layer for signs of decomposition; if it begins to compact, fluffing it up will restore its moisture-retentive qualities.
One mistake many gardeners make after applying mulch is overwatering, thinking the plants need more water due to the heat. However, this can lead to waterlogged soil and create conditions favorable for root rot. Instead, maintain a balanced routine that keeps moisture levels under control; drowning out the roots can result in a much more significant decline in plant health. If you observe the soil remaining damp longer than expected after watering, it could signify that the mulch layer is too thick or that compaction is obstructing proper drainage. Regularly check the health of both the hydrangeas and mulch—if insects or pests start to invade, consider adjusting the mulch source to prevent future issues.
Step 5 – Water Hydrangeas Consistently to Avoid Heat Stress
Water your hydrangeas deeply at their base every morning to combat drooping during a heatwave. By ensuring the soil remains consistently moist, you will notice a significant improvement in your plants’ posture and vibrancy throughout the day. If you see the plants drooping by mid-afternoon, it may indicate inadequate moisture reaching the roots. Establishing a morning routine minimizes water loss due to the sun and helps to counteract the heat stress caused by daytime temperatures, ensuring your plants thrive even in challenging conditions.
Hot, dry conditions typically lead to increased evaporation from the soil, which causes drooping. Hydrangeas that receive adequate moisture will maintain their structure and bright appearance. Additionally, monitor the soil closely; if you observe cracks beginning to form on the surface, immediate action is required to provide the necessary water, preventing severe dehydration and damage. Understand the particular needs of your hydrangeas; some varieties may require more frequent watering than others, especially in scorching conditions.
As summer progresses, adjust your routine by adding mulch around the base of your hydrangeas. This additional layer helps retain soil moisture and regulate temperature, providing further protection against heat stress. In extreme conditions, such as when temperatures spike above 90°F for several consecutive days, consider increasing your watering frequency to every day, as swift evaporation can quickly jeopardize your plants’ hydration levels. Hydrangeas typically require about one inch of water per week, sourced from rainfall or irrigation. In particularly hot conditions, watering early in the morning or late in the evening helps minimize evaporation and optimize water absorption, ultimately resulting in stronger, healthily-structured plants.
Monitor the weather conditions closely; if temperatures rise unexpectedly, adapting your watering frequency and amount accordingly often proves beneficial in maintaining health and resilience. Regularly checking the soil with your fingers ensures that you’re aware of its conditions; if it feels dry an inch below the surface, it’s time to water—even if you’ve recently watered. This level of attentiveness increases the chances of avoiding severe hydration issues as heatwaves persist.
Step 6 – Check Hydrangea Leaves for Signs of Rehydration
Start by checking the moisture level of the soil around your hydrangeas. Use your fingers to dig about an inch into the soil; it should feel damp but not waterlogged. If the soil is dry, give the plants a deep watering in the morning or late evening when temperatures are cooler, and observe how the leaves perk up within a few hours.
A fully recovered hydrangea will exhibit vibrant, upright leaves and blooms that return to their normal fullness, contrasting with the early signs of drooping where leaves may appear limp and lose their luster. As the plant recovers, the texture of the foliage should feel firm and resilient, while a return to drooping may present with leaves that feel soft and wilted under light pressure. If the leaves are turning yellow alongside drooping, your plant may be experiencing stress from too much sun or insufficient water.
If drooping returns even after proper watering, consider providing afternoon shade by strategically placing shade cloth or nearby taller plants. If the issue persists, re-evaluate your watering routine; frequent, shallow watering can lead to a stressed root system. Look closely for signs of root rot if the soil retains water too long in the heat.
A fully recovered hydrangea showcases plump leaves that feel thick and supple, displaying vibrant color and standing tall. In contrast, early signs of the problem returning include leaves that appear wilted, with a brittle or parchment-like texture and a subtle yellowing at the edges. If your hydrangeas begin to droop again, check for lingering dry soil or drooping stems as potential issues.
If the drooping persists despite your care, take the step of providing shade cloth during peak heat to reduce stress. Additionally, consider applying a balanced fertilizer to rejuvenate the plants; however, if you see no signs of improvement after a week, consult a local garden expert for potential pests or diseases that may need addressing.
A fully recovered hydrangea will exhibit vibrant, firm leaves that stand upright, showcasing a healthy green hue without wilting. In contrast, early signs of the problem returning include limp, discolored leaves, which may curl at the edges or develop a dull texture. If you notice this limpness returning despite proper watering, the flowers may also droop again instead of opening fully, indicating an immediate need for corrective actions. Observing these signs in your hydrangeas can help decipher when additional care is needed.
If the drooping persists despite following these care steps, reapply mulch around the base of the plant to aid in moisture retention and temperature regulation. If symptoms continue after mulching, it may be time to move the plant to a slightly shadier location or consult a local garden center to inspect for pests or root rot issues that may have emerged. A healthy plant typically shows resilience if rehydrated effectively; a lack of improvement may indicate deeper problems, such as disease or improper pH levels, requiring further evaluation. Continually tracking your hydrangeas’ progress within the recovery phase is crucial, as this may dictate future steps in the care process.
Ideally, you should begin to see firmer leaves within a week after implementing these recovery steps. However, if the leaves are still exhibiting signs of wilting or drooping after providing consistent care, this could suggest a more significant underlying issue that likely requires professional assessment. Continued discoloration or browning on the leaves could signify prolonged stress or disease, indicating that something beyond simple hydration is at play. Tracking progress closely will be key during this recovery phase; should symptoms recur, consider consulting an expert for further evaluation and treatment options that align with maintaining a healthy garden.
FAQ
Can I save my hydrangeas during a heatwave?
Yes, with immediate and consistent care, you can rescue your hydrangeas from heat stress. Focus on deep watering, mulching, and closely monitoring soil moisture levels, as these practices are critical for the plant’s recovery. By taking these steps, you can significantly increase your chances of successfully revitalizing them. Keep in mind that sustained attention will greatly amplify results.
How long does it take for drooping hydrangeas to recover?
Hydrangeas usually show signs of recovery within a few days of implementing proper care practices. Consistent watering and monitoring can trigger a visible change within a week; look for firmer leaves and new growth as signs of improvement. However, if there is any delay in recovery or signs of continued deterioration, investigating root problems or pest issues may help clarify the necessary additional actions required to support their recovery.
Should I prune my hydrangeas after they droop?
Pruning is generally advisable only after the heat stress period has passed. Avoid trimming immediately after a heatwave unless severely damaged parts are present. Allow the plant time to recover fully before assessing any necessary pruning, which can help promote healthy new growth. Assess your hydrangeas carefully for any extra measures that might be needed alongside pruning to enhance overall health during the recovery period.