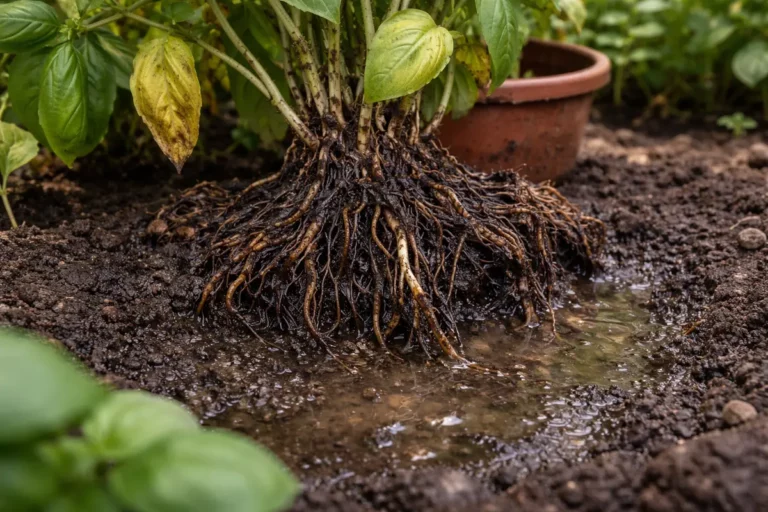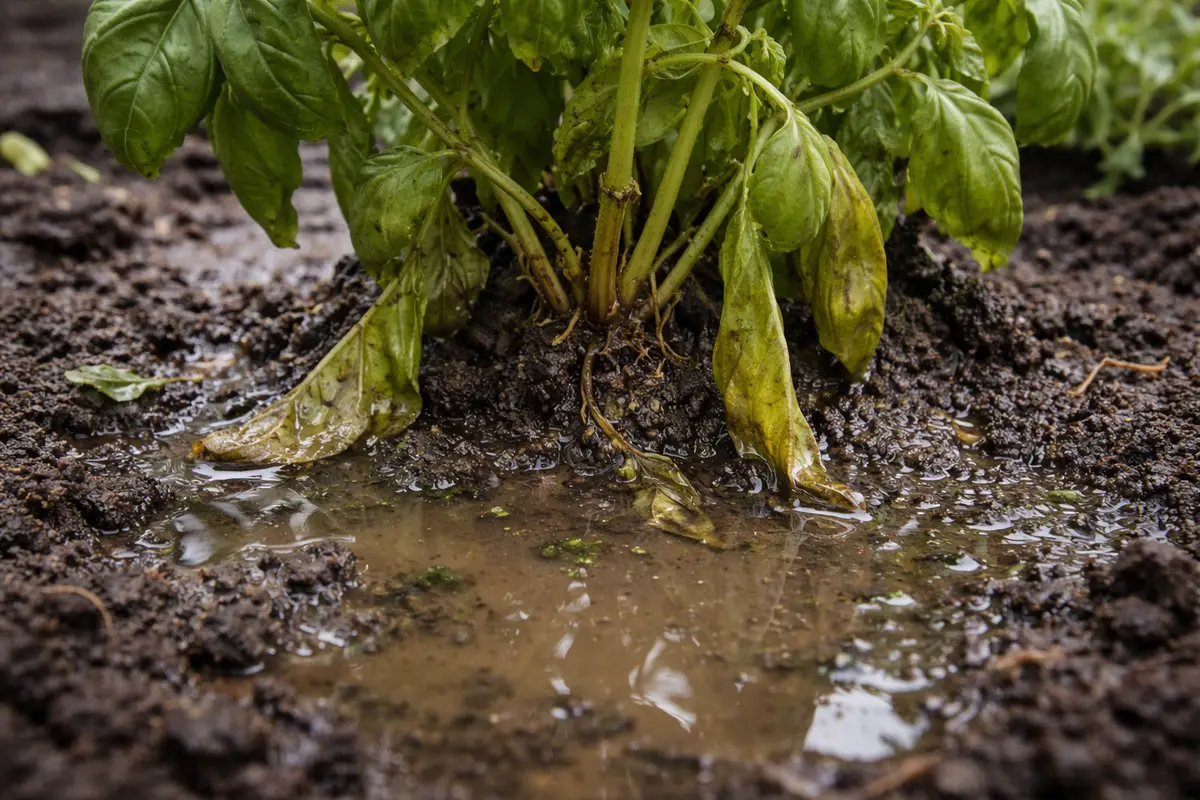
You may notice your potted herbs appearing droopy and yellowing after a period of consistent overwatering, which is why you need to know how to fix root rot in potted herbs after overwatering. The roots are likely suffering from a lack of oxygen due to soggy, mushy conditions that lead to rot. If left untreated, this problem worsens and weakens the plant, making recovery harder to achieve. Fortunately, you can inspect, trim, and adjust your watering habits to restore your herbs back to health.
Step 1 – Remove Excess Water from Herb Pots
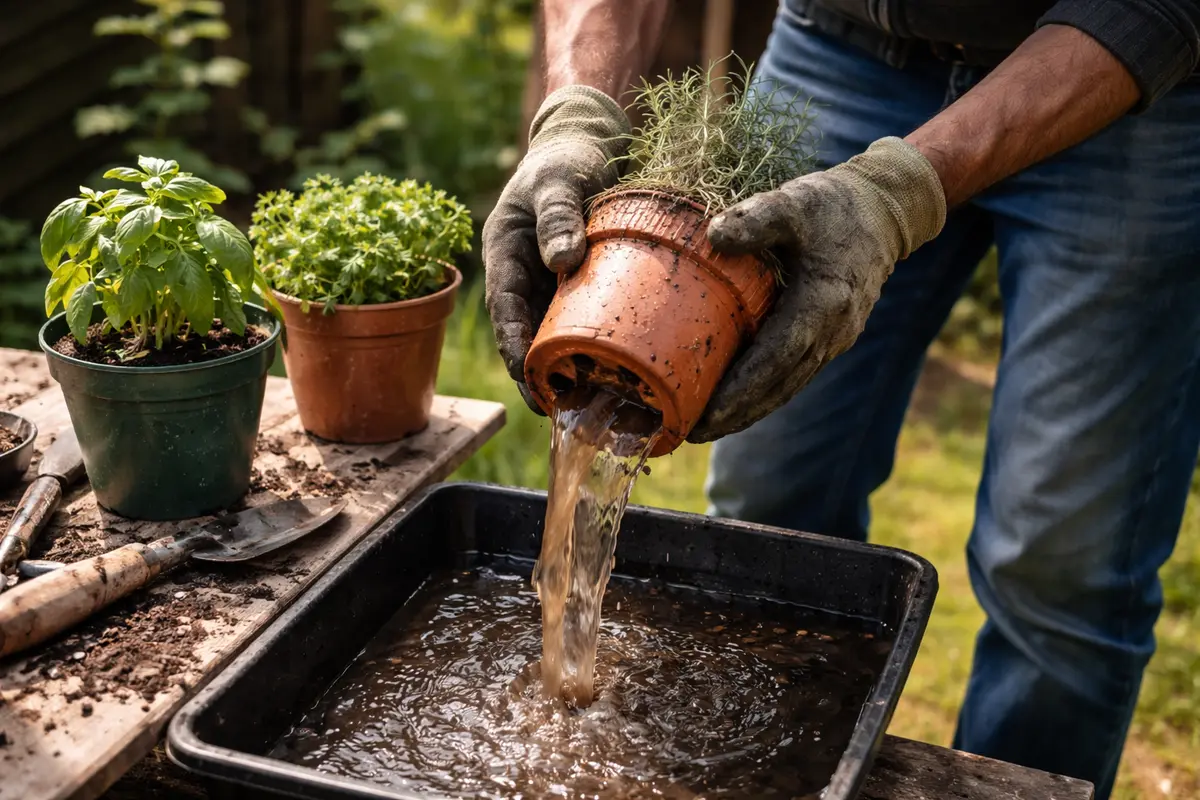
Start by tilting the pots slightly to drain out any excess water. You will notice that runoff will begin to flow out of the drainage holes at the bottom of the pots. If water quickly drains, it confirms that drainage holes are functioning, but if water continues to pool, further action is necessary. Aim to have about 30 seconds of draining before assessing whether additional measures are needed.
Quickly removing excess water from the pots is crucial as it alleviates immediate stress on the roots. Saturated soil deprives the roots of the oxygen they need for metabolic processes; without prompt action, the situation can worsen, leading to fungal growth and irreversible damage. In my experience, acting swiftly to drain excess water within the first hour of noticing droopiness has often helped to mitigate further loss. Additionally, placing the pots in a sunny location for a few hours can help evaporate excess moisture, but avoid putting them under direct, scorching sunlight for prolonged periods, as this can stress the plants. A careful watch over the herbs during this time can prevent unanticipated heat damage.
A common mistake gardeners make is neglecting to check for drainage issues in container gardening. Often, the pots are either too small or lack sufficient drainage holes, resulting in standing water at the bottom. This can lead to chaos in health, especially when temperatures rise and evaporation increases moisture levels. If ponding persists after draining, standard pots without drainage holes might worsen the root situation. In such cases, consider repotting into containers designed specifically for better drainage options, such as those with larger drainage systems or even adding a layer of gravel at the bottom of the pot to foster better water flow. If prolonged drainage issues arise again, look further into the soil mix, as heavy soil can particularly contribute to compaction and water retention.
Step 2 – Assess Water Drainage in Herb Containers
Examine the drainage holes in your pots to ensure they aren’t blocked. You will see whether water is escaping freely or if it sits stagnant at any point. If the holes appear clogged, use a thin object like a chopstick or a skewer to gently poke through the soil to clear the passage. Make this inspection visible by moving the pot to a slightly elevated area, allowing you to observe more easily the drainage pattern.
Checking the drainage is essential as it informs you about the pot’s capability to release excess moisture. When the soil retains too much water, the roots cannot breathe, resulting in the stress indicators you’re observing. Furthermore, if the water sits too long, it may lead to fungal infections that jeopardize the roots. A musty odor also indicates this condition. In instances where soil is heavy and dense, consider switching to a lighter potting mix that enhances drainage, such as one composed primarily of peat and perlite. This kind of mix helps retain moisture without sacrificing oxygen levels for the roots and can assist in recovery if root rot is still an issue.
If you notice a sour smell coming from the soil, this is a sign of root rot, indicating that the soil is likely compacted and deteriorating. Inspect for mushy roots while still assessing the overall health of your herbs. If you encounter this, don’t hesitate to replace the soil entirely with fresh, well-aerated mix instead of just trying to adjust the current setup. However, if the odor persists even after replacing the soil, this may indicate deeper issues such as root damage or a bacterial infection that could require further treatment or a professional consultation. When considering next steps, observe if newer growth is pushing through the drainage holes, as this typically suggests a moving recovery.
Step 3 – Replant Herbs in Fresh Soil for Recovery
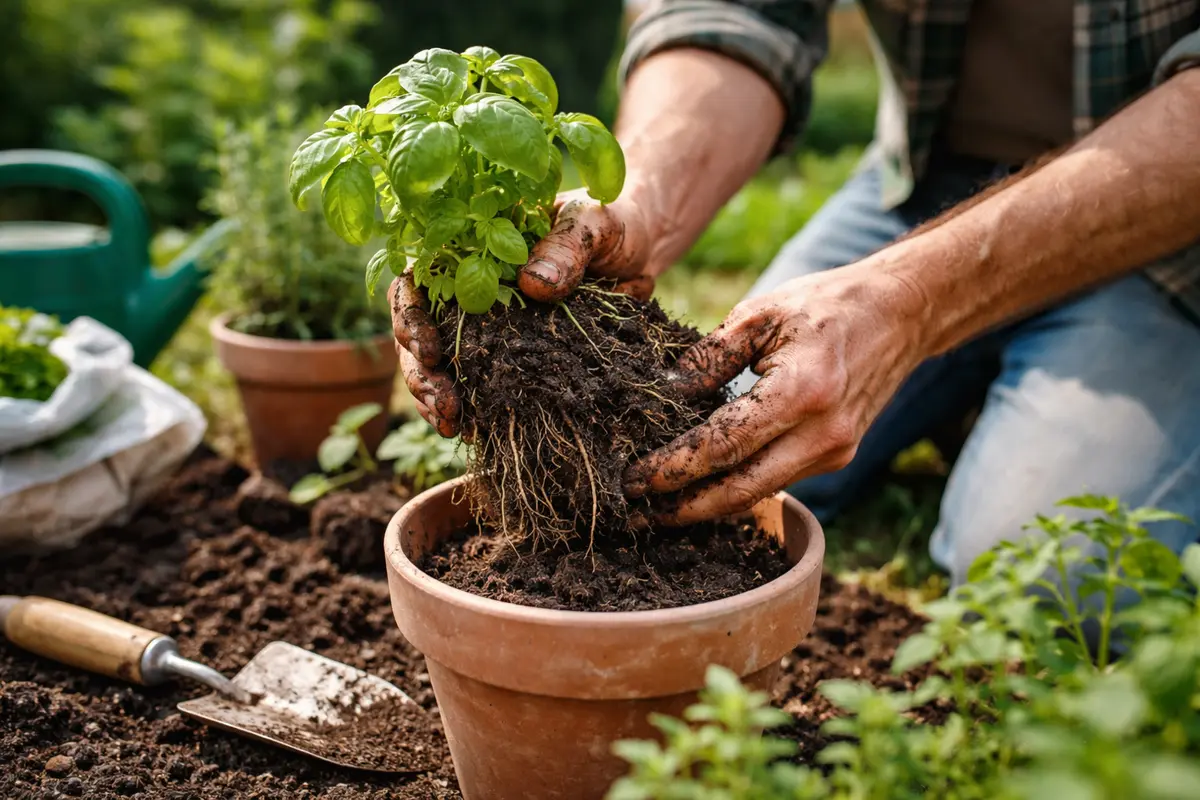
Start by carefully removing the herb from its pot and inspecting the roots. Grab a pair of clean scissors and trim away any mushy, darkened roots while being mindful not to cut into any healthy sections of root. Repot the plant in fresh, well-draining soil, ensuring that you provide ample soil medium to encourage upward growth without compacting. Within a few days, you should notice new root growth visible through the drainage holes or small green shoots emerging from the soil as signs of recovery. Consider adding a touch of water after replanting, but ensure the new soil is not saturated.
The recovery timeline can vary depending on the herb and growing conditions, typically taking two to four weeks for noticeable regrowth. A healthy regrowth includes vibrant green leaves and stable, firm roots, indicating that your herb is rebounding well. Warm temperatures and bright, indirect light will speed up recovery, while excess humidity or low light can hinder it significantly; if leaves wilt despite regrowth, check the soil condition and adjust watering frequency. For herbs sensitive to shock, like rosemary or oregano, watch closely for any changes—these can sometimes be slower to respond.
Avoid overwatering or adding too much fertilizer during recovery, as these can exacerbate root rot. While herbs like basil can bounce back quickly, other varieties like rosemary need a longer time to stabilize; if leaves begin to yellow shortly after repotting, check for soggy soil or inadequate drainage and adjust immediately. A slow re-establishment of nutrient balance is vital, so adding a diluted nutrient solution only after the new growth is evident can prove beneficial here. Replanting not only removes the suffocating soil but also gives the roots a fresh environment to begin their recovery—without the overwhelming stress of the previous conditions. Over the next week, look for visual cues that indicate recovery, such as upright leaves and new growth emerging from the center of the plants; this is a positive signal that your herbs are bouncing back. As recovery continues, you may find additional small leaves sprouting that weren’t evident before.
A common mistake during recovery is over-fertilizing, thinking that the herbs need immediate nutrition. Overcompensating can lead to root burn or further root stress, negating your efforts. Therefore, hold off on adding fertilizers until the plants show consistent signs of health over a week or two. Also, avoid top-dressing with organic matter at this stage; while it sounds beneficial, it can introduce excess moisture that your recovering plants do not need.
Step 4 – Water Herbs Sparingly After Overwatering
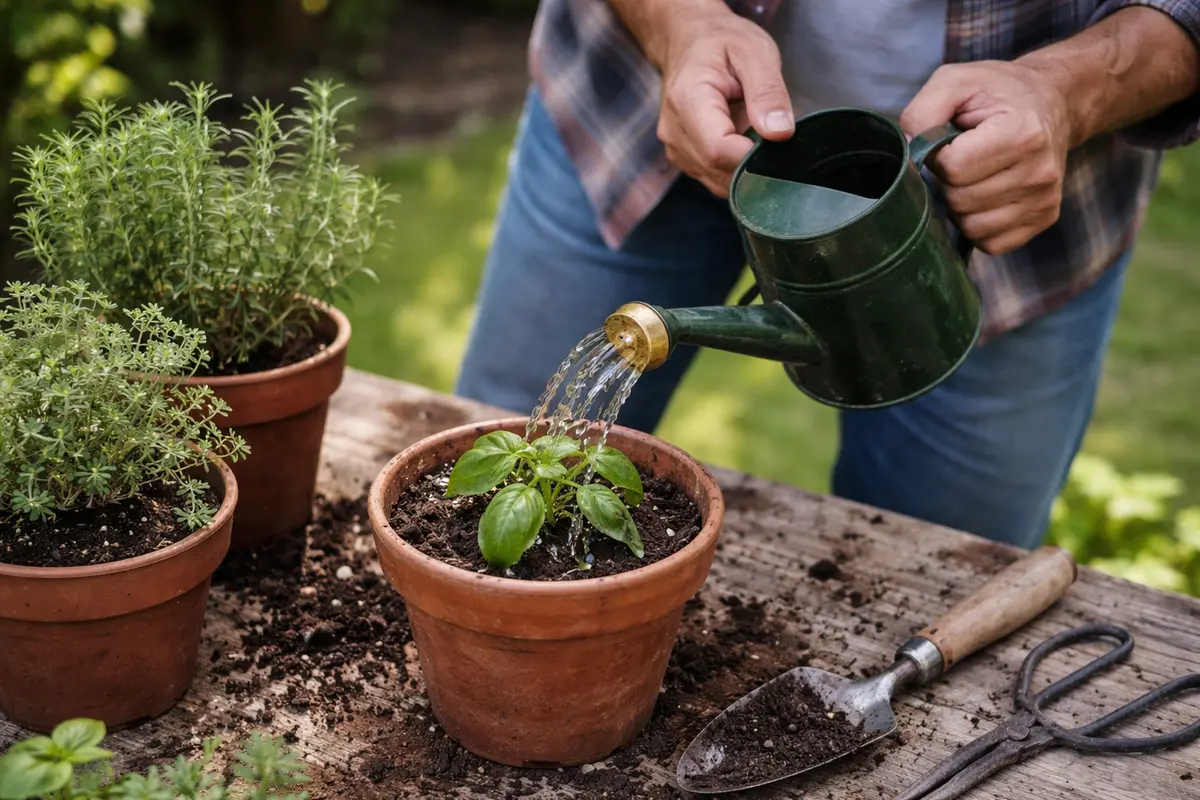
Start by allowing your potted herbs to dry out between waterings, ensuring the top inch of soil feels dry before rehydration. This practice establishes a healthier watering routine, preventing excess moisture from settling around the roots and reducing the risk of root rot.
Overwatering often occurs in high humidity or poorly draining soil conditions, leading to stagnant water that encourages fungal growth. By adopting a schedule that checks soil moisture and allowing for proper drainage, you address the root cause of the issue, contrasting with potential symptoms like yellowing leaves or wilting that can prompt overwatering.
In warmer months, when evaporation increases, adjust your watering routine to be more frequent while still allowing soil to dry out. Additionally, consider using a moisture meter for a more accurate reading; if not this, check that your pots have sufficient drainage holes to avoid recirculating excess water.
Adjusting your watering routine is vital because frequent watering can re-establish the conditions that led to rot. Roots need a dry phase to absorb oxygen effectively; without it, they could again suffocate or experience rot. To avoid repeated issues, you should establish a regular watering schedule where you check the soil moisture levels before proceeding. For instance, watering every 7-10 days in cooler weather may suffice; however, increase frequency to about 5 days during hot spells to keep the soil adequately moist without being soggy. This is particularly true during peak summer months when herbs like basil can naturally demand more moisture. Understanding the signs of overwatering versus underwatering is critical; droopiness generally indicates overwatering, while brittle leaves can indicate underwatering.
Seasonal fluctuations can also affect how much you need to water your herbs. For example, during the summer months when evaporation rates are higher, you can increase watering slightly without permitting water to sit in the bottom of the pot. As indicated, during winter, keep moisture intake significantly lower. Alongside these tips, maintaining a consistent environment helps as well; if your herbs are subjected to rapid temperature changes, they may react negatively to the watering regime you’ve adopted. Always check for weather changes, like incoming rain or a drop in temperature, that can alter your herbs’ water needs, as you may need to adjust your schedule accordingly. Additionally, taking note of the specific light the herbs are exposed to can help guide how often they require watering.
Step 5 – Inspect Herb Roots for Signs of Improvement
Check the roots of your herbs every few days to evaluate their condition and overall health. You should observe firmer leaves and new growth within 7-10 days of adjusting your care. If roots remain dark and squishy, it indicates persistent damage; therefore, take note; if the leaves still droop despite healthy roots, this may indicate a nitrogen deficiency requiring immediate attention. Immediate inspection offers an opportunity to react quickly to any recurring issues.
Frequent inspections allow you to identify any returning issues early on — a key to preventing permanent damage. A fully recovered herb will have roots that appear crisp and white, indicating that they are healthy and functioning well. A quick examination can reveal whether new root growth is progressing or whether the original rot is reappearing. Conversely, if you notice any of the signs of rot returning, such as softness or dark coloring, you will need to rethink your watering schedule again and ensure proper drainage to facilitate healthier conditions. Additionally, keep an eye out for any signs of pests, such as fungus gnats or aphids, which may thrive in overwatered conditions, as they can set back your recovery efforts significantly. Catching these problems early can assist in averting widespread damage.
If you notice deterioration despite implementing these steps, consider consulting a local nursery for advice on potential issues like soil health, pot size adequacy, or specific regional diseases affecting your herbs. Engaging with local gardening communities can provide insights that are more tailored to the unique conditions you may be facing. Furthermore, taking photographs of the symptoms to discuss with experts can be very useful in diagnosing the problem accurately or even diagnosing conditions that your herbs are prone to based on their environment.
FAQ
How long will it take for my herbs to recover from root rot?
Recovery time can vary based on the type of herb, but generally, you should start to see signs of improvement within 7-10 days. Healthy growth can gradually restart if conditions are adequately managed; however, persistent signs of decline may indicate that further action is needed. Be patient, as some herbs like thyme or rosemary may need more time compared to faster-growing varieties.
Can root rot spread to other plants nearby?
Root rot can indeed spread, particularly in containers or close proximity where moisture is retained. If you suspect root rot in one plant, inspect others in the vicinity and adjust their watering habits accordingly. Additionally, make sure to separate the affected plant to prevent potential fungal spores from impacting neighboring plants. Providing adequate distance and air circulation can help mitigate spores moving through water droplets.
Should I remove affected parts of the herbs?
Yes, removing any visibly rotting or dead parts can help your herbs redirect energy towards recovery. However, do not remove too much foliage at once, as this can stress the plant further. A light touch during pruning prevents additional shock; be cautious about trimming, as excessive cutting can harm the overall health further. Monitoring changes closely after pruning is integral to determining if your herb is outwardly displaying signs of stress.