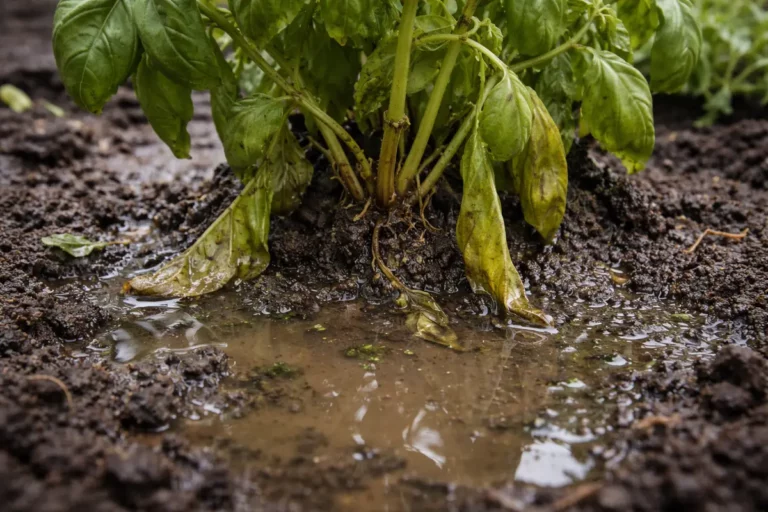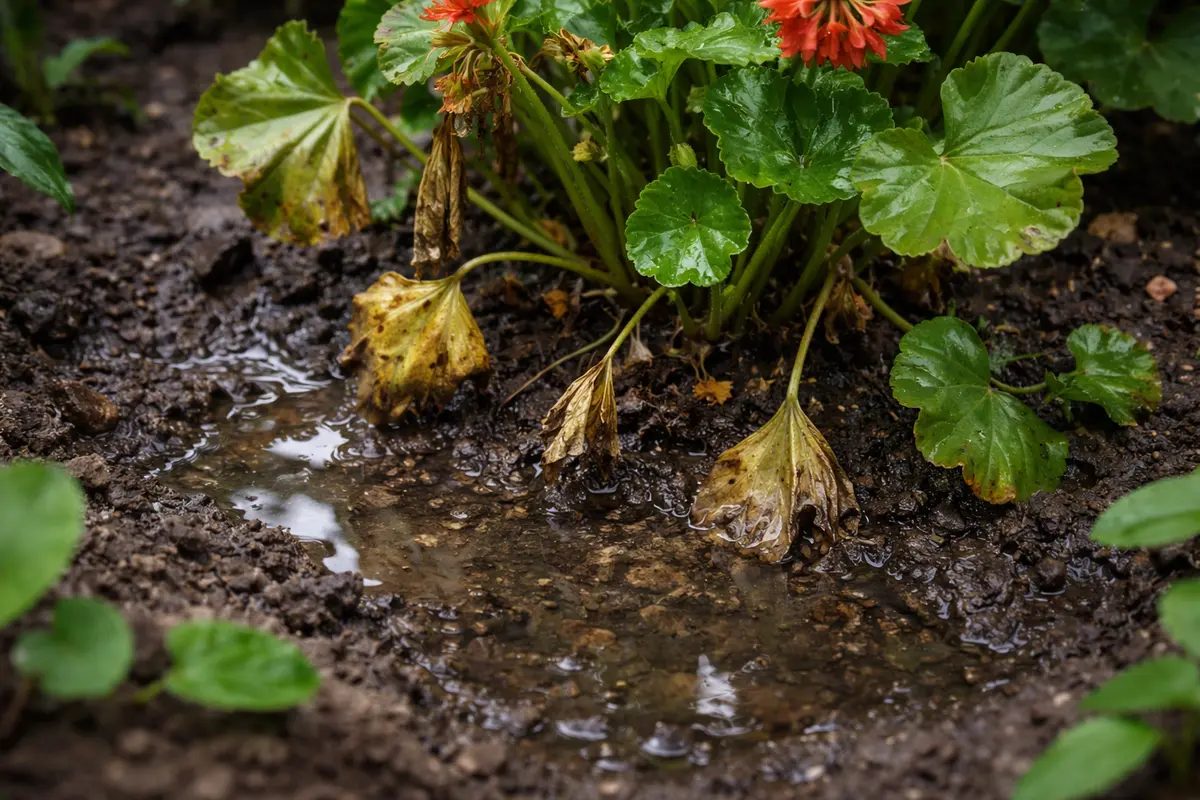
You may notice your geraniums looking wilted and droopy after a period of overwatering, which is why you need to know how to treat root rot in geraniums after overwatering. This condition occurs as the roots become mushy and start to rot due to excess moisture, leading to yellowing leaves and overall plant damage. If left unaddressed, root rot can spread, weakening the plant and making recovery harder, but fixing it is possible now—simply inspect the roots and remove any damaged ones to improve drainage.
Step 1 – Prune Root-Rotted Geranium Stems Immediately
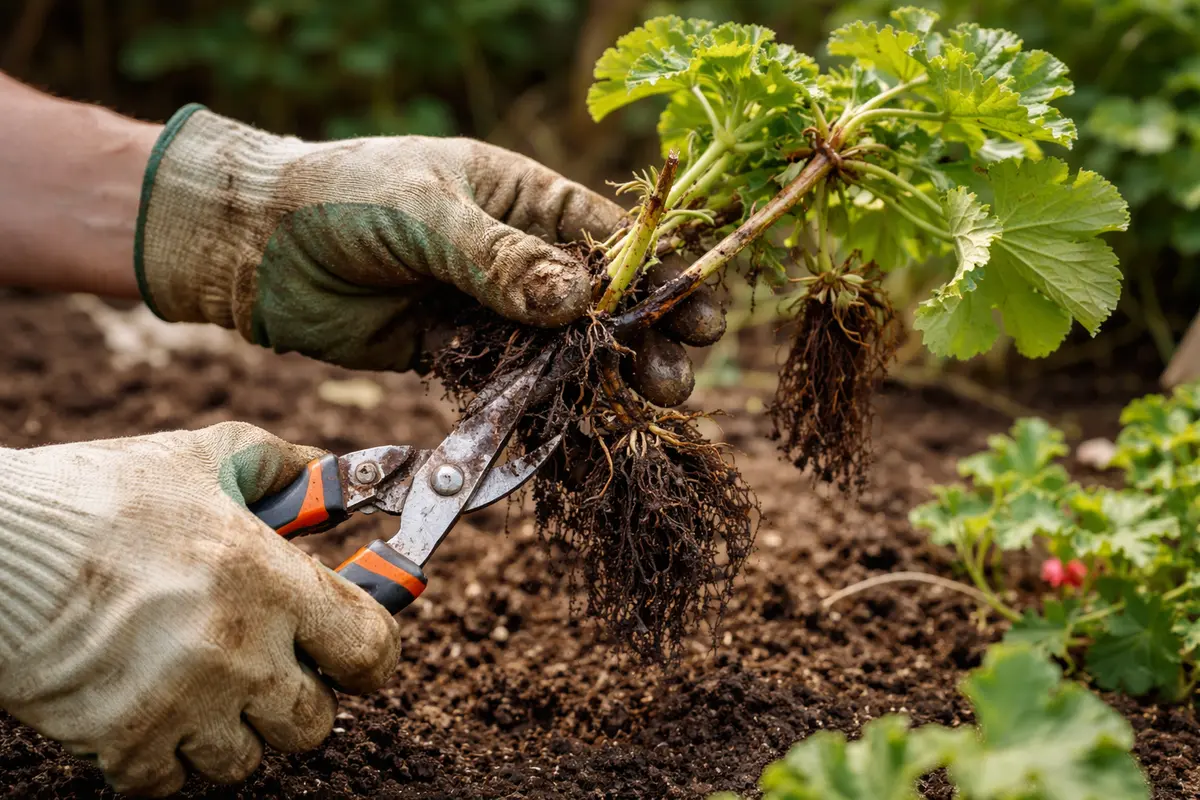
First, remove the geranium from its pot and gently shake off the soil to expose the roots. Inspect the roots thoroughly: any brown, mushy roots should be pruned away with sanitized scissors, while firm, white roots can be retained. After replanting the healthy roots into fresh, well-draining soil, you should notice a less saturated appearance in the remaining roots and a reduction in overall heaviness of the plant.
Taking swift action helps prevent the spread of pathogens, as overwatered geraniums become vulnerable to fungal infections which can rapidly kill healthy roots. If you leave root rot unchecked, healthy tissue gives way to decay, resulting in a plant that continues to decline and may not recover at all. If the lower leaves start drooping significantly, contrast this with a case where roots are salvaged quickly, leading to rejuvenated foliage the following weeks. If root surfaces appear slimy and excessively dark, check for temperature drops that can exacerbate the condition.
A gardener successfully rescued a geranium by acting within hours, with the plant bouncing back within a week, contrasting with another instance where a delayed reaction led to total loss. Many rush to simply add fertilizer at this stage, neglecting root inspection, which can worsen the decay if there’s no acknowledgment of the underlying decay issue. If you see persistent yellowing after pruning, check for lingering soggy soil rather than assuming nutrient deficiency.
Pruning away affected stems helps to redirect the plant’s energy toward healing rather than sustaining the decayed tissue. When stems are left untreated, they can continue to deteriorate and lead to increased fungal growth, ultimately compromising the entire plant. Geraniums are particularly susceptible to rapid decay in wet conditions, making immediate action vital for their survival. For instance, waiting too long to cut back stems that are entirely brown can result in the fungus spreading both through the soil and into any adjoining stems.
A common mistake at this stage is to only trim the yellow or wilting leaves while ignoring the underlying problem with the roots. The stems may still appear lush but can be harboring decay, so inspecting them thoroughly is essential. If you avoid cutting out the infected sections, the rot can worsen, making recovery much harder. To assess which stems need to go, consider gently tugging at them; any that feel overly soft or mushy should be removed. Likewise, if you see any signs of moist soil or a foul odor around the roots during this inspection, be prepared to take further action.
Step 2 – Check for Overwatering Causes in Geraniums
First, remove the geranium from its pot and inspect the roots. Trim away any brown or mushy roots using clean, sharp scissors, and replace the plant in fresh, well-draining soil. Within a week, you should notice new growth emerging as the plant begins to recover.
Root rot occurs when geranium roots sit in overly saturated soil, leading to anaerobic conditions that promote fungal growth. This results in the roots becoming discolored and mushy, preventing the plant from taking up water and nutrients effectively. Conversely, if the roots are firm and white, the issue could stem from other factors like nutrient deficiencies or pests.
If the soil smells sour during your inspection, replace it entirely to eradicate harmful pathogens. Alternatively, if you notice small, black gnats around the pot, check for signs of overwatering and adjust your watering schedule, as these may indicate a different issue.
Overwatering often suffocates the roots, leading to root rot, as the soil cannot drain properly, depriving roots of oxygen. Typically, geraniums prefer dryer conditions between waterings and can tolerate drought better than waterlogged soils. When water sits too long or is unable to escape from the pot or garden bed, the roots’ ability to function diminishes significantly. For instance, if the pot was sitting in a tray filled with water, this would create an environment ripe for root rot.
If your soil smells sour, it indicates anaerobic conditions that favor fungal growth, requiring immediate action. Switching soils or improving your pot’s drainage by ensuring holes are not blocked can create a better environment for your geraniums. If you’ve recognized these signs, it’s vital to repot them into airy, well-draining soil. Make sure to inspect the potting medium as a potential culprit; using soil that retains moisture for too long, such as a garden mix intended for moisture retention, may not be suitable for geraniums and can lead to further issues.
Step 3 – Repot Geraniums with Fresh, Dry Soil

Start by gently removing your geranium from its pot and inspecting the roots for blackened, mushy areas; trim away these damaged sections using sterilized scissors. After repotting in fresh, well-draining soil and ensuring the pot has good drainage holes, you should begin to see new growth and healthier roots within a few weeks. Look for fresh green leaves and signs of budding as early indicators of recovery.
Recovery from root rot typically takes 2 to 4 weeks, depending on how severely the roots were damaged and the ambient conditions. Favorable conditions, such as warm temperatures and bright, indirect light, can accelerate regrowth, while too much humidity or low light will slow progress significantly. If you notice that the remaining leaves are yellowing instead of green, check the moisture level in the soil to adjust your watering schedule.
Avoid the mistake of overcompensating by overwatering or adding excessive fertilizer during this recovery phase, as both can exacerbate root rot. Geraniums thrive with less frequent watering once they’re on the mend; wait for the top inch of soil to dry out before watering again. If the tips of new leaves become crispy, check your watering regimen to ensure you’re not saturating the roots.
Recovery from root rot can take time, often several weeks, depending on the severity of the damage. Healthy regrowth typically appears as vibrant green leaves and robust new shoots, while stagnant or yellowing foliage might suggest ongoing issues. Conditions such as ample sunlight and moderate temperatures can accelerate healing, whereas persistent dampness or poor airflow may prolong the recovery process. If the leaves remain wilted despite the right conditions, check the roots again for any remaining rot.
Avoid the mistake of overcompensating with excess water or fertilizers while your geraniums are recovering. During this period, stick to light watering and refrain from fertilizing for at least a month to allow the plant to adjust. If not seeing any improvement, check the pot size; repotting into a slightly larger container can prevent future drainage issues.
Fresh soil allows the roots to breathe and regain strength after root rot, promoting better nutrient absorption and overall health. New potting mix often contains richer nutrients and encourages microbial activity that helps restore balance. Without changing the soil, the lingering pathogens can reestablish and create a cycle of decay. After repotting, keep the soil just moist enough, ensuring that excess water can drain and airflow reaches the roots.
Be careful not to overwater immediately after repotting; do so only when the top inch of soil feels dry. Many gardeners rush to add fertilizer during this stage, but needing it may not be dire; excess nutrients can further stress weak roots. Monitor for signs of recovery like good color in leaves and new growth within a couple of weeks. Watch out for signs of stress still present from the previous overwatering, such as leaves drooping or falling off; this usually indicates the plant is still adjusting. If so, consider allowing for a longer recovery period before introducing fertilizers or other amendments.
Step 4 – Water Geraniums Sparingly to Avoid Rot
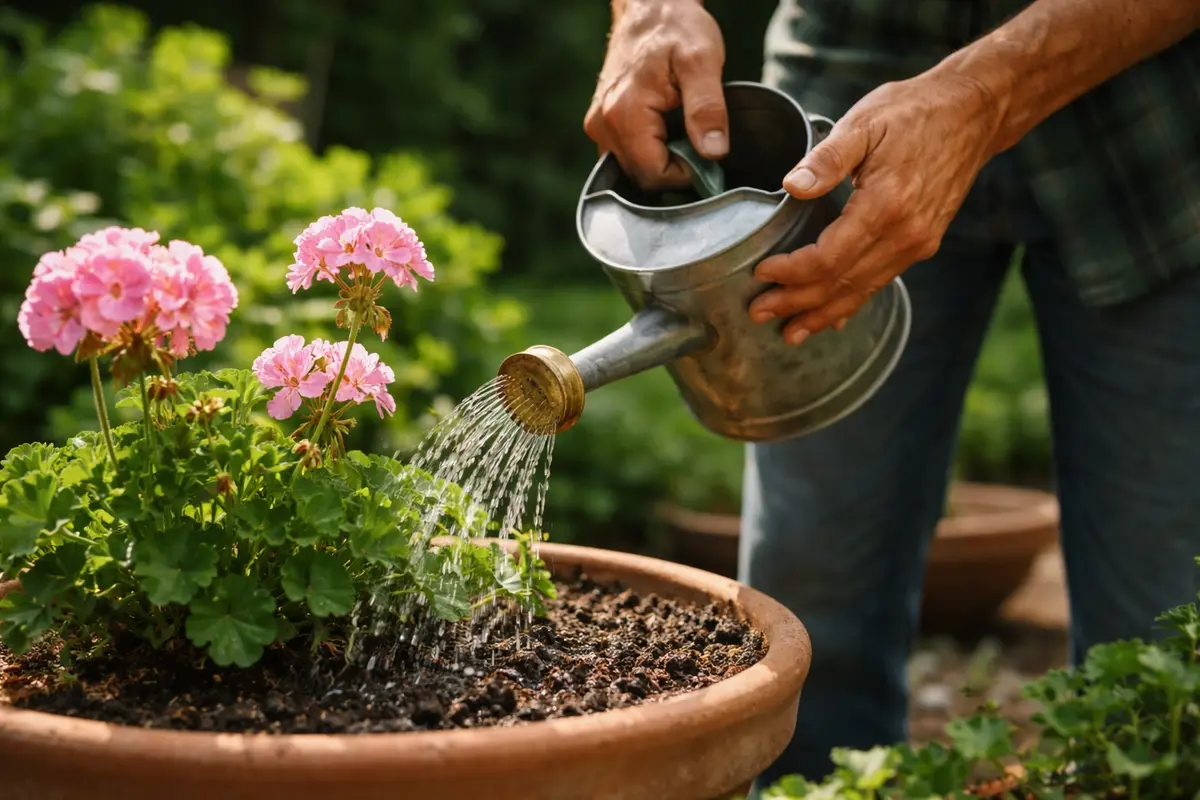
Water your geraniums sparingly, ensuring that the top inch of soil dries out completely between waterings. This practice will help prevent a return of root rot and maintain an optimal moisture balance. Regular checks of soil moisture levels keeping the geraniums healthy and thriving. If you have multiple pots, it’s a common mistake to follow a strict schedule, when in reality, each plant has its own moisture needs based on its size and the environmental conditions.
Watering habits play a critical role in the recurrence of root rot. Overwatering symptoms may resurface if the watering schedule isn’t adjusted. Additionally, geraniums prefer a soak-and-dry approach; routinely allowing the soil to dry promotes healthy root development and minimizes the risk of fungal infections. For instance, if conditions lead to high humidity in your area, it can complicate your watering schedule; in these cases, soil dry-down may not happen as quickly.
In hot weather, you may need to water more frequently, while cooler conditions require less. Be particularly attentive to geraniums kept indoors; they often experience prolonged dryness compared to outdoor plants, leading to potential stress. As a rule of thumb, you can check the soil moisture with your finger; if it feels dry down to your second knuckle, it’s time to water. Adjusting watering habits should also depend on daily temperatures; if it’s cooler or there’s been recent rain, it might warrant delaying the next watering.
Step 5 – Inspect Geranium Roots for Softness Weekly
Start by checking the soil moisture level of your geraniums every few days using a moisture meter or your finger. Observe the texture and consistency of the soil; it should feel slightly damp but not soggy. Recheck this moisture level weekly to ensure it dries out adequately between waterings.
A fully recovered geranium boasts vibrant green leaves with a firm texture, showing no wilt or yellowing. In contrast, early signs of returning root rot include soft, brownish leaves and a mushy stem, indicating overwatering has resumed. If you notice blemished leaves or an unpleasant odor from the soil, it may signal that the problem is creeping back in.
If root rot symptoms return after your initial treatment, remove the plant from its pot, trim away any new brown or mushy roots, and repot it in fresh, well-draining soil. In case the condition persists, consider treating with a fungicide specifically designed for root rot, as this can help eliminate fungal infections that linger in the soil.
A fully recovered geranium plant showcases vibrant, healthy leaves with a firm texture and robust stems, signaling that the roots have regenerated. In contrast, if the leaves appear limp and slightly discolored, or if you notice a mushy stem, these are early signs of root rot returning. If your plant lacks normal sheen and becomes off-color, check the drainage holes for clogs that might be trapping water.
If the problem persists despite your monitoring and treatment efforts, such as continued leaf wilting or a foul odor from the roots, consider repotting the geranium in fresh, well-draining soil. Escalate your actions by pruning any dead or rotting roots and ensuring your pot has adequate drainage to prevent further overwatering issues.
A healthy root system should feel firm and resilient, while any mushy or blackened roots indicate ongoing rot. After following the previous steps, signs of healthy growth, such as new shoots or leaves that appear vibrant in color, signal that your plant is recovering. Keeping an eye out for any droopy leaves or changes in color can help track the plant’s progress. The sooner you catch any issues, the more options you have to address further deterioration.
If your geranium shows signs of soft roots again, it may need re-examination of watering habits or soil conditions; consider repotting with fresh potting mix if necessary. Sometimes, despite prior care, external conditions or unnoticed issues can lead to recurrence, so vigilance is key. Early intervention is crucial to avoid full-blown rot returning to your plants. For example, if you’ve identified that a consistent source of overwatering persists, such as heavy rain, adding protective mulch can help keep moisture in check while allowing airflow to the roots.
FAQ
How long does it take for geraniums to recover from root rot?
Recovery may take several weeks to a couple of months depending on the severity of the root rot and the care being provided. If healthy roots are maintained and the conditions are properly managed, you can start seeing signs of recovery within two or three weeks.
Can root rot in geraniums spread to other plants?
Yes, root rot can spread to nearby plants if not addressed promptly. Fungi responsible for rot can be found in the soil, so it’s wise to isolate affected plants to minimize the risk of spreading to healthier ones. This is particularly important in a shared garden bed or potting area.
Should I remove damaged leaves after resolving root rot?
Yes, removing damaged leaves will help the plant conserve energy while it recovers. Focus on healthy growth after treating root rot, ensuring any soft, browned leaves are pruned to encourage new foliage development. This helps in redirecting the plant’s resources to new, healthy tissues.