You may notice your houseplants struggling during winter, with roots tightly confined in their pots, which is why you need to know how to stop root bound issues in houseplants during winter. This condition can lead to yellowing leaves and stunted growth as the plant fails to absorb adequate nutrients. If ignored, the situation gets worse, weakening the plant and making it harder to fix, but you can improve their health now by inspecting the roots and adjusting pot sizes as needed.
Step 1 – Inspect Roots for Crowding and Damage
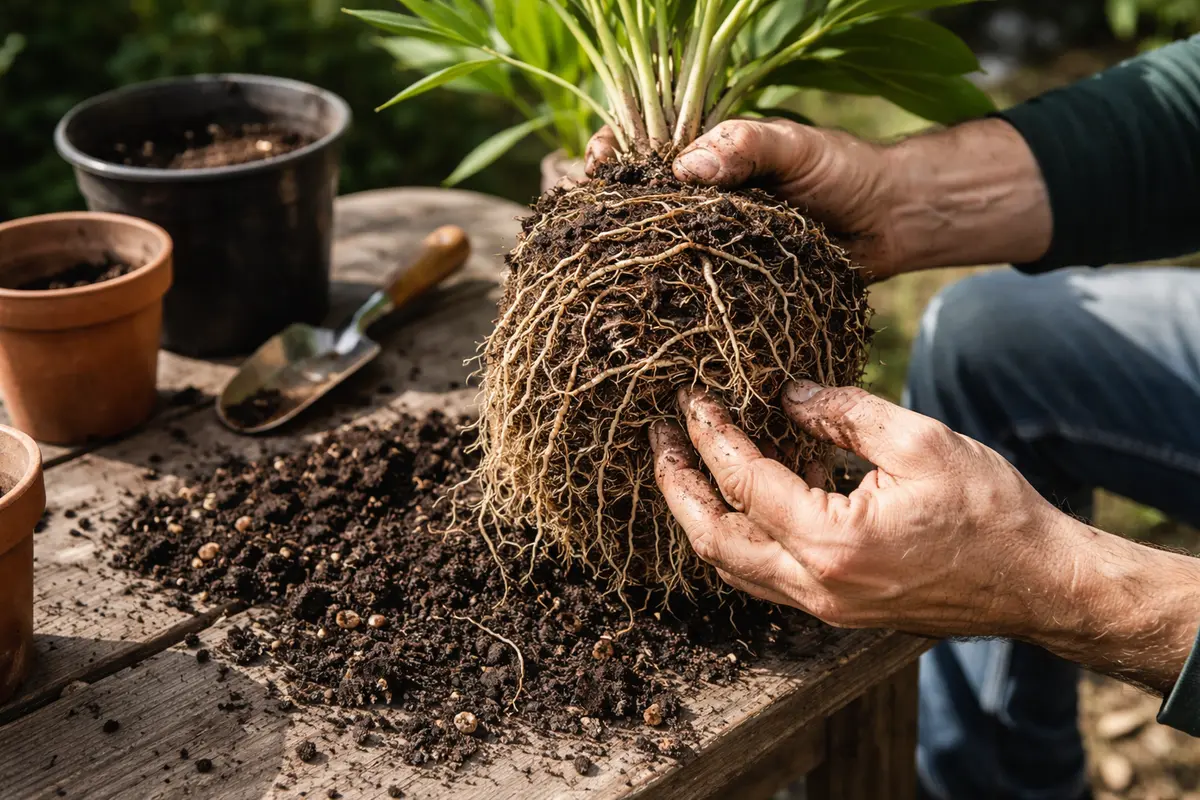
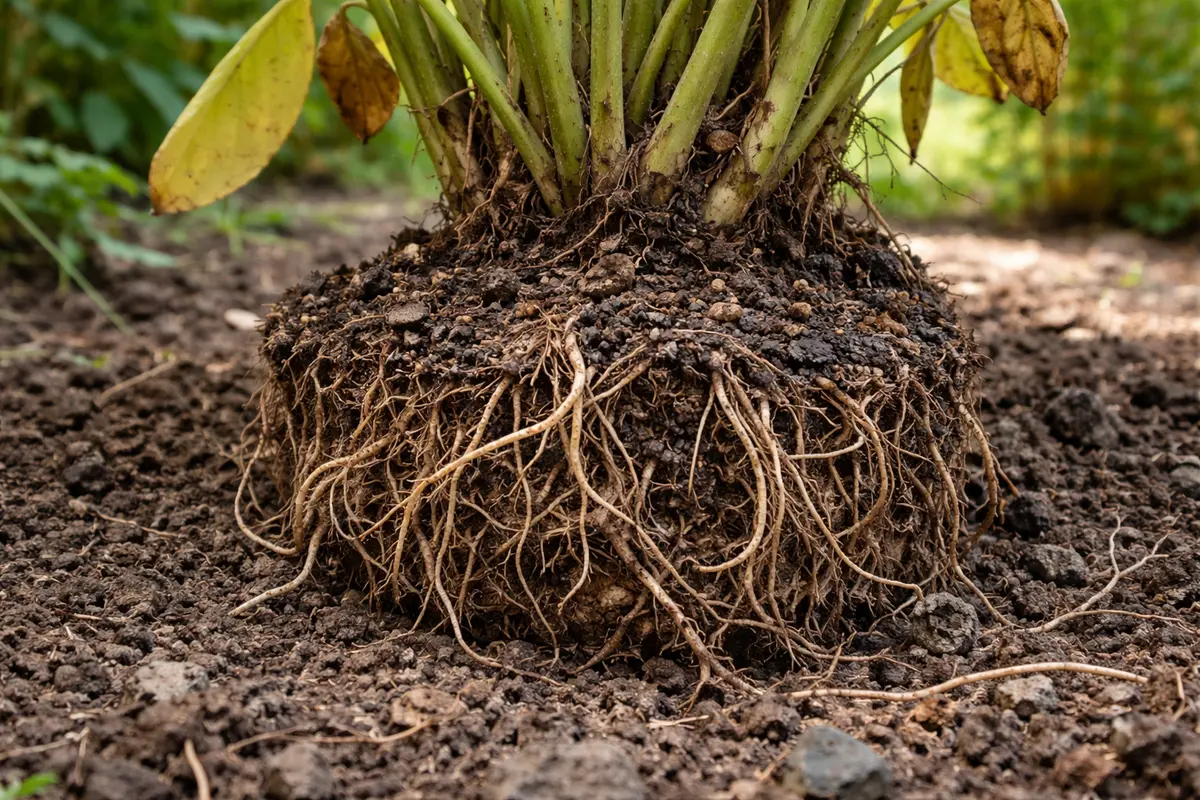
Start by gently removing the plant from its pot to inspect the roots. You should see crowded roots that are circling the pot or blackened tips indicating rot within a few seconds. This immediate action helps determine the plant’s current state and unlocks what’s causing stress in your plant.
When you expose the roots, you’re getting a clear picture of the root system’s health. Healthy roots will be firm and white, while soft or dark roots indicate problems like root rot or severe crowding. If you encounter a root ball that’s tightly wound, it’s crucial to untangle it gently, as cutting through the entangled roots can worsen the damage if not done carefully. The sooner you address these conditions, the better the chance your plant has for recovery; delaying this inspection can worsen the damage as roots suffocate and nutrients get blocked from reaching the plant. Take note that if roots appear mushy or have an unpleasant odor, root rot could be spreading, indicating a dire need for immediate action.
A common mistake at this stage is not examining roots frequently enough or overlooking the signs of stress. Many gardeners leave their plants too long in the same pot, unaware of how quickly they can outgrow their space. If the soil feels heavy or retains excessive moisture, you may find signs of root rot, which further complicates recovery efforts. Checking every few months, particularly through the colder months when growth slows, can help prevent long-term damage and promote healthy root systems.
Step 2 – Determine Root Bound Causes in Winter Plants
First, check the drainage of your plant’s pot. If water pools on the surface or takes too long to drain, remove the plant and examine the root ball. Healthy roots should not be tightly packed; instead, they should have space to grow. If they are tightly wound, you need to gently prune the roots back to allow for new growth and repot in fresh soil.
When roots become root bound, they stop absorbing nutrients and water effectively, leading to stunted growth and yellowing leaves. This condition arises when the roots are confined within the pot for too long and begin to wrap around themselves, forming a dense mat. If you observe that the soil is dry and the roots are visible through drainage holes, your plant is likely experiencing root binding due to insufficient space or nutrient availability.
If the soil feels overly compacted or has an unpleasant sour smell, repot the plant into a larger pot with well-aerated soil to promote better drainage. Alternatively, if you notice wilting but the roots seem healthy, check for overwatering or root rot, which requires a different remedy, like allowing the soil to dry out before watering again.
Roots can become bound due to insufficient pot size or lack of water drainage. In winter, lower temperatures can slow plant growth, but if the pot is too small, roots will still crowd and suffocate even though the plant isn’t actively growing. Compounding this issue, winter watering routines often involve less frequent checks, which can lead to an accumulation of water if the pot lacks adequate drainage. This situation can become dire if water sits in the bottom of the pot, leading to root rot, which quickly spreads to healthy roots.
If you notice that the soil smells sour, this indicates anaerobic bacteria due to excess water. Switch to a well-aerated potting mix and ensure drainage holes are clear. This can provide relief from both root binding and potential rot, enhancing airflow to the roots. If the container is too small for the plant species, consider immediate transplantation to a larger pot; even a few inches can make a significant difference. Additionally, bear in mind that while most houseplants will need a pot with a minimum of a couple of inches more in diameter, some plants with expansive roots may require even larger spaces to thrive properly and prevent recurrence of root binding.
Step 3 – Repot Spider Plant to Enhance Root Health
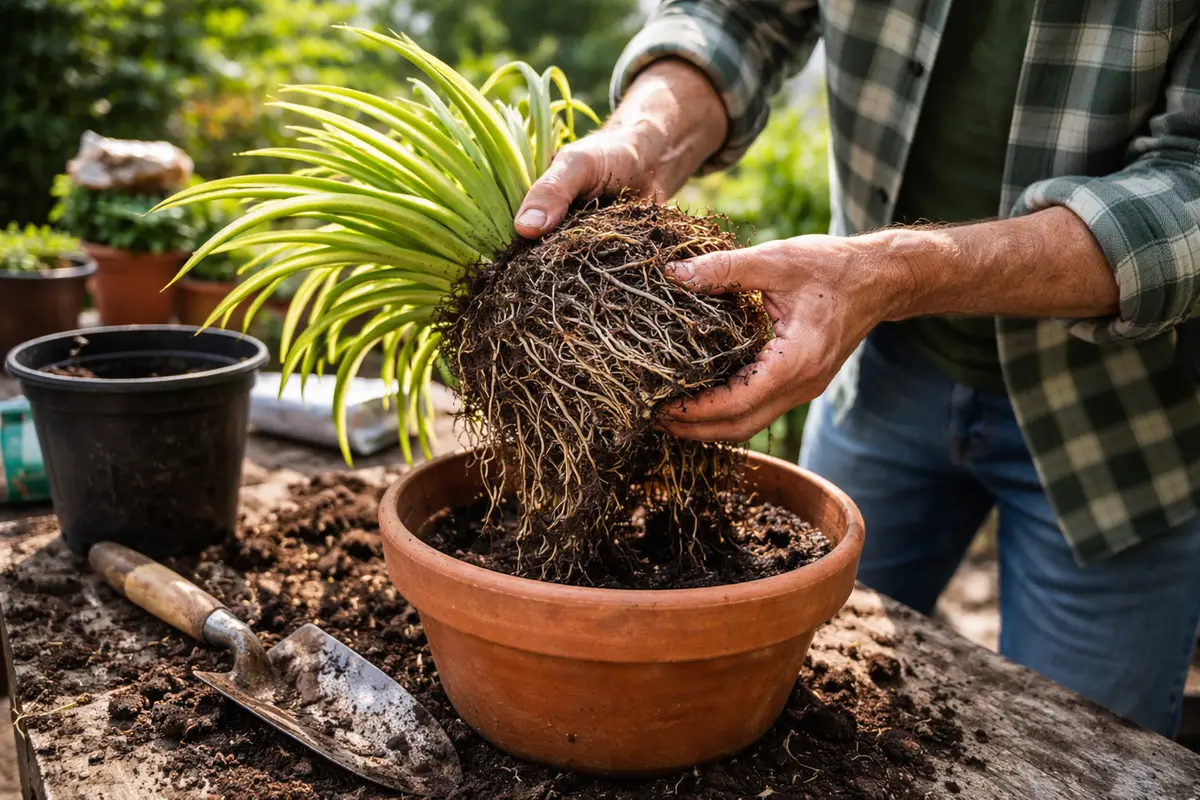
Start by gently removing your houseplant from its pot and inspecting the roots for any signs of rot or severe spiraling. Trim away any damaged roots and re-pot the plant in fresh, well-draining soil, ideally one rich in organic matter. Within a few weeks, you should notice new growth emerging from the center of the plant, indicating successful recovery.
Realistic recovery timelines typically range from two to six weeks, depending on the plant type and environment. For instance, a pothos may show new leaf growth within two weeks, while a rubber plant may take longer. Optimal light and humidity levels can speed recovery, while cold drafts or low light can significantly slow down regrowth. If your plant is still not showing progress after this period, check for root rot or underwatering signs, both of which require urgent attention.
A mistake to avoid during recovery is overcompensating with excessive water or fertilizer, as this can lead to further root stress. Too much water can drown the roots, creating an environment for fungal diseases. For a succulent, monitor the top inch of soil; if it feels dry, water lightly. If not this, check for adequate drainage, as stagnant water can hinder recovery.
By introducing fresh soil and a more spacious environment, your spider plant will have access to new nutrients and improved drainage. A well-draining soil helps avoid water stagnation, which may severely hinder root health. Amend your potting mix with perlite or coarse sand if it feels compacted after a prolonged period. In addition, freshly repotted plants often show improved leaf color and sturdiness as they assimilate to their new environment, increasing robustness against environmental stresses. If the temperatures drop significantly at night, providing a slightly warmer indoor environment, such as placing the plant in a bright window, can help kickstart its recovery.
A common mistake during repotting is watering too heavily right after the process. Overwatering can lead to more root rot, especially if the plant is already stressed. It is crucial to monitor soil moisture closely and only water when the top inch feels dry. Ideally, once you repot your plant, allow it a few days to acclimate before watering to prevent over-saturation. This resting period enables the roots to heal from potential damage during the repotting process and reduces the risk of future watering issues as the plant adjusts to its new home.
Step 4 – Water Phalaenopsis Strategically to Avert Root Issues
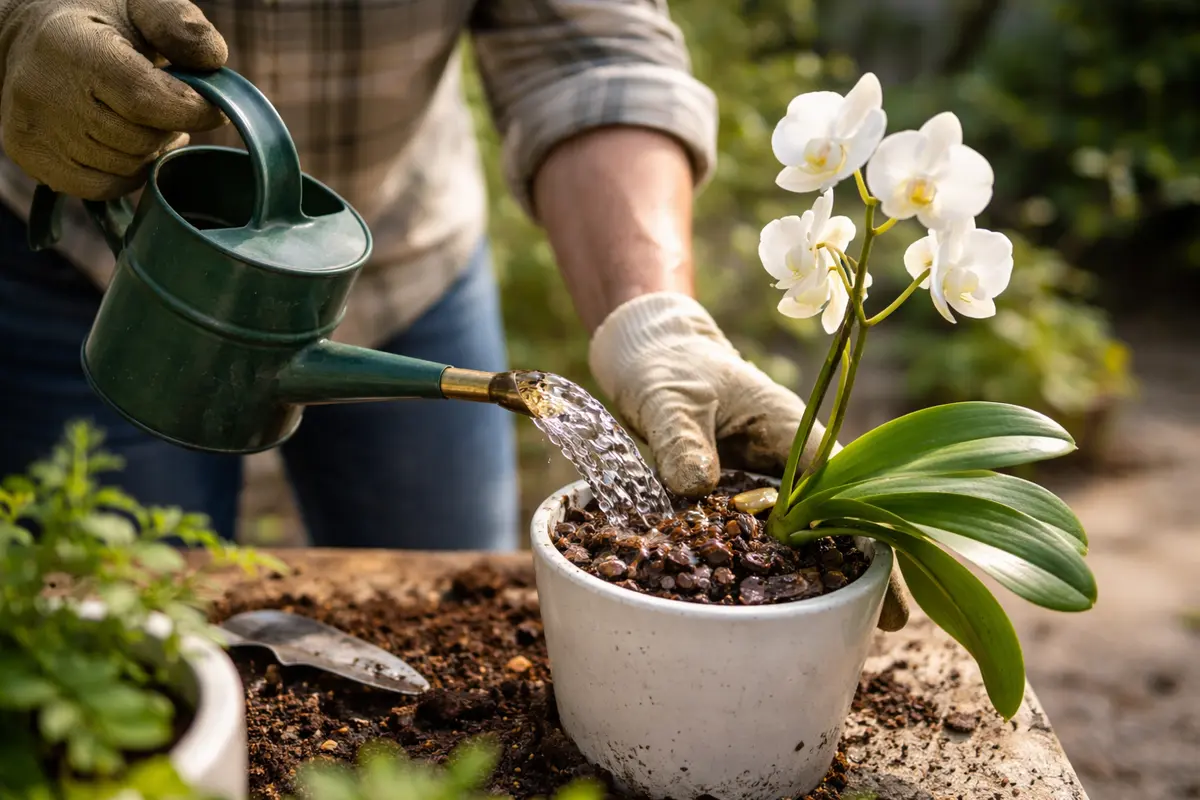
Water the Phalaenopsis orchid strategically by allowing the top inch of soil to dry out completely before soaking again. Following this routine will lead to visibly perked-up leaves and healthier roots within a week. This approach reduces the chances of excess moisture that can lead to rot. Check moisture levels, as using a moisture meter can offer more assurance of when to water, especially for plants sensitive to overwatering.
Watering less frequently but deeply when you do encourages the roots to search for moisture deeper in the soil, promoting stronger root growth. This practice also discourages surface root development, which can contribute to plant instability. As winter light diminishes, plants often need less water, so understanding your plant’s water needs is crucial for preventing repetition of previous issues. Regularly scheduled watering prevents the compaction of soil and maintains good airflow around the roots.
During colder months, it’s also wise to ensure your plants aren’t sitting in drafty areas. Different temperatures can lead to inconsistent moisture levels and shock. If you find your plant showing signs of stress despite following this routine, evaluate for other stress factors such as light levels or temperature variations and adjust accordingly. For example, if your orchid is in a location with rapid temperature fluctuations, consider relocating it to a more stable environment. Also, monitor for any fuzzy white mold on the soil surface, which can indicate dampness; if present, it’s time to reevaluate your watering schedule.
Step 5 – Check for New Growth in Houseplants Weekly
Start by monitoring your houseplants closely every week. Check the root system by gently lifting the pot and observing how tightly the roots fill the space. Look for signs such as yellowing leaves, stunted growth, or drooping, which indicate that the issue may still be present. If you notice these signs, repeat the potting procedures and reassess in a few days.
A fully recovered plant will exhibit vibrant green leaves and actively grow new shoots with a firm texture that feels resilient when touched. In contrast, a plant beginning to exhibit early signs of root binding will show weak, yellowing leaves that feel limp or brittle. If the roots start crowding the soil surface or growing out of the drainage holes, look for those visual cues indicating the problem’s return.
If you notice signs of the problem returning despite your efforts, consider repotting the plant into a larger container or breaking up the root ball gently. Ensure to use fresh potting soil and provide adequate drainage. If the condition persists, re-evaluate your watering schedule, as over-watering can exacerbate root-bound issues.
Once new growth begins to reflect the health of the plant, it’s a good indicator that the previous root issues have been resolved. Observing growth patterns can help distinguish what’s healthy from what may still need attention. Pay close attention to the color and firmness of the leaves; as wilted or yellowing leaves can indicate ongoing stress. If you detect persistent yellowing despite good care, inspect the plant for pests that may be feeding at the root level.
If symptoms return despite following your care routine, consider inspecting both the potting medium and the root system again. It’s possible that not all issues are entirely resolved, or new issues have cropped up due to environmental changes. If growth does not improve within another month, it may be time to consult a local gardening expert or consider moving your plant to a more suitable environment. If root binding issues persist, consider changing to a more spacious container every year or two until the plant reaches maturity to help avoid future problems.
FAQ
How long will it take for my plant to recover after being root bound?
Recovery time can vary based on plant type and environmental conditions, but generally, you can expect visible improvements within 2 to 4 weeks. Regular monitoring and suitable care will expedite the recovery process, especially during active growing seasons. Keep in mind that some plants may take longer, especially if they had significant root damage.
Can root bound issues spread to other plants nearby?
Root bound issues themselves are not contagious, but if the conditions that led to the root binding—such as poor drainage—affect multiple plants, it can create similar problems across your collection. Always ensure adequate pot size and drainage for all plants to prevent such situations. Periodically checking the condition of nearby plants can help catch related problems early on.
Should I remove damaged roots during repotting?
Yes, trim any visibly rotting or dead roots during repotting. Healthy roots should be firm and white, while any mushy or dark roots should be cut away to promote the overall health of the plant. Use clean, sharp scissors to make a clean cut, which helps minimize the risk of introducing pathogens during the repotting process and encourages healthy regrowth.