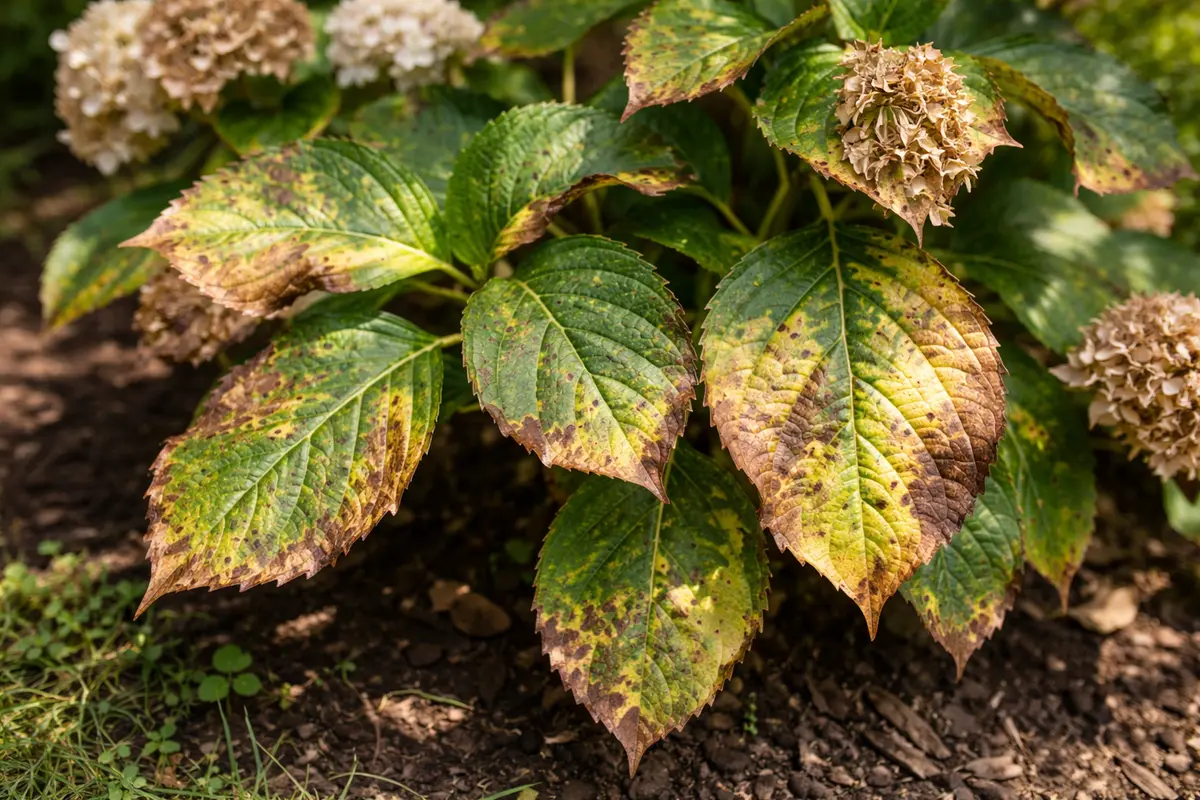
You may notice that your hydrangea blooms turn brown in full sun during the heat of summer, a clear sign that you need to know what to do when my hydrangea blooms turn brown in full sun. This browning typically indicates stress due to excessive sun exposure, leading to wilting and eventual damage. If left unaddressed, the problem gets worse, weakens the plant, and can lead to more damage; however, fixing it is possible now by adjusting watering practices and providing some shade to protect your hydrangeas from harsh sunlight.
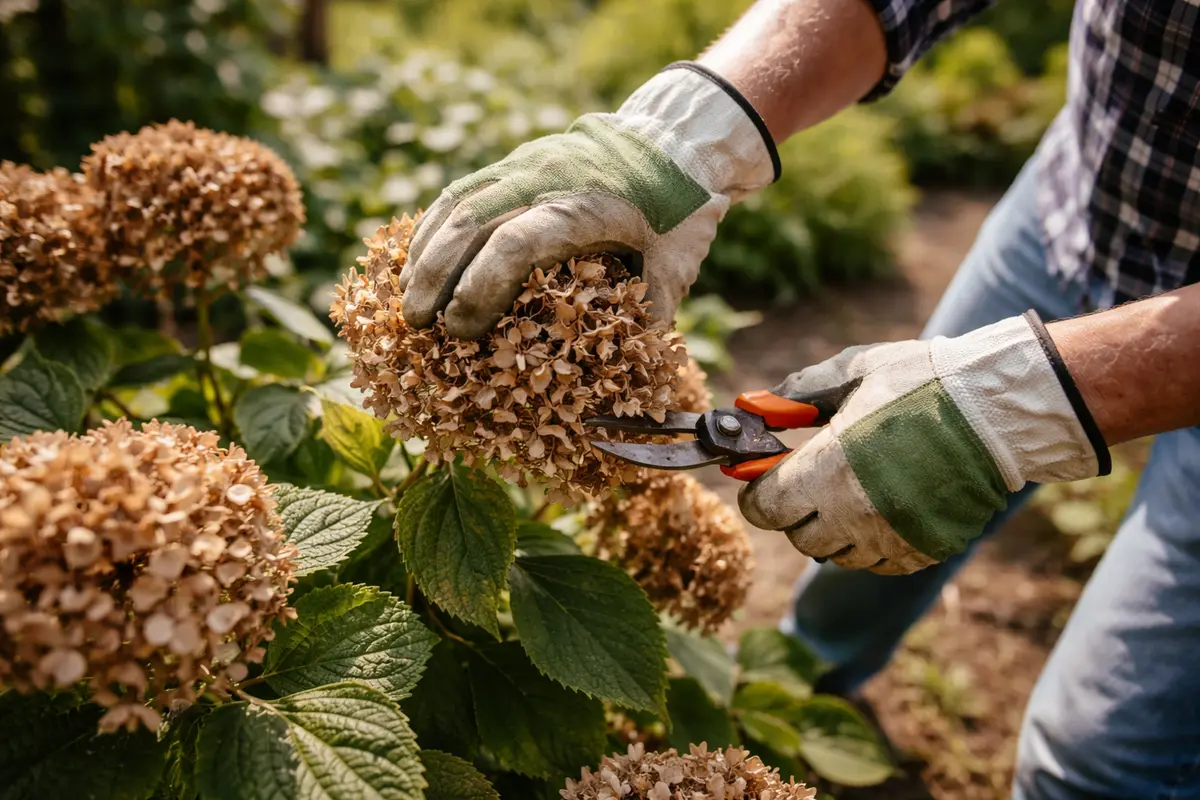
Step 1 – Trim Brown Hydrangea Blooms Right Away
Start by moving your hydrangea to a partially shaded area or providing shade with an umbrella or cloth during the hottest parts of the day. Within a few hours, you should notice a reduction in the rapid browning of the blooms as they receive some relief from the intense sunlight.
Acting quickly is crucial because hydrangeas lack a protective mechanism against sunburn in extreme heat. If you delay, the affected blooms may become irreversibly damaged, causing the plant to redirect resources from healthy growth to damaged sections, leading to overall decline. This shift in energy can result in fewer flowers and stunted growth, as the plant struggles to cope.
For example, a gardener once rushed to cover her hydrangeas just in time to prevent significant browning after a heatwave, whereas her neighbor ignored symptoms and lost most of his blooms. A notable mistake at this stage is providing too little shade or water, thinking the plant will adapt; if your blooms are browning despite shade, check the moisture level in the soil to ensure it’s not too dry.
Acting fast is crucial because brown blooms often indicate heat stress, causing plants to divert resources away from flowers and focus on survival. When delayed, the plant’s cellular structure may break down further, leading to irreversible damage and potential loss of future blooms if the plant isn’t stabilized quickly. If you notice wilting leaves along with browning blooms, check for soil moisture; underwatering could worsen the condition. If the wilting is severe, it’s even possible that the plant may not recover from such stress without immediate action.
A gardener in my community once delayed moving her hydrangeas despite spotting browning blooms, believing they could recover on their own. Instead, by the time she relocated them, many flowers were lost forever, highlighting the necessity of prompt action. A common error is assuming that waiting for cooler weather will naturally resolve the issue, which often leads to more extensive damage instead. Additionally, if the blooms are still brown after four to five days in a shadier environment, it may indicate deeper issues such as root stress or disease.
Trimming the affected flowers prevents the plant from exerting energy on damaged blooms, which can attract pests or diseases. Brown blooms may indicate that the flowers have overheated and are no longer viable, causing the plant to focus resources where they’re most needed. By removing these blooms quickly, you provide an opportunity for healthier blooms to thrive in their place, promoting a quicker overall recovery. Aim to make the cut just above a leaf node to encourage healthy regrowth, ideally leaving a healthy node that can support new life. If you don’t see signs of regrowth within a week, reassess your plant care routine for potential improvements.
Many gardeners make the mistake of delaying this step, hoping the flowers will recover on their own. However, it’s often observed that timely pruning can lead to a more robust flowering cycle. For instance, after trimming, watch for signs of new growth within a few days, such as green shoots beginning to develop where the flowers once were. If the plant doesn’t show signs of recovery within a week, consider assessing your overall care routine to determine if other factors, such as watering or sun exposure, may need adjusting. If blooming does not resume by mid-summer, that may also indicate the need for more drastic measures like repotting or evaluating the nutrient levels in your soil.
Step 2 – Diagnose Sun Stress on Hydrangeas
Start by assessing your hydrangea’s watering schedule and make sure to water it deeply at least once a week during dry spells. After a few days, healthy, vibrant blooms should begin to emerge if underwatering was the issue. If you notice continued browning despite watering, it indicates that the conditions may be more severe than initially thought, signaling you to investigate further.
The browning of hydrangea blooms often indicates stress from insufficient moisture levels in the soil, particularly in full sun. When the plant’s roots experience drought conditions, they cannot absorb enough water to support the blooms, causing them to dry out and turn brown. This problem is in stark contrast with well-watered hydrangeas, which typically flourish and produce vibrant blooms. If your blooms suddenly start turning brown just days after being watered, suspect that root damage or disease may be holding back their recovery.
If your soil feels overly dry yet the blooms are still browning, check for compacted soil or inadequate drainage. Compacted soil restricts root expansion and water penetration, leading to similar symptoms as drought stress. In contrast, if the soil smells sour, the issue could be root rot, requiring immediate adjustment of watering practices and soil conditions. An easy way to check is to insert a garden trowel into the soil; if you meet resistance or the soil does not crumble easily, you may need to aerate it to allow better water penetration. Testing for moisture conditions effectively identifies the right course of action—if the soil feels dry below an inch but moist deeper, consider deepening your watering sessions to encourage deeper root growth.
Your hydrangea may be experiencing sun stress due to insufficient moisture retention in the soil or inadequate shading during peak sunlight hours. These conditions can quickly lead to dehydration, which hampers the plant’s capacity to flourish. The roots struggle to absorb the required nutrients and water, leading to detrimental symptoms such as wilting, limp leaves, or brown flower petals. If the soil feels sandy and dry rather than damp, this may suggest that the plant is not absorbing enough water, requiring you to intervene quickly before further browning occurs.
If you notice dry, crusty soil at the surface, it’s time to amend your watering strategy. Ensure you’re watering deeply—if the top few inches of soil feel dry and the plant is also showing wilted leaves, then it’s time for a moisture boost. Conversely, if the soil smells sour or is overly saturated, you may be facing root rot instead, which becomes apparent when the stems feel mushy or discolored. If either condition persists without adequate correction, you could risk long-term damage to the plant, including loss of blooms or premature wilting of leaves. If stem integrity is compromised, consider consulting with a local gardening service to assess the damage before it’s too late.
Step 3 – Water Hydrangea Deeply for Recovery
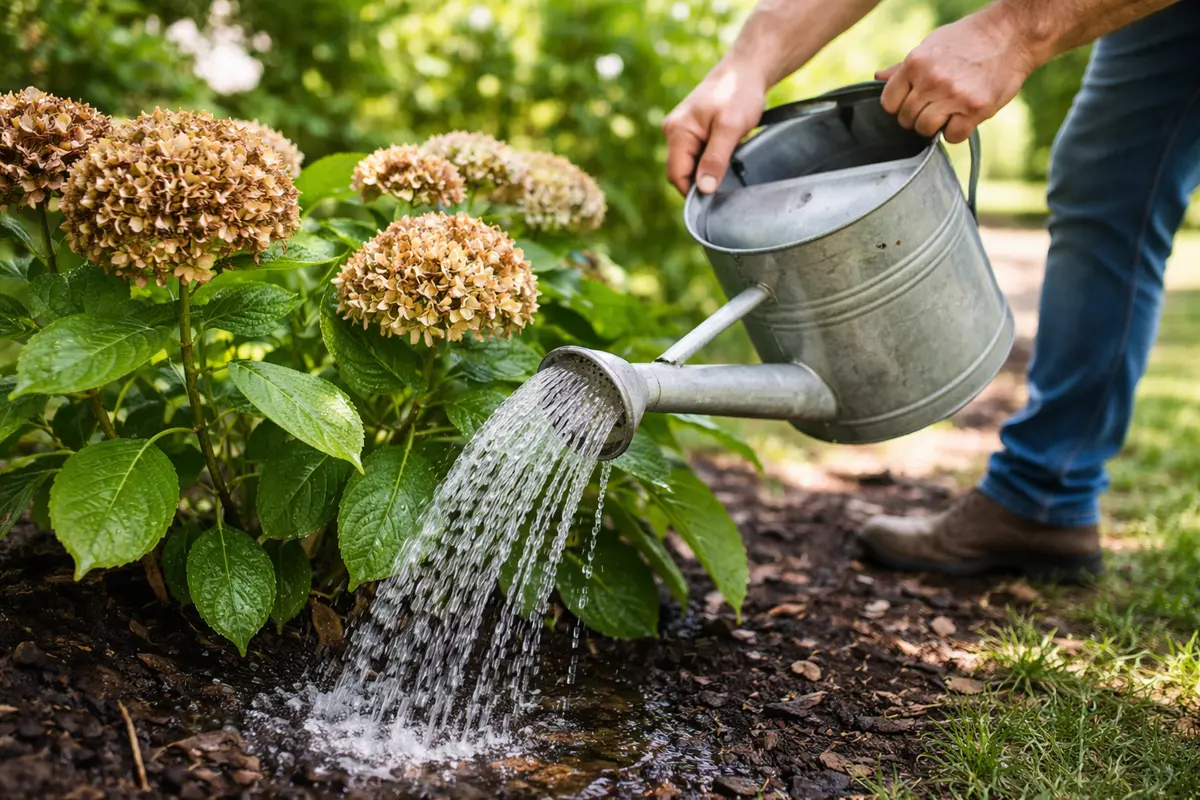
Water your hydrangea deeply to aid in its recovery from sun stress and browning blooms. Immediately, you should observe the soil surface becoming moist and saturated with water, drenching the root zone effectively. Hydroting your hydrangeas at the base helps restore hydration levels, encouraging the plant to reestablish healthy tissue and blooms. Be sure to provide about 1 to 2 inches of water per session to ensure it thoroughly penetrates the root zone.
Watering deep ensures moisture reaches the root systems, which is crucial for revitalizing exhausted plants. Providing around 1 to 2 inches of water at the base weekly, especially during dry spells, can often help prevent stress from setting in again. With enough water reaching the roots, you can expect the plant to bounce back within a few days, showing signs of new foliage growth and possibly renewed bloom development. In this recovery phase, it’s important to continuously monitor soil moisture levels, checking that roots can absorb nutrients without being waterlogged.
A common mistake during recovery is the inclination to overwater, thinking it will expedite the healing process. This often leads to waterlogged roots, which can exacerbate existing problems and lead to root rot. If your hydrangea’s leaves begin to yellow after a period of deep watering, it may signal over-saturation. If you notice the plant isn’t improving within a week even after consistent watering, reconsider your approach to both watering and the plant’s sun exposure, potentially evaluating whether to switch locations or amend the soil for better drainage. Incorporating aeration or using a moisture gauge can help you monitor soil conditions more accurately and adjust accordingly.
Step 4 – Protect Hydrangeas from Intense Sunlight
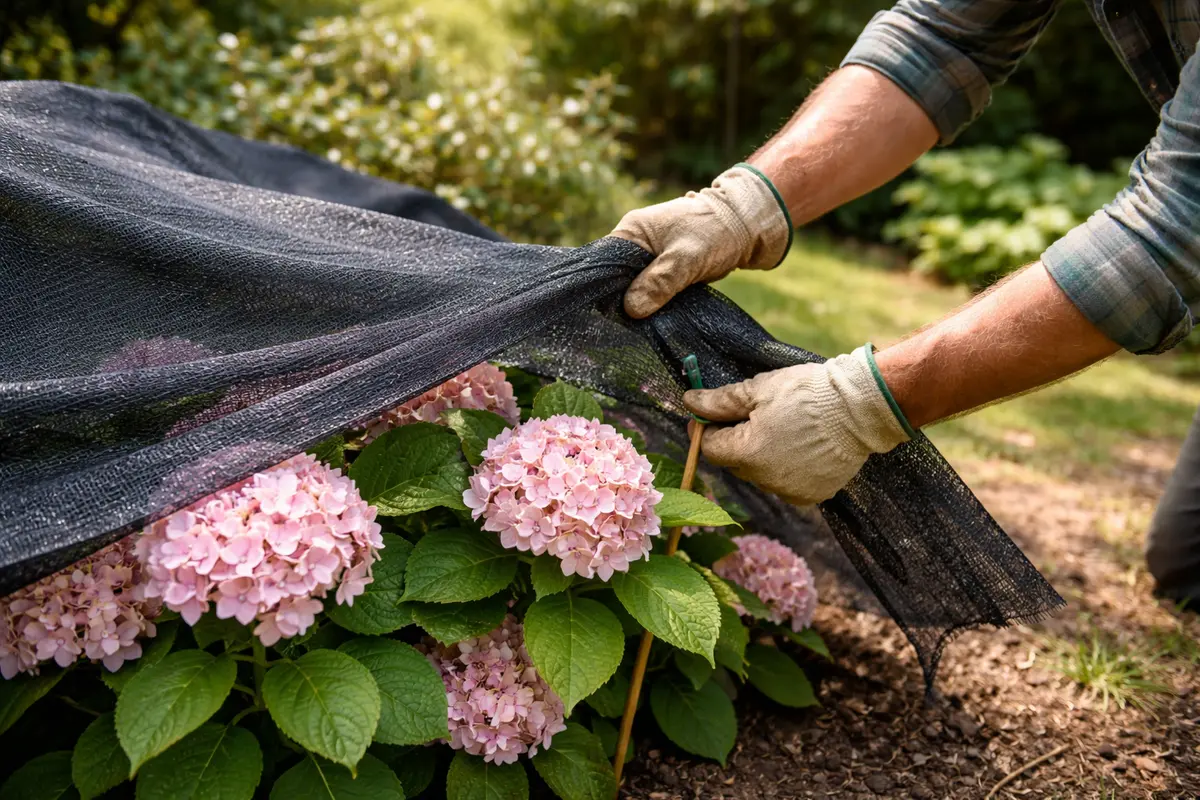
Start by providing your hydrangeas with adequate afternoon shade by planting taller plants or using shade cloth. You should notice less stress on the blooms, keeping the vibrant colors intact longer and preventing them from turning brown. Depending on your garden layout, strategic placements of sun-dappled companions can effectively shield your hydrangeas from overheating.
Excessive sunlight and heat can cause hydrangeas to dehydrate, leading to browning blooms. By implementing shade solutions, you mitigate the risk of sunburn on the petals, as the blooms will receive filtered sunlight instead of harsh rays. If the browning persists despite shade, check for insufficient watering, as both issues can hamper bloom vitality. Consider repositioning the shade cloth or choosing different companions if they prove inadequate.
In the height of summer, evaluate the shade coverage regularly, especially during a heatwave; adjust the shade cloth as needed. Another layer of prevention is adding mulch around the base, which retains soil moisture and reduces temperature fluctuations. If your soil appears dry despite mulch, consider increasing your watering schedule accordingly. Regularly observe your hydrangeas’ response to changing light conditions and alter your care routine to adapt accordingly, whether that means adding a shade structure or rotating pots to avoid prolonged direct sunlight exposure.
Shielding your hydrangeas from excessive sunlight alleviates stress on the plant and allows for proper photosynthesis without the risk of burning. Implementing this protective habit can also enhance soil moisture retention, as shaded areas will prevent the ground from drying out quickly. Be vigilant in changing weather patterns to anticipate your plants’ needs and adjust shading as necessary. Additionally, pay attention to the soil temperature—excessive heat can cause the soil to dry out faster, so mulching can help moderate temperatures effectively. If your hydrangeas continue to struggle in the same spot, consider evaluating ground cover options that naturally thrive in shaded conditions.
I often recommend regularly checking weather forecasts for prolonged sunny spells or high temperatures that could increase sun exposure risks. In peak summer months, establishing a more permanent shading option, such as planting companion plants that can provide natural protection, may also reduce the stress on your hydrangeas in the long run. Consider further mulching around the base of your plants to help insulate the roots and retain soil moisture. If you notice that one area of your hydrangea is still suffering despite shading, adjusting the height or angle of coverage may maximize effectiveness, leading to overall plant health improvement.
Step 5 – Inspect Hydrangea Leaves for New Browning
Check your hydrangea leaves for any signs of new browning or stress every few days after implementing your recovery plan. Observe the emerging foliage carefully; you should be looking for healthy, vibrant green leaves and any signs of impact from prior stress. Monitoring these symptoms will help you gauge whether your recovery steps are effective or if adjustments are still needed. If new growth is sluggish, it may point to persistent issues within your care regimen.
A fully recovered hydrangea should display firm, perky leaves and vibrant blooms without any continuing browning. Pay close attention to texture and color—the leaves should feel supple and exhibit rich shades of green. If you begin to spot signs of browning returning, it signals a need for immediate intervention to avoid further damage. Pay attention to leaves if they appear droopy at night but perk up during the day; this may indicate an underlying watering issue that needs addressing. A leaf that has persistent brown patches may also reveal localized overheating or damage from pests.
If new brown leaves appear despite your interventions, consider reevaluating the plant’s sun exposure or water levels. Ignoring these signs may lead to more severe consequences, such as reduced flowering or even plant death. If this occurs, you can take a step back and reassess your approach: ensure that the hydrangea is receiving consistent watering without being in direct sunlight for too long during peak hours. Don’t hesitate to consult a local gardening expert if unsure about the symptoms being displayed or require assistance troubleshooting persistent issues following your recovery efforts. Depending on the outcome after a week of monitoring, it might even be advisable to take soil samples to check for nutrient deficiencies or chemical imbalances.
FAQ
How long does it take for hydrangeas to recover from sun stress?
Typically, once you’ve pruned affected blooms and adjusted watering practices, you can expect improvements within one to two weeks. New growth should start showing up soon after, indicating recovery is underway. Monitor the plant closely during this time to determine if changes are effective. If recovery stalls beyond this timeframe, there may be need for further investigation into soil health or other care elements.
Can browning blooms on hydrangeas spread to other plants?
Browning blooms typically do not spread to other plant species unless the condition is caused by pests, which can migrate. It’s crucial to monitor surrounding plants for any signs of pests and address them promptly to prevent infestation. Consider checking the undersides of leaves where pests often hide, as close monitoring can help minimize issues before they escalate. If pests are found, immediate treatment is crucial.
Should I remove all the brown blooms now?
It’s advised to remove all visibly damaged blooms to encourage new growth and reduce the risk of attracting pests. Failing to do so may result in lingering stress on the plant, hindering recovery. If unsure, also consider removing any partially damaged blooms to further redirect the plant’s energy to healthy growth. If you notice blooms with only slight browning, you may also consider selectively pruning to see if the plant shows signs of renewed vigor and color in those areas.