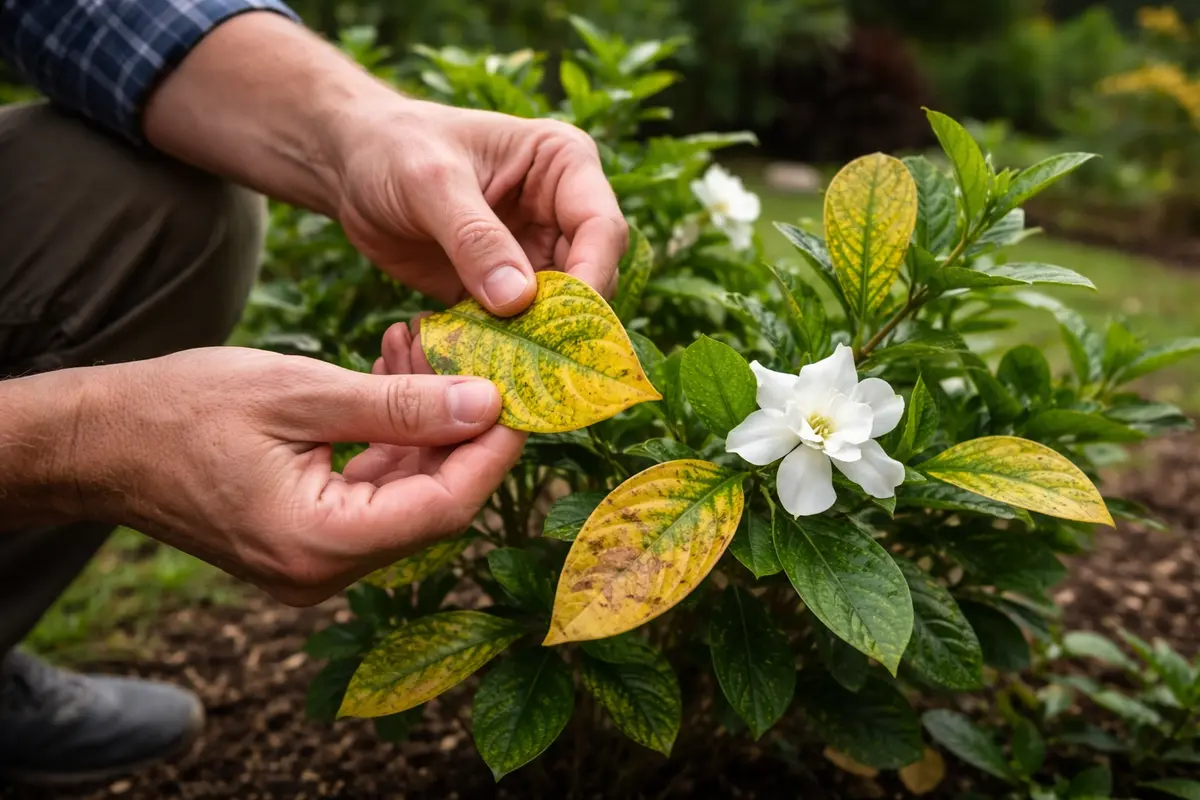
You may notice your gardenias developing yellowing leaves in spring, which is a clear sign that you need to know how to treat yellowing leaves on gardenias in spring. This yellowing often occurs due to nutrient deficiencies or poor drainage, leading to leaf drop and overall plant stress. If left unaddressed, the issue worsens, weakens the plant, and may lead to more damage, but fixing it is possible now—just inspect the soil, adjust your watering schedule, and fertilize as needed.
Step 1 – Trim Yellowing Gardenia Leaves Promptly
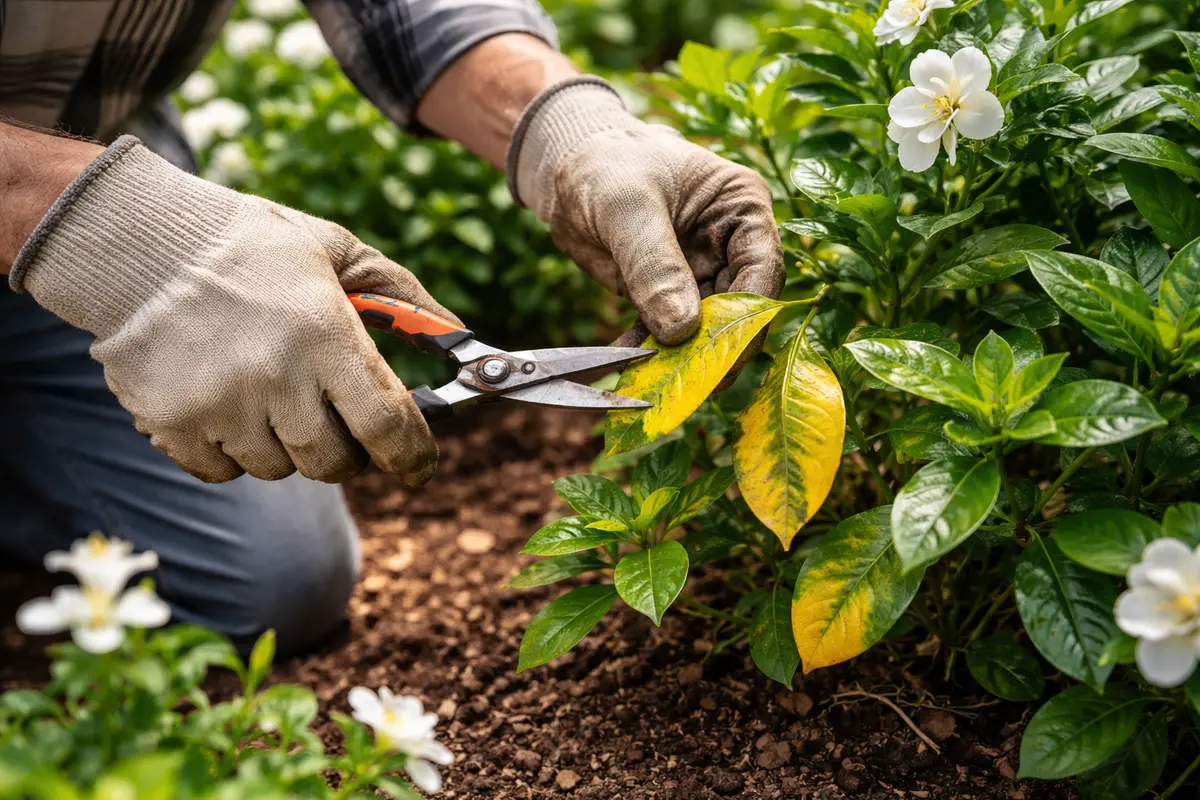
Begin by trimming any yellowing or damaged leaves from your gardenias immediately. You will visibly reduce stress on the plant, and the remaining leaves will start to perk up within days. Removing these leaves helps redirect the plant’s energy towards healthier foliage and new growth, which is essential during the active spring season. Aim to trim back only the most affected leaves, focusing on those that are significantly yellowed or wilting. If multiple leaves are yellowing, this may indicate an urgent underlying problem that needs addressing.
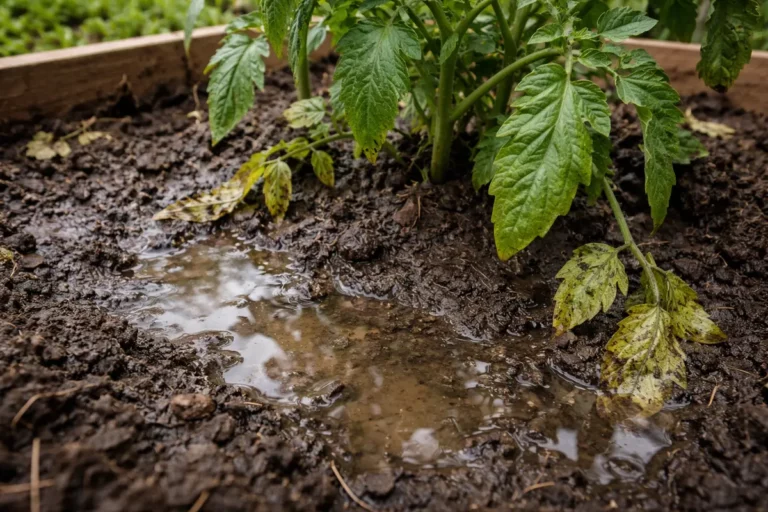
Acting quickly is crucial because yellowing leaves often indicate poor health and may be a response to various environmental factors, including overwatering or nutrient deficiency. For example, if the underlying issue is not corrected, you’ll observe an increasing number of yellow leaves within a week or two, reflecting a troubling trend. Removing these leaves minimizes the possibility of further damage and lessens the risk of diseases spreading through the plant. If left untreated, this yellowing can compound and further harm additional leaves, adversely impacting the overall vigor of the entire plant. When several leaves turn yellow simultaneously, it may signify a deeper issue, such as root rot or disease, necessitating a comprehensive approach to recovery. Always ensure that your pruning shears are sterilized before making cuts to avoid introducing any pathogens, as unclean tools can lead to infection that may further exacerbate the yellowing situation.
A common mistake gardeners make during this step is waiting too long to trim back affected leaves, thinking the plant will recover on its own. Gardeners can easily misjudge the impact of immediate intervention; for instance, a neglected gardenia may take weeks to rebound after excessive yellowing, whereas another that was promptly clipped during the first signs of distress bounced back within days. If you notice that trimming isn’t leading to noticeable improvement within a week, reassess the plant’s environment and care regimen. Check the impact of watering patterns; if you find the soil remains persistently soggy, consider adjusting your watering frequency. If yellowing persists despite trimming, inspect the roots and consider adjusting your watering practices or checking for pests. For instance, too much moisture in the soil can contribute to root rot, prompting more drastic measures like repotting or enhancing drainage with a commercial soil mix designed to improve aeration and moisture retention.
Step 2 – Analyze Soil pH for Gardenia Health
Check the soil pH around your gardenias to determine its acidity level. You will either find that the soil is too alkaline or too acidic, which can lead to nutrient lockout and contribute to yellowing leaves. A proper pH for gardenias typically falls between 5.0 and 6.5; adjusting it will help the plants absorb nutrients effectively. Testing kits are readily available at garden centers and can offer immediate and actionable feedback on soil condition. If your results indicate a pH around 7.0 or higher, it’s critical to take corrective measures.
The pH level directly influences the plant’s ability to absorb vital nutrients, including nitrogen and iron, which are crucial for healthy leafy growth. If the soil pH is outside the ideal range, essential elements may become unavailable to the plant, contributing to the yellowing of the leaves. This issue is particularly prevalent in poorly drained or compacted soils, which can amplify pH issues while stifling root health. Look for visual indicators such as stunted growth, leaf drop, and barren patches around the base of the plant, all pointing to a stressed gardenia. Routine soil tests should become part of your annual gardening maintenance to catch these issues earlier, preventing serious degradation.
If your testing shows the soil pH is too high, adding elemental sulfur can help lower it over several weeks. Conversely, if the pH is too low, incorporating lime can raise it; however, this effect is not immediate and can take several months to stabilize. Pay attention to changes during these adjustments—if the soil emits a sour smell, it may suggest anaerobic conditions that further stress your plants. Ensure to improve aeration and drainage alongside pH adjustments, as poor drainage complicates nutrient uptake and pH management. As you implement these corrections, closely monitor the gardenias for signs of recovery or additional stress. If after a month, yellowing leaves continue to appear but you’ve made pH adjustments, it may be necessary to re-evaluate your planting mix or consider a different method of soil amendment.
Step 3 – Fertilize Gardenias to Recover from Stress
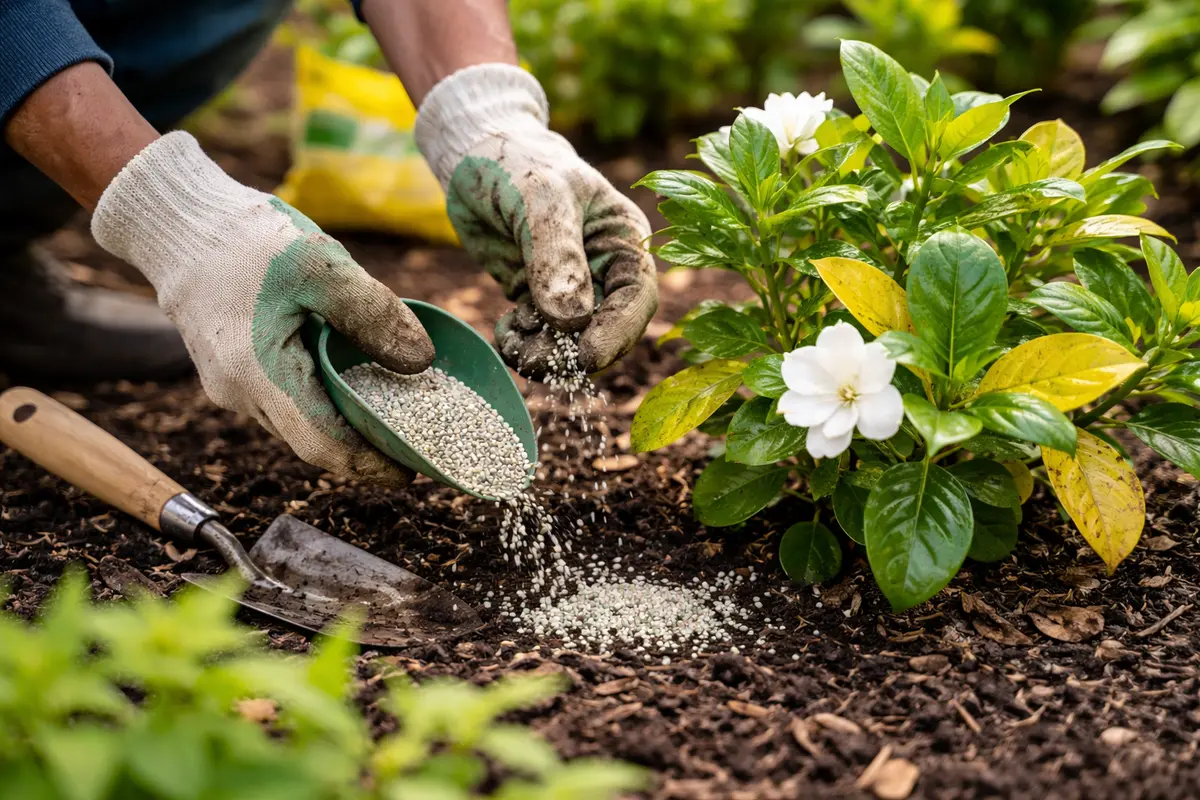
Apply a balanced, slow-release fertilizer specifically formulated for acid-loving plants to facilitate recovery for your gardenias. Within two to four weeks, you should begin to notice the leaves regaining their green color, with new growth starting to emerge, signaling that the plants are bouncing back from stress. Fertilizing provides the necessary nutrients that may be deficient due to environmental stressors, enhancing overall resilience and enabling the plant to resume healthy growth. Be mindful of the fertilizer’s N-P-K ratio; an ideal option might range around 30-10-10 to ensure proper green foliage development, crucial for optimal photosynthesis and energy production.
Providing adequate nutrients will help restore nitrogen levels in the soil, vital for vibrant green foliage and healthy blooms. Gardenias especially need nutrient boosts to recover from existing stress; this is where proper fertilization can stimulate growth. However, be cautious not to over-fertilize, as excessive nitrogen can exacerbate yellowing and stress, particularly in already compromised plants. A common dosage guideline is around 1/2 cup of slow-release fertilizer per square foot; however, specific products have unique instructions that must be closely followed. After applying the fertilizer, ensure that you adequately water the plants to help activate it and allow it to move effectively into the root zone.
Common mistakes during this recovery stage include uneven application or rushing to fertilize directly after suspecting that overwatering has occurred. Adding fertilizer to waterlogged soil may damage root systems, leading to further complications such as root burn. For a more cautious approach, if the gardenias were overly wet, allow the soil to dry slightly before fertilizing; this helps ensure that nutrients do not overwhelm the plants while they are already under stress. If initial fertilizer applications seem ineffective after several weeks, consider including a liquid fertilizer with a higher nitrogen concentration for a quicker nutrient boost. Furthermore, be acutely aware of local weather patterns; fertilizing before anticipated heavy rain may wash valuable nutrients away before your plants can absorb them, undermining your efforts and delaying recovery. If storms are forecast, fertilization should be postponed to ensure optimal nutrient uptake.
Step 4 – Look for Leaf Improvement Over Next Weeks
Start by monitoring your gardenias every few days for visible changes in their leaves. Look specifically for any improvement in color, as healthy foliage should appear deep green and vibrant. Recheck at least weekly, focusing on new growth as a positive sign of recovery, alongside a reduction in yellowing leaves.
A fully recovered gardenia will showcase lush, green leaves with a smooth texture, devoid of any browning or wilting. In contrast, early signs of the problem returning may include a resurgence of yellowing, particularly in the lower leaves, which may feel crisp to the touch. If the plant exhibits newer leaves that remain pale, check the soil moisture to ensure it isn’t too dry.
If yellowing returns despite your efforts, consider adjusting your watering schedule to ensure consistent moisture, and evaluate for potential pest infestations like aphids. If symptoms persist, escalating action involves applying a balanced fertilizer, or consulting with a local garden center for more specific advice on potential nutrient deficiencies.
A fully recovered gardenia will display vibrant, green foliage without any remnants of yellow leaves, which indicates a successful turnaround. Watch closely for the emergence of new stems and leaf shoots, as these signals affirm that the plant is on track for a healthful recovery. Conversely, if you notice lingering yellowing or new leaves exhibiting distress, there may still be an underlying issue needing further attention. Inspect for hidden pests among the foliage or signs of disease, as they could uncover problems lurking behind yellowing leaves, allowing for prompt intervention. If new yellowing occurs with leaf drop, consider whether environmental factors, such as temperature fluctuations or drought, may worsen the situation.
If problems persist despite your interventions, it’s essential to inspect for pests or diseases that might have previously been overlooked. In many cases, gardenias, while resilient, struggle under multiple stressors, such as fluctuating pH, nutrient levels, and pest issues. Regularly assessing environmental conditions and care regimens is vital; for instance, placing gardenias in direct sunlight could make them susceptible to heat stress if not acclimatized correctly. When yellowing continues out of control, causing further concern, it may be wise to consult a local agricultural extension office for tailored advice regarding your specific garden conditions, which may involve soil testing, pest management strategies, or possibly expert intervention. Addressing these challenges effectively can be integral in returning your gardenias to robust health.
FAQ
How long does it take for yellowing leaves on gardenias to recover?
Typically, you can expect to see some improvement in the yellowing leaves within two to four weeks after you implement the necessary corrective actions. The timing can depend significantly on the problem’s severity and the specific responsiveness of your gardenia plants, but prompt responses generally yield quicker results. If improvement isn’t observed within this timeframe, it might indicate deeper underlying issues; exploring environmental factors or potential pest infestations would be prudent to prevent prolonged stress.
Can yellowing leaves spread to other gardenias?
Yes, yellowing leaves can signify issues that might be contagious, such as root rot or specific pests. If you notice yellowing leaves on one plant, it’s advisable to inspect surrounding gardenias for similar symptoms to avoid further spread. Early detection is key; for instance, if a single plant exhibits signs of fungal infection, quick action can prevent it from taking hold in nearby plants, thereby avoiding larger issues throughout the garden. Intervention may include isolating affected plants until the problem is diagnosed and treated.
Should I remove all the yellowing leaves at once?
While it’s advantageous to trim back yellowing leaves, removing all at once can stress the plant further and lead to increased yellowing or decreased growth capacity. Focus on cutting those that are severely yellow or damaged, while allowing the healthier remaining foliage to support the plant’s recovery. Gradual trimming of only selected problematic areas is generally better for plant health, maintaining functional foliage that can aid the recovery while assisting in overall growth balance. Observing how the plant reacts to these trims will guide your subsequent actions.