You may notice your chives looking forlorn and unhealthy during watering, which is why you need to know how to prevent stunted growth in chives during overwatering. This excessive moisture can lead to yellowing and wilting, as the roots become stressed and oxygen-deprived. If ignored, the condition can worsen and weaken the plant, making it harder to fix, but you can still improve the situation by inspecting the soil, adjusting your watering habits, and trimming any damaged leaves.
Step 1 – Assess Chives for Overwatering Damage
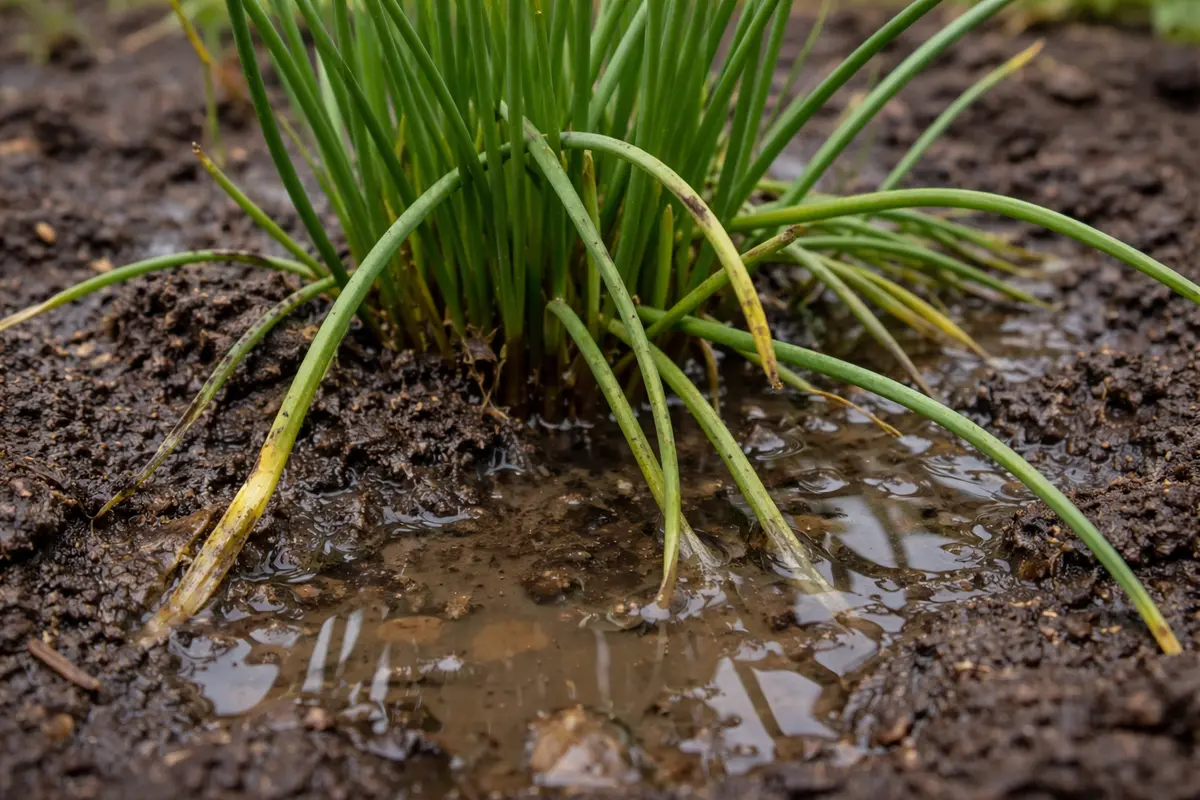
Start by checking the soil moisture around your chives immediately. You should notice the soil feels excessively wet or saturated within moments. If the soil is too muddy, this indicates that your chives are experiencing overwatering, which can lead to root damage. Generally, soil should feel firm but not compacted; if it gives under slight pressure and remains moist up to two inches deep, that’s a strong sign of overwatering. Run your fingers through the upper layer of soil to assess whether it has a spongy texture, another telltale sign of excess moisture.
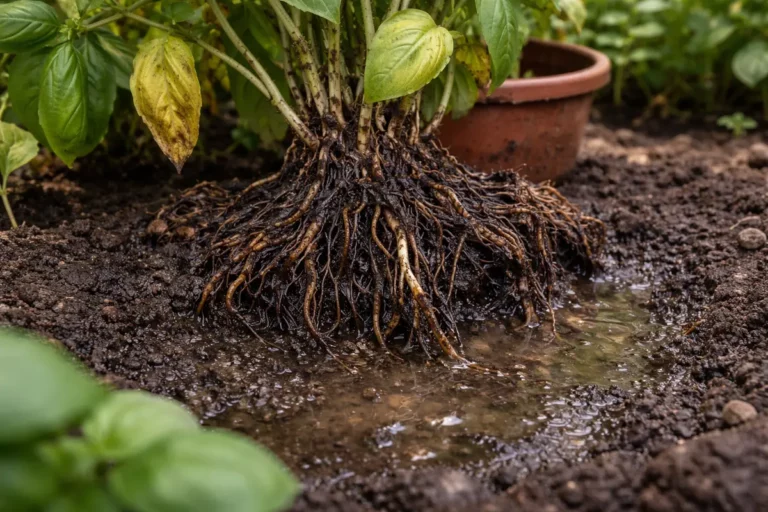
Overwatering occurs when the roots of the chives stay submerged in waterlogged soil, robbing them of necessary oxygen. Healthy roots need to be aerated; otherwise, they can begin to die off. The chives exhibit symptoms like leaf discoloration and wilting because they can’t take up nutrients effectively and are under stress. A clear indicator of this stress is if the chives yield fewer leaves or if the existing leaves start to curl or turn pale. If you notice the long leaves begin to droop as though they are fatigued, that is an urgent sign to act. Droopy leaves can also be accompanied by a loss of vibrant green color, which requires immediate attention.
A common mistake involves leaving the chives in their pots without considering drainage. For instance, if your pot lacks drainage holes or if you’re not allowing the soil to dry between watering, you significantly increase the chances of water accumulating. This often accelerates the symptoms of damage. For example, if the soil remains wet for more than two consecutive days after rain, damage can escalate quickly. A visual heads-up: look for roots that are starting to protrude or suffocate, which can sometimes be seen through clear pots. Always aim for a soil moisture reading that allows for slight dryness at the top inch before watering again; you can simply insert your finger a couple of inches into the soil to gauge moisture levels. If the top soil is dark and consistently wet, that could point towards unsuitable watering habits.
Step 2 – Identify Poor Soil Drainage Issues
Next, examine the drainage capacity of the potting medium. You should observe closely whether water is pooling at the bottom of your pot or if it drains slowly; if you notice soil that stays completely saturated after watering, this needs to be addressed. A well-draining soil should not retain water after a few minutes; if water collects and stays, that indicates poor drainage that could spell trouble for your chives. Investigating how quickly your soil drains is key; ideally, it should absorb water and release it slowly, preventing waterlogging while still keeping moisture accessible to roots.
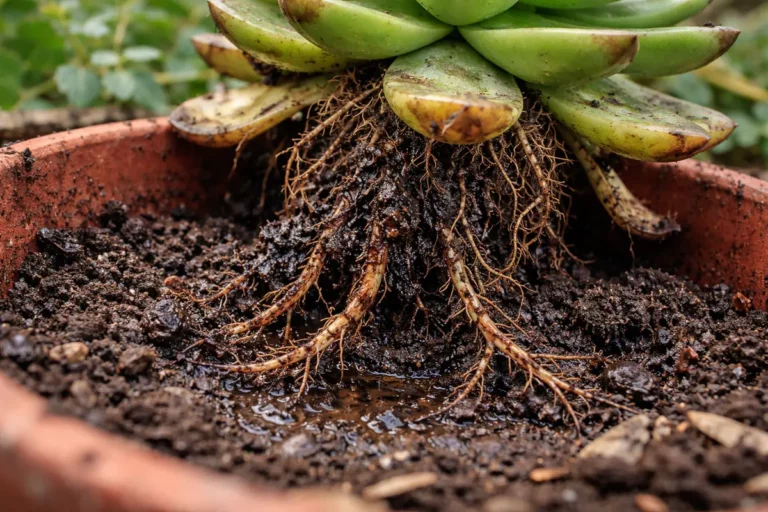
Chives thrive best in well-draining soil that allows water to escape easily. When drainage is poor, the roots become saturated, leading to conditions favorable for rot and root-borne fungal diseases. Typically, chives should be planted in a soil mix that includes components like peat moss and coarse perlite, which both retain some moisture and allow for effective drainage. If left unchecked, your chives can quickly decline. If you squeeze the soil and it does not crumble or instead feels like it is squeezing water out, that is a pressing signal to act fast. Additionally, check for compacted layers beneath the surface, as this can also impede drainage.
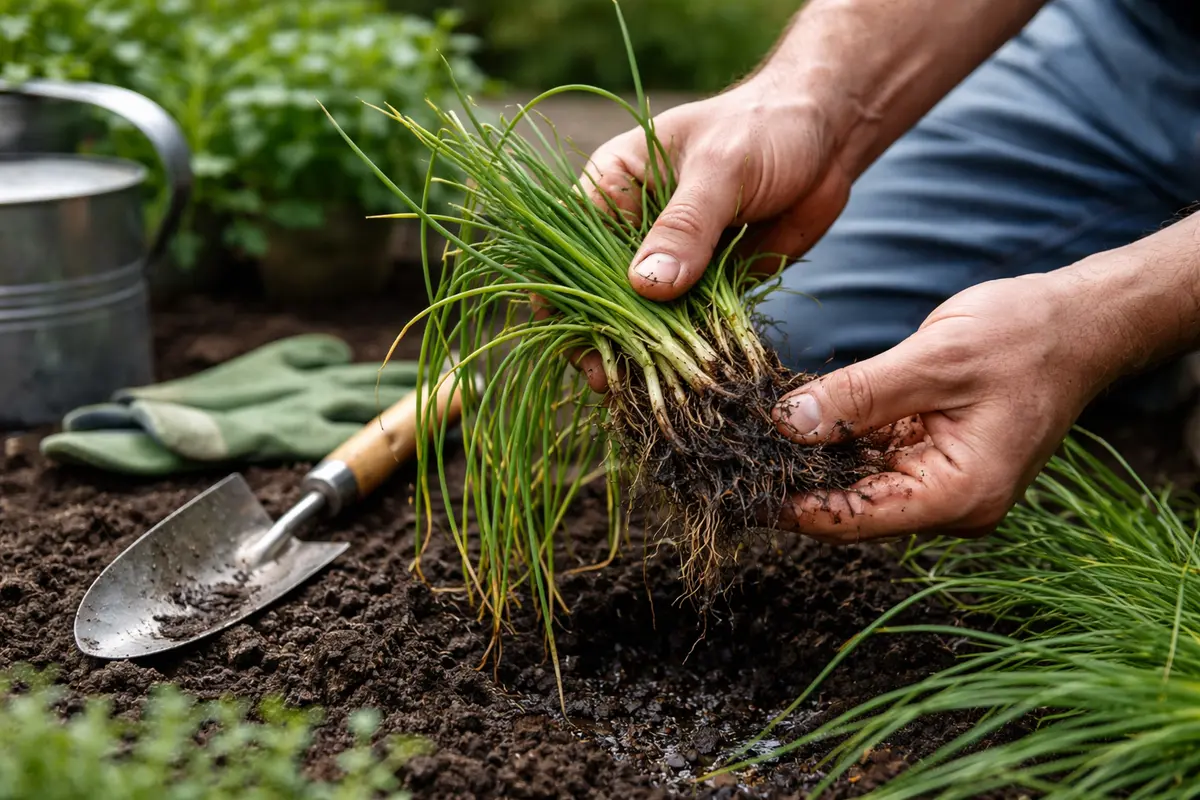
If you observe that the soil retains too much moisture after testing, consider repotting your chives into a specially designed soil mix that emphasizes drainage; you could combine two parts potting soil with one part perlite or coarse sand. This specific ratio ensures adequate drainage while retaining enough moisture to satisfy the needs of your plants. Alternatively, if there’s a visible yellowing of leaves paired with a lack of water drainage, that’s an indicator of root rot which could lead to further complexities. Be aware: if you pull your plants out and notice a foul smell or mushy roots, immediate removal from the pot and replacement with fresh soil is necessary. Failure to do so can lead to a complete loss of your plants. This transition can be guided by carefully gently removing the chives and inspecting the root health, ensuring that no rot is present before transferring to new soil.
Step 3 – Revitalize Chives with Proper Fertilizing
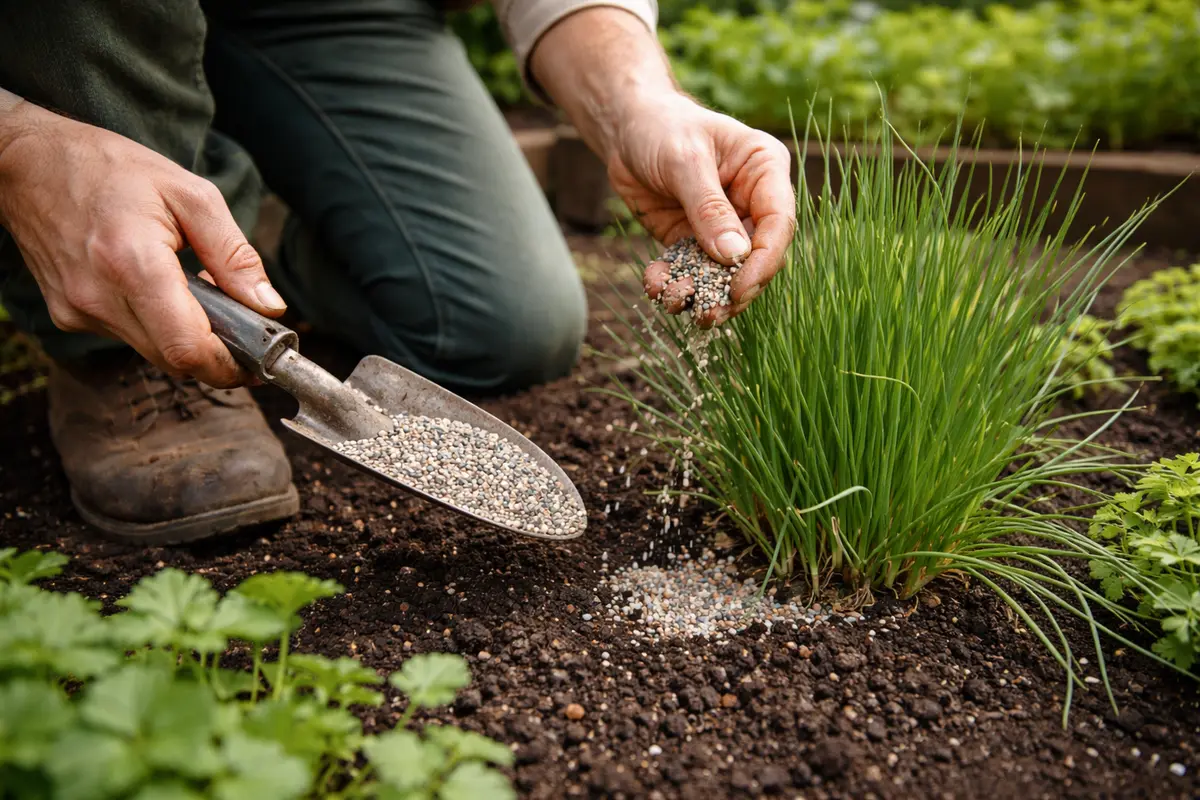
Fertilize the chives with a balanced, water-soluble fertilizer to stimulate recovery. You should expect improvements in the color and health of the leaves within a week, with lush greens returning to flagging plants. Ideally, choose a fertilizer with an NPK ratio of 10-10-10 or something similar towards balanced nutrient intake. This infusion of nutrients should occur after your chives have shown recovery signs from the previous stress, allowing plants to strengthen. Make sure to dilute the fertilizer to half the strength recommended on the label to avoid shocking the roots further, allowing nutrients to enter the root system gradually while minimizing trauma.
By applying fertilizer, you provide essential nutrients that the overwatered chives may lack due to impaired root function from previous excess moisture. During this initial weeks’ post-fertilizing observation, you should see signs such as the deepening of green tones in the leaves and a decrease in drooping. A healthy recovery will be visible when the chives exhibit lush green leaves, standing upright, which indicates they are regaining their vigor and returning to their intended growth patterns. If you note the edges of the leaves turning brown, it could suggest that the fertilizer is too strong or the plant remains under stress from poor drainage. Always check leaf health against soil moisture; if the leaves do not perk up despite fertilizing, this often points to ongoing root issues.
A common mistake during this stage is over-fertilizing. Applying nutrients indiscriminately can shock the plants further if they are not yet fully recovered from overwatering. For instance, applying a full-strength fertilizer shortly after removing a plant from crisis could worsen wilting. Keep an eye on signs; if the leaves begin turning brown again or new growth is struggling to appear, this might indicate ongoing stress from excess moisture or high nutrient concentrations. Waiting too long to fertilize after fixing the moisture issue can slow down the recovery process; ideally, fertilizing should take place only after the soil moisture has stabilized for a few days, such as waiting three days after watering has begun to stabilize, to avoid further compounding stress.
Step 4 – Water Chives Sparingly During Rainy Seasons
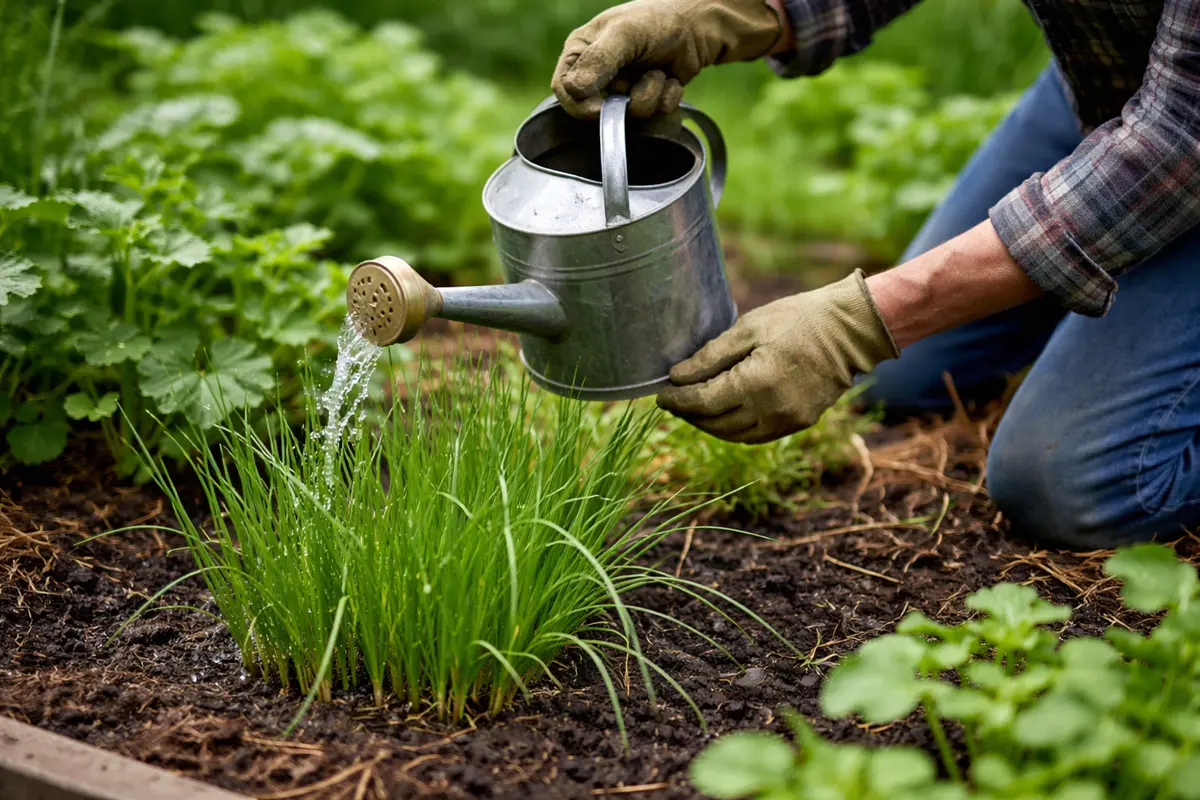
Water your chives sparingly, especially during rainy seasons. You should notice that the soil stays moisture-balanced without becoming overly saturated. This precaution means paying careful attention to moisture levels; if you find that the top inch of the soil is still damp after rainfall, skip watering during that period. This requires you to check the soil regularly, typically around four times a week in humid weather, adjusting the frequency to avoid overloading the plants.
Excessive watering during wet periods creates risks of waterlogged roots, significantly hampering the plant’s ability to absorb nutrients effectively and even leading to further stunting. It’s best to use your finger to test the soil moisture first. If it feels damp, inserting a moisture meter can provide an accurate and clear picture of the soil’s saturation without further digging. Your watering schedule should include checks after heavy rain, ensuring the topsoil has dried out before deciding to water again to prevent sogginess. This vigilance will minimize the risk of overwatering, promoting a healthier growing environment for your chives.
As a preventive measure, consider adjusting your irrigation techniques depending on weekly weather forecasts. For instance, if rain is predicted for a few days, it’s wise to hold off any watering for at least a week to allow ample time for natural drainage and soil recovery. If you find that the soil retains too much moisture for more than 48 hours following rainfall, re-evaluate the drainage conditions to take further action. Monitoring your watering based on weather patterns allows you to create a responsive watering schedule that protects your plants from dangerous levels of moisture. This could also involve mulching around the base of your chives to retain some soil moisture while allowing excess water to drain away.
Step 5 – Inspect Chives for Signs of Wilting Weekly
Start by checking the moisture level of the soil every few days, specifically looking for signs of sogginess or excessive dampness. Observe the leaf texture; healthy chive leaves should feel firm and slightly crisp, while any soft or wilting foliage indicates overwatering. Recheck the soil moisture regularly and adjust your watering habits accordingly to ensure the soil remains well-draining.
A fully recovered chive plant exhibits upright, vibrant green leaves that are firm to the touch, contrasting with the early signs of stunted growth seen through yellowing or limp leaves. If you notice any discoloration returning, check for signs of root rot by examining the roots for softness or mushiness, which indicates they are too wet. A healthy chive plant should also have a pronounced, pungent aroma, whereas a struggling plant may lack this distinct scent.
If stunted growth returns despite these adjustments, consider reducing watering frequency even further and, if necessary, transplant the chives into drier, well-draining potting mix to encourage proper hydration. Additionally, evaluate if the plant is in an overly humid environment, which can exacerbate overwatering issues. If problems persist, consult a gardening specialist for tailored advice on your chives.
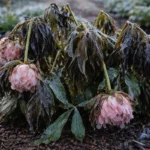
A fully recovered chive plant showcases vibrant green leaves that stand upright, demonstrating resilience and growth. In contrast, early signs of stunted growth due to overwatering manifest as soft, yellowing leaves that droop and may feel mushy to the touch. Regular weekly check-ins are critical; if the leaves return to a limp state or exhibit dark spots, these are indicators that the issue may be starting again. It’s also important to document your chives’ recovery progress over time, so you know what specific conditions correlate with positive health outcomes.
If stunted growth continues despite proper watering adjustments, reduce watering further and increase sunlight exposure to enhance drainage and evaporation. For instance, if you notice poor growth, evaluate whether your chives are receiving at least six hours of indirect sunlight daily, optimizing their environment to tackle ongoing issues. If wilting persists even with reduced watering and more sun, consider repotting your chives into fresh, dry soil to refresh their environment and provide better aeration. Full recovery means that individual plants have thickened leaves and stand tall rather than drooping, which reflects a stabilized environment.
Still, if wilting returns, this signals that conditions may still be unfavorably wet or that nutrients are not reaching the roots effectively. Regular inspection is key to catching any returning issues before they morph into severe conditions, ideally initiating this routine a week post-implementation of corrective actions. Particular attention should be paid to any variations in the color of new leaf growth when performing inspections; sudden changes can indicate root or moisture issues needing action. If you notice wilting again after following the recovery steps, consider testing the soil moisture once more. If it remains overly soggy, rather than merely moist, further adjustments in drainage or even possible repotting should be considered to preclude any recurring stunted growth. Additionally, if newly grown leaves begin displaying discoloration or die back rapidly, this suggests an ongoing issue with root health that cannot be sidelined. By remaining proactive with these follow-ups, you can effectively avert the recurrence of stunted growth or other chronic issues arising from overwatering while maximizing your chives’ growth potential.
FAQ
How long does it take for chives to recover from overwatering?
Chives generally start showing signs of recovery within one to two weeks after correcting the watering issue and applying fertilizer. Recovery speed may vary based on the extent of root damage; ideally, maintaining a stable moisture level afterward will hasten this process. Regular checks should be conducted to ensure they are not backtracking.
What signs indicate that overwatering has happened?
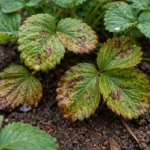
Signs of overwatering in chives include yellowing leaves, wilting, and a sour smell emanating from the soil. Early detection is crucial to prevent permanent damage; for instance, wilting conditions can worsen quickly, leading to irreversible root loss if left unattended. Familiarizing yourself with the nuances of your plants’ response will provide better targeting of environmental adjustments.
Should I remove any affected parts of the plant?
Yes, trimming off severely wilted or yellowed leaves can help the plant focus its energy on healthier growth. Be sure to use clean, sharp scissors to minimize any potential for infection. When cutting away affected foliage, remember that a timely response can stimulate healthy growth by redirecting nutrients to the surviving parts of the plant. A note of caution: avoid taking off too many leaves at once, as this can stress the plant further. Instead, assess the overall condition before trimming more leaves and ensure that not too much foliage is removed all at once.