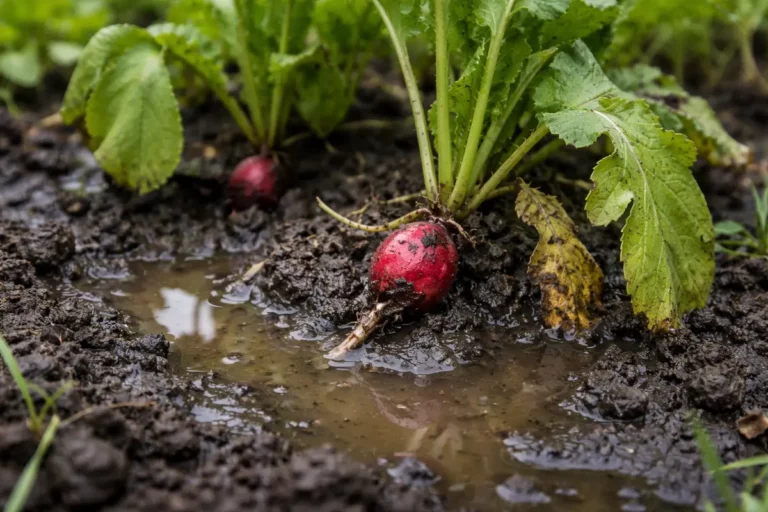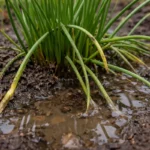
You may notice unsightly dark spots on your strawberry leaves during those humid days following a heavy rain, which is why you need to know about fixing leaf spots on strawberries after heavy rain. This issue stems from excess moisture creating a breeding ground for fungal infections, leading to leaf spots that can compromise the health of your plants. If left unattended, the problem worsens and can spread to other parts of the plant, leading to more damage and stalling growth. Fortunately, fixing it is possible now—simply check your plants for affected leaves, and remove any that show signs of infection to improve overall health.
Step 1 – Trim Affected Strawberry Foliage Immediately

First, remove any affected leaves immediately to limit the spread of leaf spots caused by the heavy rain that created excess moisture. Ensure you dispose of these leaves away from the garden to prevent further infection. After this action, you should notice less transference of spores or pathogens among remaining leaves, and the overall appearance of the plant should start to improve as it focuses on healthy growth.
Acting quickly is crucial because strawberries are particularly susceptible to fungal infections in wet conditions. If you delay, the moisture creates an optimal environment for pathogens to thrive, exacerbating the issue—leading to increased leaf spots and compromised fruit quality. By removing the affected leaves, you also reduce the plant’s stress from fighting multiple infections, allowing it to redirect energy toward recovery instead of battling a spreading disease.
For instance, a gardener who delayed tending to their strawberry plants after heavy rains noticed their crop succumbed to a rapid outbreak of gray mold, ultimately resulting in a lost harvest. Conversely, another gardener who acted quickly by removing the damaged foliage saw their plants rebound swiftly and yield fruit just weeks later. If you notice an increase in leaf spots despite pruning, check for standing water, as it often indicates drainage issues that need addressing.
Acting fast is crucial with strawberries because delayed intervention allows pathogens such as Botrytis and Anthracnose to proliferate, resulting in more extensive damage or even plant death. If left untreated, the plant’s ability to photosynthesize diminishes, ultimately affecting fruit development and yield. If leaf spots are progressing rapidly, check for excess moisture in the soil, which exacerbates the problem.
For example, a gardener who addressed leaf spots within 24 hours noticed a significant reduction in the spread, while another who waited a week lost a considerable portion of their crop. A common misstep at this juncture is merely trimming wilted or damaged foliage without confirming the root cause, which can lead to recurrent issues in the future. If there’s minimal recovery after removing spots, check your watering practices to avoid over-saturation.
The importance of immediate trimming lies in limiting the opportunity for fungal spores to spread to healthy foliage. By cutting away the affected areas, you reduce the leaf surface area where pathogens can thrive. This practice aids the plant in redirecting resources to its healthier parts, encouraging overall vitality. If spots are noted immediately after heavy rain, those leaves should be addressed right away to minimize further damage. If conditions remain wet, even a few hours can mean the difference between a minor issue and a major systemic outbreak.
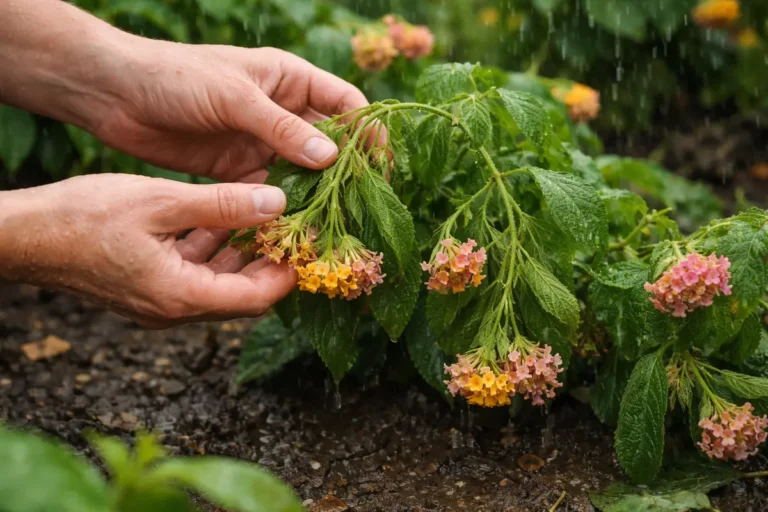
Many gardeners mistakenly focus on cleaning the soil around their plants without addressing the damaged foliage first. By doing this, they miss a critical moment where quick action could prevent further issues. Additionally, remember to use sterilized scissors for pruning to avoid introducing additional pathogens into the plant. However, if the scissors are not sterile, you run the risk of transferring pathogens from one part of the plant to another, potentially exacerbating the problem. After cutting, be sure to dispose of the infected leaves away from your garden area to prevent reinfection.
Step 2 – Diagnose Fungal Issues from Excess Moisture
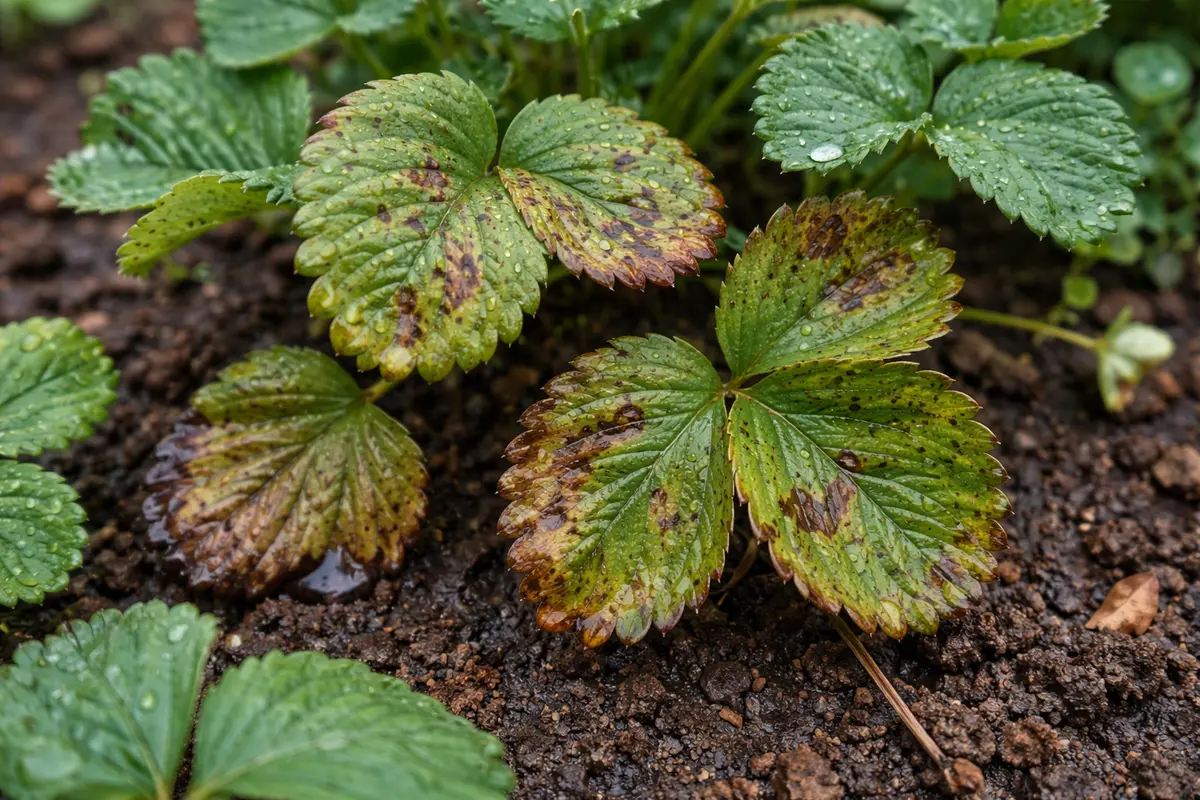
Inspect your plants closely for signs of fungal infections that may have developed due to the heavy rain. You will find clear indicators, such as a powdery or fuzzy appearance on the undersides of leaves, suggesting mold or mildew. Visible dark spots can also spread quickly, diminishing overall leaf health. If you see a jelly-like substance on the leaves, this could indicate the presence of a more serious issue like a pathogen’s base level starting to form, revealing roots starting to rot or the plant tissue becoming compromised.
Excess moisture creates an ideal environment for pathogens like powdery mildew to flourish, which can compromise the plants’ health. When frequently saturated, the tissue becomes less resistant to disease, often resulting in issues such as leaf spots. To diagnose further, check the soil moisture and inspect for any root discolored symptoms, such as blackened areas, as these issues may indicate deeper problems. Understanding these dynamics helps in creating a more suitable environment for strawberry plants through proactive measures. If there are also visible areas of root rot or the smell of decay, those signs indicate systemic issues needing urgent attention.
If you notice a consistently damp soil environment, this might point to drainage issues as well. Inspect the base of your plants for standing water immediately after rains. If waterlogged conditions persist, it’s essential to amend the soil and improve drainage by incorporating organic matter or altering the soil structure. Adding a layer of compost or well-rotted manure can enhance soil structure effectively—this can improve drainage while also providing necessary nutrients. In cases where soil remains heavy and wet even days after rain, consider moving the plants to a raised bed or using containers specifically designed for better water retention management.
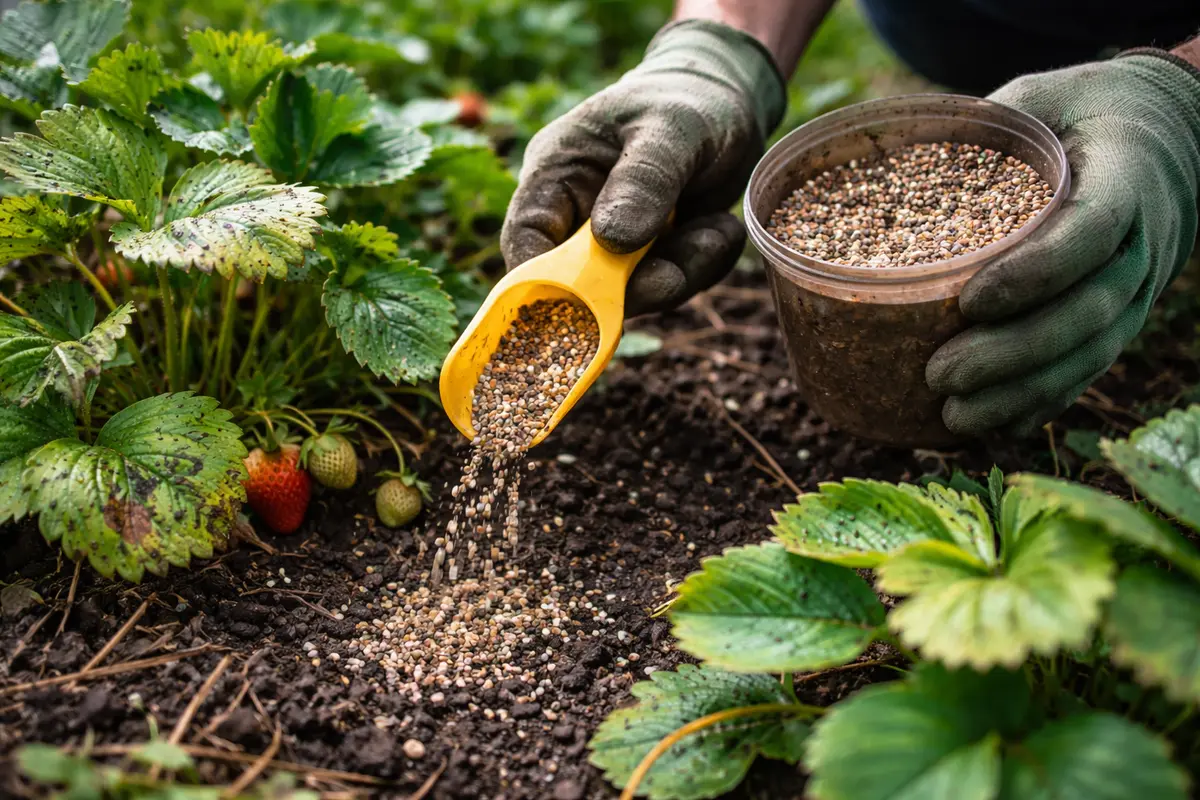
Step 3 – Apply Nutrient Boost to Revitalize Strawberries
Start by removing any severely affected leaves from your strawberry plants after heavy rain, cutting them at the base to prevent the spread of fungal infections. As you do this, look for new green shoots emerging, which indicate that the plant is beginning its recovery process.
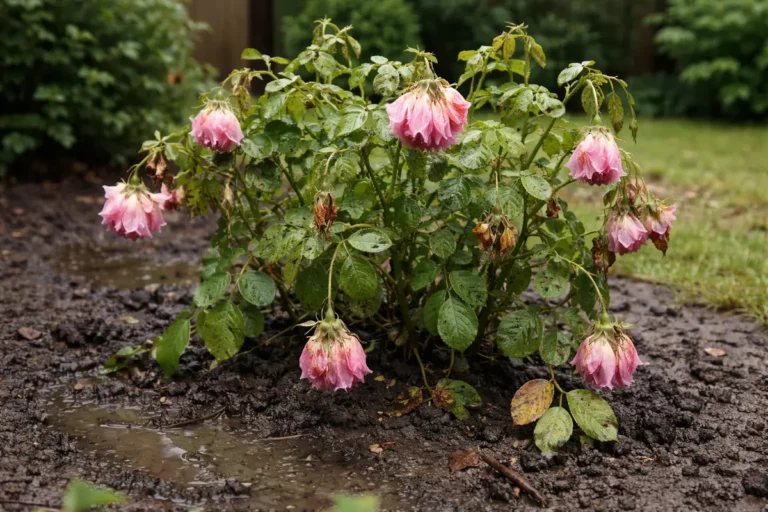
Recovering from leaf spots often takes one to three weeks, depending on how well the plants are sheltered from further rain and excess moisture. Healthy regrowth will appear as lush green leaves free of spots, thriving in a well-drained area. If the leaves remain discolored and droopy, check to ensure they are not still sitting in overly wet soil, which can hinder recovery.
Avoid the mistake of overwatering your strawberries during recovery; heavy rainfall may have saturated the soil already. Instead, wait until the top inch of soil dries out before adding water. If you notice wilting after heavy rain, check for fungal infections instead of assuming the plants need more water.
Recovery from leaf spots typically takes about two to four weeks, depending on environmental conditions. When conditions are warm and sunny, you may notice robust new growth; conversely, in humid and overcast weather, growth might be slower. If new leaves appear with only minor spotting, continue to monitor moisture levels; if leaf spots return, check for excess moisture in the soil.
Avoid over-fertilizing your strawberries during recovery, as this can lead to nutrient burn and further stress the plant. Instead, focus on providing consistent but moderate watering; if you notice leaves wilting after heavy rain, check drainage to prevent waterlogging. Timing is key; ensure fertilizers are applied during the active growing season for optimal results.
Providing adequate nutrients helps the plant recover from the stress caused by flooding and fungal attacks. Nutrient deficiencies can take a toll on recovery, stifling new growth. Application at the right time—such as after removing damaged leaves—can enhance the overall effectiveness of the fertilizer. Keep in mind that soil amendments should be well-mixed into the top few inches of soil to ensure roots effectively absorb them.
Avoid over-fertilizing, as this can lead to nutrient burn, which stresses the plant further. Instead, follow the recommendations for application rates on the fertilizer packet and monitor your plants for signs of improvement. Within a week, you should specifically look for signs of fresh green leaves sprouting from the crown area. If leaf edges begin to yellow or die back, that’s a clear indication of over-fertilization. If little to no new growth is visible after a week, further soil assessment may be needed to address underlying issues. Routine soil testing can help guide future applications effectively, ensuring plants receive the right balance of nutrients—testing soil pH and nutrient levels at least twice a growing season will allow you to adjust over time for better outcomes.
Step 4 – Prevent Leaf Spots by Managing Watering Schedule
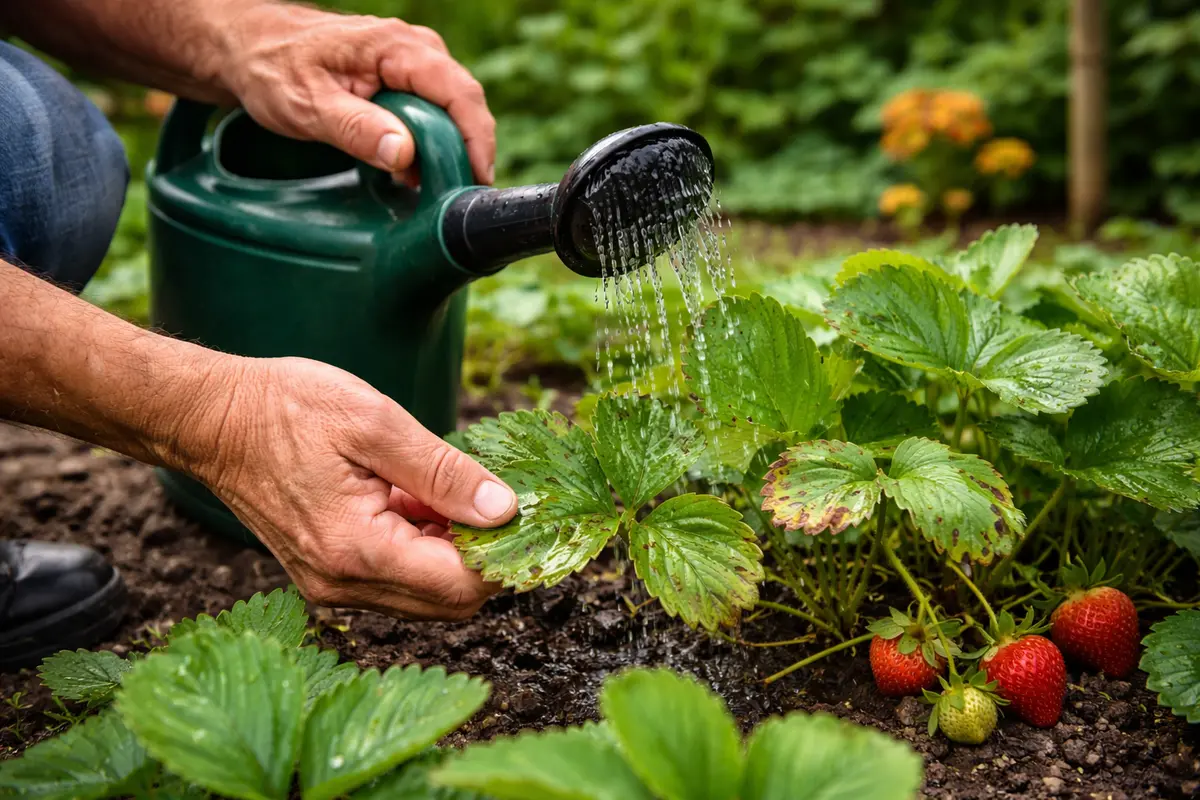
Adjust your watering routine to ensure the soil remains moist but never soggy. This strategy will help maintain healthy plants and minimize the risk of leaf spots. A good rule of thumb is to check the soil’s moisture level by inserting your finger an inch into the ground; if the soil feels dry at that depth, it’s time to water. Additionally, be mindful of the weather patterns—during prolonged wet periods, reduce your watering frequency to avoid waterlogging.
In establishing a consistent watering schedule, you align your practices with the plants’ need for moisture without creating overly saturated soil conditions. Allowing the top inch of soil to dry out between waterings encourages root health while preventing the ideal conditions for fungal growth. Watering either in the morning can allow excess moisture to evaporate before nightfall, thereby reducing mildew risk in the cooler hours; watering in the evening can risk leaving plants susceptible to infections overnight.
During periods of heavy rainfall, consider temporarily reducing supplemental irrigation to avoid further compounding moisture levels within the soil system. Implementing mulch can help regulate moisture retention and temperature, giving the strawberries a buffer against excessive rain. However, be cautious—while mulch aids in moisture retention, if it becomes too thick or clogs the soil surface, it can hinder water infiltration, leading to poor drainage. Conversely, if you find the mulch is holding too much moisture after rainfall, consider reducing its thickness to enhance drainage. Moreover, monitoring weather forecasts enables you to be proactive about watering, aligning your efforts with forecasted rain events so that irrigation aligns with the natural conditions.
Step 5 – Inspect Leaves for New Spots Weekly After Rain
Monitor your strawberry plants weekly for any new leaf spots after heavy rainfall to stay on top of potential issues. You should see fewer spots if the initial problem was addressed effectively, but be vigilant for any reoccurrence. Use a notebook to keep track of the condition of your plants, noting down visible changes every week to spot patterns or re-emergence of leaf spots. Create a checklist that includes areas of concern, surrounding environmental conditions, and intervention methods for future reference.
A fully recovered strawberry plant will display vibrant, healthy foliage that is free from discoloration or spots. If the leaves are regaining their green color and firm texture, this is a good sign that recovery is progressing. Watch for signs of systemic problems such as yellowing leaves or stunted growth; these can indicate deeper-rooted issues necessitating further intervention that might involve checking soil drainage or nutrient deficiency. If leaves are drying out or curling at the edges accompanied by dark spots, it’s time to reassess your watering strategy.
If you discover new leaf spots reemerging despite prior actions, consider evaluating your environmental setup. Factors such as plant overcrowding can lead to poor air circulation, making conditions ripe for fungal spread. It may become necessary to trim back surrounding plants to improve airflow. Additionally, consider implementing row covers or other protective measures in scenarios where rain is forecasted to minimize splashing water that can spread pathogens. Perhaps the underlying rot or drainage issues persist, requiring additional adjustments to soil or watering practices. Checking elements such as airflow and sunlight exposure can also reveal whether environmental stresses are contributing to the problem, thus necessitating adjustments in plant positioning as needed.
FAQ
How long will it take for my strawberries to recover from leaf spots?
Recovery can take from one to three weeks, depending on the severity of the leaf spots and how effectively they were treated. After addressing the immediate issue, monitor for new growth, which indicates the plant is recuperating. If you provide optimal conditions, such as proper watering and nutrient supply, recovery time may be at the shorter end of that range. However, if you notice any persistent issues after the initial recovery period, consider exploring underlying conditions such as root health or drainage quality.
Can leaf spots spread to other plants nearby?
Yes, leaf spots can spread to nearby plants, particularly if they are caused by fungal pathogens. It is essential to trim affected leaves and improve airflow around your plants to minimize the risk of transmission. Regularly cleaning any plant debris around the garden area can help reduce the prevalence of fungal spores in the environment, limiting cross-contamination. Also, consider rotating crops annually; this helps break pathogen life cycles and prevent recurrence in subsequent years.
Should I remove all affected leaves immediately?
While it is prudent to remove heavily infected leaves, do not remove all foliage at once. Leaving some healthy leaves will help the plant continue photosynthesize and recover effectively. If the number of healthy leaves becomes limited due to heavy infestation, it can further weaken the plant and hinder its growth processes. Look for a balance—cutting back enough to stop the spread but ensuring foliage remains to facilitate recovery from light stress while responding to environmental cues.