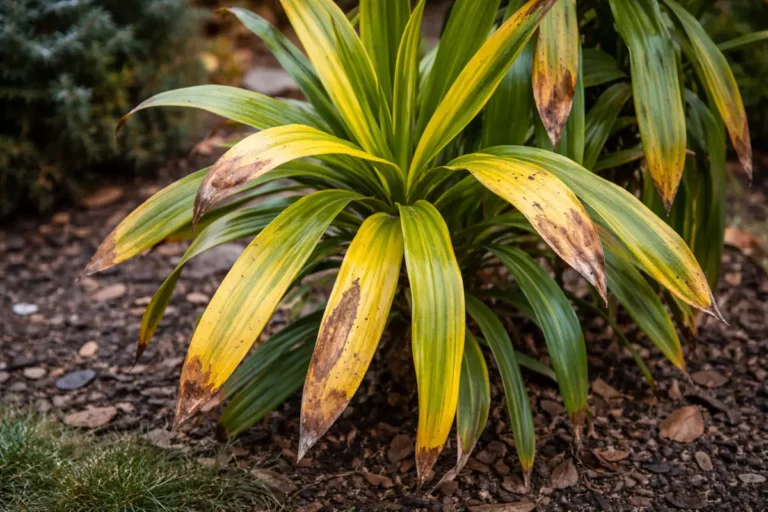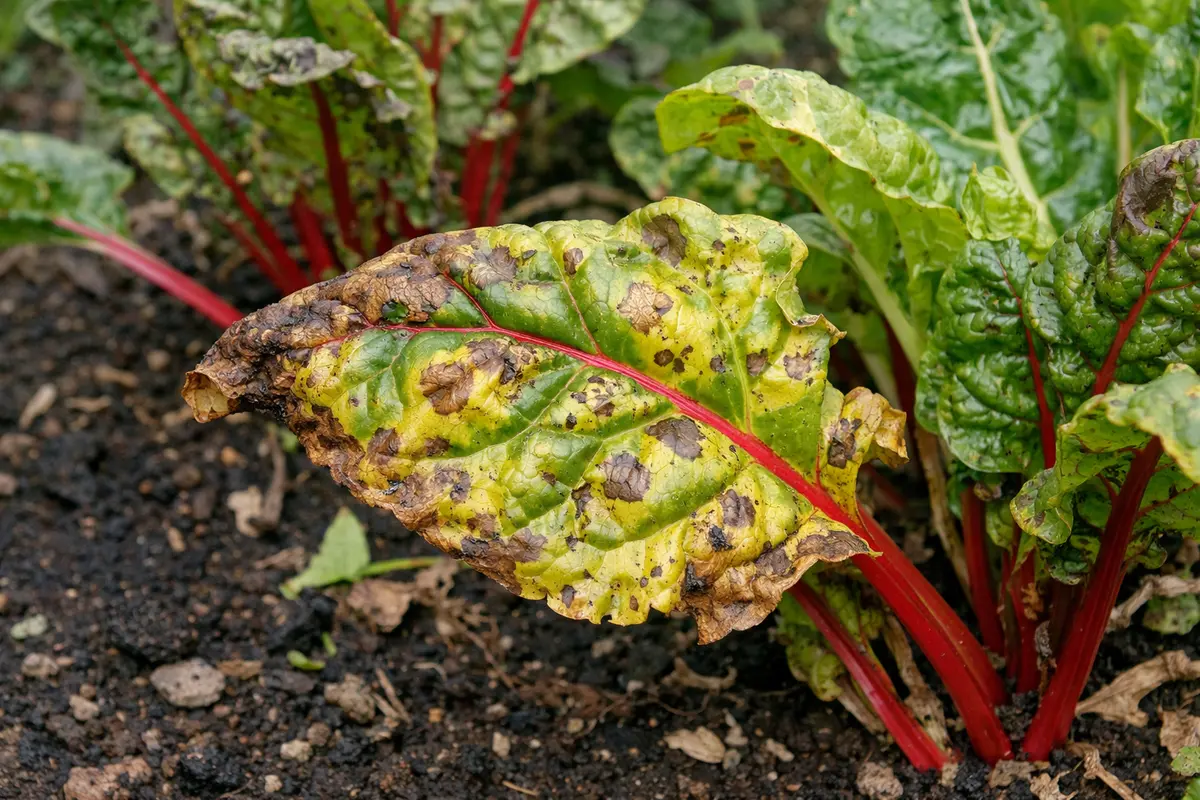
You may notice that your chard plants are developing yellowing leaves during the colder winter months, which is why you need to know how to stop yellowing leaves on chard plants in winter. This issue often arises due to nutrient deficiencies or inadequate light, leading to the distressing yellowing of leaves. Ignoring this problem can weaken the plant and lead to more damage, but the good news is that you can improve the situation by adjusting your care and monitoring conditions closely. The key is to act promptly and assess your plant’s environment to prevent further deterioration.
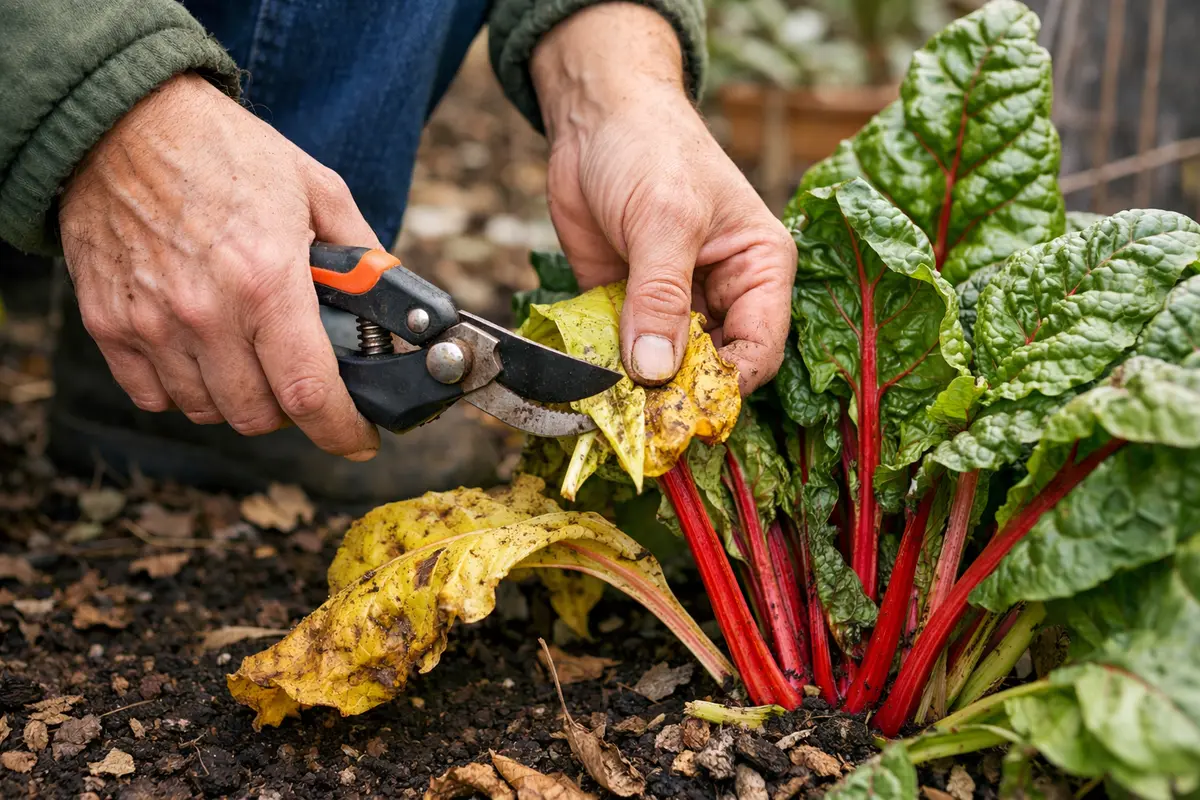
Step 1 – Trim Yellowing Chard Leaves Promptly
Start by checking the soil moisture around your chard plants and ensuring it is consistently damp but not waterlogged; this can help prevent yellowing leaves caused by stress. If the soil feels dry, water it thoroughly, and within a day or two, you should notice the leaves regaining some turgor and brightening in color.
Swift action is crucial because chard plants can quickly suffer from nutrient deficiencies when they face stress, leading to further yellowing and decay. If you delay addressing dry soil, your chard may not only continue to yellow, but the roots could also begin to rot in sogginess, creating a stark contrast between vibrant, healthy growth and limp, yellowing leaves that signal distress. If yellowing persists despite adequate moisture, check for pests like aphids that can sap nutrients directly from the leaves.
A gardener discovered significant improvement in their chard after recognizing the importance of immediate watering; while their first batch turned limp and yellow, a subsequent planting thrived with timely moisture management. Commonly, gardeners overlook soil condition, allowing dryness to damage their plants before realizing the need for intervention, thus prolonging recovery.
Removing the affected leaves helps the plant direct its energy toward healthier foliage, promoting overall plant vigor. When leaves turn yellow, they typically signal nutrient deficiencies or environmental stress; thus, cutting them loses any further opportunity for those nutrients to drain from healthy parts. Chard, being a leafy vegetable, heavily relies on strong leaf growth for photosynthesis and overall health, so it’s crucial to act swiftly. Aim to make clean cuts using sharp shears to avoid tearing the leaves; messy cuts can invite disease, which may exacerbate the yellowing problem. If your chard is thriving, the difference in energy distribution can be noticeable very shortly after you’ve made the cuts.
A common mistake is to allow yellow leaves to remain on the plant, mistakenly hoping they will green up again. However, leaving them can compromise the health of nearby green leaves and lead to rapid deterioration. If many leaves turn yellow, it can indicate larger issues with soil health or environmental conditions that need to be resolved. Make it a habit to assess the plant thoroughly after trimming; a good practice is to cut yellowing leaves at their base, which not only enhances cleanliness but also helps minimize trauma to surrounding healthy leaves. Conversely, if you notice that several leaves are still yellowing after trimming, consider it a signal to dive deeper into the root causes behind this distress. The presence of multiple yellow leaves can suggest issues with nutrient absorption or root health that require immediate attention.
Step 2 – Diagnose Causes of Chard Leaf Discoloration
First, check the soil moisture levels around your chard plants to ensure they aren’t waterlogged. If they are, reduce watering and improve drainage by amending the soil with organic material, which should lead to an improvement in leaf color within a few days as excess water is removed from the root zone. If you discern a wet, squishy texture in the soil, this is an early warning sign that roots may be suffering from lack of oxygen.
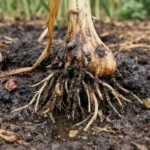
Yellowing leaves often indicate root rot caused by saturated soils, where oxygen is cut off from the roots. The roots begin to decay, and nutrients cannot be absorbed effectively, leading to visible leaf discoloration; this condition contrasts sharply with healthy plants exhibiting vibrant green leaves that thrive in well-draining soil. If you notice mushy roots when inspecting, this confirms rot is affecting your chard. In cases where plants are situated in poorly draining heavy clay soil, the chance of this problem increases significantly, creating conditions that are ripe for rot and yellowing.
If the soil smells sour or feels overly compacted, shift to raised beds and incorporate perlite or coarse sand to enhance drainage. Alternatively, if the leaves are yellowing but soil moisture is adequate, closely inspect for nutrient deficiencies such as nitrogen or magnesium, which may require a targeted fertilizer application. To accurately diagnose these deficiencies, observe your plants’ growth patterns: if they are small and stunted despite your watering routine, nutrient deficiency is likely at play. Monitor the color of the stems and leaf veins; pale or yellowish veins against green leaves suggest a nitrogen deficiency, while broader yellowish leaf areas indicate potential magnesium issues. If left unaddressed, these deficiencies can lead to an entire crop of chard failing to thrive.
Another frequent cause is inadequate drainage, especially in heavy clay soils where roots may rot if left too wet. To remedy this, ensure proper drainage systems before rehydrating the plant; this is crucial for maintaining healthy growth during winter months. In cases of poor drainage, you might observe water pooling on the soil’s surface even after light rainfall. Amending the soil with organic matter such as compost or peat moss can enhance structure and drainage capacity, allowing roots to breathe and thrive. However, exercise caution, as adding too much organic matter may displace necessary mineral content; aim for a balanced amendment strategy that incorporates about 25% organic material into your existing soil, tailoring the mix to address specific drainage issues effectively.
Step 3 – Nourish Chard to Revive Leaf Color
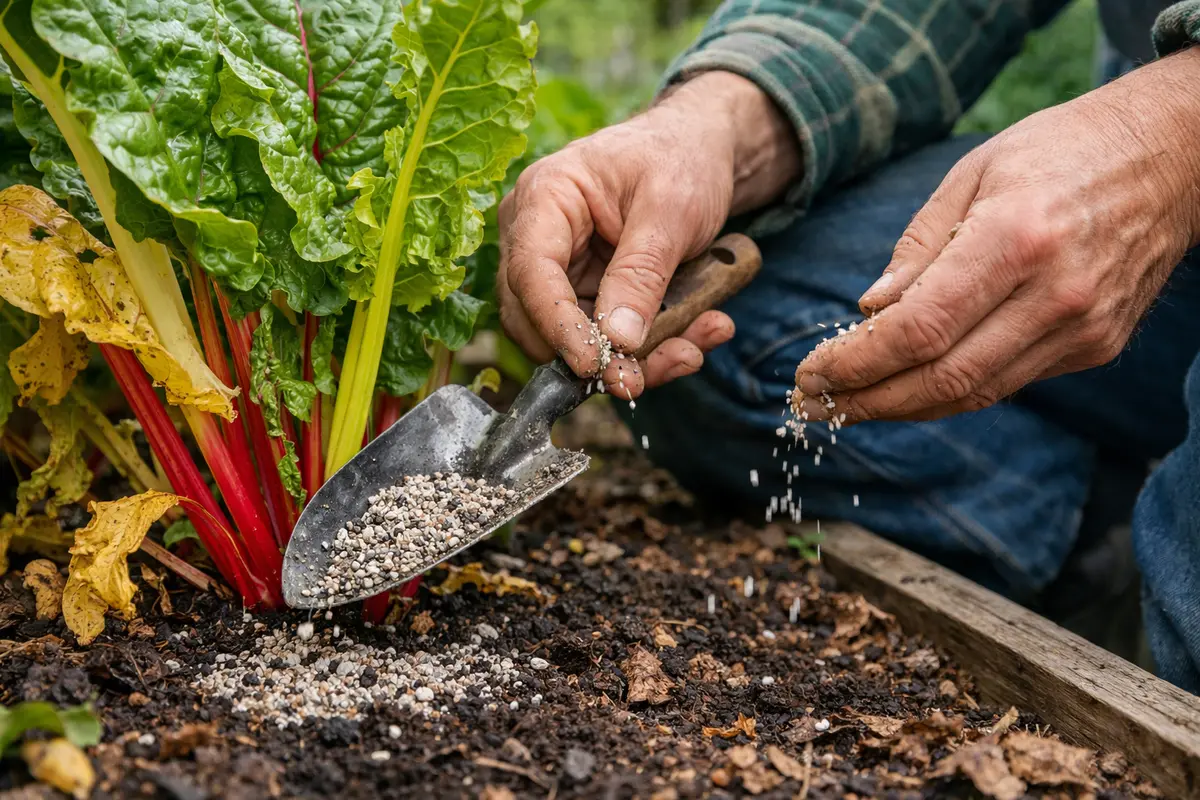
Apply a balanced organic fertilizer to replenish depleted nutrients in the soil. You should see signs of improved leaf color within a week as the chard begins to regain its vibrant green tint. Choosing a fertilizer that is higher in nitrogen (such as a 10-10-10 or a fish emulsion) can be particularly beneficial for leafy greens like chard. It’s important to water the plants lightly before applying fertilizer to avoid root burn, particularly if your soil is already moist; this serves to buffer the impact of any extra nutrients, promoting healthy absorption. Ensure that any fertilizer you’re utilizing aligns with the specific nutrient deficits indicated by prior observations.
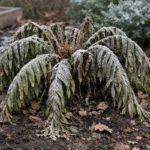
Feeding your chard not only supports recovery from yellowing but also enhances its resistance to future stressors, like temperature fluctuations common in winter. Organic fertilizers, rich in nitrogen and micronutrients, revitalize distressed plants and strengthen roots. When the soil is nutrient-rich, chard plants are better equipped to deal with winter challenges, such as frost and wilting. Be mindful of the quantities you apply; typically, two tablespoons of fertilizer per square foot of soil are adequate, but adjust based on plant size and existing conditions. Perform a follow-up assessment after two weeks, observing leaf growth patterns to confirm whether the nutritional strategy is effectively addressing deficiencies and enhancing overall plant vigor.
During this care period, water regularly but ensure that the soil does not become waterlogged, which can lead to root rot. A common mistake during recovery is over-fertilizing; this can lead to root burn and further stress, indicated by browning leaf tips and a sluggish growth response. If your chard is particularly stressed, start with diluted applications, using half the recommended amount of fertilizer for the first couple of weeks. After evaluating the response, gradually increase the amount if significant improvements are noted. If leaves continue to appear discolored despite fertilization efforts, consider performing a soil test to identify specific nutrient deficiencies. A comprehensive soil test can clarify whether pH or nutrient levels might still be problematic for your plants and guide subsequent corrections.
Step 4 – Inspect Chard for Leaf Changes Weekly
Start by checking your chard plants every few days for signs of yellowing leaves. Pay close attention to the leaf color and texture; healthy leaves should be vibrant green and firm. If you notice the yellowing returning or worsening, recheck your plants weekly to ensure you’re catching any issues early.
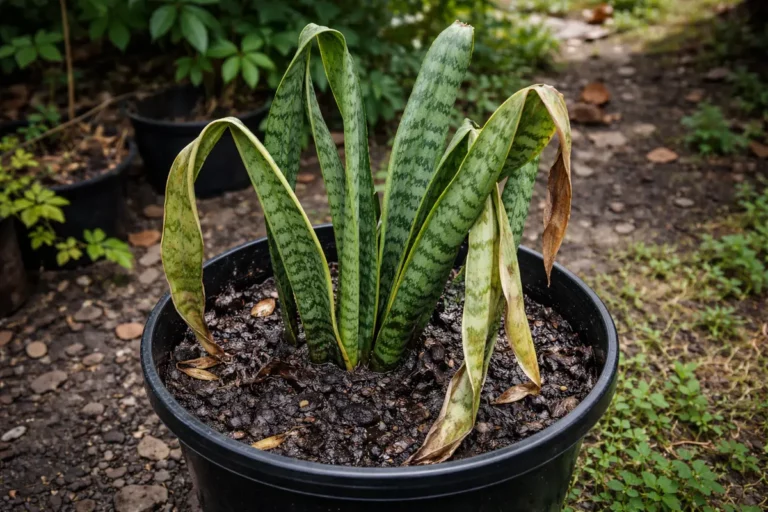
A fully recovered chard plant will display deep green leaves that are crisp and firm, while early signs of trouble include yellowing or wilting that can lead to soft, droopy leaves. If you notice leaves with a brittle texture alongside a fading green hue, your plants may be on the brink of another decline. If not firm and vibrant → check for potential pests or nutrient deficiencies.
If yellowing returns despite your efforts, consider changing your watering schedule or inspecting the soil for drainage issues; chard is sensitive to overwatering. Alternatively, if the problem persists, escalate by adding a balanced fertilizer to give the plants necessary nutrients and reassess their growing conditions.
A fully recovered chard plant should exhibit bright, healthy green leaves with no further yellowing. This change signals that the plant is returning to optimal health after addressing its nutritional and environmental deficiencies. If yellowing begins to reappear after a period of recovery, it could indicate a recurrence of prior issues, necessitating immediate attention. Make a habit of marking your calendar for weekly checks, as sticking to a routine can prevent larger problems. Distinguish between typical seasonal leaf shedding and more concerning signs of deterioration; if new leaves show early signs of yellowing, this often indicates an urgent underlying issue that may require quick adaptations to watering or nutrient inputs.
If issues persist even after following the previous steps, consider testing the soil pH levels, as too acidic or alkaline conditions can stifle nutrient uptake, exacerbating stress on your plants. Optimal pH for chard falls between 6.0 and 7.0, and deviations from this range can manifest in various stress signs. If you find the soil to be unfriendly, amend it with lime or sulfur as needed, targeting gradual changes to avoid shocking the chard. Gradual pH adjustment helps maintain soil health without risking shock to roots, impacting overall chard recovery times. Don’t hesitate to consult local gardening professionals if pH remains outside the ideal range, as they can offer tailored recommendations for your specific soil conditions.
FAQ
How long does it take for chard leaves to green up again after treatment?
Typically, you can expect visible improvements in leaf color within a week after applying the appropriate fertilizer and adjusting watering practices. However, if the underlying issues persist, improvement may take longer; ongoing assessment is necessary to determine any need for further intervention. In situations where nutrient deficiencies are severe, it may take several weeks for the plant to fully respond, particularly as it adapts to the recently improved conditions during the challenging winter.
Can yellowing leaves spread to other plants in the garden?
If yellowing is due to disease or pest issues, it can indeed spread to nearby plants. Monitoring closely and promptly addressing any signs of distress is key to preventing wider issues. Always inspect other plants for similar symptoms, as they may indicate a systemic problem affecting your garden, which may require you to adjust care practices across affected areas to maintain overall garden health.
Should I remove all yellowed leaves immediately, or only the worst ones?
Focus on removing the most severely affected yellow leaves first; however, if many leaves are yellowing, it’s worth considering trimming them back entirely to prevent stress on the plant. This ensures the chard can channel its energy into growing healthier foliage, thereby promoting the chances of recovery. Always prioritize the plant’s overall health when making these decisions; sometimes, radical trims can be beneficial to address severe stress, and may be the best course of action to reinvigorate the remaining plant structures.