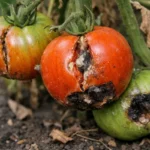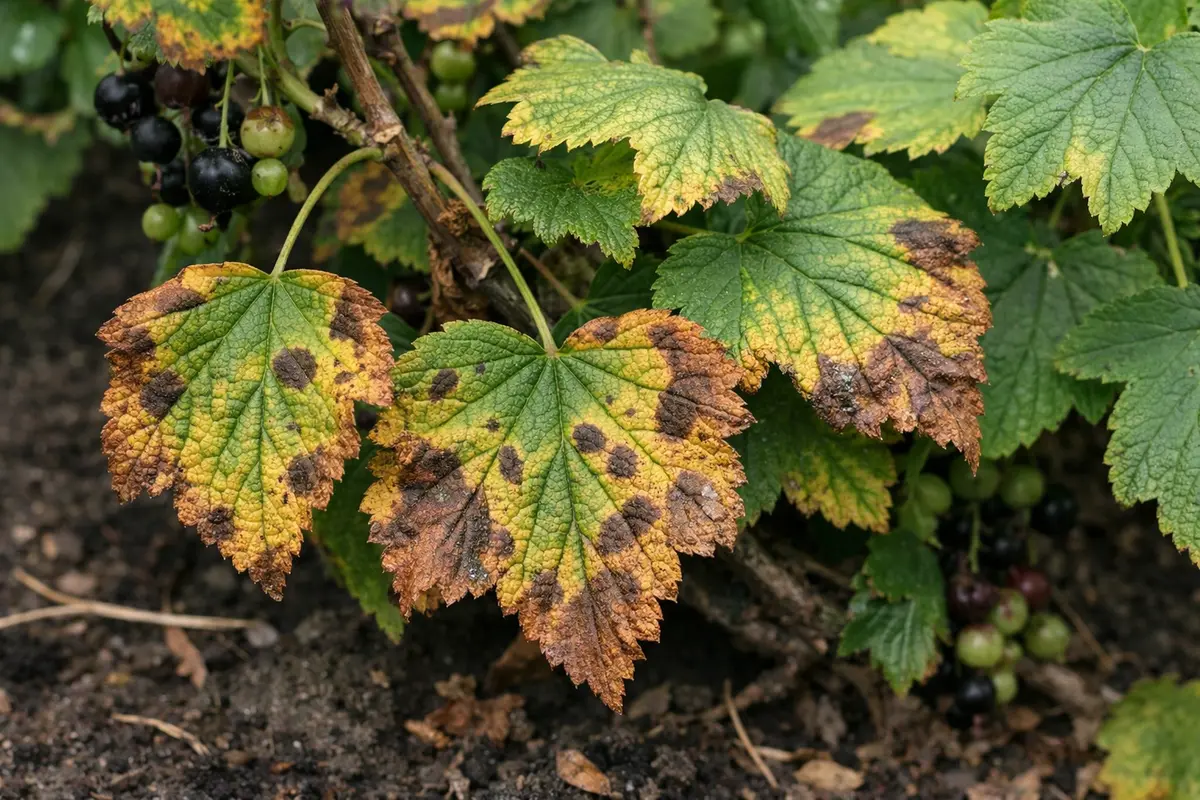
You may notice your currant bushes struggling during the heat of summer, which is why you need to know “Why do my currant bushes have yellowing leaves in summer.” This yellowing is often a sign of stress, caused by factors like nutrient deficiency or environmental changes affecting the leaves. Ignoring these symptoms can lead to worsening damage, weakening the plant overall, but it is possible to fix the issue now by inspecting soil conditions and adjusting your watering practices without delay.
Step 1 – Prune Yellowing Currant Leaves Immediately
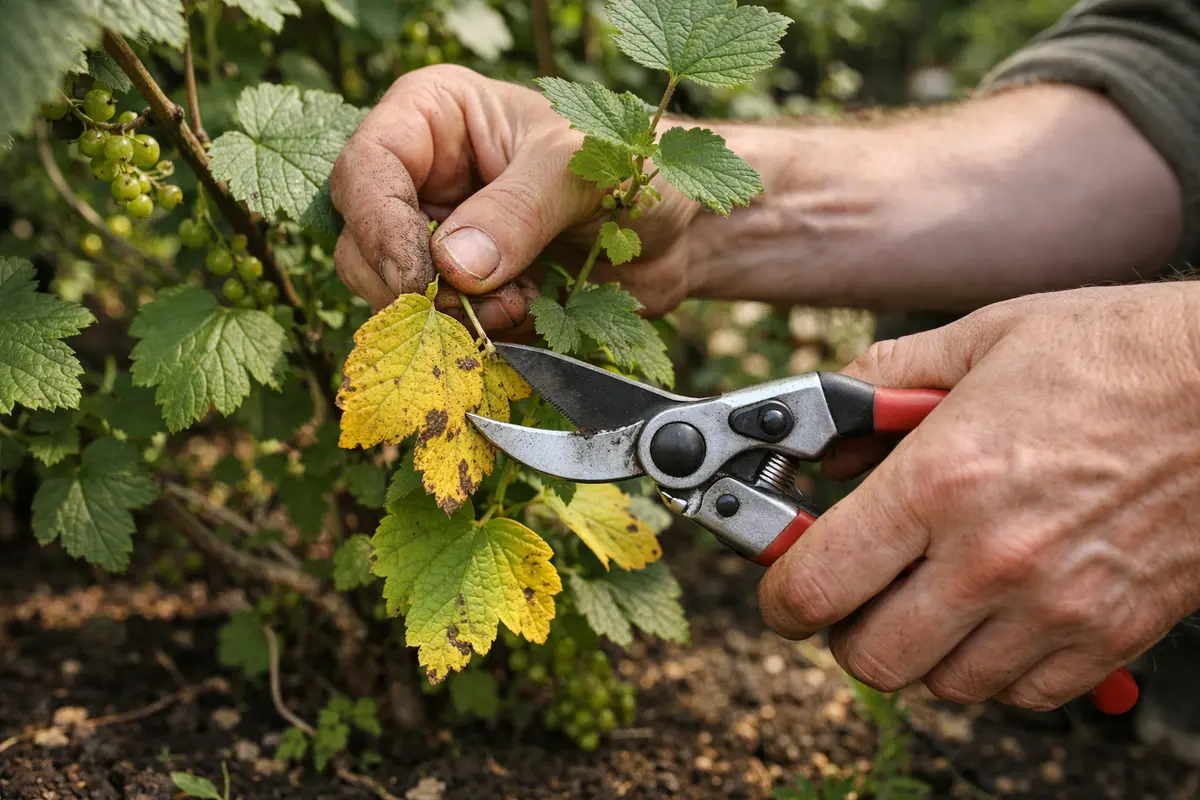
Prune back any yellowing leaves immediately. You will see noticeable improvement in overall plant appearance and health within a few days as the stressed areas are removed. Target leaves that show significant yellowing or browning, which are clear indicators of stress and may not return to health. The cut should be near the stem, at a node, to promote lateral growth that can help compensate for the loss. Ensure your cuts are deliberate and efficient to minimize disruption to the bush.
Removing yellow leaves is crucial as it helps the plant divert energy toward healthier foliage and fruit production. When you prune away the compromised leaves, the plant can allocate resources better, focusing on the unblemished parts that can photosynthesize effectively. After pruning, pay attention to the pruning cuts; they should be clean and made at a node to facilitate healthy new growth. Sterilizing your pruning tools beforehand is not just good practice; it prevents the introduction of pathogens that could exacerbate existing problems, such as viral infections or bacterial diseases. Performing this action promptly prevents the plant from exhausting itself trying to revive damaged foliage, which ultimately contributes to its decline.
A common mistake is delaying the pruning of affected leaves, assuming that they will recover on their own. This usually exacerbates the issue, leading to more extensive damage. Healthy leaves can continue to photosynthesize, but compromised leaves often attract pests, such as aphids or spider mites, that can spread to healthier parts of the plant. If left untreated too long, pests could overwhelm your currants, complicating recovery and creating a cycle of stress and pestilence. By acting promptly and removing visibly damaged foliage, you increase the plant’s overall vitality and resilience against environmental stressors. To further protect your currants, an additional inspection for pests is essential; check the undersides of remaining leaves for signs of infestations, such as webbing or small insect excrement. After damage opens the canopy, control pests on borage plants during risk rises.
Step 2 – Diagnose Nutrient Deficiency in Currants
Start by checking the soil moisture levels around your currant bushes. If the soil feels overly dry, water deeply to ensure the roots can access the necessary moisture, which should help reverse the yellowing leaves within a week. Take note of any drainage issues immediately; if the water pools on top, your soil composition may need amending for better absorption.
The yellowing leaves on your currant bushes could be due to water stress, where insufficient moisture prevents the plant from adequately transporting nutrients. When the roots are dry, they can’t absorb essential elements like nitrogen, leading to chlorosis, characterized by those yellowing leaves. On the flip side, if your soil is overly saturated, it may suffocate roots and cause similar symptoms due to root rot. If you notice a sour smell emanating from the soil, this can signify waterlogging, and you should improve drainage immediately, as excess moisture can be detrimental, leading to severe root damage.
If the soil appears dry but you see signs of wilting, investigate whether the roots are compromised due to pests like root aphids, which often require different management tactics. Nutrient deficiencies can lead to yellowing leaves since the plant struggles to perform photosynthesis effectively. For instance, nitrogen is vital for leaf growth; without it, leaves will turn yellow and drop prematurely. Additionally, micro-nutrient deficiencies, such as magnesium, can showcase yellowing between leaf veins, while the veins themselves remain green. Analyzing the soil’s pH and nutrient levels provides insight into specific issues, helping you address them responsibly without trial and error. Soil testing kits are invaluable tools and can provide a detailed analysis of nitrogen, phosphorus, potassium levels, and pH (ideally, for currants, the pH should be between 6.0 and 6.8), allowing for targeted amendments.
If the soil feels overly compact or clay-like, consider aerating it to improve drainage and nutrient absorption. Signs of potassium deficiency might look similar to nitrogen deficiency, showcasing unhealthy leaf edges that brown and curl. If you encounter this at the onset of summer heat, reassess your fertilization schedule; you might need to apply fertilization more often than usual to keep the plants flourishing amidst stress. Furthermore, carefully monitor your watering techniques; overwatering can lead to nutrient leaching, while underwatering can cause the roots to dry out and struggle to take up essential nutrients. Instead, adjust your watering based on moisture retention; for example, moist soil should have a faint smell of earth, while dry soil feels light and powdery, indicating a need for hydration. Regular checks and adjustments in these areas can help maintain proper soil health and nutrient retention over the summer months.
Step 3 – Feed Currant Bushes to Revive Foliage
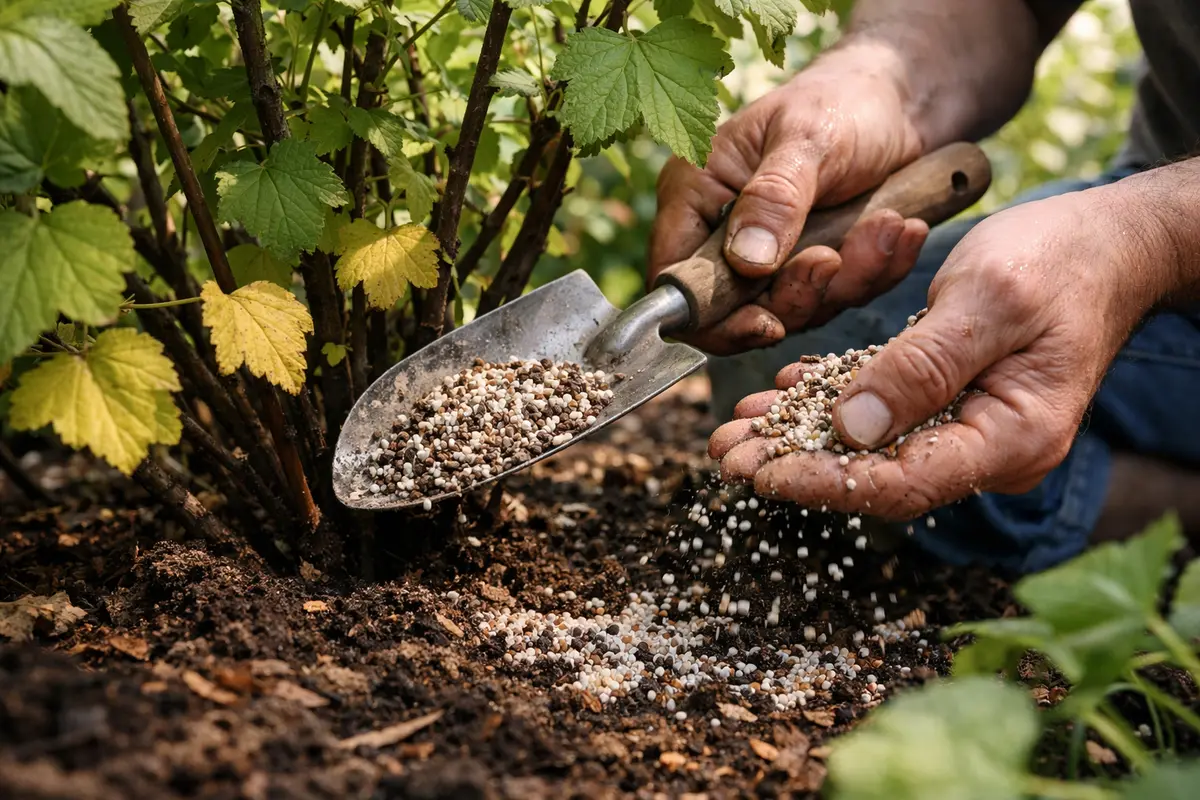
Apply a balanced fertilizer specifically designed for currant bushes to provide necessary nutrients. Within a week, you should see new growth beginning to replace the yellowing foliage, indicating that the plant is on the road to recovery. Look for signs of fresh green shoots or leaves emerging, which are promising indications of nutrient uptake. When applying the fertilizer, ensure to follow the recommended application rates and timing for your chosen fertilizer, as over-fertilization can exacerbate yellowing symptoms. Excessively high nutrient levels can cause plants to burn, leading to even worse yellowing and stunted growth.
Feeding your currants with fertilizers tailored for fruit-bearing plants helps replenish depleted nutrients, particularly nitrogen, crucial for their growth during this phase. Observing how quickly the plants respond aids in identifying whether additional organic amendments like compost or manure are needed in future applications. It’s crucial to maintain a feeding schedule; typical recommendations suggest fertilizing currants about every four to six weeks during the growing season unless otherwise indicated by soil tests. During the blooming period and early fruiting, alternating between high-nitrogen and high-potassium fertilizers can cater to the plant’s changing nutritional needs better. For example, a slow-release granular fertilizer can be advantageous, as it feeds the plant continuously over time without the risk of burning.
A frequent mistake is over-fertilizing, which can lead to nutrient burns, evidenced by brown leaf edges or drooping stems. Be cautious about increasing fertilizer dosage if you’re not seeing immediate results; instead, it’s more sensible to wait for new growth before making adjustments to avoid compounding stress. If your currant bushes do not respond after a week to the fertilizer application, it may indicate deeper issues, such as root rot or pest activities that require a different approach. Plants suffering from root rot may exhibit symptoms like wilting, slow growth, or emit a foul odor from the soil, indicating that it’s time to investigate thoroughly. In such scenarios, consider repotting the shrub into fresh, well-draining material enriched with nutrients that are likely absent from the original soil, thereby giving it a fresh start.
Step 4 – Check Currant Leaves for Recovery Signs After Treatment
Inspect your currant bushes every 2-3 days after treatment to monitor leaf recovery. You should observe new green shoots and leaves developing, which indicates that the plants are regaining their strength during the recovery period. A well-pruned and nourished bush should start producing vibrant foliage within a short time, reflecting its improvement. Maintain a diligent check on stem strength as well; it should feel firm rather than limp, suggesting retained vigor and vitality.
A healthy currant bush should exhibit vibrant green leaves, firm stems, and an overall improved confidence in its growth. If the leaves remain yellow and limp, this could indicate that the treatment was insufficient or that other issues, such as pests or diseases, need to be addressed. Early warning signs that indicate potential continued challenges include wilting, increased yellowing, or stunted growth. Tracking progress through consistent observation is essential for determining these dynamics; if new growth does not appear after about ten days, consider revisiting your watering practices or assessing for pests that might be affecting the new growth. If yellowing returns rapidly after initial improvement, it could indicate insufficient watering or a new issue, such as soil compaction, resurfacing.
Factors such as rainfall and high summer temperatures can significantly influence the watering schedule needed for your currants. If significant rain has fallen recently, the soil may remain too moist, leading to increased chances of root rot. Conversely, prolonged droughts require closer attention to ensure the bush receives sufficient hydration. Developing a routine of monitoring soil moisture is essential; for example, consider checking soil moisture with your finger to approximately the first knuckle’s depth. If the soil feels dry at that depth, it’s a clear signal to water your currants again, preventing stress-related yellowing.
FAQ
How long does it take for currant leaves to recover from yellowing?
Recovery can vary depending on the specific cause of the yellowing, but typically, you should start seeing improvement within 1-2 weeks after implementing corrective measures. New growth and greener leaves are good signs that your currant bushes are bouncing back successfully. If no improvement is observed after two weeks, reevaluating both the nutritional inputs and environmental conditions may be necessary, considering factors like soil moisture levels and light exposure during recovery.
Can yellowing leaves spread to other bushes?
Yes, if the yellowing is caused by diseases or pests, it can spread to nearby plants, potentially leading to wider issues in your garden. Isolating affected bushes and treating them is crucial in preventing escalation and ensuring other plants do not become compromised. Implementing barriers or physical separation during treatment can be effective, especially in densely planted areas. Additionally, ensuring proper sanitation of tools and hands when transitioning between plants is vital to avoid transmitting potential pathogens that could further complicate your gardening efforts.
Should I remove all yellowing leaves from my currant bushes?
It’s essential to remove severely affected leaves to encourage a healthy resurgence. However, only remove the leaves that are significantly yellowed or damaged, as some leaves may still participate in the plant’s photosynthesis requirements. Be cautious not to over-prune, as this can leave the plant exposed to sunlight and make it more susceptible to diseases or further environmental stressors. When pruning, aim for balance; the bush should maintain enough healthy foliage to support energy production while eliminating the damaged areas that hinder overall vitality and reassurance of healthy growth.