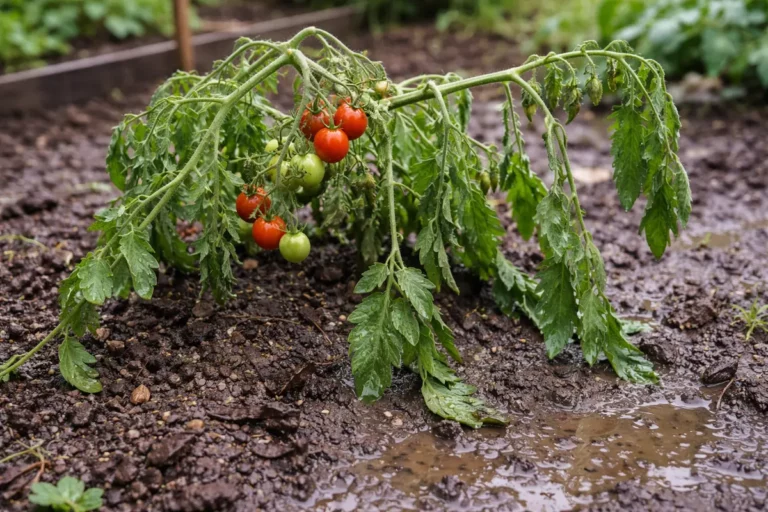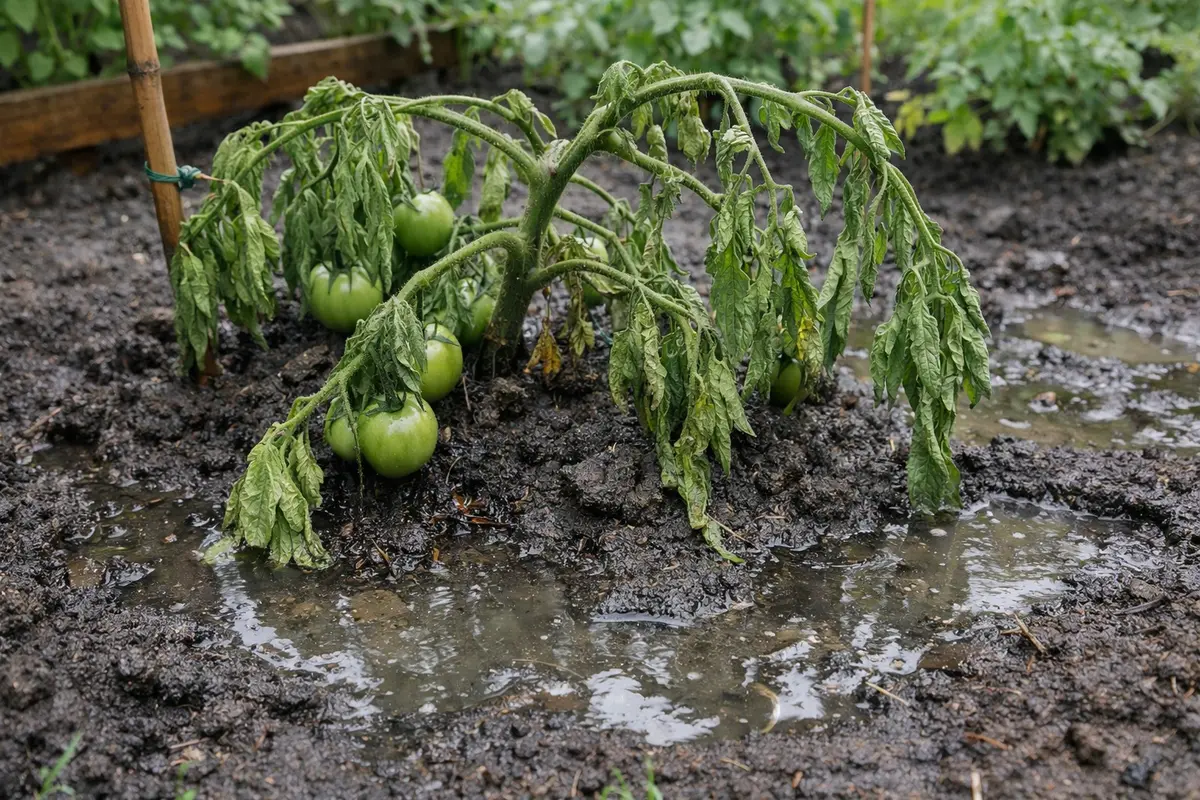
You may notice your tomato plants drooping and looking unhealthy after a heavy rain, which is why you need to know what to do when tomato plants are wilting after a heavy rain. This wilting can occur due to over-saturation, leading to stress on the roots and causing signs of damage like yellowing and drooping leaves. If left unaddressed, this issue can worsen and stall growth, but it is possible to fix by inspecting the soil, adjusting your watering schedule, and monitoring the plants closely.
Step 1 – Inspect Tomato Leaves for Wilting Signs
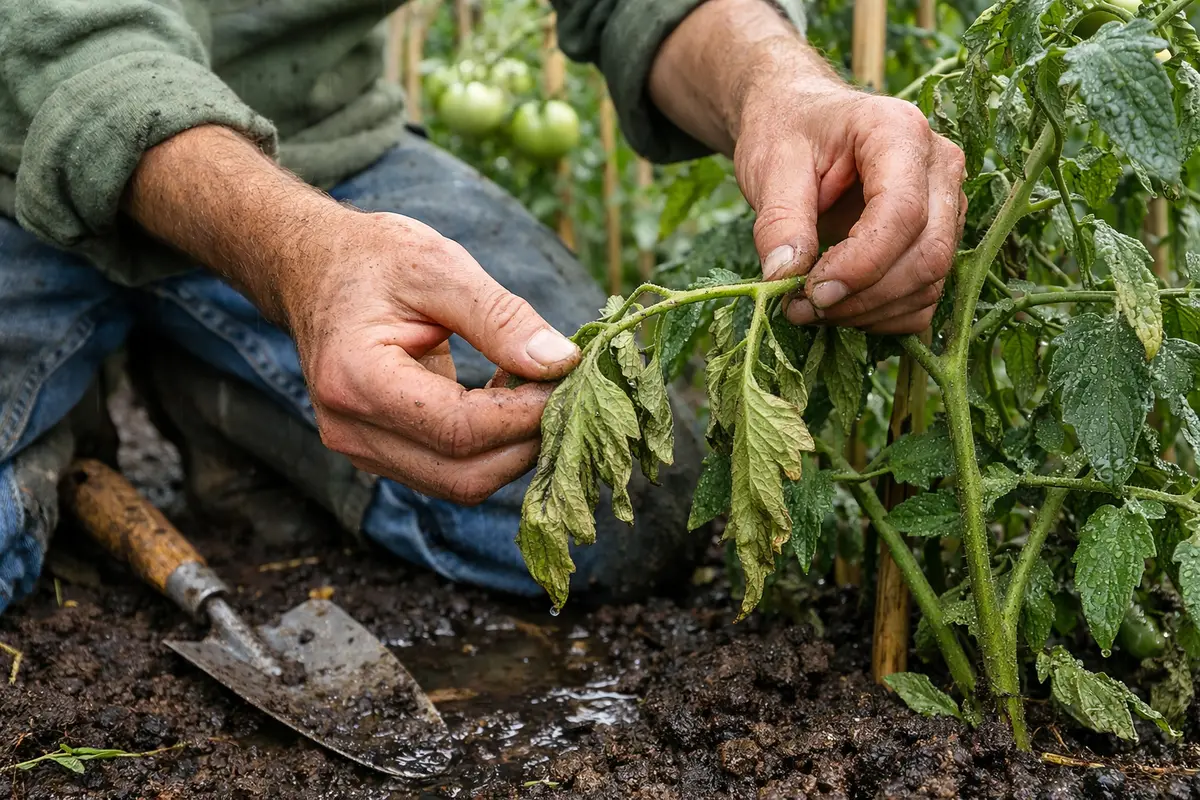
Check the leaves for any signs of wilting immediately. You should notice whether the leaves appear limp or droopy, possibly even changing color to a dull green or yellowish hue within a few hours. Additionally, check the leaf edges for signs of browning, which can exacerbate the wilting condition. If wilting occurs at the tips of the leaves, this points to stress directly linked to root health and potential flooding in the root zone.
Inspecting for wilting is crucial because visible symptoms arise when the roots can’t access oxygen due to soil saturation. If the roots are submerged in waterlogged soil, they may begin to suffocate, leading to more significant damage. Be aware that in extremely saturated conditions, roots can develop a dark, mushy texture that may spread through the root system if not rectified. Delaying your inspection may worsen the wilting and increase the risk of diseases, particularly in a warm and humid setting where fungal issues can thrive. If leaves droop and show signs of wilting for more than 24 hours, you must act swiftly to stem potential decay; observing this beyond 48 hours often indicates severe root distress.
A common mistake at this stage is to assume that the plants will recover on their own once the rain stops. While some minor wilting may resolve naturally, if you observe overly wet soil or if the wilting persists for more than a day, proactive steps must be taken. If the wilting is severe, look for additional signs like blackened leaf edges or slimy spots on the leaves, which may indicate further complications requiring urgent measures. Remember, if you notice slimy spots on the stems or if soft spots develop on the fruit, you may need to consider more invasive interventions or even re-evaluate your planting site’s drainage system.
Step 2 – Assess Soil Quality After Heavy Rain
Dig around the base of the tomato plants to measure the soil’s moisture levels. You should notice whether the top few inches feel overly saturated or if the soil has compacted and appears muddy, which will impact the ability of roots to thrive. If the soil is sticky and clumps when squeezed, it’s likely too wet for the roots to breathe. A common diagnostic threshold is to check if water starts to pool when digging—this is a clear sign that excess moisture is present.
Heavy rain can lead to poor drainage conditions around your tomato plants, making it essential to assess the soil composition. When soil remains waterlogged, it can suffocate roots by preventing necessary oxygen exchange, leading to wilting and eventual root rot. Immediate action allows for quick adjustments to improve aeration and restore plant health. Recognizing muddy, compacted soil is a critical indicator of drainage issues that need addressing. The first few inches of soil should be the key focus, as the deeper layers may remain moist longer, necessitating careful evaluation of what’s happening below the surface.
If you discover that the soil feels very compact, attempt to aerate it by gently loosening the top layer without disturbing the roots, perhaps using a hand cultivator. As you aerate, observe whether water begins to pool at the surface; if it does, it indicates that drainage improvement is necessary. A key rule is to detail any unpleasant odor that arises during inspection—this could signal anaerobic activity has set in. If conditions seem particularly bad, consider adjusting your planting area or using raised beds to improve drainage. Be cautious: excessive digging can harm the root system, so focus on surface-level aeration to allow oxygen back into the soil structure. If your plant roots are showing signs of rot, such as brown, slimy patches, or increased wilting, consider carefully cutting away affected roots to save the rest of the plant.
Step 3 – Add Organic Matter to Enhance Drainage
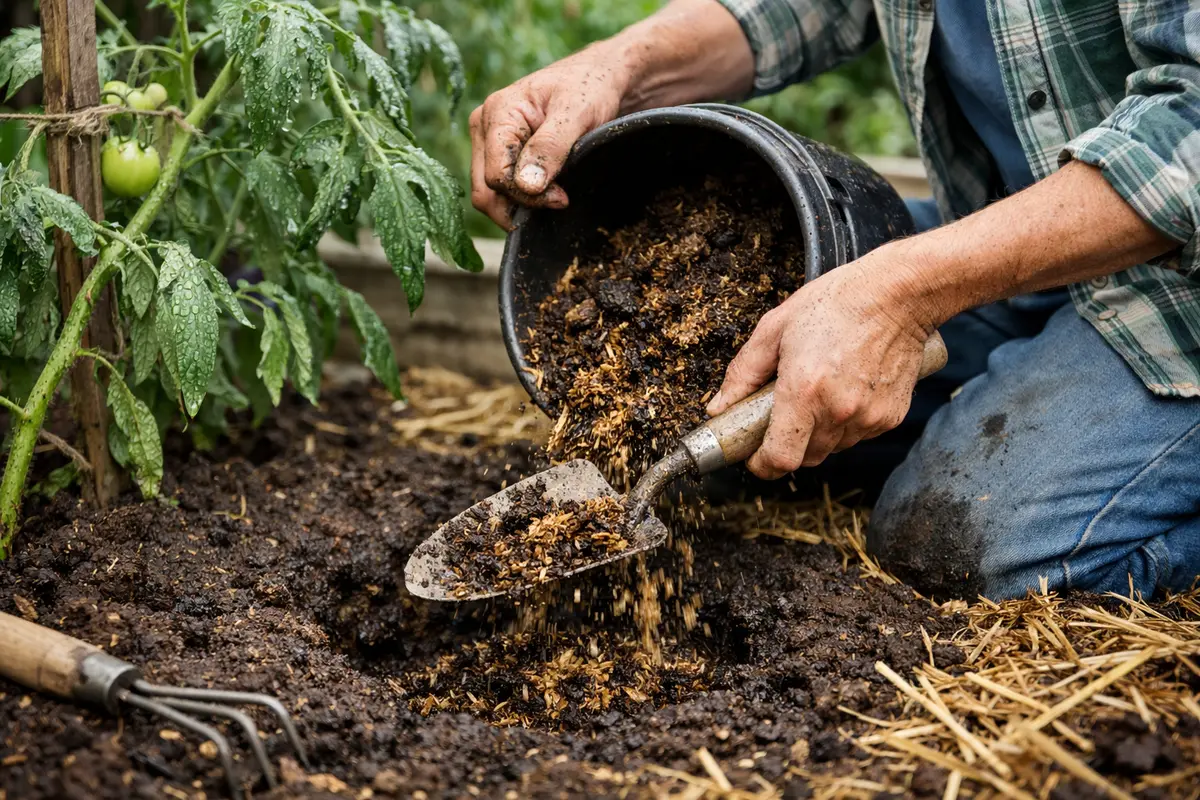
Start by gently loosening the soil around the roots of your tomato plants to improve drainage and promote air circulation. After a few days of applying changes, you should notice a reduction in wilting, as leaves begin to perk up and regain their firmness. To enhance the soil structure further, consider mixing in organic matter such as compost or aged manure, taking care to integrate it into the top few inches of soil only. This practice not only improves drainage but also enriches the soil with essential nutrients.
Tomato plants typically recover within a week, but if excess moisture remains in the soil or surrounding area, recurring wilting may occur. In contrast, if the soil feels dry, the tomato plants might recover quickly, showing improved color and firmness. Keeping an eye on soil moisture levels for the next week is critical; too much moisture can lead to root diseases, while dry conditions can stunt recovery. If your plants are still wilting after that week, check for signs of root rot or overwatering, which can impede their recovery and invite fungal infections.
A common mistake while transitioning from recovery to prevention is overly watering during the replenishment phase, which can cause more damage than benefit. Adjust your watering schedule based on rainfall amounts; if heavy rain is expected, delay watering until the soil has adequately dried out. If conditions after heavy rains still show retained water with no improvement, it may indicate the need for a soil amendment strategy. Conditions like muddy soil might mean adding sand or perlite for aeration could serve as a remedy. This step enhances soil structure, ensuring better drainage while preventing future waterlogging. Organic matter helps improve pore space, allowing water to flow through more freely while retaining moisture where necessary. This combination is crucial for healthy root development and can encourage robust growth as your tomato plants recover.
A common mistake during this recovery period is over-applying fertilizers simultaneously. Doing this can lead to nutrient burn if the plant is still stressed from an excess of water. To avoid further stress, allow the soil to stabilize first before resuming any fertilization protocols. Pay attention to the plant’s growth response; selecting a slow-release organic fertilizer a few weeks after recovery might be beneficial to prevent exacerbating their vulnerability. If, after a week or two, you notice that the leaves are still yellowing or not recovering, check the moisture levels closely; you may need to adjust the organic matter layer further for better drainage while ensuring no further root damage occurs.
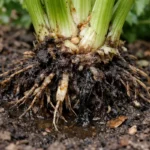
Step 4 – Check for Signs of Root Rot in Tomatoes
Start by checking the soil moisture levels immediately after rain. When the soil surface appears saturated, feel the top inch of soil; it should be damp but not overly saturated. If it squishes under your fingers, allow it to drain well before watering again, checking daily to monitor the moisture content. Ensure you also inspect the roots visually—healthy roots should be firm and white, while blackened, mushy roots denote rot and require urgent remedies.
A fully recovered tomato plant stands upright with firm stems and vibrant green leaves, indicating its return to health. In contrast, a plant early in the wilting cycle may have drooping leaves that feel limp to the touch, suggesting excess moisture remains in the soil. If the foliage becomes yellow and mushy again, it signals further issues are developing, marking a critical juncture where swift action is necessary. For instance, if the drainage does not improve, consider removing nearby encroachments, like weeds or other plants, that can compete for resources and worsen moisture retention.
If this condition persists despite following these steps, apply a light layer of mulch to improve drainage around the roots. Monitor the plant’s condition closely over the next few days; if wilting continues, it may be necessary to replant in a better-drained location or consider adjusting your watering schedule based on prevailing rainfall patterns. A best practice is to observe for a few days after applying mulch—if nothing changes, that’s a significant signal your soil structure needs immediate reassessment.
Recovery signs in your tomato plants will include vigorously perked-up leaves and new growth appearing in the following weeks. If the plants begin to show signs of wilting or discoloration again despite following your protocol, it is vital to reassess the root condition. Firm roots indicate healthy growth, while soft brown roots can signify lingering issues that need addressing immediately, such as over-compaction or persistent moisture. The observation of any foul odors during this inspection may also signal that anaerobic conditions persist, potentially leading to rapid deterioration.
If the symptoms return after implementing these steps, you may need to consider replanting in a drier, more suitable location. Alternatively, you can introduce root fungicides if the situation permits, applying them judiciously at the dig-in site to mitigate any root pathogens within the soil. Be mindful to apply such treatments according to directions and only when the plant shows no further signs of stress to avoid overwhelming already sensitive tissue. Monitoring root rot progression is paramount; root fungicides typically work better in initial stages. If heavy rot remains, consider seeking out horticultural advice for more aggressive management strategies, including targeted watering regimens or specific soil additives that enhance drainage.
FAQ
How long does it take for tomato plants to recover from wilting?
Recovery can take anywhere from several days to a couple of weeks, depending on the severity of over-saturation and root damage. Ideally, with proper soil management and conditions, you should begin to notice improvements in leaf firmness within a week, with marked recovery being evident within about ten days to two weeks. However, if the plants do not show any signs of improvement by then, it may indicate more extensive root problems that require further intervention, including careful soil amendments or relocating the plants.
Can overwatering spread diseases to other plants?
Yes, overwatering can contribute to fungal growth in the soil, which can have severe consequences for nearby plants. The moisture in the soil serves as a breeding ground for pathogens, making it advisable to monitor and manage moisture levels in the garden effectively to prevent the spread of disease. Rotting roots will emit a sour smell, another sign to keep an eye on to minimize risk across your planting area. If multiple plants in close proximity exhibit wilting, it may be time to evaluate the entire garden’s drainage and watering routine to ensure each plant has adequate conditions for health.
Should I remove wilted leaves from my tomato plants?
Yes, you should prune any visibly damaged or wilted leaves to promote airflow and reduce disease risk. This practice helps the plant focus its energy on healthy growth rather than struggling to recover damaged tissue. Aim to trim leaves at their base, avoiding cuts that could shock other healthy parts of the plant, and always use sterilized tools to prevent transferring pathogens. Additionally, assess the timing of your cuts; pruners should ideally be used when conditions are dry to decrease the risks associated with excessive moisture around cut areas. By mindfully managing these practices, you optimize conditions for recovery while permitting your tomato plant to thrive.