You may notice your zucchini plants showing signs of distress after prolonged dry spells, which is why you need to know how to treat spider mites on zucchini after dry spells. These tiny pests can cause yellowing and wilting leaves, leading to significant damage if left unchecked. Ignoring the problem only worsens the situation, as the infestation can spread, weakening the plant and stalling its growth. Fortunately, you can fix this issue now by inspecting the leaves and adjusting your watering routine.
Step 1 – Spray Zucchini Leaves with Insecticidal Soap
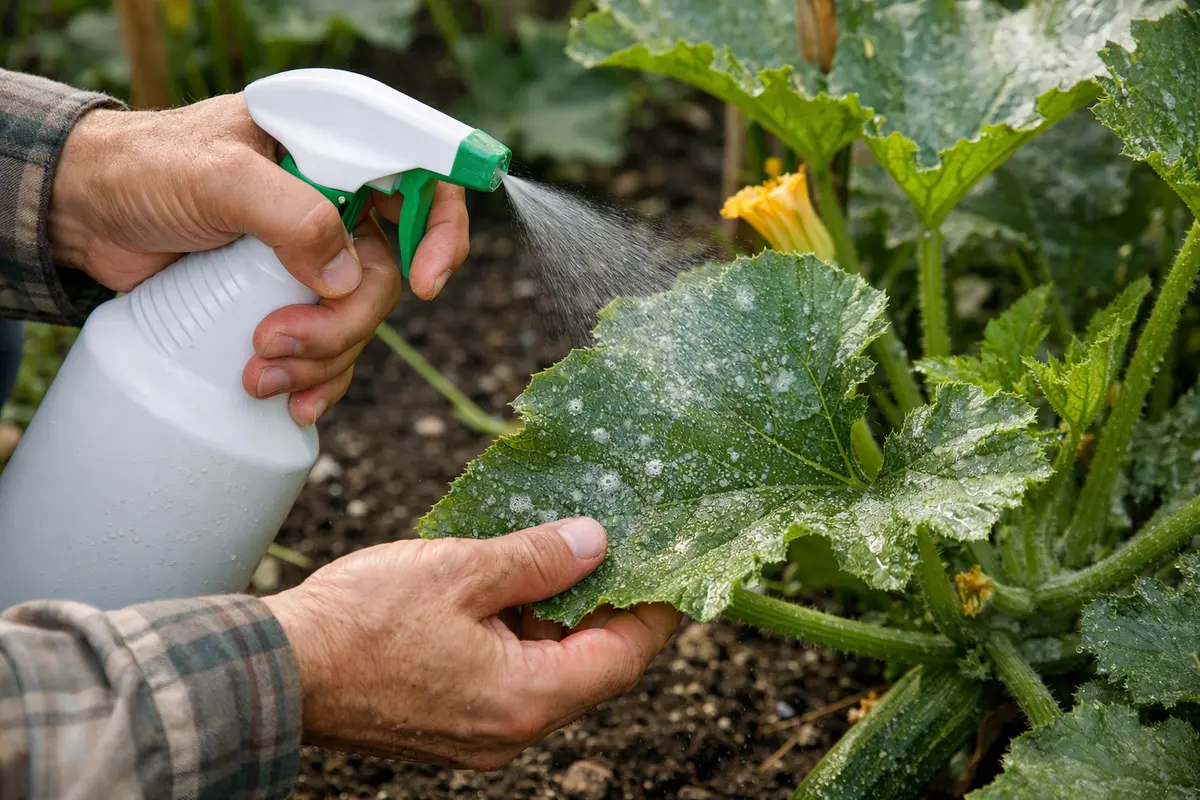
Begin by spraying insecticidal soap on the infested zucchini leaves immediately. You will notice the webbing beginning to dissipate and some dead mites within a few hours. This action addresses the urgent threat posed by spider mites, significantly reducing their numbers on your plants. Ideally, apply the insecticidal soap during the cooler parts of the day, either early morning or late afternoon, to avoid the heat from the sun, which can affect the soap’s efficacy.
Insecticidal soap disrupts the protective outer layer of the spider mites, dehydrating them and leading to their demise. Since spider mites often reproduce rapidly, acting quickly by applying this solution is crucial to halt their spread before they severely damage the leaf tissue. A strong presence of spider mites can overtake a plant in just a few days if left untreated, and this is especially prevalent in plants stressed by drought conditions. If you notice the population spike suddenly, it could be due to environmental stresses like recent heat waves or insufficient moisture. Watch for at least a week to gauge effectiveness; if the spider mites are still noticeable, a second application may be necessary to reinforce the treatment. When plants are already struggling, scout for stop pests on asparagus before they pressure.
A common mistake gardeners make during this initial action is not saturating the undersides of the leaves, where spider mites usually reside. Ensure you thoroughly cover both surfaces of the leaves for the most effective treatment. If spider mites persist despite spraying, reapply the insecticidal soap every 4–7 days until the infestation is under control. You might encounter situations where the mites seem resistant, which often indicates they are breeding in more protected areas of the plant, such as near the stem or leaf axils. In that case, re-examine your coverage; adjusting your spraying angle might help reach those hidden areas. If the initial application fails and the damage continues, consider using a different type of insecticidal soap formulated with different active ingredients.
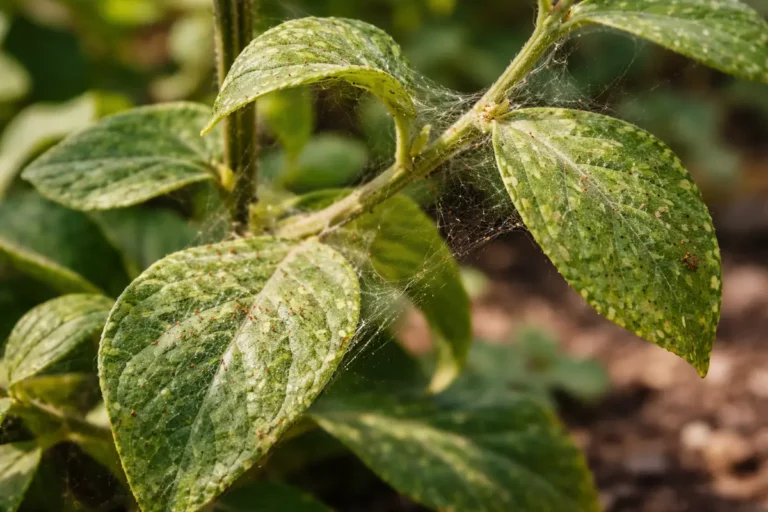
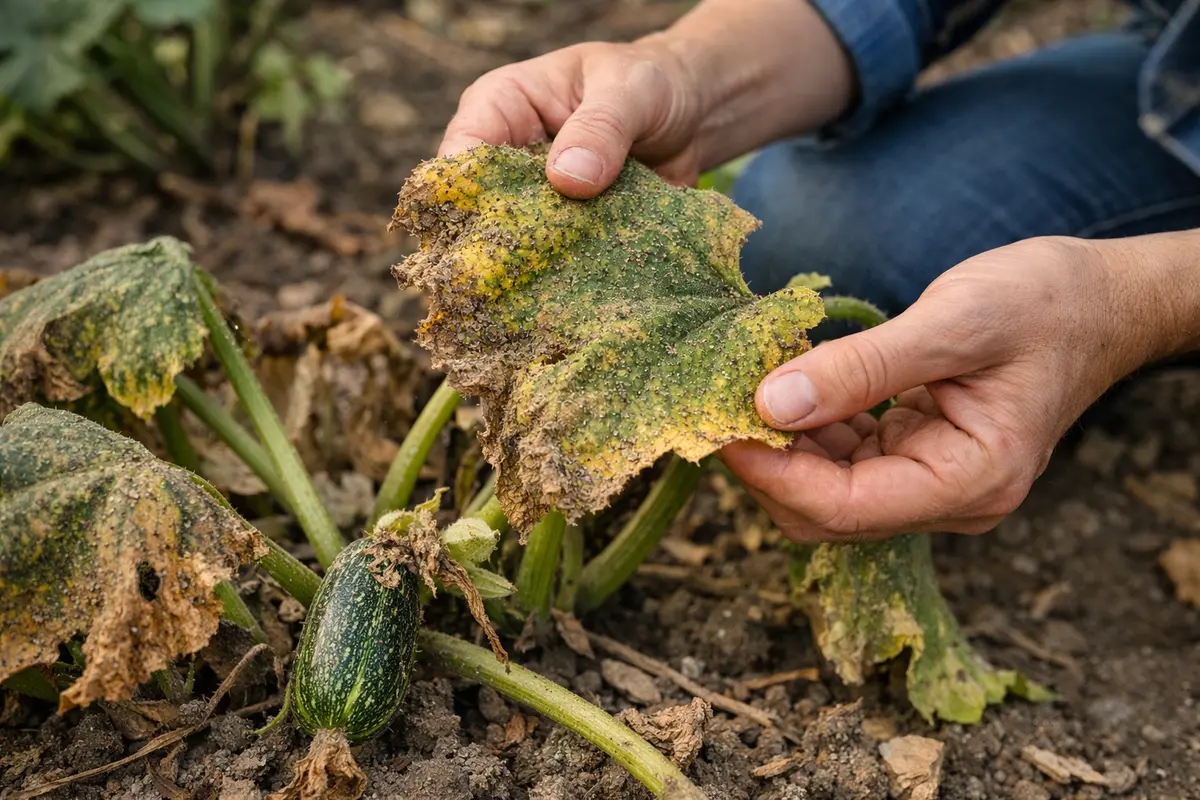
Step 2 – Check for Dusty Webbing on Leaves
Inspect your zucchini leaves carefully for dusty webbing and tiny speckled bites. You will see clear signs of mite activity if you observe these symptoms, which will confirm the presence of spider mites. If you detect a substantial layer of webbing, it indicates a larger infestation may have developed, necessitating a more aggressive approach. These observations are essential for diagnosing the extent of the infestation and determining the next steps.
The webbing is indicative of spider mites weaving protective shelters to escape the elements and feed on the plant’s sap. Identifying these signs early allows for targeted interventions that can help the plant recover before too much damage occurs. A well-timed inspection can make the difference; if you notice damage spread quickly from the lower leaves upward, it’s likely the infestation has progressed beyond a manageable state. The longer the spider mites are allowed to feed, the more they multiply, stressing the plant and leading to a decline in health. However, if the webbing appears minimal and isolated to a few leaves, a localized treatment may suffice, allowing for a more measured approach.
If the webbing is extensive and you see severe leaf damage, you may need to consider integrating additional measures such as introducing natural predators like ladybugs or lacewings. These beneficial insects can significantly reduce spider mite populations, but they work best in conjunction with other treatments rather than waiting too long. When placing beneficial insects, ensure they have a food source available in the form of pollen or nectar plants nearby to sustain them. Additionally, inspect those pollen plants for spider mite presence, as they can facilitate the return of the pests. Always double-check the affected areas regularly for re-emerging mite populations, and be wary of applying pesticides at the same time, as this could reduce their effectiveness.
Step 3 – Fertilize Zucchini to Encourage New Growth
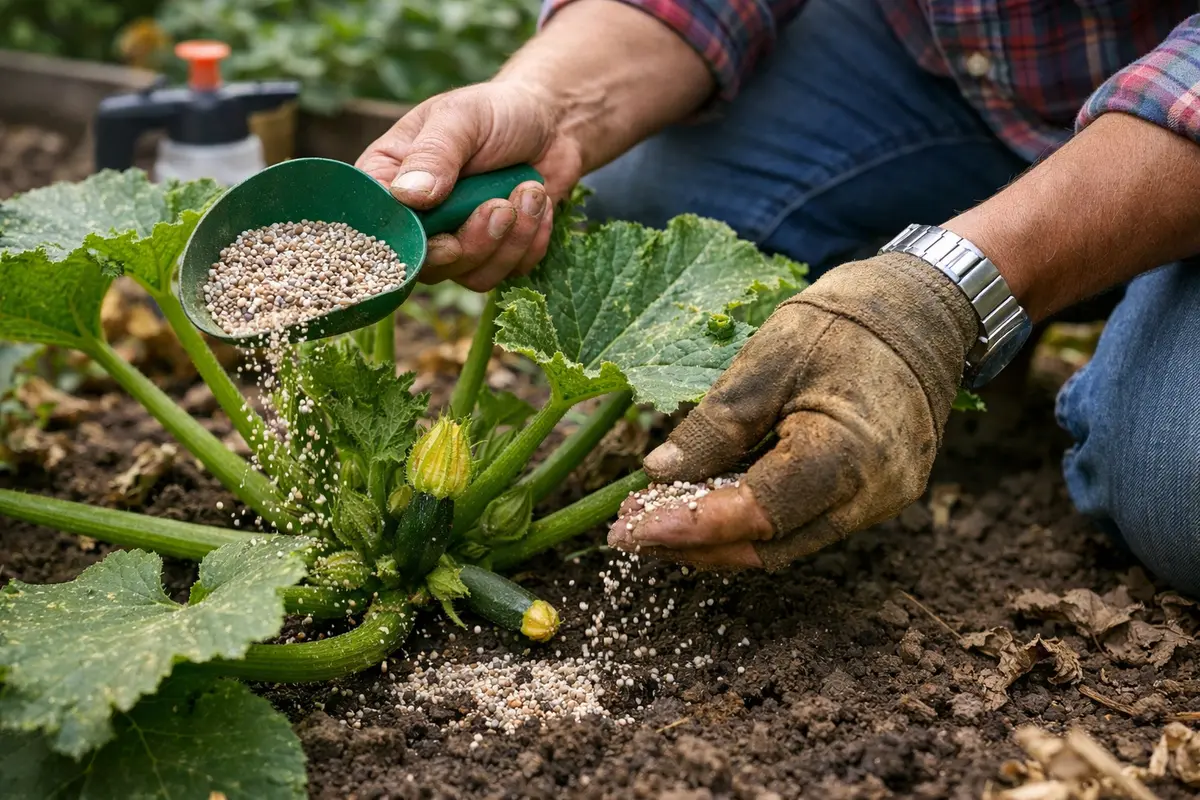
Apply a balanced fertilizer around the base of your zucchini plants to encourage new growth. You should notice fresh shoots developing and existing leaves beginning to firm up within a week. This proactive measure aids recovery by infusing the soil with nutrients. Fertilizing provides essential nitrogen, phosphorus, and potassium, and you can expect a visible difference in leaf color and texture. Applying fertilizer in the early morning or late evening helps minimize nutrient loss due to evaporation.
Recovering from spider mite damage relies on restoring the plant’s nutrient levels, which are often depleted due to pest feeding. Fertilizers reduce stress and promote growth by replenishing these critical nutrients. Keep in mind that zucchini is a heavy feeder, particularly after enduring stress; thus, nourishing them appropriately will amplify recovery chances. After a pronounced spider mite infestation, soil tests can help identify any deficiencies, allowing for targeted supplemental feeding. Also, consider using a slow-release fertilizer to ensure continuous nutrient availability during essential growth phases. If you notice that new growth is still weak or yellow, this may indicate the need for a different fertilizer high in micronutrients.
However, avoid over-fertilizing, which can lead to excessive foliage growth at the expense of fruit development. If you notice yellowing or browning of leaves even after fertilizing, it might indicate an underlying issue affecting the plant’s health that may need to be addressed. A common mistake during this phase is applying fertilizer too close to the stem, which can lead to root burn and potential plant death. Observing proper distances—generally 4–6 inches away from the main stem—will prevent this issue and maximize nutrient uptake. Consider that if your plants fail to respond positively, they might require a different nutrient blend tailored to their specific needs, such as one higher in potassium for fruit development. Monitoring should also include symptoms of excessive nitrogen, such as dark green foliage failing to set fruit.
Step 4 – Water Zucchini Consistently to Avoid Stress
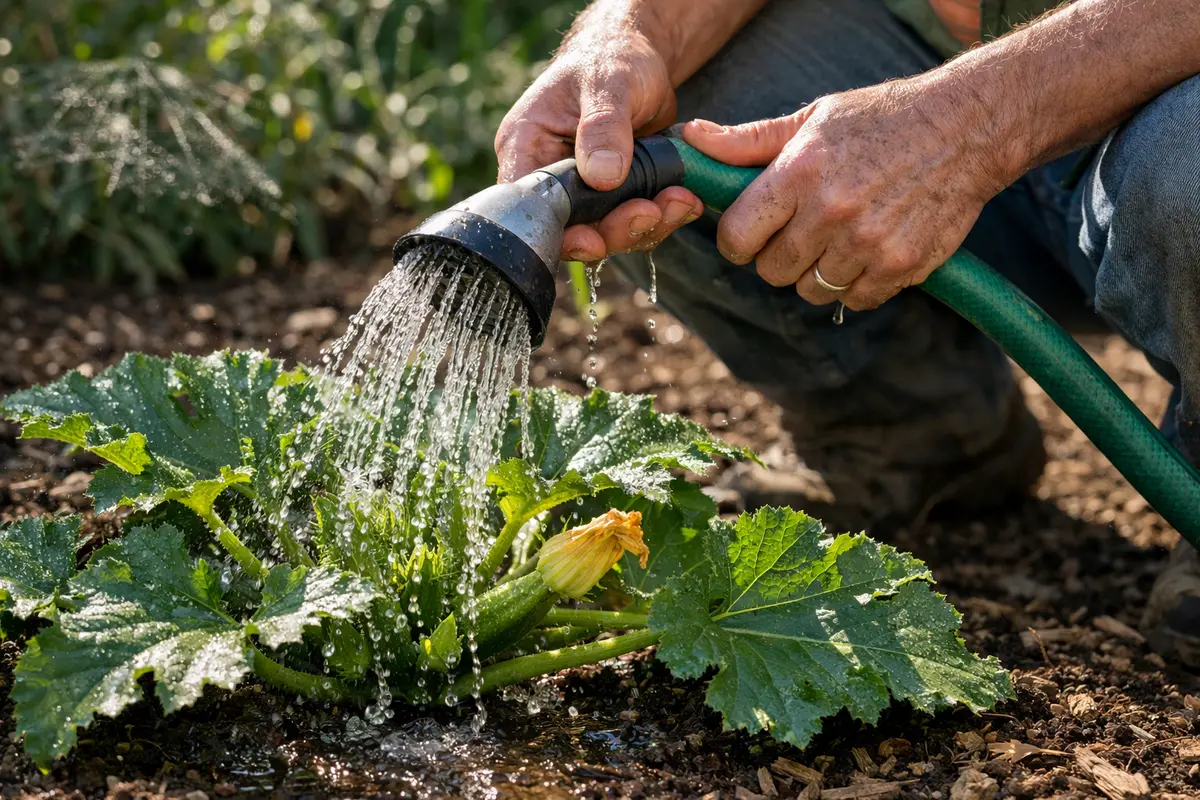
Water your zucchini consistently, aiming for deep saturation of the soil around the roots. You will see the plants standing taller and exhibiting perky leaves as they recover from previous drought stress. Watering should be calculated, with the goal of ensuring that water penetrates at least 6 to 8 inches deep into the soil. Maintaining this moisture level creates a less favorable environment for spider mites and fosters healthier plants. Adequate moisture helps regulate the temperature of the root zone, which can also deter pests. Ensuring soil moisture levels can be tested using a soil probe or moisture meter for precision.
Watering should be done deeply but infrequently, ideally once or twice a week based on your soil type and local climate conditions. Moist soil encourages root growth and better nutrient uptake while minimizing stress on the plant during recovery. The key is to prevent fluctuations between drought and excessive moisture, which can lead to complications such as root rot or fungal diseases. Monitor environmental factors: in hot and windy conditions, more frequent checks may be necessary to ensure moisture levels are stable. This vigilance is crucial especially if the weather forecast indicates continued dryness.
During hotter months or exceptionally dry spells, consider adding a layer of mulch around the plants to retain soil moisture. This practice not only regulates soil temperature but also suppresses weed growth, which can compete with zucchini for water and nutrients. If heavy storms are expected, ensure proper drainage by making shallow trenches away from the plant bases. If you find that heavy rain has occurred, use a moisture meter to assess the soil’s hydration. An easy way to check moisture levels is to push your finger into the soil about 2 inches deep; if it feels dry at that level, it’s time to water. Conversely, if it feels soggy, you may need to adjust your watering regime to prevent future issues. If you notice a pattern of leaf curl post-irrigation, it may indicate too much water combined with insufficient drainage, requiring an adjustment to your watering schedule.
Step 5 – Inspect Zucchini for New Mite Activity Weekly
Inspect your zucchini plants for any signs of new mite activity at least once a week. You should observe healthier foliage and less webbing as the plants stabilize. Keeping a close watch will help you catch any potential resurgence of spider mites before they grow into a more severe problem. Record any findings to help identify patterns of infestation that may correlate with specific conditions, such as drought or high temperatures. If changes in the environment occur, adjust your inspection frequency accordingly.
After implementing your treatment steps, a fully recovered plant will display vibrant, firm leaves, and new growth that appears healthy. Any signs of wilting, new webbing, or tiny yellow spots on the leaves will indicate that mites might be returning. Confirming these signs promptly allows for fast corrective measures. If you notice symptoms on neighboring plants, they should be inspected thoroughly to prevent a full-scale infestation. In some cases, if adjacent plants are also affected, consider implementing a broad approach rather than focusing narrowly on just a single plant. Should mite activity be confirmed, consider rotating your insecticidal soap brand to mitigate any potential resistance issues that may have developed.
If signs of spider mites return, consider reevaluating your previous treatments and possibly increasing the frequency of insecticidal soaps or integrating them with other methods, such as neem oil sprays, which can disrupt mite feeding. It’s crucial to make adjustments and not let the issue persist, as spider mites can lead to further damage quickly, especially if they breed unnoticed. Cleaning the surrounding garden area and ensuring it is free from debris will also discourage mite infestations. Moreover, providing adequate spacing between plants can help with air circulation, subsequently making it less hospitable for these pests. Many gardeners find that rotating crops yearly can also effectively disrupt pest life cycles, which is particularly helpful if infestations have recurred for multiple seasons.
FAQ
How long does it take for spider mites to recover from zucchini?
With proper treatments, it typically takes about 1-2 weeks for zucchini plants to show significant signs of recovery after spider mites. Healthy new growth and vibrant leaves are good indicators that the plants are bouncing back and resuming their growth cycle. However, if conditions such as heavy rain or ongoing drought persist, this timeline could extend.
Can spider mites spread quickly to other plants?
Yes, spider mites can rapidly spread to nearby plants, especially during warm and dry conditions. Regularly inspecting surrounding plants helps prevent cross-infestation, ensuring overall garden health. Timely interventions on the first signs of an infestation are key to containing the problem before it escalates into a larger issue.
Should I remove affected zucchini leaves?
Yes, removing heavily infested or damaged leaves can help reduce the population of spider mites and promote healthier growth. Focus on the most affected areas while ensuring to keep the healthy parts intact for ongoing plant vitality. Not only does this pruning improve airflow to the remaining leaves, making it less likely to attract new pests, but it also aids in the overall appearance and health of the plant.