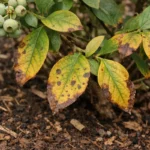
You may notice your gardenias looking droopy and yellowing during a particularly rainy season, which is why you need to know how to prevent root rot in gardenias from poor drainage. Excess moisture can cause the roots to rot, leading to mushy stems and damaged foliage. If left unaddressed, the condition gets worse and can weaken the plant beyond recovery, but you can improve the situation now by checking the drainage and adjusting your watering practices.
Step 1 – Trim Gardenia Roots Affected by Rot
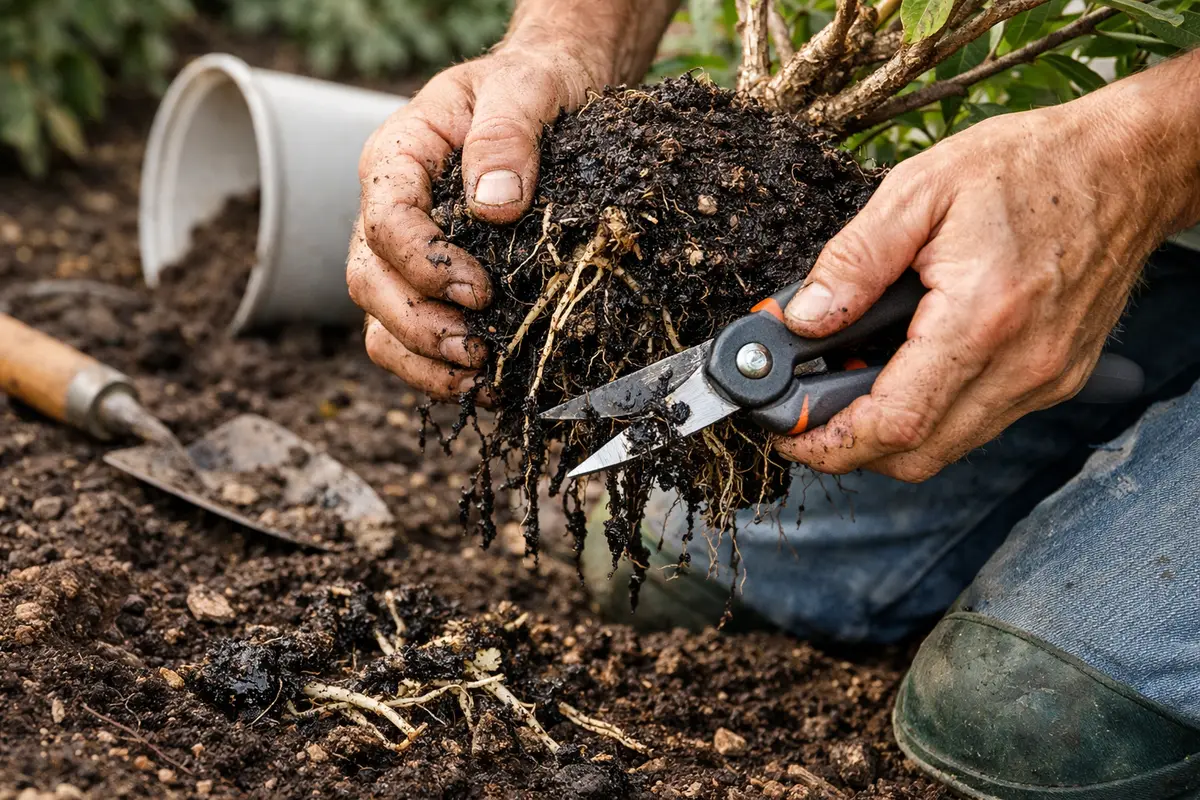
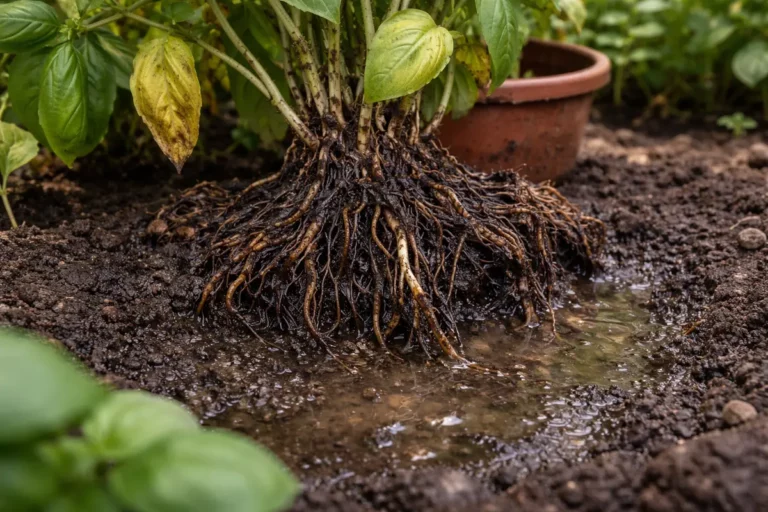
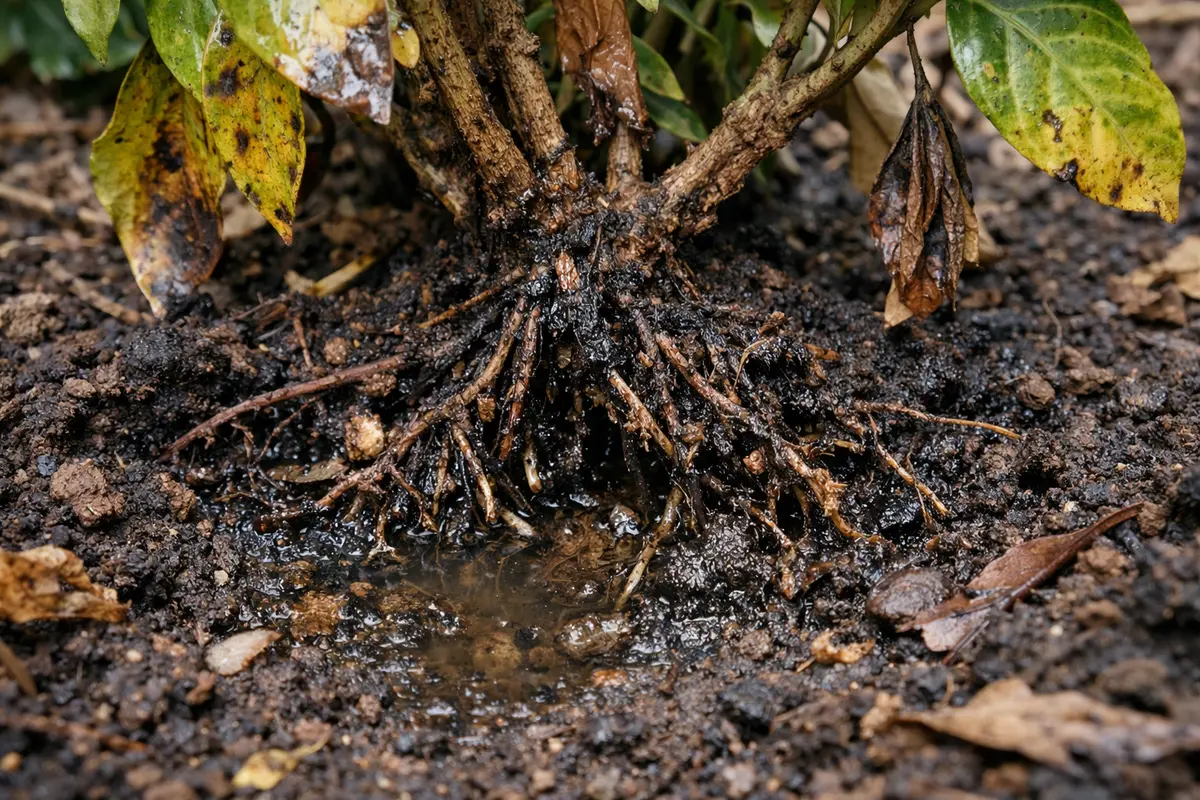
Start by removing any gardenia roots that exhibit signs of rot. This process should involve cutting away blackened or mushy roots immediately, which helps to prevent further decay. After trimming, you will notice a reduction in the foul smell and improved air circulation around the roots, which is crucial for plant health. This swift action prevents the further spread of rot to other healthy parts of the root system and is vital for limiting overall damage to the plant.
Addressing the problem right away ensures that the healthy parts of the root system can resume nutrient and water absorption effectively. Rotting roots lead to a lack of oxygen, stunting the plant’s growth and causing the wilting leaves you noticed. The decline in oxygen availability hinders the roots’ ability to absorb water and nutrients efficiently. Additionally, the overall health of your gardenia is directly influenced by the condition of its roots, and allowing rot to spread can inhibit recovery and growth.
A common mistake many gardeners make is delaying the trimming of rotting roots, hoping that the plant will recover on its own. Waiting can exacerbate the rot issue, resulting in more extensive damage. As the rot progresses, it can affect larger portions of the root system, complicating recovery efforts significantly. The moment you notice signs of rot, you must act without hesitation—when rot is suspected, timely intervention is critical. If you detect a persistent unpleasant odor or observe a color shift from brown to black in the roots, begin this process sooner rather than later to maximize your chances of recovery.
Step 2 – Diagnose Poor Drainage Issues in Soil
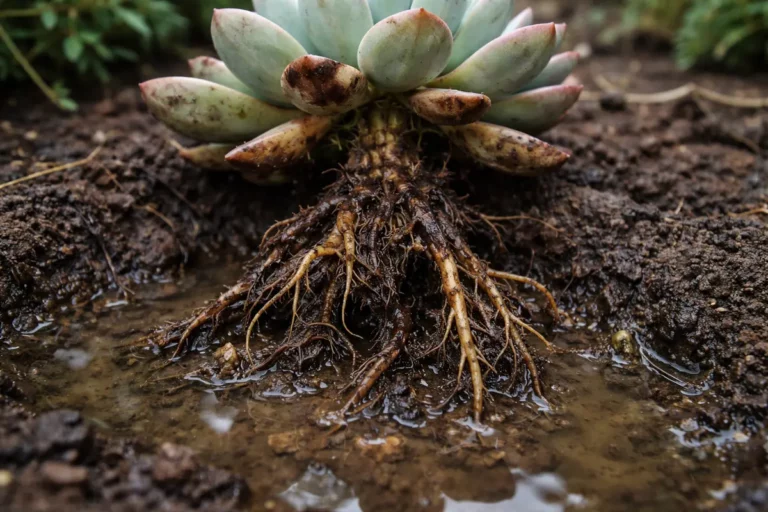
First, check the drainage of the soil around your gardenias by digging a small hole about 6 inches deep. If you find water pooling or the soil remains soggy for more than a few hours after watering or rain, clearly identify and improve the drainage. You should notice an immediate change in the soil texture as it dries out more quickly, which indicates an improvement in drainage.
When gardenias are planted in poorly draining soil, the excess moisture can suffocate the roots, causing them to become waterlogged, which ultimately leads to root rot. As the roots start to decay, a foul smell may emanate from the soil, indicating the presence of anaerobic bacteria thriving in the overly wet conditions. Conversely, if the soil feels dry and the plants are wilting, the issue may alternatively indicate insufficient water rather than drainage problems.
If you detect an unpleasant sour smell in the soil, it indicates significant root damage; you should remove the affected gardenia and repot it in fresh, well-draining soil augmented with perlite or coarse sand. Conversely, if the leaves are yellow and the soil is moist, inspect for potential over-fertilization, which can also lead to similar symptoms and requires a distinct corrective approach. Poor drainage often results from compacted soil or heavy clay that retains excessive moisture, blocking essential oxygen from reaching the roots. In contrast, sandy and well-amended soils promote quicker drainage, offering a significantly better environment for gardenias, which thrive in slightly acidic, well-aerated conditions.
If the soil emits a sour smell when stirred, it suggests anaerobic conditions are present, worsening root rot and posing an urgent concern. This sour aroma becomes more alarming in conjunction with a mushy texture. In such cases, you ought to amend the soil by incorporating organic materials like peat moss or perlite to enhance both drainage and aeration. After mixing these amendments into the existing soil, test the drainage effectiveness by pouring water on the surface: the quicker it drains, the more appropriate your drainage will be. This adjustment can prevent recurrence of similar issues, especially during heavy rain, by ensuring that roots do not remain saturated.
Step 3 – Revive Gardenias After Root Rot Damage

Start by removing any affected roots entirely and treating the cut surfaces with a fungicide to combat root rot effectively. After you replant the gardenia in well-draining soil, you should observe gradual improvements in leaf color and new leaf growth within a few weeks, which signals that the plant is on the path to recovery.
The recovery timeline for a gardenia suffering from root rot can vary based on environmental conditions. If the conditions are optimal, such as adequate sunlight and proper watering routines, new growth should appear within two to four weeks. Conversely, if the surrounding environment remains damp and boggy, recovery can be significantly delayed, with symptoms such as continuing yellowing leaves and poor regeneration manifesting. In this case, it’s critical to recheck drainage measures promptly.
Avoid overwatering during the recovery phase, as excessive moisture can compound the existing root rot issues. While it might seem beneficial to enhance nutrient delivery to speed up recovery, this could lead to extra root stress if the soil conditions remain too moist; wait until the plant displays signs of healthy new leaf growth before resuming regular fertilization. Remember that establishing moisture balance is essential for fostering robust root development.
The recovery process requires careful patience, and using the correct type of fertilizer can supply the necessary nutrients for healing. Opt for a balanced fertilizer with equal parts nitrogen, phosphorus, and potassium, typically labeled as 10-10-10. This nourishment not only stimulates root growth but also encourages vibrant foliage, enhancing the plant’s hardiness. It’s important to ensure even distribution when applying fertilizer to avoid patchy nutrient access and to ensure robust recovery throughout the plant.
Be cautious about avoiding over-fertilization as it can exacerbate stress on the already compromised root system. Excess nutrients can lead to nutrient burn, evidenced by browning leaf edges and curled foliage. If you observe such conditions, cut back on the fertilizer immediately. Over-fertilization can hinder recovery rather than facilitate it, potentially causing further damage to fragile roots. If symptoms persist, halting fertilization might be necessary until the signs of overall stability and health return to your plant.
Step 4 – Keep Soil Aerated to Avoid Root Rot
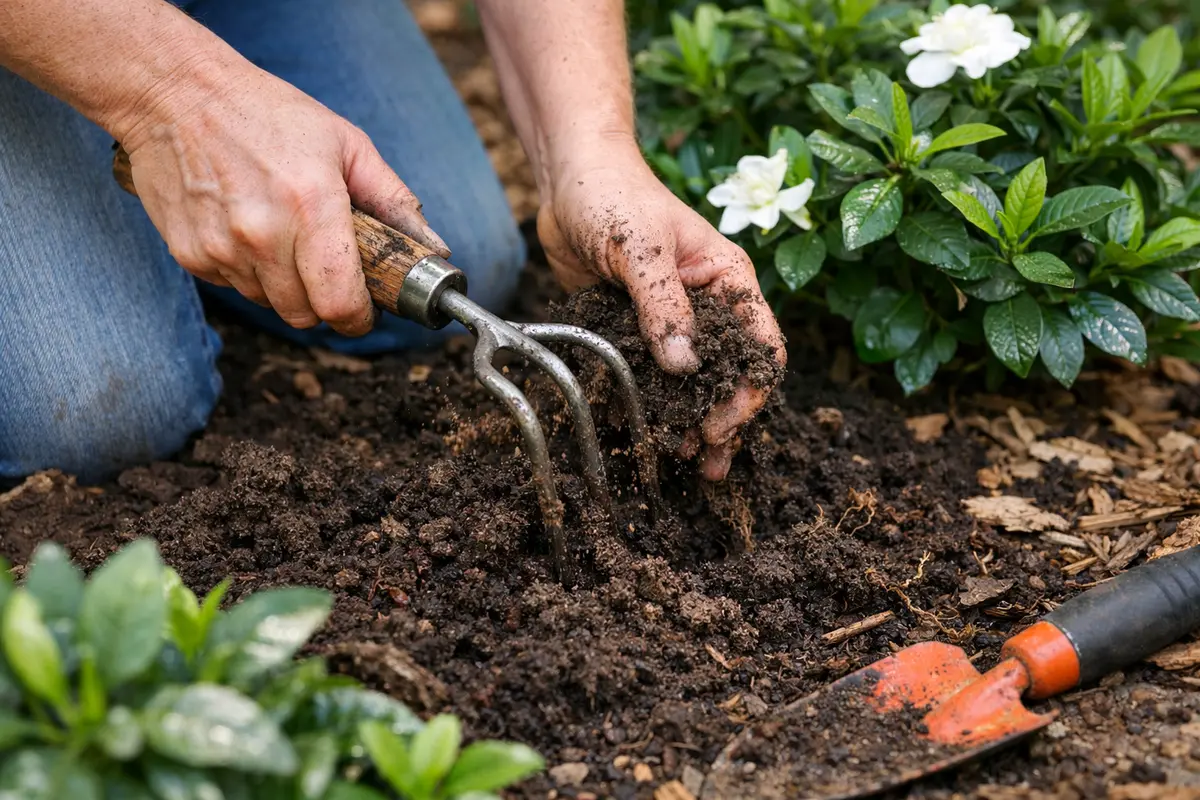
Start by amending the soil with organic matter, such as compost, to enhance drainage around your gardenias. This will ensure that water flows efficiently through the soil, reducing the risk of root rot, and you will notice an increase in soil health and moisture retention.
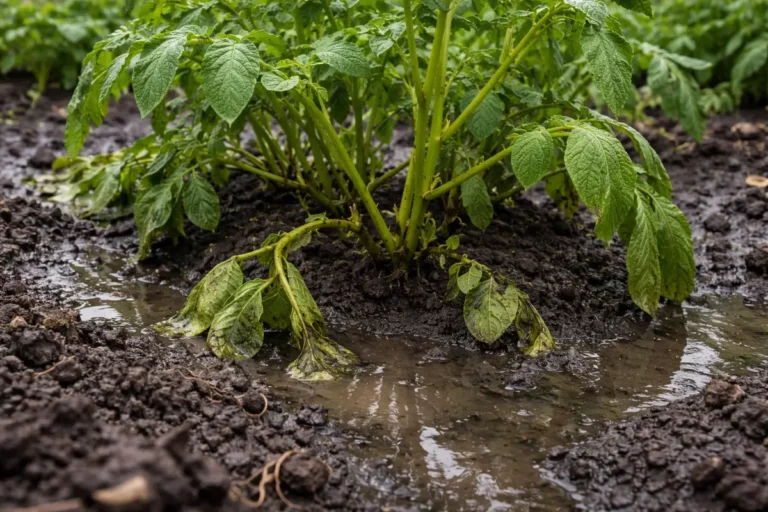
Excessive moisture, particularly in dense, clay-heavy soils, usually triggers root rot due to inadequate drainage. By incorporating organic matter, you create a loosened soil structure that promotes airflow and expels excess water, effectively addressing the root causes of the problem. If your gardenias exhibit wilting and yellowing foliage, assess for soil compaction around the roots.
In the spring and during periods of heavy rainfall, it’s advisable to establish drainage features like shallow trenches or raised garden beds for your gardenias to avert water pooling. Additionally, employing mulch can help manage moisture levels, but ensure it remains clear of the plant stems to prevent the development of other fungal infections due to excessive moisture retention.
A common cause of root rot arises from soil that is overly compacted, creating conditions that suffocate the gardenia roots. Regularly incorporating organic amendments actively combats these conditions, ensuring that your soil remains aerated and capable of draining excess moisture. If your gardenias present with yellowing foliage, verifying the soil’s moisture level can confirm if drainage issues persist, calling for prompt action.
During periods of heavy rain or humidity, consider elevating your gardenia planting areas by utilizing raised beds or mounds. This proactive strategy will encourage excess water runoff, mitigating saturated conditions that favor root rot during rainstorms. Additionally, addressing turf proximity to the gardenias can lessen competition for water and nutrients.
Soil aeration supports oxygen supply essential for gardenia root respiration. Properly oxygenated soil allows roots to compete effectively for both nutrients and water, significantly boosting overall plant health and vigor. Awareness surrounding mulch thickness is also crucial; while it aids in moisture regulation, excessive layers in warm, wet conditions can create an environment conducive to rot. Maintain vigilance against thick mulch as excessive moisture can harbor issues.
For the rainy season, ensure the mulch is appropriately layered; overdone mulching can capture moisture too long and create conditions that endure rot. It’s wise to adjust mulch by season, and remain alert to soil conditions. If water seems to linger on the surface instead of draining, reassess both your drainage and mulching strategies promptly to avoid future complications.
Step 5 – Inspect Gardenia Leaves for Stress Signs
Start by checking the soil moisture level around your gardenias every few days, especially after watering. Look for signs of excess moisture, such as a slimy texture on the soil surface or a foul smell, which indicates poor drainage and root disturbance. Recheck the conditions weekly, and observe if the soil begins to dry out more quickly or if drainage improves.
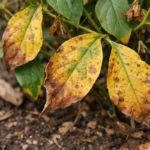
A fully recovered gardenia will exhibit vibrant green leaves that are firm to the touch and free from any discoloration or wilting. In contrast, early signs of root rot returning may include yellowing leaves that feel soft or droopy, indicating ongoing distress. If the leaves start to curl or the stem begins to blacken, take immediate action to address the drainage issue.
If the problem returns despite earlier prevention efforts, consider repotting the gardenia into a container with drainage holes and fresh, well-aerated potting mix. Escalate your approach by inspecting the roots; if you find them brown and mushy, trim away the affected sections before replanting. If drainage issues persist, evaluate the garden bed’s slope and consider digging a trench for improved water runoff.
An indicator of a fully recovered gardenia is the presentation of vibrant green leaves with a firm, smooth texture, denoting resilience; conversely, early signs of root rot manifest through yellowing foliage that feels soft and begins to drop. In inspection, notice if browning occurs at leaf edges, combined with a droopy appearance; these can signify the plant’s stressed state. Effectively compare recent growth against observable symptoms: healthy blooms show positive recovery, while drooping foliage suggests distress and warrant closer investigation.
If issues resurface despite your methodical monitoring, enhance soil drainage by amending with perlite or sand to boost aeration. Should symptoms continue to appear, it may be time to repot the gardenia into a well-draining container to mitigate the risk of further root rot. Furthermore, evaluate the planting location—excessive shade can heighten moisture retention and needs addressing.
A fully recovered gardenia typically showcases vibrant green leaves alongside new growth, such as fresh buds and blossoms. However, if the plant reveals browning edges or ongoing wilting after you’ve applied remedial effort, this could suggest that fundamental issues remain unresolved. Regular monitoring ensures prompt action; avoiding complacency is crucial, as allowing problems to linger can lead to severe repercussions for the plant’s ongoing health.
If symptoms recur, despite diligent attention, take stock of your drainage systems and soil makeup. Performing a soil analysis could clarify whether acidity and nutrient levels are optimal for your gardenias. If waterlogged conditions persist, you may need to consult a professional, particularly if underlying roots are consistently compromised due to drainage failure. Being proactive entails continual assessment of your plants; recognizing early signs of trouble allows you to address potentially severe issues before they escalate beyond control.
FAQ
How long does it take for gardenias to recover from root rot?
The recovery time for gardenias from root rot typically varies, spanning from a few weeks to several months, contingent on the severity of the issue and the swiftness of corrective actions taken. With attentive care, which includes root trimming and soil enhancement, you may begin to observe signs of recovery within two weeks of treatment.
Can root rot spread to other plants in the garden?
Yes, root rot can indeed spread to adjacent plants if the conditions of excess moisture are not resolved. If you suspect root rot in any particular plants, isolate them from others to minimize the risk of spreading. Consistent watering practices accompanied by efficient drainage techniques are critical preventive strategies to stop the spread of root rot in your garden.
Should I remove all affected gardenia parts?
To effectively control the spread of root rot, it is advisable to remove all affected areas of the gardenia. Focus primarily on trimming back dead or rotting roots along with any unhealthy leaves to facilitate new growth and bolster plant health going forward. Moreover, disposing of these trimmings away from healthy plants is essential to prevent potential cross-infection.