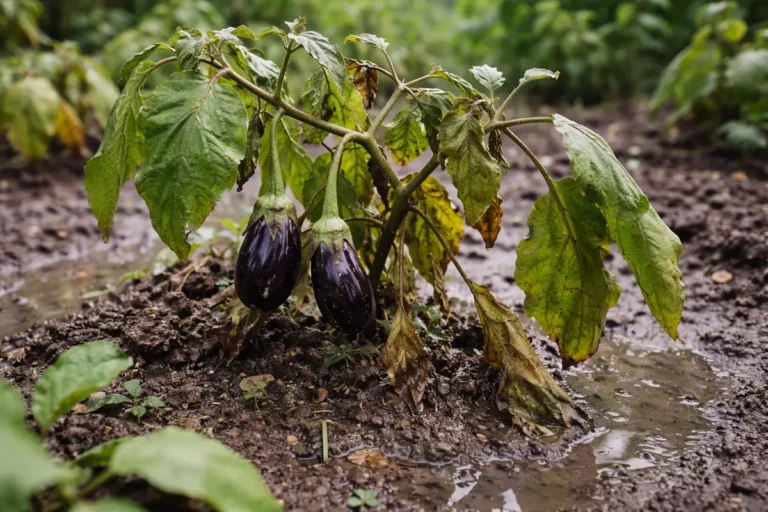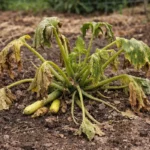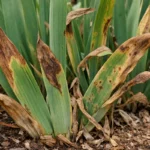
You may notice your indoor herbs struggling during winter, with yellowing leaves and drooping stems, a clear sign that you need to know how to treat root rot in indoor herbs during winter. This condition arises when the roots become waterlogged, leading to mushy tissue and a heightened risk of disease. If left unaddressed, the situation gets worse, weakening the plant and making it harder to fix, but you can improve the health of your herbs by inspecting the roots, adjusting your watering practices, and removing any affected areas.
Step 1 – Remove Rotting Herb Roots Immediately
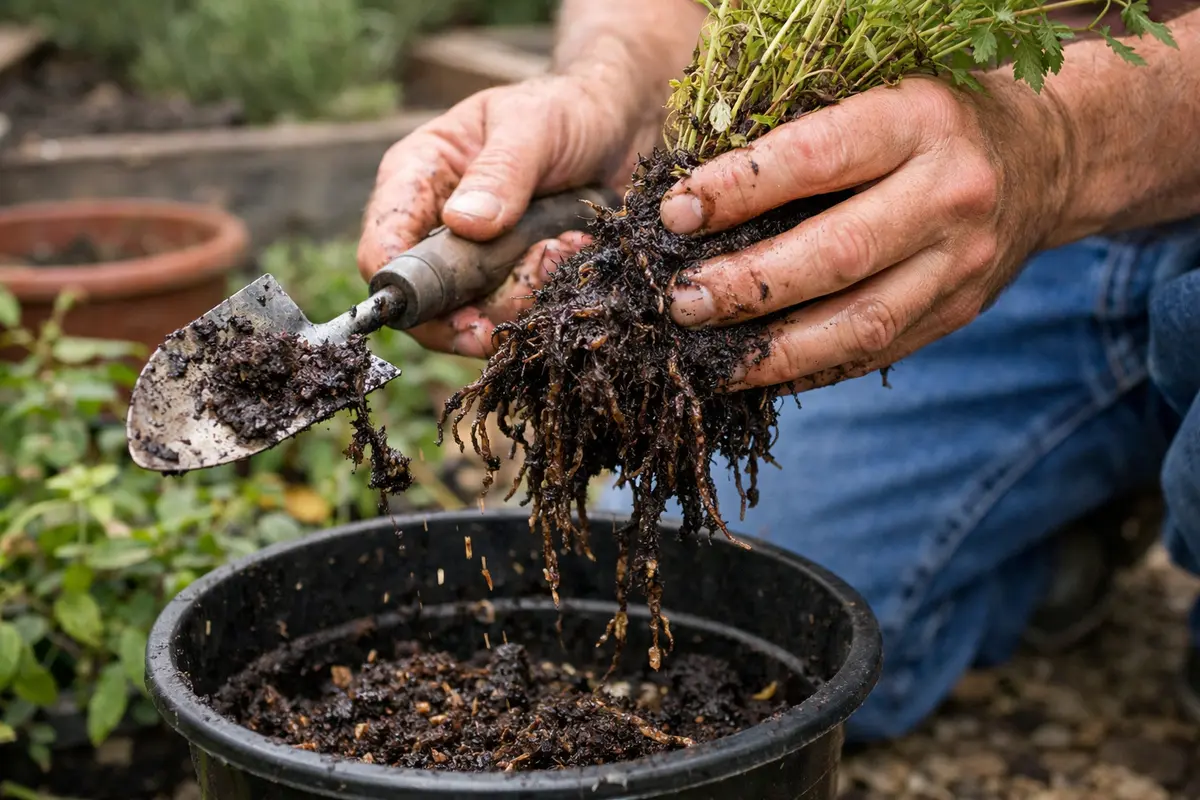
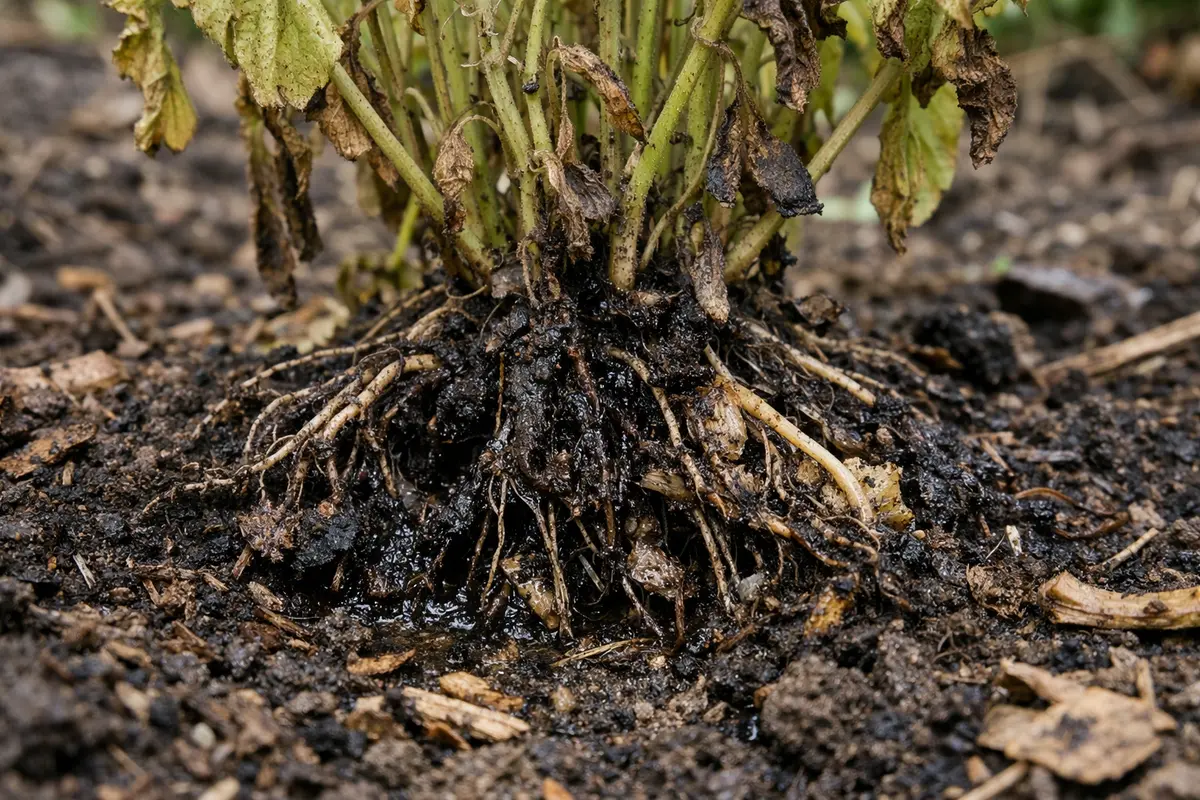
Remove the rotting roots from your herbs immediately. You will see the remaining roots still firm and white rather than brown and mushy. Quick action prevents the spread of decay to the healthy parts of the plant and allows for better airflow towards the roots. If the roots appear slimy or emit an unpleasant odor, that is a clear indication of advanced decay. By taking immediate action, as soon as you notice any undesirable symptoms, you significantly increase your chances of saving the plant.
Acting fast is crucial as rotting roots can release harmful pathogens into the soil that further damage the plant. Each moment of delay increases the risks of secondary infections that can travel to foliage and halt recovery. Performing this action within the first 24 hours helps maintain the plant’s stability and begins rectifying the issue before it escalates. Inadequate ventilation often exacerbates the problem, making timely intervention even more critical. Additionally, if the soil feels compacted while you’re checking the roots, it could be a sign of poor drainage, which must also be addressed to prevent a recurrence. After removing the affected roots, make sure to tilt the pot slightly to drain any excess water that may have pooled at the bottom.
In my experience, the most common mistake is waiting too long to address rotting roots, thinking that the issue will resolve itself. Until you finally notice the yellowing leaves, the damage may have become systemic. Sticking to a regular maintenance schedule, which includes checking root health every couple of weeks, encourages immediate action upon the first signs of wilting leaves or discoloration. If you notice leaves starting to droop, inspect the roots without hesitation. If upon inspection you see some healthy roots, it’s a good idea to keep as much of that root system as possible while removing the rot. If even the healthy roots seem thin or fragile, it may warrant reconsideration of watering frequency in the future to prevent stress on the plant.
Step 2 – Identify Causes of Indoor Herb Root Rot
Test the soil moisture levels by sticking a finger into the potting mix about two inches; if it feels soggy, correct it by allowing the soil to dry out completely. You will observe that the top layer of soil becomes drier, allowing for improved air circulation around the roots. Waterlogged conditions often mark the onset of rot, resulting in stunted growth and vulnerability to pathogens. Hence, it’s essential to establish a solid baseline moisture level for recovery.
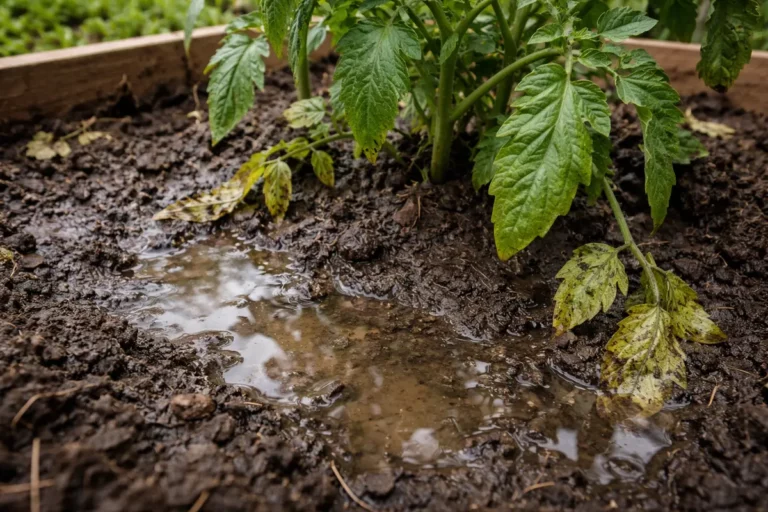
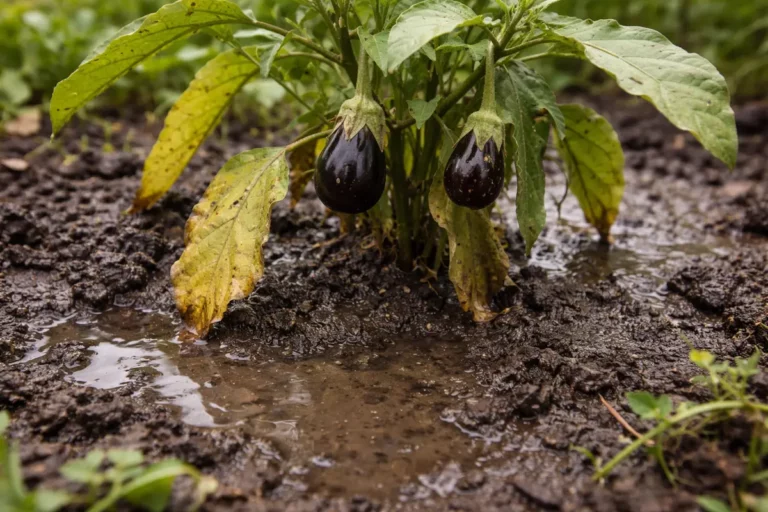
Root rot often stems from overwatering, particularly during winter when indoor conditions can be cooler and humid, leading to stagnant moisture. The soil traps excess water, eliminating oxygen availability for the roots and causing them to rot. Mismanagement of your water routine creates a detrimental cycle, where attempts to fix problems only lead to additional complications. Once you identify this imbalance, it’s crucial to adjust your watering routine or consider switching to a well-draining potting mix to facilitate faster drying and oxygen penetration. If you switch potting soils, ensure that it is suitable for the specific herbs you’re growing, as some herbs may require a more coarse mix.
If the soil smells sour as you touch it, it’s a clear sign that fungal growth is present alongside the roots. In such cases, consider replacing the soil entirely with fresh, organic potting mix that allows for better drainage. This is particularly important if you have observed a white or grayish overlay on the soil surface, indicating mold formation. Acting on this evidence creates a solid foundation for your herbs to begin recovering, helping to eliminate hidden threats that could undermine your efforts. Monitor moisture levels closely in future watering sessions, adjusting frequency based on your herbs’ visual cues of health—this helps prevent repeating the same mistakes. Taking temperatures of the soil can also guide you; if it remains significantly cooler or consistently wet, it can indicate ongoing drainage issues.
Step 3 – Treat Indoor Herbs with Nutrient Boost
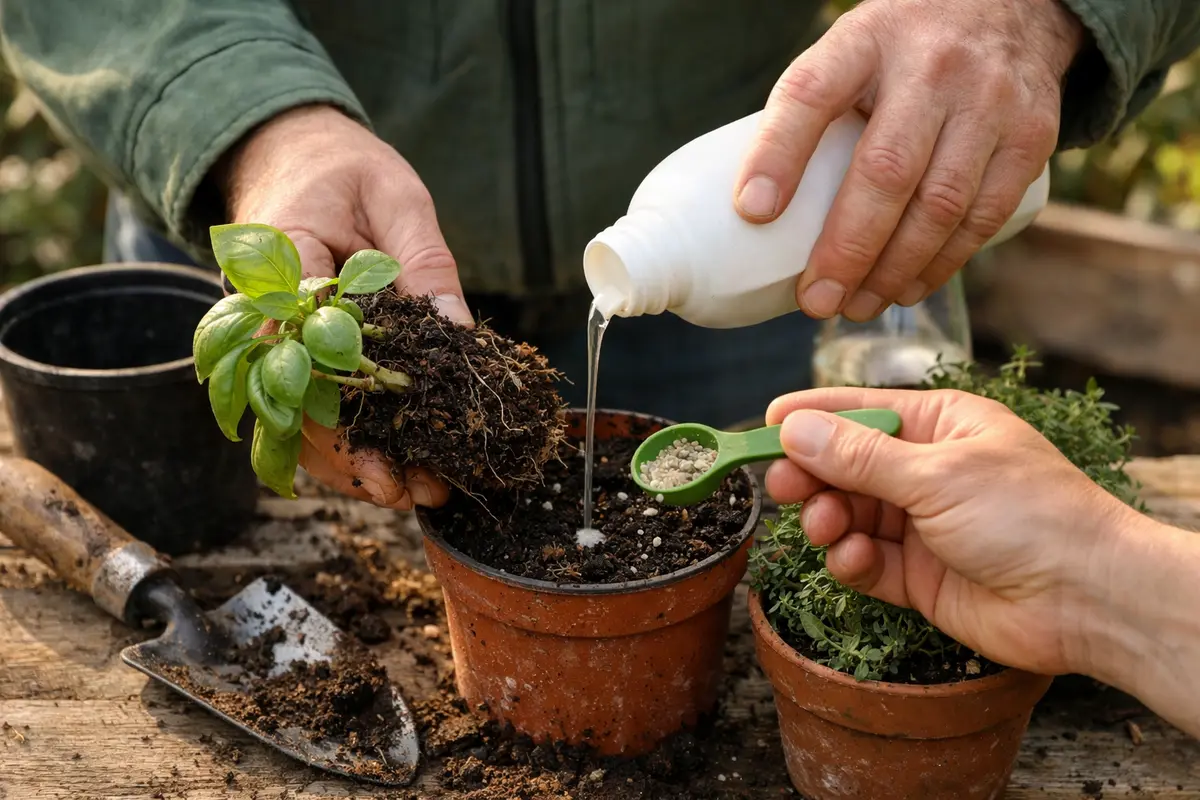
Apply a diluted fertilizer solution to the soil around your indoor herbs within a week of root removal. You should notice the leaves starting to green and new growth appearing shortly after treatment. This action infuses the plants with the necessary nutrients, fostering healing and regrowth after the recent root disturbance. Ensure to use a balanced formula rather than a high-nitrogen blend, as the latter can lead to further root stress. Following your initial treatment, it’s recommended to observe the plants for any adverse reactions, such as wilting or discoloration, indicating the need to adjust your approach.
Nutrient restoration is key for recovery, as the herbs will have likely depleted their resources due to the stress of root rot. Fertilizers containing nitrogen and potassium promote strong leaf and root development. Additionally, applying a diluted liquid seaweed solution can enhance nutrient absorption and stimulate growth. During this time, monitoring new leaf growth is crucial to understanding how your herbs are rejuvenating. Healthy green leaves are indicators that your herbs are on the right path; expect increased vigor if your fertilization is effectively aligned with their needs. Aim to apply the diluted solution after the first complete watering so that the health of the roots improves before feeding begins—this ensures they can uptake the nutrients more effectively.
A common mistake here is over-fertilizing, thinking that more nutrients will ensure faster recovery. This can backfire and lead to nutrient burn, especially if the roots are still compromised or recovering from rot. It’s advisable to follow dosage instructions closely, as providing excessive nutrients can stifle growth and even kill the plant. If you notice the tips of the leaves start turning brown or yellow, that’s a clear warning sign to reduce nutrient application. Once you begin to notice this sign, immediately stop feeding and flush the soil with clean water; this helps to remove excess fertilizers that the roots may not be able to handle. Always ensure the herbs have absorbed excess moisture before fertilization to avoid overwhelming their roots. If root tenderness persists or nutrient burn occurs, consider using a gentle seaweed solution rather than chemical fertilizers—this will help avoid further root distress.
Step 4 – Water Herbs Properly During Winter Months
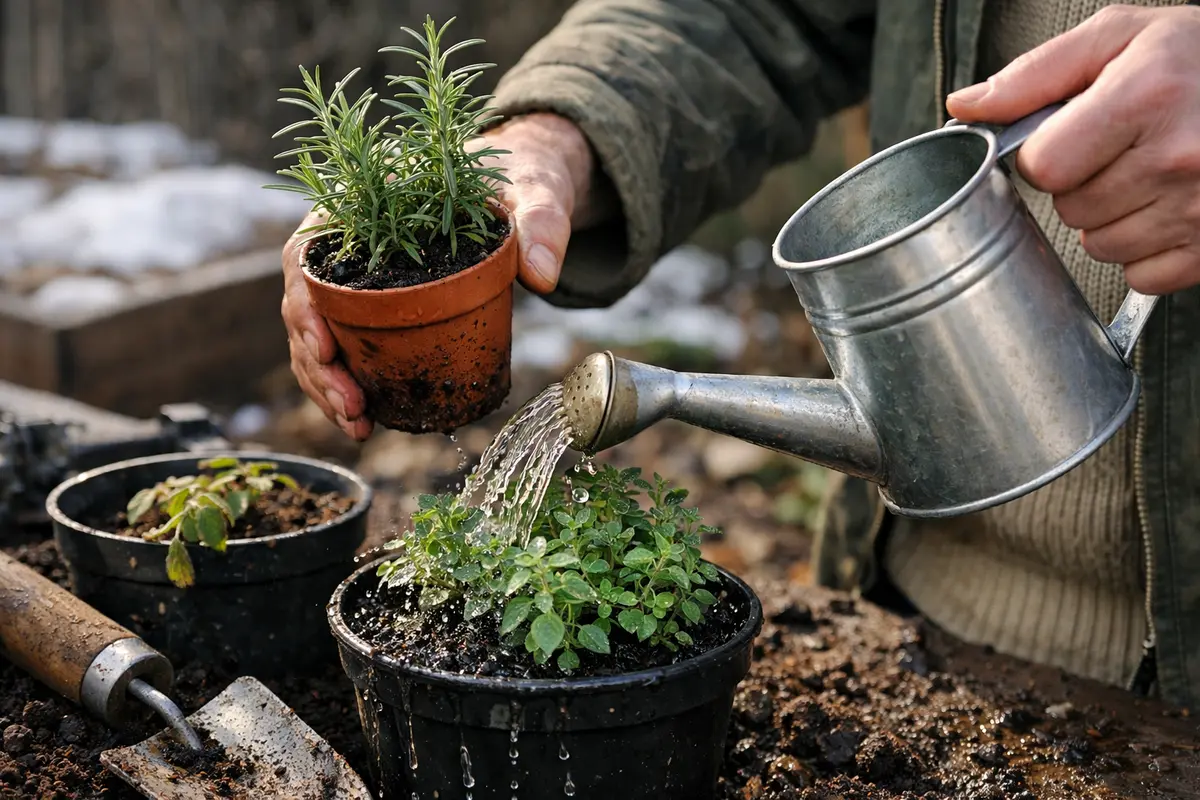
Adjust your watering routine to every 10-14 days during the winter months. You should find that the top inch of soil feels dry before the next watering cycle begins. This approach ensures that the herbs do not face the same moisture retention that caused root rot. A visual check, where the soil appears crumbly and the surface is less glossy, indicates readiness for additional moisture. Additionally, it may help to use pots with drainage holes, enhancing moisture control further to prevent water accumulation. Using self-watering pots can be an alternative if your watering schedule is irregular.
During winter, indoor temperatures are cooler, reducing a plant’s water needs. If you uphold a summer-like watering routine, you’ll find yourself in a cycle of waterlogging, which rejuvenates the very conditions you’re looking to avoid. Excessive moisture can create a breeding ground for pathogens or further rot, so selecting well-drained pots and amending your soil can significantly improve the overall health of your herbs. Keeping an eye on moisture levels and adjusting frequency can stop issues before they begin. Consider distributing pots across varying locations in your home; different exposures to sunlight and heating systems can alter moisture needs and responses in your herbs.
Additionally, be cautious with any sudden changes in watering frequency; gradual adjustments are ideal, as changing conditions can stress your plants. Sudden increases in heat from nearby heating systems can dehydrate your herbs quicker than anticipated. Therefore, consistent monitoring is essential; if you notice that your herbs begin to droop following a heater’s activation, reassess your water schedule to avoid future stress. If you live in a particularly dry climate during winter, also consider placing a humidity tray or pebble tray filled with water beneath your pots to increase moisture levels around the plants—this helps stabilize the environment without over-saturating the roots.
Step 5 – Inspect Herb Soil for Excess Moisture Regularly
Check the moisture level of the soil every 3-4 days for the following two weeks. You should notice that the soil isn’t overly moist and that the surface remains dry between waterings. Implementing a simple routine of checking can provide timely insights into the health of your roots. A consistent inspection helps ensure early intervention if any issues arise, preventing a complete relapse into rot. Utilize a moisture meter if possible for a hands-off approach—these tools can provide accurate readings, eliminating guesswork. If the readings are consistently high even with reduced watering, that could indicate a compaction issue or low airflow around the roots.
The recovery of soil moisture indicates good root rehabilitation, and you’ll see signs of more vigorous growing parts of the herb. Expect to see crisp leaves that regain their color and firmness, contrasting the prior limp appearance associated with root rot. If you notice the soil crusting at the surface, that can indicate drainage issues that need to be addressed promptly. Pay close attention to soil texture; if it feels sticky, then drainage is likely impeded, necessitating improved soil aeration. Remember to look at your pot size—if the roots seem to be packing tightly against the edges, then a larger pot may be warranted.
If the problem persists despite these proactive measures, it may be time to repot your herbs into fresh soil while trimming back any remaining damaged roots. An observable shift, such as persistent wilting or discolored leaves, signals a red flag; timely remediation is essential. Also, consider the size of your pots—if they are too small for root expansion or inadequate drainage, switching to appropriately sized containers is crucial for long-term health. Keeping a watchful eye can save your garden from repeat disturbances—establish a pattern of care that monitors growth and health regularly, allowing speedy interventions as needed.
FAQ
How long will it take for my indoor herbs to recover from root rot?
The recovery timeline varies, but you may start seeing signs of improvement within 2 to 3 weeks after implementing corrective measures in watering and fertilization routines. Leaves should become vibrant again, and new growth can appear after ensuring proper access to nutrients and air circulation around the roots.
Can root rot spread from one plant to another?
Yes, root rot can spread if both plants share the same potting mix or soil. Fungal spores can migrate through moisture or contact with infected soil, making it essential to isolate any affected plants during treatment to avoid cross-contamination. Keeping a dedicated set of tools for infected plants is advisable for sanitation; check plants regularly for signs of issue recurrence to reinforce your preventive efforts.
Should I remove all parts of an infected herb plant?
Not always; you should remove only the visibly rotting roots and the most affected foliage. Healthy portions of the plant can often recover if they aren’t stressed further by overwatering or poor drainage. However, if significant portions of the roots are affected, consider complete repotting to ensure recovery success. Keeping the potting conditions conducive to regrowth will facilitate a stronger comeback from your herbs.