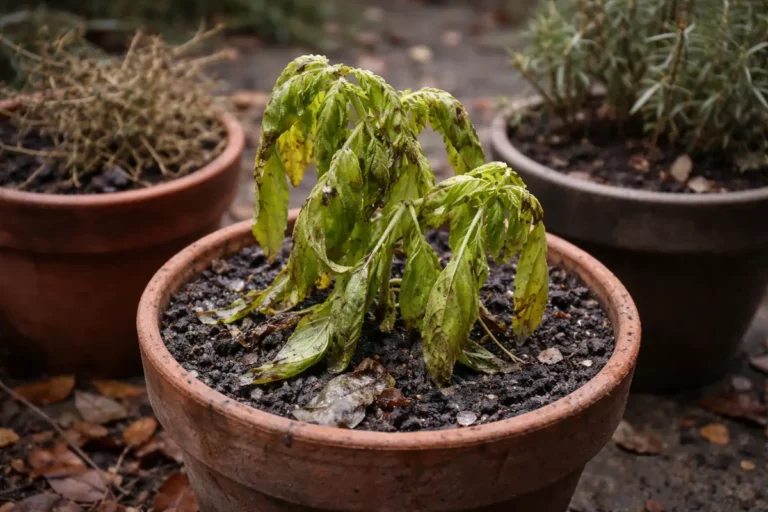
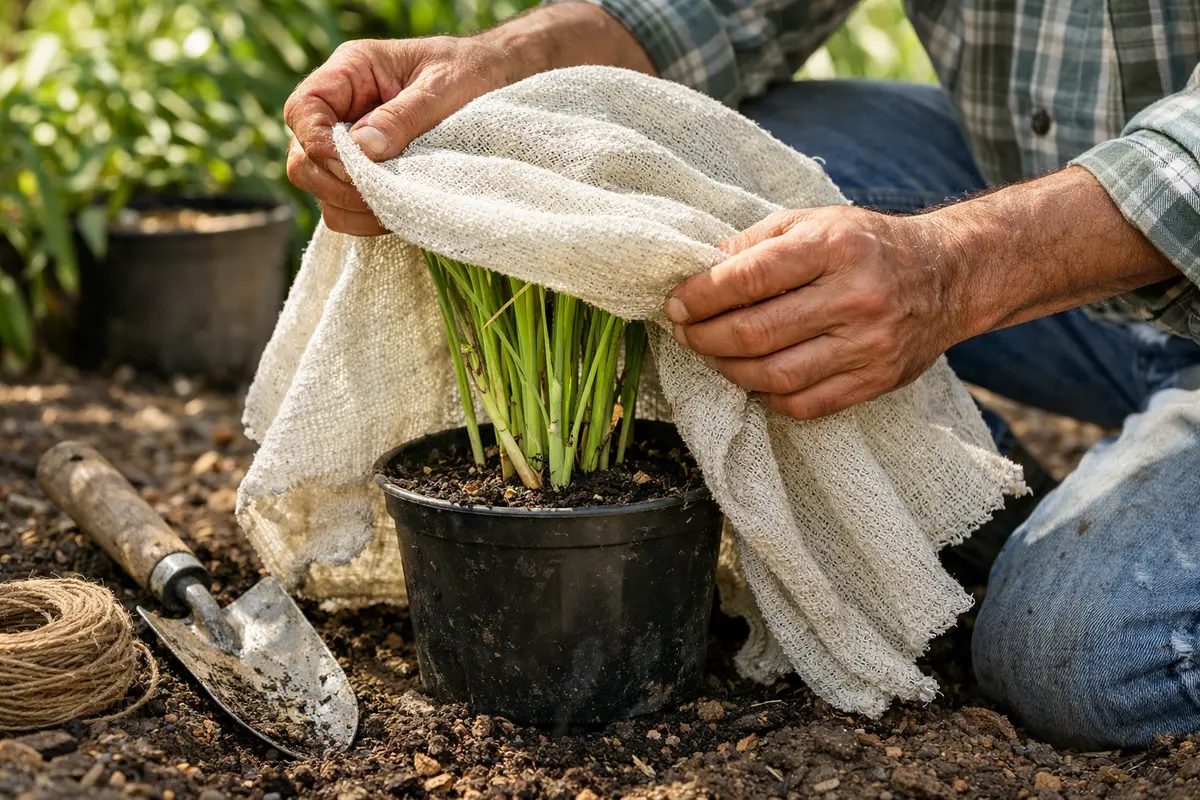
You may notice your potted lemongrass exhibiting stunted growth after repotting, which is why you need to know how to fix stunted growth in potted lemongrass after repotting. This could manifest as wilting leaves or yellowing stalks, indicating that the roots are struggling to adjust to their new environment. If ignored, the situation gets worse and can lead to more damage to the plant, but fixing it is possible now by adjusting the watering schedule and monitoring the soil conditions.
Step 1 – Trim Overgrown Lemongrass Stalks Now
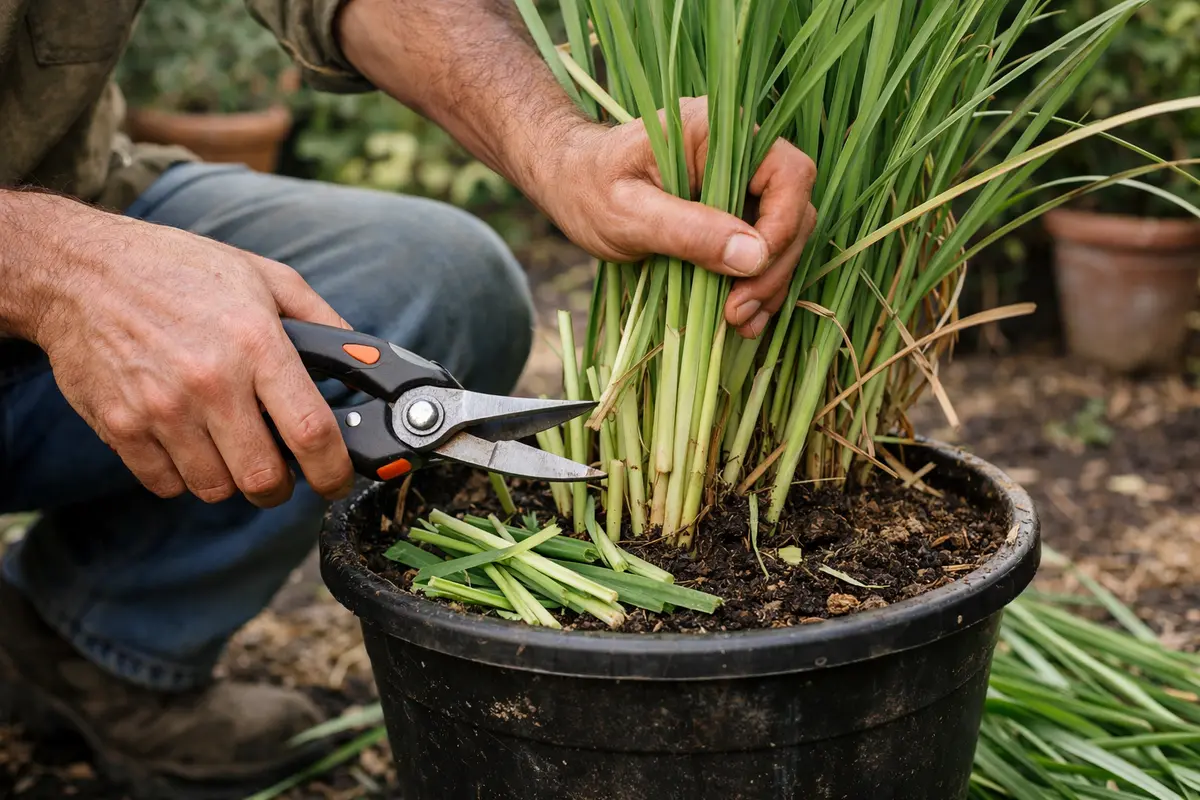
Start by trimming back any overgrown or damaged stalks of your lemongrass. You will notice that the plant looks more balanced and less stressed after the trim. This immediate action helps direct the plant’s energy to healthier growth rather than maintaining excess foliage. Aim to remove about one-quarter of the height of the stalks; this precision allows for optimal recovery while minimizing stress. It is crucial to use clean, sharp scissors or pruning shears to make clean cuts, as ragged edges can invite infection.
Trimming encourages new growth by reducing the overall biomass that the plant needs to support. In lemongrass, excess stalks can hamper proper photosynthesis and moisture regulation. If not addressed, these underperforming stalks can lead to further weakening, as they compete for essential nutrients and water. Furthermore, if the plant continues to divert energy into maintaining unhealthy growth, it may lead to more severe stunted growth down the line. This scenario often arises when significant portions of the stalks are left untrimmed, causing an imbalance in growth and nutrient allocation.
A common mistake novice gardeners make at this stage is neglecting to trim the plant after repotting. They worry that any cutting could cause further stress, but the opposite is often true. By removing the excess, the lemongrass can regenerate more efficiently. After trimming, check the remaining stalks regularly for any signs of new growth, which typically appears within a week or two. If you do not see any signs of rejuvenation after two weeks, it might indicate a deeper issue, suggesting the need for further diagnosis. This feedback loop is vital, as witnessing growth confirms the health of the remaining stems and allows you to fine-tune care strategies based on the plant’s response.
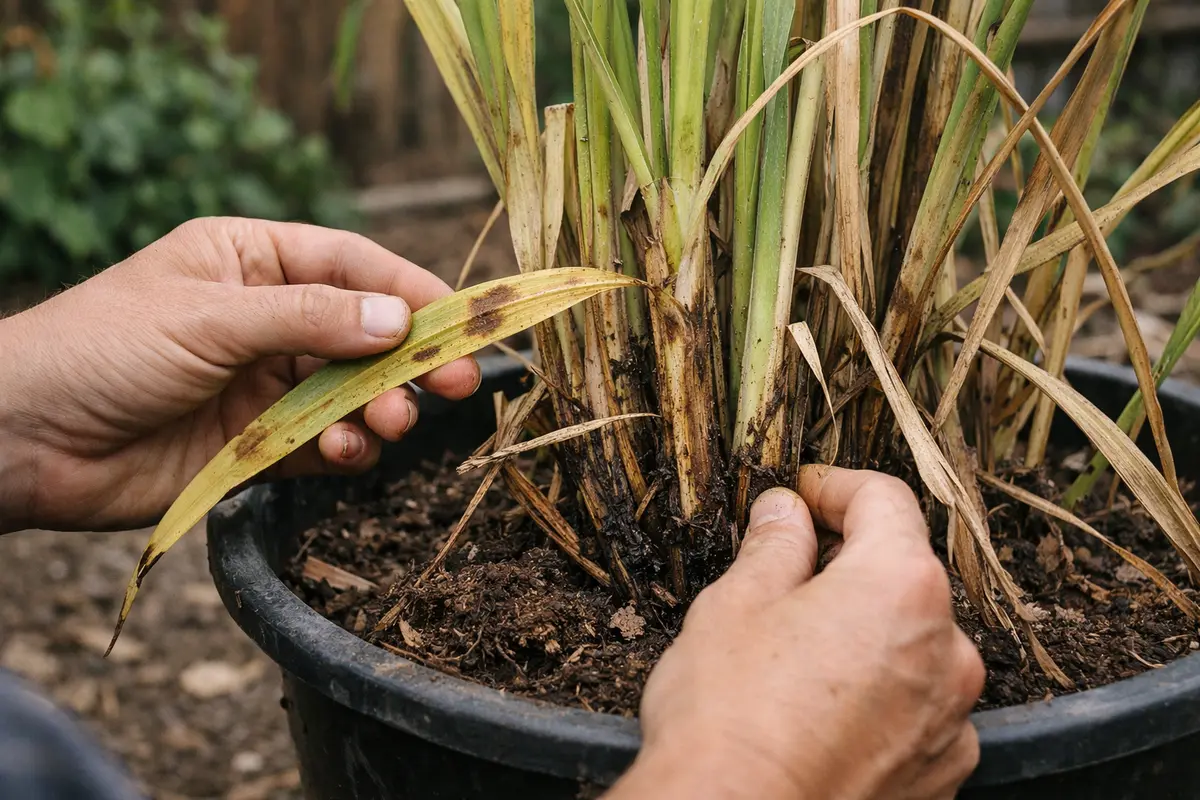
Step 2 – Diagnose Root Issues in Lemongrass
Start by checking the root system of your potted lemongrass. Carefully remove the plant from its pot and inspect the roots for crowding or rot; roots that are brown or mushy indicate decay, while tightly tangled roots suggest overcrowding. Fix these issues by trimming dead roots or replanting in a larger container to improve growth, which should be noticeable in a few weeks as new shoots emerge.
The stunted growth observed could stem from root overcrowding or rot, both resulting from inadequate space or poor soil drainage. When roots are too tight in the pot, they cannot effectively uptake nutrients or water, leading to nutrient deficiency symptoms like yellowing leaves; conversely, roots sitting in waterlogged soil will rot, causing wilting and stunted growth. For healthy roots, ensure they are firm and white, contrasting with soft, brown mushy roots indicating rot.
If the soil smells sour, it implies anaerobic conditions needing immediate action; replace with fresh, well-draining soil to promote aeration. Additionally, if you notice leaf yellowing without root rot, the issue could be a lack of nutrients or insufficient light, necessitating a review of your fertilizer schedule or light exposure instead.
Root rot is often caused by overly wet conditions or poorly draining soil, both of which can hinder nutrient absorption. When roots drown or rot, nutrients cannot travel through the plant effectively, leading to stunted growth. Identifying these issues immediately is crucial for preventing further damage; rotten roots need to be pruned to allow healthy root regrowth. An effective action is to trim back any brown or mushy roots until you reach white or firm tissues, as these are signs of healthy roots. Following up with a light application of a rooting hormone can promote quicker recovery of the trimmed roots. If pots stay saturated, plants can gradually express stop yellowing leaves on.
If your lemongrass’s roots seem healthy but the plant still struggles, check the soil conditions. If the soil feels compact or smells sour, you may need to repot the plant into fresh, well-draining soil. Ideal soil should consist of equal parts potting mix, perlite, and compost to encourage proper drainage and aeration. It’s important to check that the pot’s drainage holes are not clogged, as this can lead to retention of excess moisture. If rot is an issue, apply a fungicide to safeguard any remaining healthy roots and boost growth potential. This intervention can provide a more favorable environment, helping roots to stabilize and the plant to thrive once again.
Step 3 – Water Adequately to Revive Lemongrass
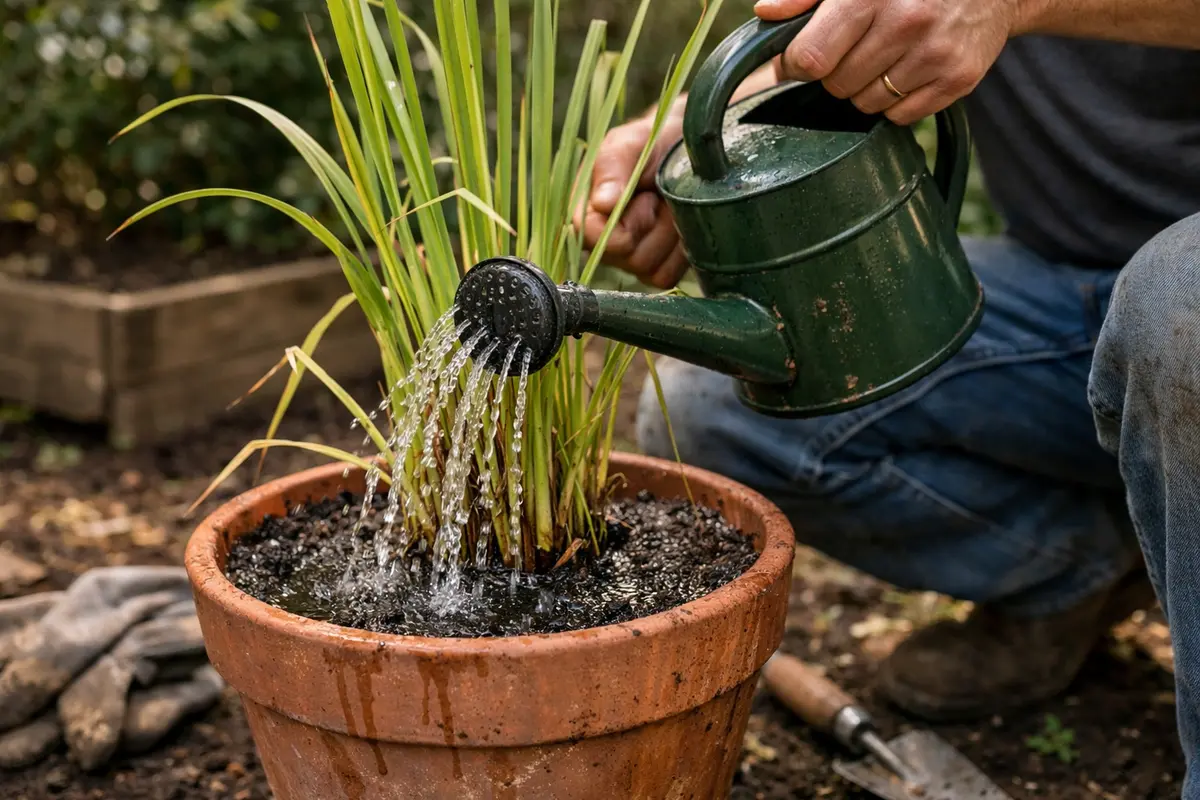
Water the lemongrass with enough moisture to penetrate the soil deeply. You should see the leaves perk up and regain a brighter green hue within a few days of watering. This action provides the necessary hydration that supports recovery and new growth, creating a balanced moisture level that’s essential for enhancing nutrient uptake. Ensure that the water reaches the roots by applying it until you see it draining from the pot’s bottom—this guarantees thorough saturation.
Lemongrass requires approximately 1 inch of water each week, ideally distributed over two watering sessions to allow moisture to seep deeper into the root zone. Effective watering promotes a robust root network, essential for nutrient absorption and strong overall growth. If the soil was previously parched, start with less water initially to avoid shocking the roots. Pour water until it drains from the bottom of the pot, ensuring the entire root ball is hydrated. After this initial watering, gauge the moisture level by checking the soil with your fingers; it should feel moist, not soggy, deeper than the surface.
However, avoid overwatering, as this can lead to further root rot and stagnation. A common mistake during recovery is to apply excessive water, believing it is necessary for quick recovery. If the excess water doesn’t settle within an hour or two, the pot may need extra drainage or adjustments in the watering frequency. The ideal condition is to achieve consistently moist but never soggy soil, where the top layer dries out slightly between waterings to encourage strong root growth. If a fine misting of water promotes humidity, it can also support growth without saturating the roots—especially in drier environments.
Step 4 – Limit Sun Exposure to Prevent Stagnation
Reduce sunlight exposure by relocating your potted lemongrass to a partially shaded area. The plant should start to show signs of reduced stress, with leaves appearing less wilted and more vibrant over the next week. Limiting relentless direct sun during recovery helps create a more favorable environment for root development and prevents water loss that exacerbates the plant’s stress. If possible, provide a setup where the plant receives morning sun and shade throughout the hottest parts of the day.
Intense sunlight during recovery can exacerbate water loss and cause additional stress on the plant. Lemongrass thrives best with at least 4-6 hours of partial sunlight to avoid scorching and dehydration during this recovery phase. If possible, consider a location where it can receive filtered sunlight through a sheer curtain or where it is shaded during the hottest part of the day. This measure can provide relief while still ensuring the plant receives enough light for photosynthesis. If you notice yellowing leaves or scorched tips, it indicates too much direct sunlight and necessitates further adjustments.
Feel comfortable adjusting the plant’s location according to changing weather conditions. If transitioning from summer to cooler months, ensure the lemongrass still receives adequate warmth without the intensity of midday sun. Some signs of heat stress to watch for include crispy leaf edges and a brown discoloration at the tips; if these symptoms arise, it’s crucial to adjust the location immediately. Additionally, if temperatures dip below 15°C, bringing the plant indoors temporarily may help safeguard it during extreme fluctuations, as sudden cold exposure can stall recovery. Regular evaluation of plant condition following any adjustment in sunlight can inform whether further action is necessary.
Step 5 – Check for New Growth After Two Weeks
Recheck your lemongrass after two weeks to look for signs of new growth. You should observe fresh shoots sprouting and leaves beginning to firm up, indicating the plant is recovering well. Regular checks will help ensure the interventions you implemented are yielding positive results. Keeping records of your observations can also help track progress and make necessary adjustments. If growth appears delayed, it might indicate that additional stressors need to be addressed.
At this point, a fully recovered lemongrass will display bright green, erect leaves and solid stems. If you notice that new shoots appear stunted or that leaves still show yellowing, these may indicate underlying issues requiring immediate attention. Stay alert for any signs of stress; this proactive approach allows for timely adjustments before further issues arise. Should you notice continued yellowing even after addressing watering and sunlight, it might indicate that nutrient deficiencies have developed during the stressful period.
If you notice no new growth after this period, consider checking other factors. Look for root health again, ensure consistent watering, and confirm that the soil remains properly aerated. If the same problems persist, investigating whether the pot size is adequate for root growth is also essential. Over time, root systems can outgrow their containers, leading to nutrient deficiencies and stunted growth. In the worst-case scenario of persistent issues, you may need to consult with a gardening expert for further diagnosis or recommend repotting in fresh soil using a different container, ensuring it offers the best possible growth conditions.
FAQ
How long will it take for my lemongrass to recover?
Recovery can take about two to four weeks, depending on how severely the plant was affected after repotting. You should start seeing new growth within two weeks if the adjustments are effective. Regular observation during this time is crucial to gauge the effectiveness of your recovery efforts. If recovery seems delayed, use this interval to assess environmental conditions and care practices.
Can I fertilize my lemongrass while recovering?
It’s best to avoid fertilizing during the initial recovery phase as it can stress the roots further, especially if they are still establishing. Once you see new growth and the plant is stable, then you can begin applying a diluted, balanced fertilizer every 4-6 weeks. This timing allows your lemongrass to benefit from additional nutrients without overloading stressed roots. Focusing first on root stabilization and overall health will create a more resilient plant in the long term.
Should I remove any dead or yellowing leaves?
Yes, trimming away any dead or yellowing leaves will help the plant focus its energy on new growth. Performing this step as necessary improves air circulation and reduces the chances of diseases developing, creating a healthier environment for new shoots to thrive. If removing large portions of leaves, ensure this is done strategically to avoid shock. Always inspect the cuts to ensure they promote healing and minimize further stress on the plant.