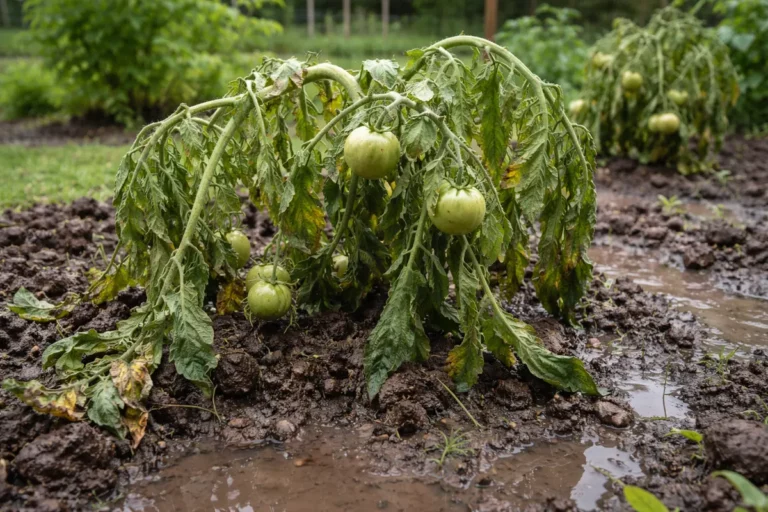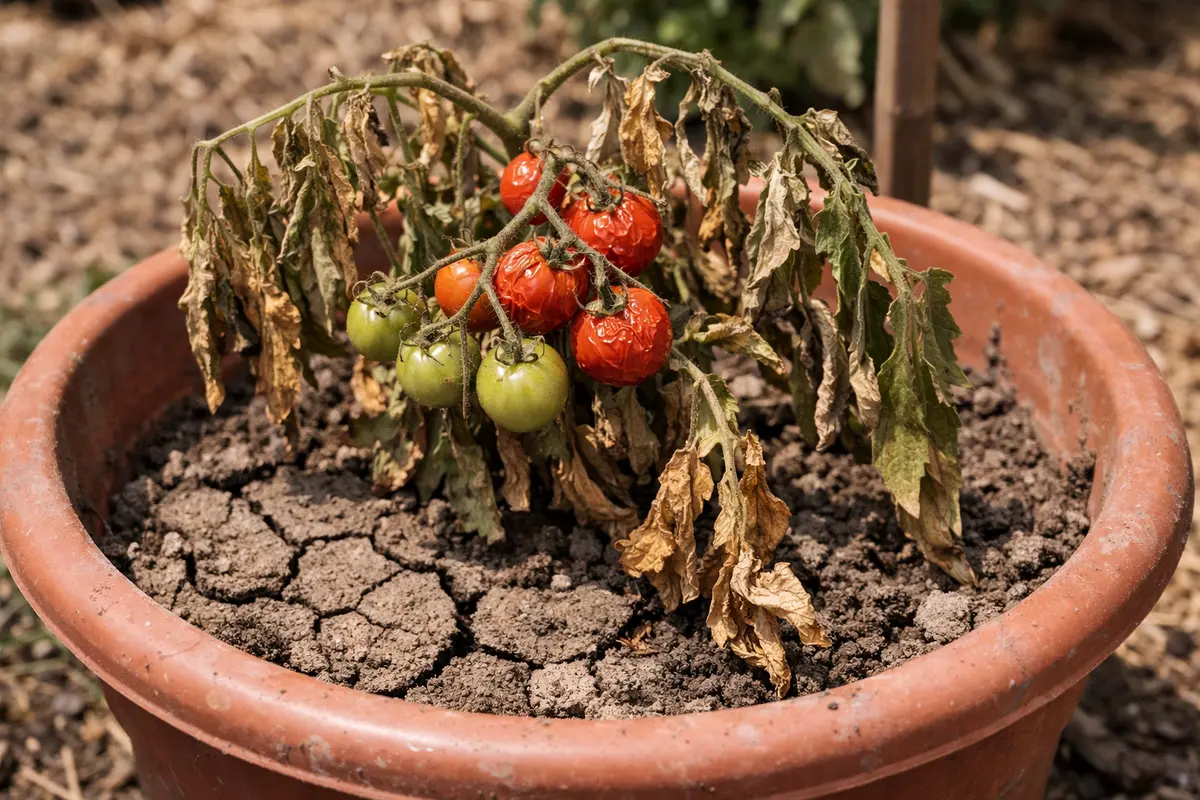
You may notice your potted tomatoes looking droopy and lifeless during the sweltering days of summer, which is why you need to know, “Why are my tomatoes wilting during a heatwave in pots?” This wilting is often caused by the plant’s inability to take up enough water from the soil due to extreme heat, leading to wilting leaves and a stressed, drooping appearance. If you ignore these symptoms, the situation gets worse, ultimately weakening the plant. It’s critical to act quickly by checking the soil moisture and adjusting your watering habits accordingly to prevent significant harm.
Step 1 – Water Potted Tomatoes Immediately
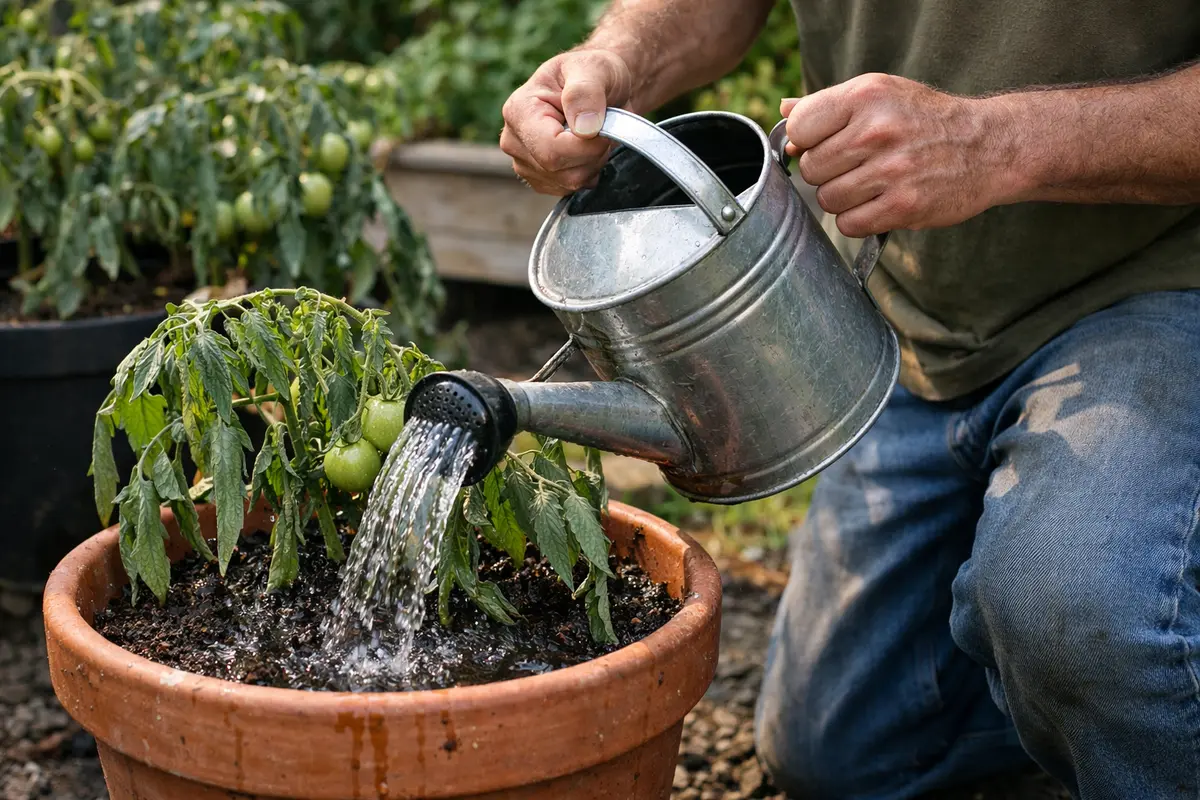
Water your potted tomatoes thoroughly right away. You will notice the leaves gradually perking up within a few hours, returning some vitality to the plant. Providing immediate hydration helps to counteract the effects of heat stress and restores moisture levels in the soil, creating a healthier environment for your tomatoes. Watering deeply ensures moisture reaches those vital root zones, critical for plant recovery during extreme temperatures.
Tomatoes are particularly sensitive to changes in moisture due to their shallow root systems, which cannot effectively withstand drought conditions. When soil moisture is too low, the plant cells lose turgor pressure, leading to wilting. Keeping the soil consistently moist, especially during heatwaves, allows your plants to uptake water and nutrients efficiently, preventing further stress. Check the moisture content by sticking your finger into the soil; if the first inch feels dry, it’s time to water again. Consider using a moisture meter for a more accurate assessment, which can help you avoid over- or under-watering.
A common mistake at this stage is to provide a quick sprinkle rather than a deep soak. It’s crucial to ensure that water penetrates to a depth of about 6 inches; otherwise, only the surface gets moist and the roots remain dry. If you notice that your tomato plants don’t show signs of improvement within a few hours after watering, check the soil to confirm that moisture has reached the desired depth. If the soil is still dry at 6 inches deep, increase watering frequency or duration. In cases where watering fails to yield visible recovery, consider assessing drainage and soil quality, as compacted or poor-quality soil can impede water absorption.
Step 2 – Assess Heat Stress on Tomato Plants
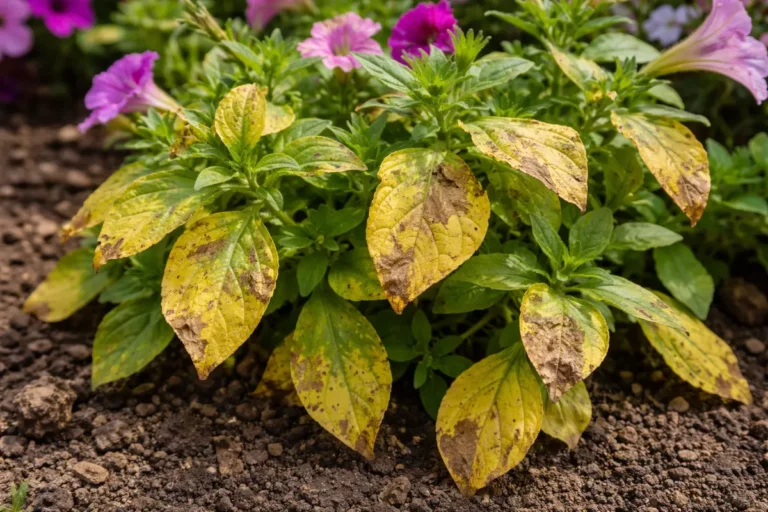
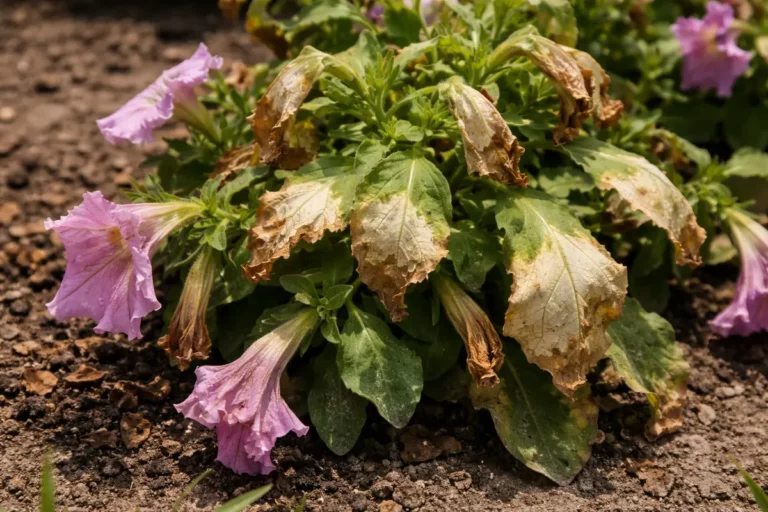
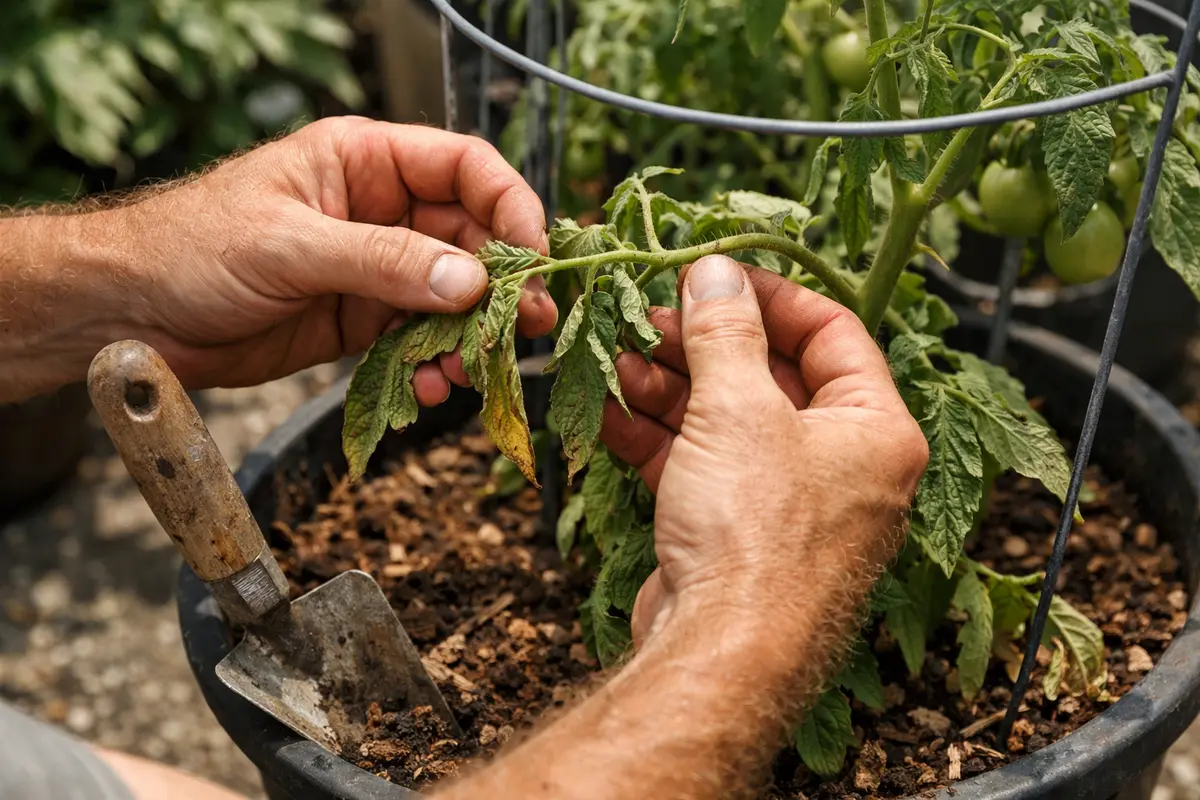
Check your tomato plants for signs of heat stress. Observe whether the leaves are curling or discoloring; healthy green leaves should not show any signs of yellowing or browning. Identifying these symptoms allows you to determine if the plants need immediate care or if other issues are at play. In extreme cases, burnt leaf tips that resemble scorch marks may indicate damage from prolonged exposure to high temperatures. If leaf edges are curled but the surface remains green, it suggests the plant is stressed but has not yet given up.
Heat stress occurs when the exterior conditions exceed what tomato plants can tolerate, often from high temperatures combined with insufficient watering. When the air temperature rises above 90°F, moisture evaporates quickly, leaving plants vulnerable to dehydration. Understanding this mechanism enables you to take control by adjusting your watering habits. Schedule your watering during cooler parts of the day—early mornings or late afternoons—to minimize evaporation. Consistent monitoring is crucial; if you see wilting after a particularly hot day, increase your watering frequency as temperatures fluctuate.
If your plants show signs of wilting but the leaves are still somewhat green and firm, you might simply need to increase your watering frequency during high temperatures. In contrast, if the leaves are turning yellow or brown and feel limp, it may suggest root rot or an issue with excess water. Assessing these visual clues can further guide your caregiving approach. Plants with yellowing leaves but firm texture may recover with more water, while limp leaves might need drainage evaluation to avoid further stress. Pay special attention to the area around the stems; if the soil feels mushy or smells sour, root rot is likely, and cutting back on watering is essential.
Step 3 – Test Pot Moisture Levels for Wilting

Inspect the soil moisture levels around your potted tomatoes. Dig down about an inch into the soil; if it’s dry to the touch, your plants are likely stressed from lack of water. Testing the soil moisture helps confirm whether the wilting is due to dehydration or indicates other underlying issues. A soil probe or moisture meter can also assist in determining water levels without causing root disturbance. Striking a balance is the key; check moisture after heavy rain or excessive heat, as both conditions can drastically alter water availability.
Healthy soil should retain some moisture, providing a balanced environment for roots to thrive. If the soil is too dry, the roots cannot absorb water effectively, manifesting in wilting. Allowing this situation to persist can lead to more severe issues such as fertilizer burn or root damage due to prolonged dryness. Pay attention to the different textures; slightly moist soil that holds its form while crumbling slightly is ideal, while dry soil that crumbles easily indicates a need for immediate intervention.
If you find wet and sour-smelling soil, this indicates overwatering, which can also lead to wilting and potential root rot. In that case, allow the soil to dry out before watering again; this could take several days, depending on humidity and temperature levels. If you encounter uncertainty about the issue, monitor the plants over a few days while adjusting your watering accordingly and observe any changes in wilting or recovery signs. Be aware that stagnant water can lead to fungal growth, so ensure pots have proper drainage to facilitate moisture escape and prevent soggy conditions. Cleaning out drainage holes also prevents blockages from old roots or debris, ensuring that excess water can escape freely.
Step 4 – Add Mulch Around Tomato Base for Recovery
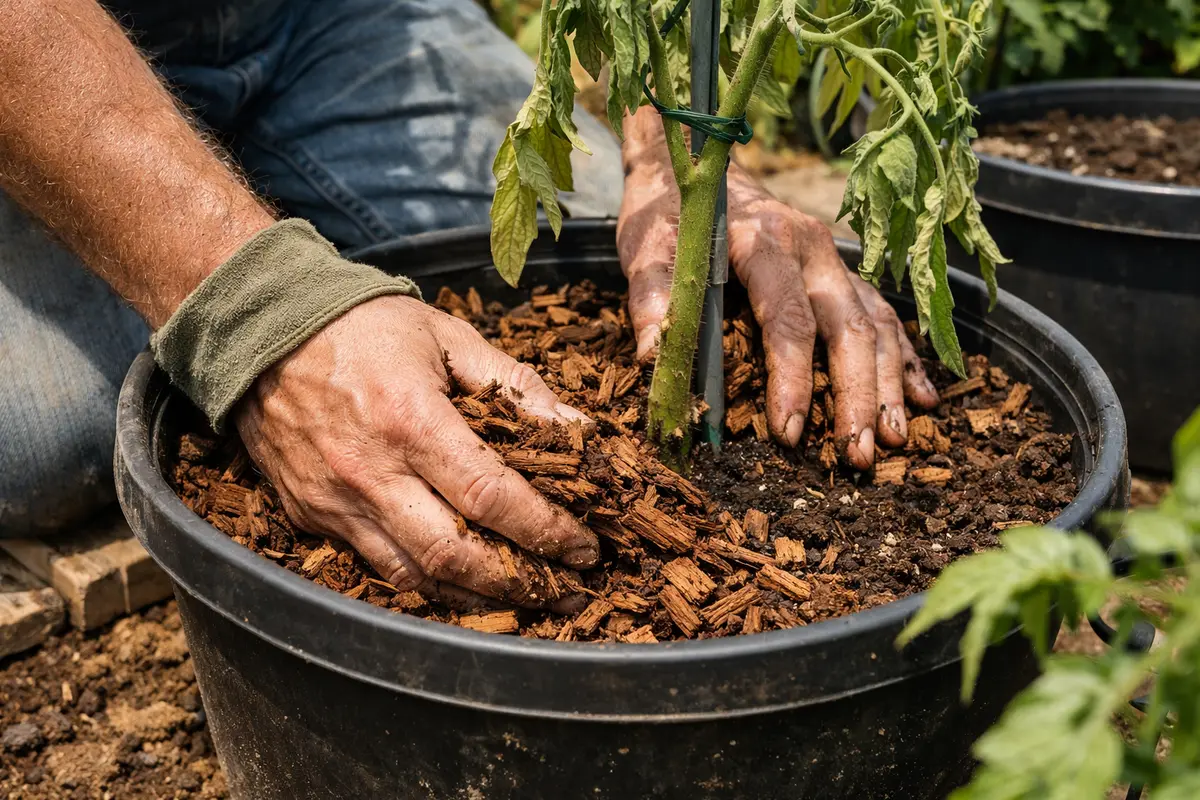
Apply a layer of mulch around the base of your tomato plants to aid in moisture retention. This will create a barrier that minimizes evaporation and keeps the soil cooler. As a result, you should notice that the soil holds moisture better, contributing to healthier root growth. Mulching effectively helps insulate the soil against the sun’s rays, which is particularly critical as temperatures rise. Choose organic mulches like straw, wood chips, or shredded leaves that allow for moisture retention and will decompose over time, enriching the soil.
Mulch provides both immediate benefits by reducing surface temperatures and long-term advantages through moisture conservation. As temperatures rise, mulch can insulate the soil from heat, crucial during summer months when conditions can be excessively dry. The visible signs of success include a more vibrant appearance in the plants and reduced wilting, marking their fight back to health. A mulch layer of about 2 to 3 inches is ideal; this thickness balances moisture retention and insulation while preventing weed growth around the plants.
Be cautious not to apply excessive layers of mulch, which can smother the roots or create conditions favorable for pests. Also, avoid direct contact between mulch and the plant stems to prevent rot. If you notice pests in the soil or around the base of your plants, consider adjusting the mulch type or material to mitigate attraction. For instance, some gardeners opt for pebbles as mulch around the base while keeping organic material just below; this technique visually reduces pest attraction while still offering moisture conservation.
Step 5 – Water Tomatoes Frequently During Heatwaves
Increase your watering schedule for tomatoes during heatwaves. Set a routine to water the pots deeply every 1-2 days, ensuring that the entire root zone receives sufficient moisture. As a result, you’ll create a consistent environment that helps prevent future wilting. Adjusting your watering frequency to account for the heat will significantly reduce the risk of wilting during critical temperature peaks. Keep an eye on the forecast—if high temperatures are predicted, intensifying the watering routine becomes essential.
Frequent watering during extreme heat is vital because hot weather conditions accelerate water loss from the soil. Tomatoes become particularly vulnerable when temperatures soar, requiring more water than usual to maintain their health. By implementing this schedule, you will help sustain consistent soil moisture levels, which ultimately supports strong growth and fruit production. Additionally, consider using techniques like drip irrigation to ensure even distribution while minimizing waste and keeping your plants hydrated.
Local weather variations could affect your watering regimen as well; if you know a heatwave is coming, start increasing moisture levels beforehand. If your region experiences unpredictable weather, regular checks of soil moisture, along with daily observation of your plants, will ensure adjustment happens in real time. During particularly hot days, consider providing afternoon shade using lightweight garden fabric or even shade cloth to protect sensitive portions of your plants without blocking sunlight entirely.
Step 6 – Check Leaves for Signs of Stress After Care
Monitor your tomato plants daily for signs of recovery. Look for visible improvements in leaf firmness and color, especially in the days following adjustments to watering and mulching routines. You might see new growth starting, indicating that your efforts to save the plants are working. Additionally, watch for pest activity or diseases; high-stress conditions often attract unwanted species, making vigilance even more crucial.
A fully recovered tomato plant should boast vibrant leaves and firm stems, indicating that it is returning to a healthy state. Give particular attention to the base of the stem, where rotting typically starts if there is underlying moisture retention due to overwatering. If the leaves continue to show discoloration or appear limp despite care, it could indicate other issues such as nutrient deficiencies needing redress. Continued observation of your tomato plants’ health signs can prevent chronic issues from emerging.
If issues persist despite following all steps, consider contacting a local agricultural extension office or gardening expert. Their expertise may provide valuable insights into more advanced intervention techniques or treatment options that might not be immediately apparent. Maintaining consistent monitoring is essential; daily checks allow for timely adjustments in care. If no recovery is observed within a week, reevaluate your soil choice, drainage conditions, and possible hidden diseases that could be causing ongoing stress.
FAQ
How long does it take for my tomatoes to recover from wilting?
Recovery time varies but you should see signs of improvement within a few days of proper care. If you observe leaves perking up and signs of new growth, your plants are on their way to recovery. However, complete recovery may take a week or two depending on the severity of stress, particularly for plants that have experienced prolonged wilting or outright droopiness from inadequate hydration.
Can mulching help prevent future wilting events?
Yes, applying mulch around tomato plants can effectively prevent wilting by maintaining soil moisture and regulating temperature. A good layer of mulch can minimize evaporation while providing insulation, making it easier for your plants to thrive during intense heat. Regularly replenish mulch as needed to maintain its effectiveness; be sure to check for decomposition, as this can affect the desired moisture retention levels.
Should I remove any wilting parts of the plant?
It’s best to trim back any severely wilted or damaged leaves to promote healthier new growth. Removing dead or dying foliage allows the plant to redirect energy to healthier parts, improving overall vigor. However, avoid over-trimming, as this can stress the plant further. Focus on the most severely affected areas to minimize shock while facilitating recovery for the rest of the plant.