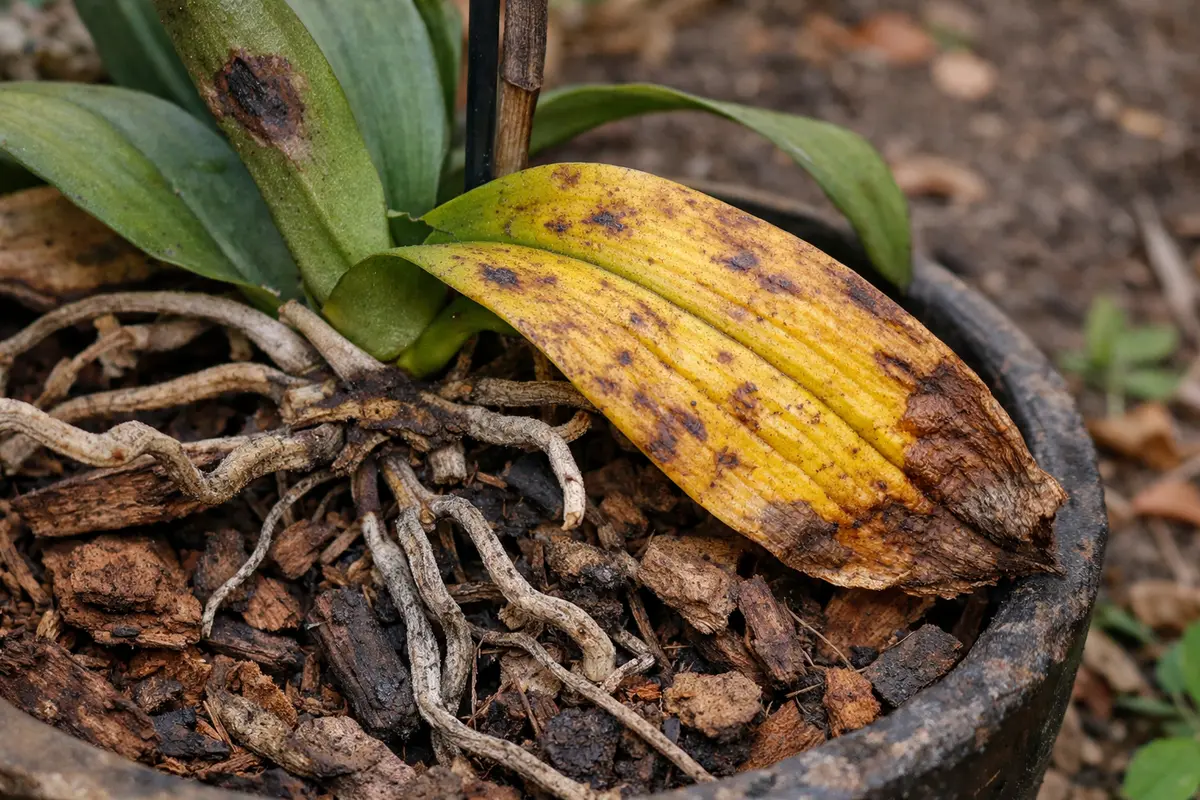
You may notice that your orchid’s leaves are turning yellow during the winter months, which is why you need to know what to do when orchid leaves turn yellow in winter. This yellowing is often caused by stress factors such as inadequate light, temperature fluctuations, or overwatering, leading to potential leaf drop. If left unaddressed, these issues can worsen and weaken the plant, making recovery harder to achieve. Fortunately, you can improve the situation now by adjusting light exposure, checking watering habits, and monitoring temperature conditions.
Step 1 – Cut Off Yellowing Orchid Leaves Immediately
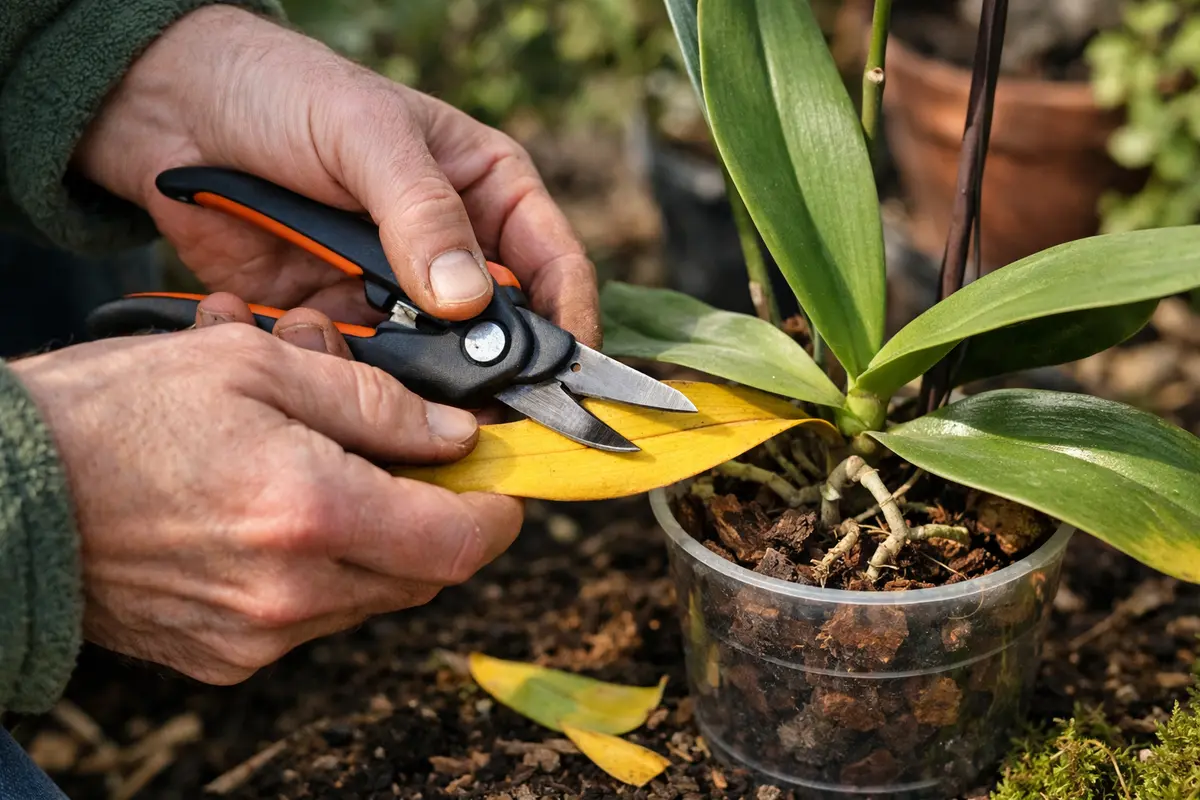
Cut off the yellowing orchid leaves immediately. You should notice the plant starting to look cleaner and healthier within a few days. The key is to use sterilized scissors or pruning shears to make a clean cut, preventing any potential infections from entering the plant. Ensure you’re cutting close to the base of the leaf without damaging the stem or healthy foliage to minimize stress on the plant.
Acting quickly limits the stress on the orchid, preventing potential diseases and pests from taking advantage of the weakened leaves. Yellow leaves can signal that the plant is allocating energy away from healthy growth, and prompt removal can redirect those resources toward new, healthy foliage. This process not only enhances the aesthetic appeal of your plant but also contributes positively to its overall vigor and health. Be watchful for any signs of mold or decay on the cut edges as you proceed; if mold forms, it may indicate undue moisture levels.
Many gardeners make the mistake of waiting too long before trimming yellow leaves, thinking that they might recover. However, the longer you wait, the more likely the plant will experience negative impacts on its overall health, such as the spread of fungal infections. For example, if a leaf is just beginning to yellow but is not firm, leaving it too long can lead to broadening decay, risking healthy leaves nearby. Remember, dead or severely yellow leaves pull nutrients from the healthy sections of your plant, hindering recovery. If multiple leaves are affected, consider the plant’s overall environment to diagnose if other factors require your attention, such as humidity levels or watering frequency.
Step 2 – Diagnose Low Light or Overwatering for Orchid
Check the light levels and watering schedule for your orchid. If it is receiving too little light or too much water, you will start to see a difference in leaf color and overall plant health. A quick test can be as simple as observing the plant’s growth direction and leaf texture; a plant stretching toward the light typically indicates insufficient brightness, while wilting or mushy roots can signal overwatering, as they become waterlogged and oxygen-deprived.
If your orchid is in a location with inadequate light, it will tend to stretch toward the light source, resulting in yellowing leaves as it becomes weak and leggy. Conversely, overwatering leads to root rot, which suffocates the roots and restricts their ability to absorb nutrients and water. In the event of poor drainage, you may notice a foul smell emanating from the potting medium, indicative of decomposing roots. This odor becomes stronger if you have heavy soil that retains moisture, hence leading to root decline.
If the leaves still appear yellow even after adjusting light and water, inspect the roots to ensure they are healthy and firm. If the roots feel mushy, it’s a sign of root rot, and you should consider repotting your orchid in fresh, well-draining media, choosing a substrate that matches your orchid’s specific needs, such as a bark mix for phalaenopsis. Timing is essential; early identification of lighting or watering problems directly influences recovery speed — for instance, waiting too long after noticing root issues can lead to shock during repotting. If left unchecked, prolonged exposure to inappropriate conditions can lead to a cascading decline in your orchid’s health.
Step 3 – Revive Orchid with Proper Watering Techniques
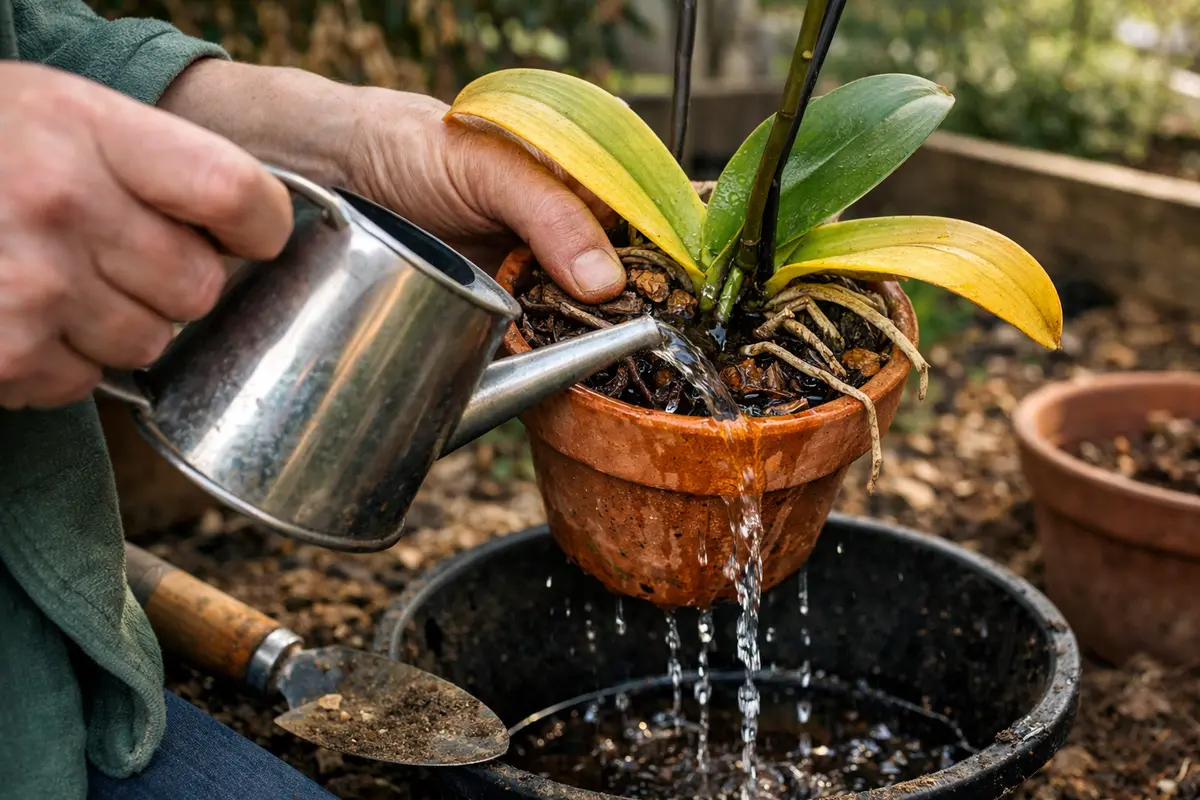
Water the orchid using proper techniques, ensuring that the medium feels damp but not saturated. You will start to see improved leaf colors and overall plant health within a week if you adopt a schedule suited to the specific need of your orchid. Generally, it’s recommended to water when the top inch of the medium is dry to the touch, but always adjust based on the specific environmental conditions in your home; for example, heaters can create dry air, necessitating a more frequent check on moisture levels.
Well-watered orchids will perk up, their leaves will firm up, and you might notice new growth emerging from the plant as it becomes more comfortable in its environment. Healthy orchids typically retain a vibrant green color and exhibit firm and plump leaves, signaling they are receiving adequate moisture without saturation. This effective watering practice not only aids recovery but helps the orchid absorb nutrients more efficiently. Monitor the medium keenly; if it shrinks away from the pot edges, it might dry too quickly, indicating changes in your watering strategy might be needed.
Be cautious not to overcompensate after identifying watering issues, as this can lead to additional stress on your plant. Many beginners mistakenly believe more water is better, resulting in soggy roots that lead back to yellowing leaves. For example, if too much water is applied immediately after a dry spell, the roots might be slow to react and suffer further damage instead of recovering. Make sure your watering frequency is adjusted according to the season, particularly during winter when orchids usually require less water due to slower growth rates and decreased evaporation rates. If you’re unsure, consider using a moisture meter to gauge the soil’s wetness before deciding to water again. If the meter consistently reads moisture, then attempt to lower your watering frequency.
Step 4 – Shield Orchids from Cold Drafts in Winter
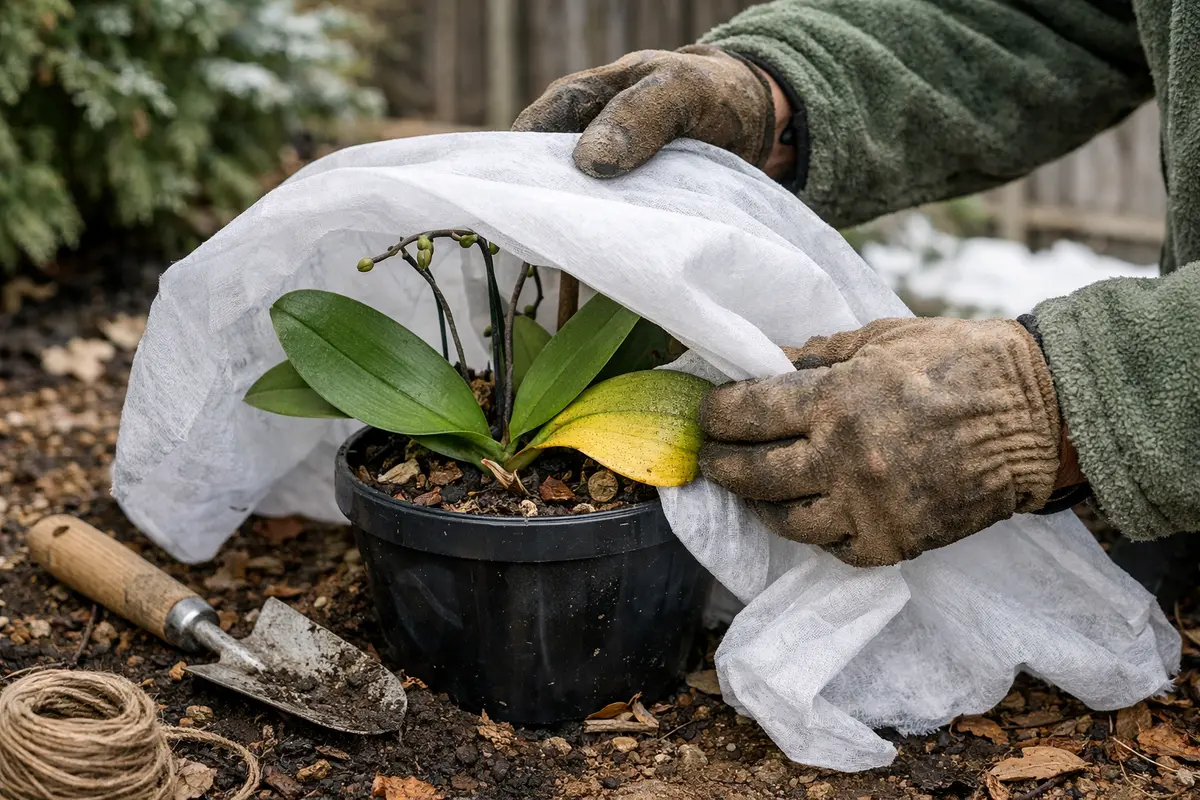
Protect your orchids from cold drafts during winter. This will help create a stable environment, reducing the risk of yellowing leaves due to temperature fluctuations. Place your orchid away from frequently opened doors, windows, or heating vents that could expose it to drastic temperature changes; ideally, a stable room temperature should be maintained year-round.
Orchids thrive in consistently warm temperatures; however, sudden drafts from windows or doors can harm them, leading to stress and yellowing leaves. If your orchid tends to be near a window, the use of thermal curtains can help provide some range from the cold while still allowing for light penetration. Regularly monitor the temperature around your orchids with a thermometer; temperatures dropping below 60°F (15°C) can trigger stress responses, so adjust the positions accordingly.
Keep in mind that fluctuations can occur even within your home, especially during cold nights or harsh weather. For instance, if you have radiators or heating systems that kick on and off during winter, check for temperature spikes immediately around your orchids. Maintaining consistent indoor temperatures of about 65°F-75°F (18°C-24°C) during the day and slightly cooler at night contributes greatly to their health. If you live in an area with particularly cold winters and notice ongoing issues, consider investing in a small space heater or heat mat designed for plant care; this can provide soothing warmth without significant energy costs. However, be cautious of overheating, as excessive temperatures can lead to dry leaves and fewer blooms.
Step 5 – Inspect Orchid for New Yellow Leaves Weekly
Start by checking the moisture level of the potting medium. Ensure that the orchid is neither overwatered nor underwatered, as either condition can lead to yellowing leaves. Observe the soil’s moisture by inserting your finger about an inch into the medium; if it feels dry, water the plant appropriately. Recheck the moisture levels every few days to maintain consistent care during winter.
A fully recovered orchid displays vibrant green leaves that are firm and resilient, signaling improved health. In contrast, if yellowing returns, the leaves may appear limp or show signs of a wrinkled texture, indicating stress. If the leaves develop brown spots or edges, this may signal an underlying issue. If you notice these symptoms, immediate action is required to determine the root cause.
If the problem persists despite maintaining proper watering and environmental conditions, consider repotting the orchid with fresh, well-draining medium. Monitor for inconsistencies such as root rot, which can be identified by a foul smell or mushy, darkened roots. If these signs are present, promptly trim affected roots to prevent further decline and provide suitable care.
A fully recovered orchid will display vibrant green leaves, firm to the touch, and no signs of yellowing. In contrast, if the yellowing returns with a slight curling of the edges, it signals that the issue persists. If you notice that the leaves are still yellowing but feel firm, you’ll need to investigate light levels further.
If yellowing recurs despite your adjustments, consider repotting your orchid in fresh, well-draining potting media to address potential root rot. Additionally, consult with an orchid specialist or local nursery for tailored advice if the condition does not improve within a week or two.
A fully recovered orchid will display vibrant green leaves that feel firm and plump, with no discoloration. In contrast, early signs of the problem returning may manifest as patches of yellowing on the leaves or a droopy texture that suggests a lack of hydration. If the edges of the leaves start to feel soft and mushy, that indicates further decline.
If the yellowing returns despite adjustments, reassess the watering schedule and consider repotting your orchid in fresh, well-draining medium. Additionally, introduce a balanced fertilizer to support recovery; however, if conditions remain unfavorable, consult a gardening specialist for further advice.
After making the necessary adjustments, follow your orchid’s progress closely. Healthy orchids will show signs of recovery, such as the appearance of new growth and the firming up of leaves within a few weeks; this can vary depending on the orchid species and how severe the initial issues were. If you observe any leaves that are just starting to turn yellow, you may need to investigate further; an isolated yellow leaf could indicate a localized issue, whereas multiple leaves may signify underlying systemic problems that need addressing.
If you spot any new yellow leaves, it may indicate that further adjustments are needed; for example, a sudden drop in temperature or a change in humidity can provoke such responses. Maintaining a regular inspection routine allows you to catch issues early and adjust care as necessary. If stability is not achieved within a month, reevaluate your care routine or consider consulting with an expert on orchid care for targeted advice, especially if you suspect pests or disease have entered the picture.
FAQ
How long does it take for orchids to recover from yellow leaves?
Recovery from yellowing leaves can take several weeks, depending on the severity of the issue. If you follow the appropriate steps, like adjusting watering and light conditions, you may see improvements within 2-4 weeks. However, some orchids may take longer if the stress they were under was significant; in some cases, it may take up to two full growth cycles to see normal green leaves return.
Can yellow leaves on orchids spread to other plants?
Yellowing leaves can indicate underlying issues like overwatering or pests, which may affect nearby plants. If their causes are not addressed promptly, the health of surrounding plants may also decline. It’s essential to monitor the broader environment, noting if other plants show similar symptoms, and ensure that your other plants are not experiencing comparable conditions to prevent further issues.
Should I remove all yellow orchid leaves?
Remove yellow orchid leaves only when they are completely dead or withered. This ensures the plant can focus its energy on healthy growth rather than maintaining unhealthy foliage. Be mindful, as leaving partially yellow or damaged leaves can invite pests and diseases that may affect the rest of the plant; for example, spider mites often thrive on weakened foliage, causing further damage. Always evaluate each leaf individually to ensure you’re fostering the best conditions for overall plant health.