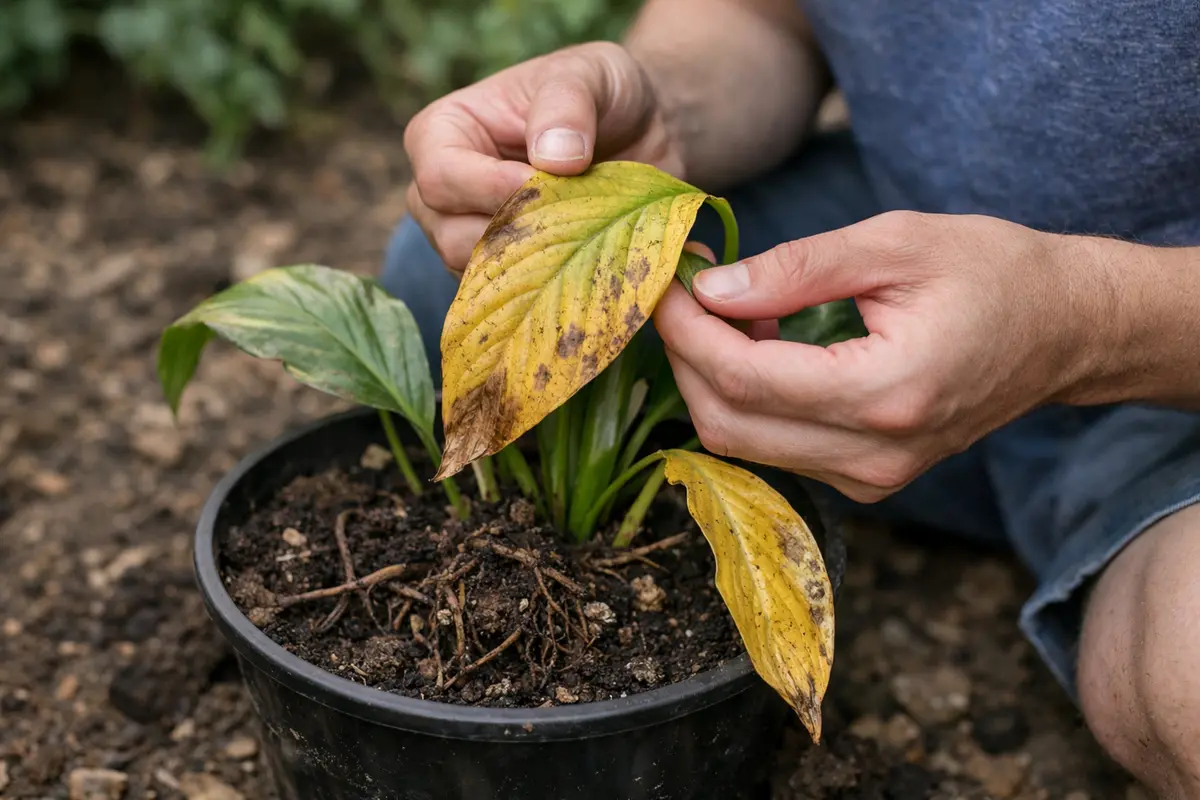
You may notice that your peace lilies’ leaves are turning yellow when you repot them, which is why you need to know how to treat yellowing leaves on peace lilies after repotting. This yellowing often indicates stress from changes in the root environment, leading to potential wilting and overall decline. If left unattended, the issue can spread and weaken the plant, but fixing it is possible now—just check the soil moisture and adjust your care routine accordingly. Immediate action can prevent smaller issues from escalating into more significant problems, so assessing the situation promptly is essential.
Step 1 – Trim Yellowing Peace Lily Leaves Promptly
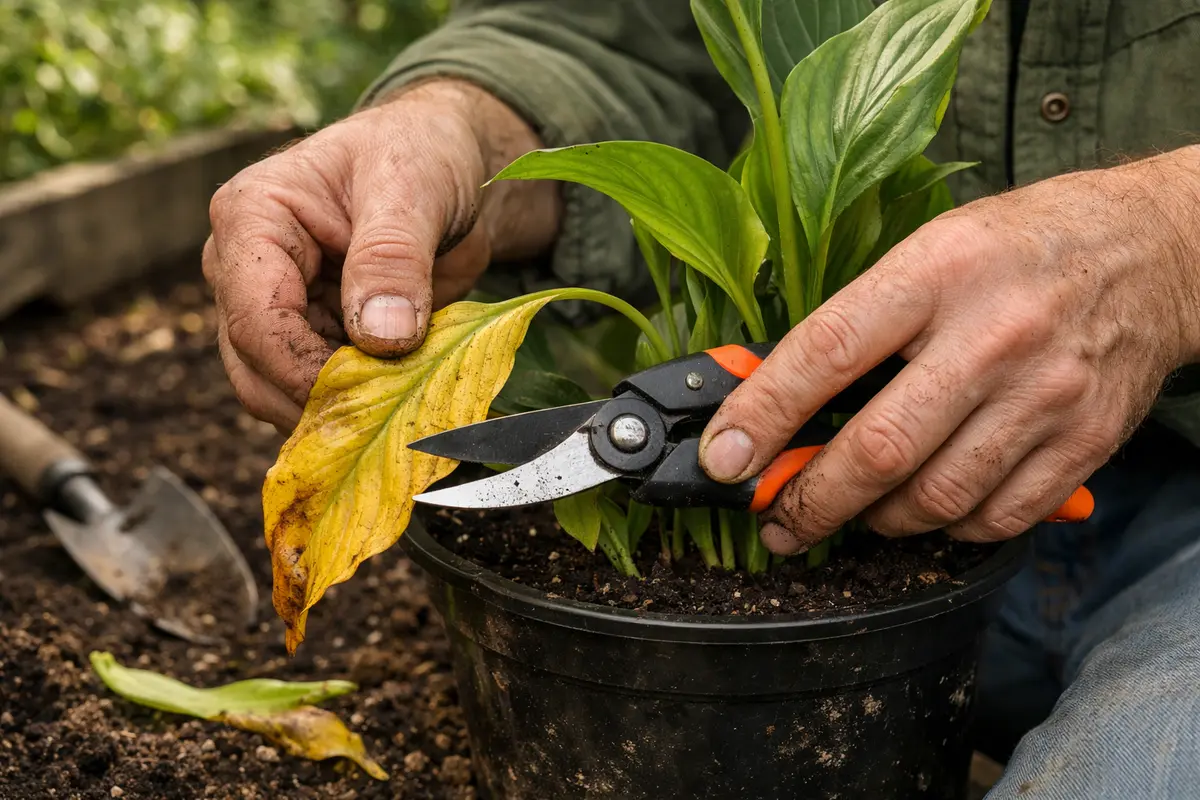
Start by gently removing the peace lily from its pot and inspecting the roots for any signs of rot or damage. Trim away any mushy or dark roots with sterilized scissors. Once repotted into fresh, well-draining soil, water the plant thoroughly but allow the excess water to drain completely. Within a few days, you should notice the remaining green leaves appearing perkier and more upright.
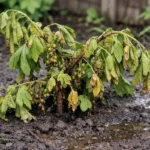
Acting quickly is crucial for a peace lily because yellowing leaves often indicate root stress or underwatering following repotting. When a plant is not given immediate attention, the compromised roots struggle to supply nutrients, leading to further leaf discoloration and overall decline. If you observe a peace lily with drooping yellow leaves, it typically reveals signs of immediate distress; otherwise, healthy green leaves will maintain their firmness and luster. When watering is too sparse, plants often develop yellow leaves eggplant drought.
A gardener may recall a situation where they delayed addressing yellowing leaves, ultimately losing the entire plant to severe root rot. Conversely, those who promptly repot their peace lilies often witness a swift recovery. If you notice a plant wilting despite sufficient watering, check for root health first before assuming it’s an issue with the soil moisture level.
Acting swiftly is crucial because peace lilies, when stressed from repotting, can suffer from reduced nutrient uptake, leading to chlorosis, or yellowing leaves. If neglected, the damaged roots will struggle to provide adequate water and nutrients, causing further deterioration. Healthy roots are white and firm; if the roots remain dark and mushy after repotting, immediate intervention is necessary. Recently moved plants are also prone to yellowing leaves peace lily.
For example, a gardener who delayed repotting their peace lily noticed continued yellowing that worsened over weeks, ultimately leading to leaf drop. If a plant starts showing signs of stress after repotting, check the root condition to prevent irreversible damage. The sooner you address root health, the better your chances for recovery.
Acting quickly is crucial for peace lilies because delayed treatment can lead to further root damage, worsening the yellowing leaves. This tropical plant relies on healthy root systems to absorb nutrients and water efficiently; if left untreated, nutrient uptake becomes compromised, and the soil pH can shift adversely, affecting overall vitality. Ideally, trimming should occur within the same day of noticing yellowing foliage to promote a bounce back.
For example, a gardener who waited too long to address yellowing leaves after repotting found that their plant suffered extensive root rot, requiring more time and care to recover. In contrast, another gardener noticed yellowing early and took swift action, allowing their peace lily to rebound within weeks. If you see the leaves yellowing but the roots remain firm, check the watering schedule to avoid issues related to overwatering. This is often where an acute understanding of care routines can shift recovery into positive results.
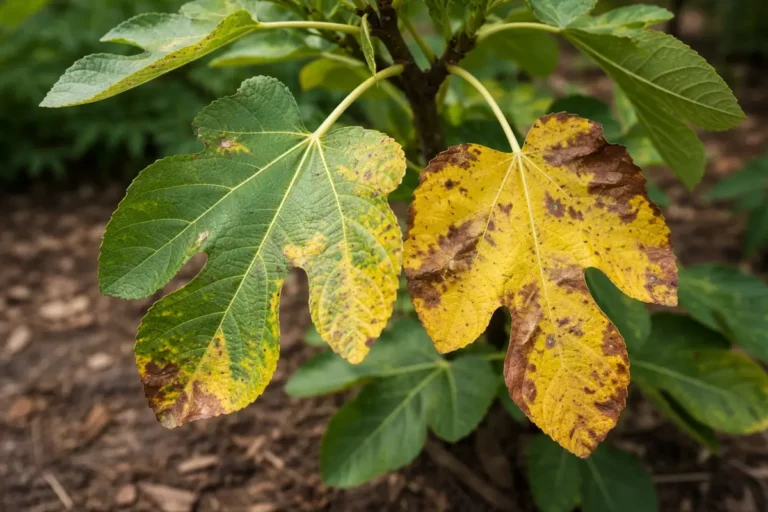
Removing affected foliage not only enhances the appearance of your peace lily but also prevents energy from being wasted on diseased or dying tissue. Yellowing leaves often signify that the plant is struggling, especially after repotting, as it adapts to a new environment. If left unattended, these issues can cascade throughout the plant. By trimming these leaves promptly—ideally within the same day of noticing the signs—you help the plant focus on producing new, healthy growth and improve its overall vigor during this vulnerable period. Monitor for new growth patterns and ensure they appear firm and vibrant. A notable sign that trimming is needed is when leaves appear to droop and fail to rise back up after a few days, indicating further stress.
A common mistake gardeners make is delaying the trimming process, thinking it might resolve on its own. This can lead to increased stress on the plant, making recovery more challenging. If too much leaf material is left on the plant, it may lead to mold or rot issues, especially in humid environments. Acting promptly can dramatically improve recovery time. If multiple leaves are yellowing, assess whether they are close to the new growth; removing them will help redirect energy effectively and promote a healthier overall structure. Check for any leaves that are losing turgor pressure, which can be an indicator that the plant’s resources are being depleted by the presence of decaying foliage.
Step 2 – Assess Pot Size for Root Bound Peace Lilies
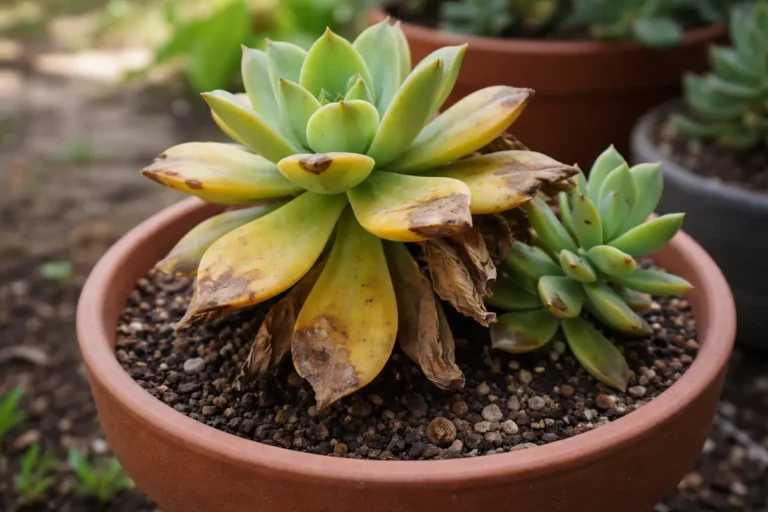
Start by checking the moisture level of the soil to determine if overwatering or underwatering is the cause of the yellowing leaves. If the soil feels overly wet, allow it to dry out before watering again, and you should see the leaves begin to perk up within a few days. On the other hand, if the soil is extremely dry and crumbly, this could suggest the plant is drought-stressed.
When yellowing occurs after repotting, it often indicates that the roots are either waterlogged or suffering from transplant shock. Overwatering leads to root rot, where the roots cannot uptake nutrients effectively, resulting in yellow leaves. Conversely, if the soil is too dry, the plant will struggle to absorb water, causing similar yellowing symptoms. The timing of your watering can thus greatly impact your peace lily’s recovery. Excess moisture often leads to problems like succulent turning mushy heavy rainfall.
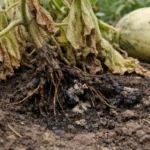
If the soil smells sour, it indicates root rot, and you should remove the plant from the pot and inspect the roots, trimming away any affected areas before repotting in fresh, well-draining soil. Alternatively, if only the older leaves are yellowing while newer leaves remain vibrant, this may be normal leaf aging, which doesn’t require immediate action. You will want to compare the yellowing on old leaves versus new ones—if the new growth is also yellowing, that indicates deeper issues requiring your attention.
Peace lilies thrive best when their roots have enough space to grow. If they become root-bound, they can’t effectively absorb water and nutrients, which leads to leaf yellowing due to nutrient deficiencies or insufficient moisture. Roots encircling the pot and forming thick mats indicate that it’s time to upgrade to a larger pot—ideally, a pot that is 1-2 inches wider in diameter than the previous one. As you repot, consider lightly teasing apart any tightly bound roots, taking care not to damage them as you provide new space for growth. A gentle tug can indicate whether the roots are too tightly bound or if the plant has room to grow.
If your peace lily seems to suffer from yellowing leaves without visible root binding, consider checking the soil moisture too. If the soil feels too compacted or doesn’t drain well, moisture retention rather than root binding could be the issue causing the yellowing. This often occurs in pots without sufficient drainage holes. In these cases, modifying the soil composition can improve airflow and drainage, which is critical for long-term root health. Ensure that your pots have sufficient drainage, and consider whether the potting mix is suitable for water retention while still facilitating drainage. If you find that the pot is adequate but the soil seems dry on the surface while retaining moisture below, consider using a moisture meter for an accurate reading. This contrasts with a scenario where the soil feels micro-fine and dry all the way through, indicating both under-watering and likely root stress, necessitating immediate corrective measures.
Step 3 – Rehydrate Peace Lily Soil to Aid Recovery
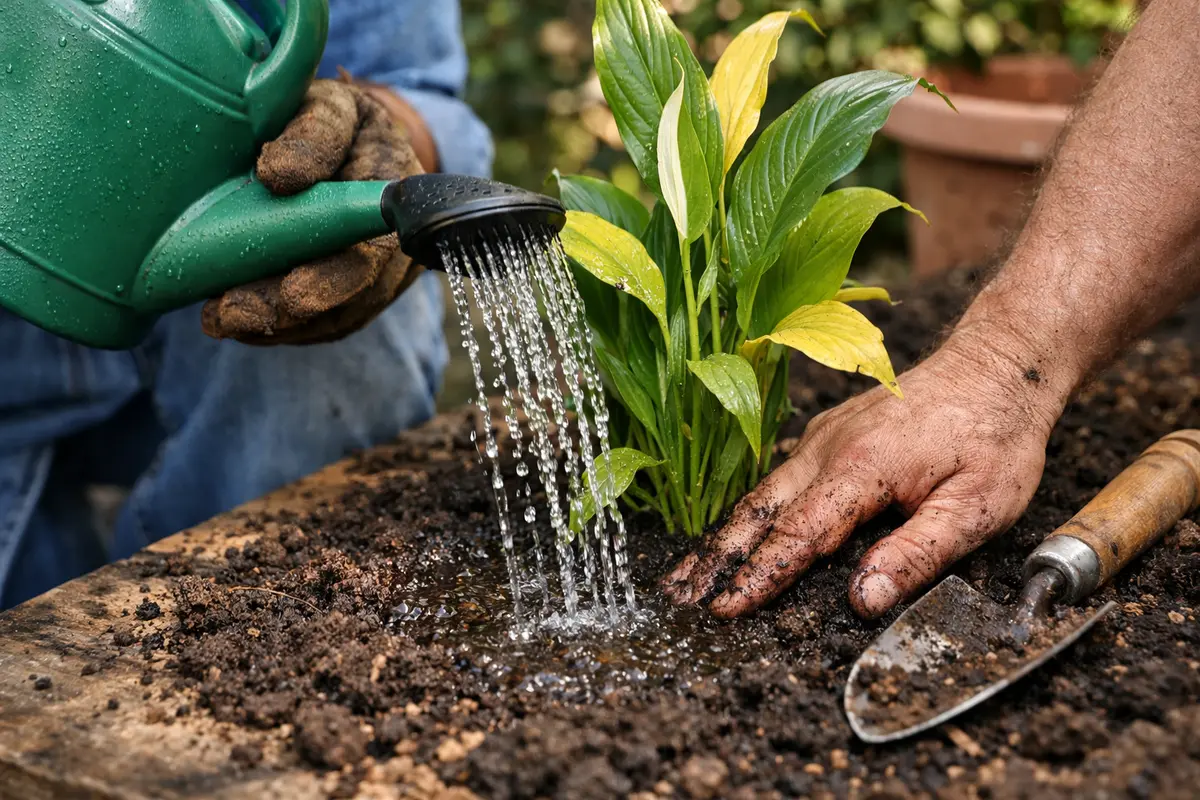
Water the peace lily thoroughly to ensure the soil is evenly moistened. You should notice the soil darkening and the plant starting to perk up within a few hours. Ensure you water until you see excess water draining from the bottom of the pot, as this indicates that the roots are receiving necessary hydration—allowing roots to spread and flourish is essential for recovery. Using room-temperature water can help prevent shock, promoting quicker absorption into the soil.
Thorough watering is crucial for recovery, especially after repotting, as the soil may be dry and will not adequately hydrate the root system. Infrequent watering can lead to fluctuating moisture levels, which stress the plant even more. Once the soil is consistently damp but not soggy, the roots can reestablish themselves effectively, rejuvenating the plant and supporting its recovery. However, be cautious; overwatering can lead to root rot, especially if the soil remains soggy for too long. The goal is a balanced moisture content, which often involves patience and consistent monitoring. Excess moisture often leads to problems like wilting tulips after prolonged rain.
Avoid over-watering, which can lead to excessively soggy soil and encourage fungal diseases like root rot. If your peace lily continues to suffer from yellowing leaves after attempting to rehydrate, it could indicate an underlying issue with root rot. If that’s the case, let the soil dry slightly before watering again and check the roots for signs of damage. Additionally, look for visible issues such as a foul odor from the soil, which may indicate root degradation—this requires immediate action such as removing the plant to potentially trim away damaged roots. An edge case would be if the plant does not perk up after a few watering attempts, signaling that recovery may need more drastic intervention. If these steps do not yield observable improvement within a few weeks, it may be time to consider repotting into fresh soil to optimize growing conditions.
Step 4 – Check Peace Lily for New Yellowing Leaves Weekly
Inspect your peace lily every week for any new yellowing leaves. If you spot further discoloration, take immediate remedial actions based on the observed trends. Regular checks can prevent damage from escalating and provide insight into whether your recovery actions are effective. If yellowing appears in newer leaves rather than older ones, adjust your care routine promptly. Noticing these patterns can signal nutrient deficiencies or environmental stressors that require intervention.
Signs of recovery generally include new leaf growth and a vibrant green color gradually returning to existing healthy leaves. If the yellowing returns, it may indicate ongoing issues related to overwatering, insufficient light, or nutrient deficiencies. Regular monitoring helps catch any worsening conditions before they escalate, allowing timely adjustments to your care routine. For example, if new growth appears healthy but older leaves become increasingly yellow, this could signal an environmental imbalance, which can be recalibrated by adjusting watering or relocating the plant to improve light exposure. Keeping your peace lily near an east-facing window often supports healthy growth by providing indirect sunlight. In poor drainage conditions, plants may also develop jasmine droop after overwatering.
If you notice continual yellowing or other alarming symptoms despite following the previous steps, consider consulting a plant care professional. They can identify deeper issues, such as pest infestations, which may require specialized treatment. For instance, yellow leaves accompanied by black spots may signify root rot caused by pests, while uniformly yellow leaves might indicate inadequate nitrogen levels. Staying attentive to both leaf health and overall vigor can prevent these problems from becoming severe, ultimately allowing for a healthier plant in the long term. Monitoring should continue to evolve based on observable changes, ensuring consistent attention to the plant’s needs. Look for signs of pests, like webbing on leaves, to prevent wider infestations that complicate recovery efforts.
FAQ
How long does it take for peace lilies to recover from yellowing leaves?
Recovery time can vary, but visible improvement in leaf color and new growth typically starts within a week after proper care. Conditions like adequate watering and appropriate light levels can dramatically influence recovery time, so stay vigilant with your plant’s needs and adjustments. Regular monitoring is essential to ensure your peace lily maintains its recovery trajectory successfully, especially during its adaptation period after repotting.
Should I remove yellowing leaves if my peace lily is still recovering?
Yes, removing yellowing leaves encourages the plant to focus on healthy growth and prevents further stress. It’s a crucial step in maintaining the plant’s overall health, especially during the vulnerable recovery phase following repotting. If the yellow leaves are significantly deteriorating, removing them reassures that the true health of the plant can shine through, pushing fresh growth forward and improving air circulation around the healthy foliage—crucial for preventing fungal issues.
Will my peace lily recover from yellowing leaves after repotting?
Absolutely! With proper care, including regular watering and monitoring, your peace lily can bounce back from yellowing leaves post-repotting. Focus on proper light conditions and a stable watering schedule for the best recovery; many find that simply adjusting light exposure can dramatically improve overall health. Recovery is often closely tied to the degree of care adjustments made immediately following the signs of yellowing. Be patient and attentive to your plant’s needs to maximize the chances of a successful turnaround.