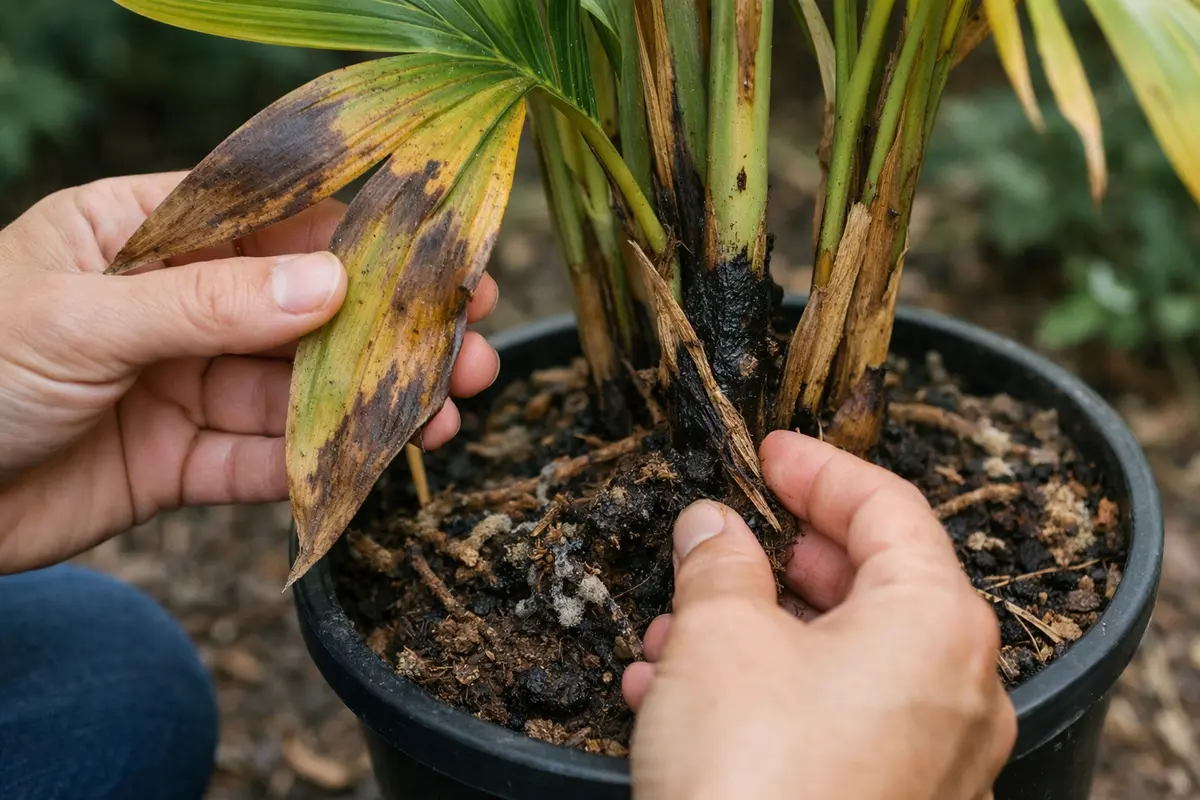
You may notice your palm plants in pots looking unhealthy after a period of excessive moisture, which is why you need to know how to treat root rot in palm plants in pots. Symptoms like yellowing leaves and mushy roots signal that your plant is suffering from this condition. If left unaddressed, the issue gets worse and stalls growth, but you can improve your plants’ health now by inspecting the roots, removing any that are rotten, and adjusting your watering schedule. Immediate action will not only help your palm recover, but also prevent worsening damage that could prove fatal.
Step 1 – Cut Away Blackened Palm Roots Quickly
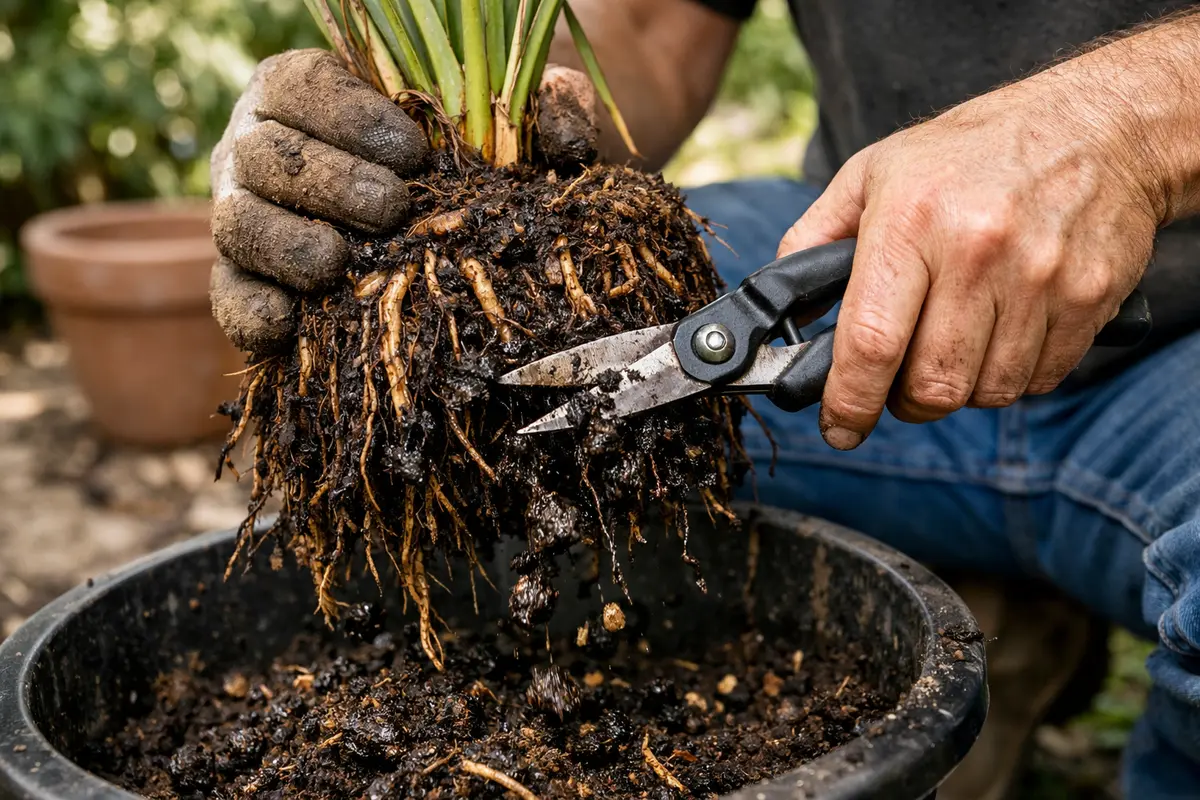
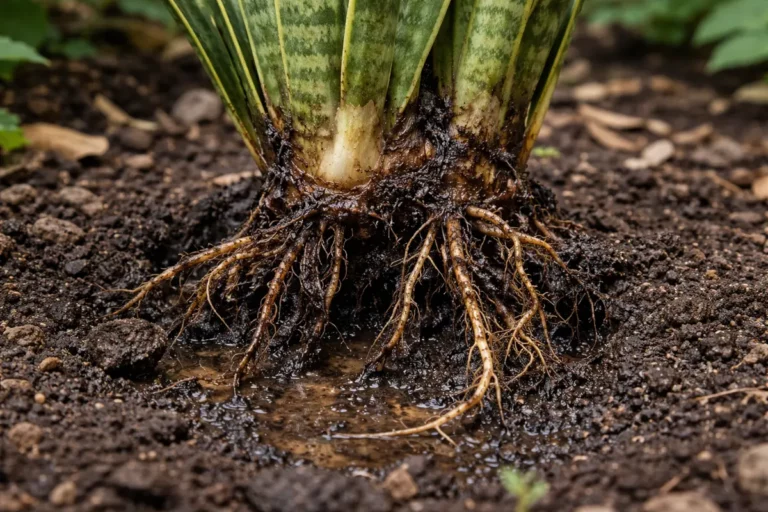
First, remove the palm plant from its pot and inspect the roots closely. Trim away any blackened and mushy roots with sterilized shears, ensuring you leave behind the healthy, firm roots. Once trimmed, repot the plant in fresh, well-draining soil, and ensure the pot has proper drainage holes. You should notice that the remaining roots look firmer and healthier, indicating a step toward recovery.
Acting quickly to address root rot in palm plants is crucial because prolonged exposure to excess moisture can lead to irreversible damage. When the roots begin to rot, they lose their ability to absorb water and nutrients, leading to a cascading failure that affects the entire plant. If severe enough, delayed action can lead to plant collapse, whereas an untreated healthy root system typically retains its firmness and color, contrasting starkly with the mushy, darkened rot.
In a common scenario, a gardener might delay intervention, thinking that the plant will recover on its own. After weeks of neglecting visible signs of root mushiness, they discover that the palm has completely wilted and cannot be salvaged. If you see signs of wilting without root rot, check the moisture levels—overwatering could still be the culprit.
Quick action is critical because roots affected by rot are often mushy and unable to facilitate nutrient intake. Palm plants are particularly susceptible to root rot due to their relatively shallow root systems, which rely heavily on well-drained soil to thrive. The speed at which rot spreads can be alarming; if not addressed promptly, infected roots can contaminate otherwise healthy roots due to close proximity. Therefore, it’s crucial to perform this action as soon as possible to stop the rot from advancing and potentially take the entire plant down.
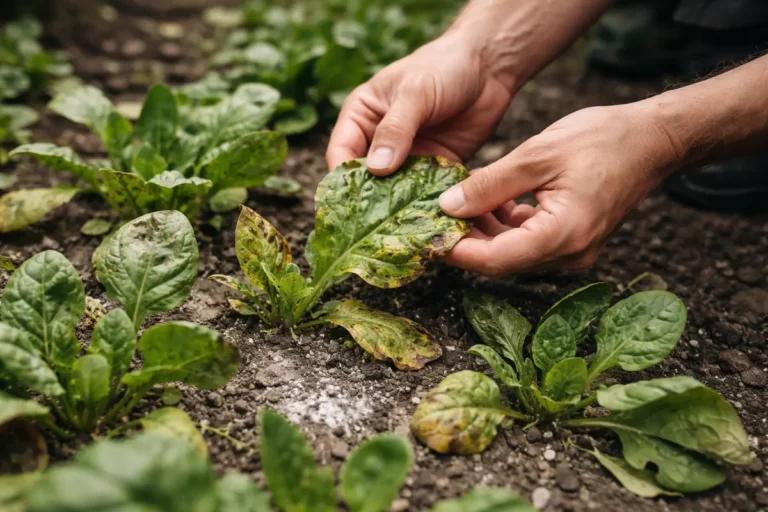
A common mistake gardeners make during this step is to delay the removal of diseased roots, hoping that they will recover naturally. However, this can actually worsen symptoms. If you notice that leaves are turning yellow or wilting, those are signs that the rot has progressed beyond the roots and into the leaves. Additionally, if you see any leaves starting to brown or die back, this should send up a red flag; these materials aren’t providing energy but rather draining the plant’s reserves. Addressing the rot promptly keeps the rest of the plant healthy. For instance, if the lower leaves are drooping significantly, they may no longer be salvageable and should be removed to not tax the plant’s energy reserves, enabling it to channel nutrients to healthy parts.
Step 2 – Assess Soil Moisture Levels for Root Rot
First, check the soil moisture levels by sticking your finger about two inches into the potting mix. If the soil feels excessively wet or soggy, it’s a likely cause of root rot. To correct this, remove the palm from its pot, trim away any blackened or mushy roots, and repot it in fresh, well-draining soil. You should notice the remaining healthy roots start to perk up within a week or two. Look for signs of vibrant growth such as new leaf spikes, which may indicate improvement.
Root rot occurs when the roots of the palm become waterlogged, leading to oxygen deprivation and ultimately decay. Prolonged wet conditions lead to anaerobic bacteria proliferating, breaking down root tissues, which manifests as yellowing leaves or stunted growth. If your soil appears dry but symptoms persist, inspect the root system for compacted soil or a fungal presence that may indicate that while the surface seems dry, the inner layers remain overly wet. You might also notice a foul smell emanating from the soil, a sure sign that the roots have begun to decay.
If the soil smells sour, it may signify a bad microbial environment; in this case, replace the soil immediately with dry, sterile potting mix. Examine the internal structure of the soil; if it’s muddy and dense, this typically indicates prolonged saturation. Alternatively, if you observe white fungus or mold, it could suggest overwatering but may not necessitate repotting if the affected area is localized. Trimming out the visible mold and reducing watering can often rectify this situation. Always remember to wear gloves when handling affected soil to prevent any potential skin irritation from contaminants.
Excess moisture hampers oxygen availability for the roots and creates a favorable environment for fungal pathogens that can lead to root rot. Palm plants typically require well-draining soil to prevent water from pooling around the roots. By evaluating moisture levels and the condition of the soil, you can understand the root cause better. If the soil is consistently too wet, consider how the potting mix may need to be changed to a more aerated option, such as one that includes perlite or sand. Such amendments enhance drainage capabilities without compromising moisture retention. If the texture is more sludge-like than soil, that should be a high-priority concern requiring immediate attention and remediation.
Step 3 – Replant Palm in Fresh, Well-Draining Soil
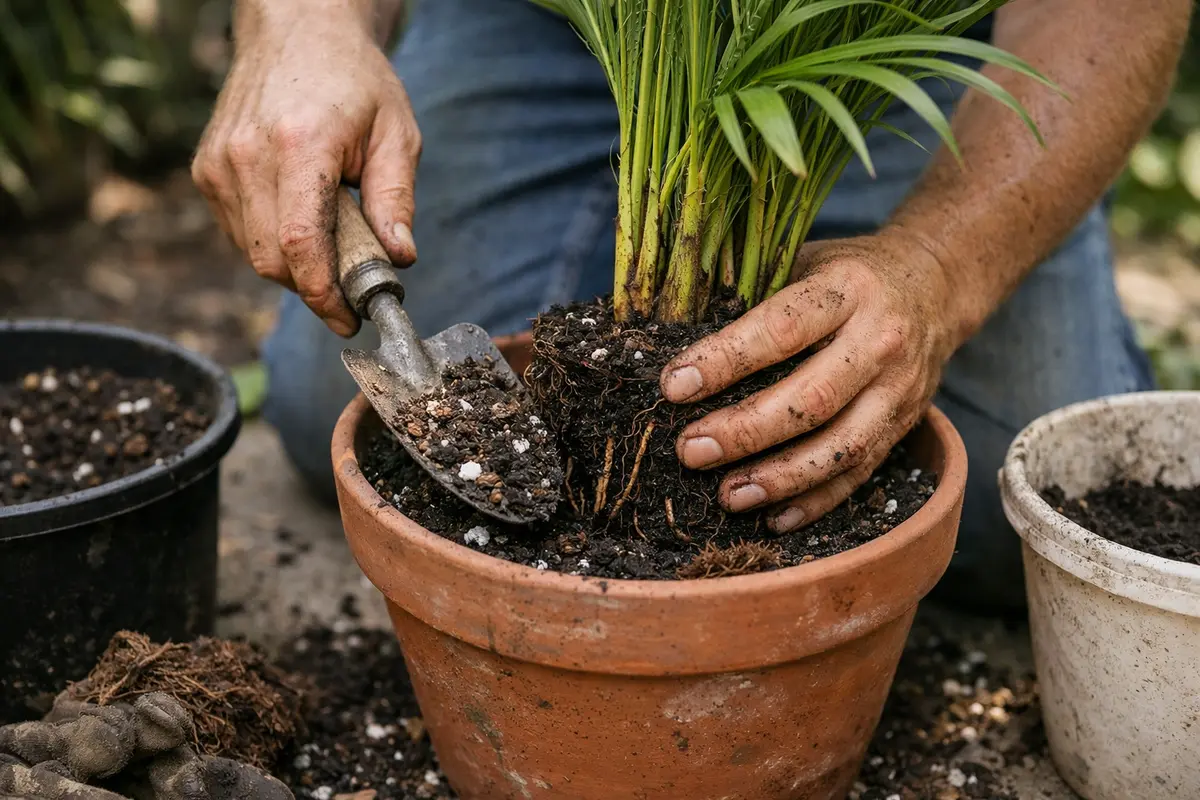
Replant your palm in fresh, well-draining soil as soon as you have removed the affected roots. You should start to see signs of improvement, such as the palm’s leaves gradually perking up over the next few days. Choose a quality commercial potting mix designed for indoor plants or consider a mix specifically labeled for palms to ensure the right balance of drainage and nutrients. Look for data on the packages that specify water retention for optimal palm growth.
Using fresh soil not only provides a nutrient boost but also ensures that excess water drains away effectively. This combination allows the stressed roots to regenerate without the threat of re-infection. After replanting, give the soil a gentle press down to eliminate any larger air pockets that might have formed, which can affect water retention. Inadequate packing can lead to water pooling, increasing the risk of future rot.
A common mistake during this phase is to overwater the newly potted palm immediately after replanting, thinking it will help the roots settle in. Instead of flooding the plant, allow the top inch of soil to dry out between waterings; doing so will help secure healthier root establishment. Watch for signs like yellowing leaves which indicate recovery is still in its early stages. If you notice any leaves wilting despite following proper replanting steps, check the drainage holes to ensure they are not blocked. Clogged drainage can quickly become a return path for the very conditions that caused the original rot.
If blocked drainage issues arise, take immediate corrective actions. Remove the potting mix surrounding the drain holes and reconfigure the materials in the bottom of the pot to allow free flow of excess water. Consider adding gravel to improve drainage before reburying the healthy roots. Additionally, inspect your pot to ensure it’s not too deep, which can hold more moisture than needed for a root system that prefers slightly shallower environments.
Step 4 – Water Sparingly to Prevent Future Rot
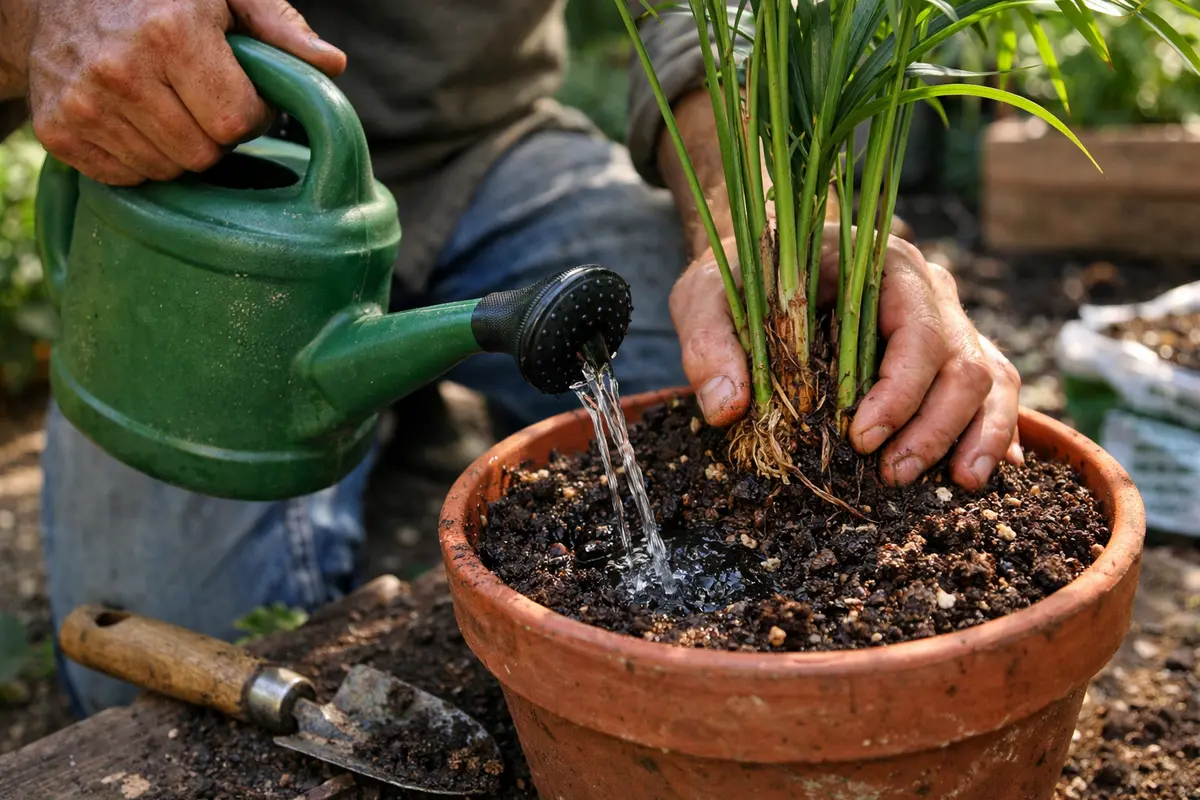
Water sparingly to prevent recurrence of root rot. You will notice that the soil remains consistently moist without becoming saturated, which locks in a healthy balance for your palm. A good rule of thumb is to wait until the top two inches of soil are dry to the touch before watering it again. This practice will help maintain an optimal moisture level while avoiding conditions that favor fungal growth. If you find that the top layer dries quickly, you may need a pot with better drainage or a mix adjusted for moisture retention.
Palms typically thrive when they are watered only when the top layer of soil feels dry to the touch. Monitor moisture levels closely, especially in warmer months when plants may require more frequent watering. By developing a scheduled watering routine based on the plant’s environment, you can maintain healthy moisture levels without overdoing it. Furthermore, consider factors like humidity and temperature, as they can dramatically affect moisture evaporation rates. Indoor palms might require different moisture levels than those grown outdoors, reflecting their microclimate conditions.
Seasonal changes should also dictate your watering approach. For instance, during cooler months, palm plants generally require less water, with some needing irrigation just every two weeks. A common oversight is to follow the same watering routine year-round, which can lead to rot in winter when the plant is dormant. Adjusting your care routine not only helps reduce water but also promotes health during these months when growth slows. If you notice the soil drying out too quickly in winter, consider relocating the palm to a slightly warmer area where it benefits from indirect sunlight.
Further adjustments can aid in the health of your palms. Investing in a humidity gauge can offer insights into the ideal moisture range. Additionally, using watering cans with controlled dispensing nozzles can help apply water carefully without overwhelming the plant. Excess watering often leads to surface runoff, which can become a conduit for pathogens if not managed properly at the source.
Step 5 – Inspect Leaves for Signs of Recovery Weekly
Monitor your palm plant closely by checking the soil moisture level at least once a week. Look for signs of wilting leaves or darkened, mushy roots when you remove the plant from its pot. Recheck every few days after implementing treatment to observe any changes in root health and overall plant appearance. This routine will help catch potential issues before they escalate.
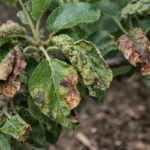
A fully recovered palm plant displays firm, vibrant green leaves with a smooth texture and no signs of discoloration or drooping, indicating good health. As you observe recovery, maintain a detailed log of observed changes; this can help not only identify issues but allow you to track progress over time. In contrast, early signs of root rot returning may include yellowing leaves that feel soft and mushy or a persistent foul smell coming from the soil, which should raise immediate concern. If the leaves begin to yellow again despite previous efforts, assess the root structure immediately.
If root rot symptoms return after treatment, act quickly by removing the plant from its pot, pruning away any affected roots, and repotting in fresh, well-draining soil. Additionally, evaluate care practices and reduce watering frequency, as overly moist conditions can lead to disease resurgence. If problems continue despite your best efforts, consider consulting a plant specialist for advanced disease control methods. Ignoring recurring symptoms can lead to irreversible damage or even plant death.
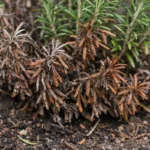
Fully recovered palms will display vibrant green leaves and firm, erect stems. The contrast between healthy and unhealthy leaves can be stark; recovering palms develop new fronds that appear fresh and invigorated while any yellowing or wilting indicates that further issues may be present. Regular inspections can help identify these discrepancies early on. Should you see any leaves that have returned to yellowing trends, consider if a change in environmental conditions such as increased light or humidity could have contributed.
If you see any new signs of yellowing or drooping despite following these steps thoroughly, it may be time to reassess your soil and watering practices. A fallback action could be to ensure proper drainage by reworking the soil mix, or inspecting for further root damage that hasn’t yet fully healed. Consistent monitoring is crucial for long-term health and growth. Keep an eye out for pests as well, which can cause stress misidentified as recovery issues; they often appear after a plant is already struggling. Notice any unusual leaf textures or the presence of sticky residue, which can indicate pest activity.
FAQ
How long does it take for a palm to recover from root rot?
Recovery time varies based on the severity of the rot, but typically you can expect to see improvements within 1-2 weeks after replanting. New growth should begin to emerge as signs of recovery, provided that the conditions are right. In more severe cases, full recovery may take several months, particularly if the roots suffered significant damage that takes time to regenerate.
Can root rot spread to other plants in the same area?
Yes, root rot can spread if the same contaminated soil or water is shared among plants. Isolate affected plants immediately and practice sterile gardening methods, such as using clean tools and disinfected pots. If you suspect any other plants may be at risk, check their roots and soil conditions as a preventive measure to catch any potential issues early.
Should I remove any leaves that show signs of damage?
Yes, any leaves that appear yellow or wilted should be removed to allow the plant to focus its energy on new growth. This helps redirect nutrients to the healthier parts of the plant and can promote faster recovery. Additionally, be vigilant about not leaving these damaged leaves on the plant for extended periods, as they can easily harbor pests and diseases that could compromise the overall health of your palm.