You may notice your shallots starting to wilt and develop mushy roots during a particularly rainy season, which is why you need to know how to stop root rot in shallots after overwatering. This condition arises when excess moisture suffocates the roots, leading to blackened, rotting spots that can jeopardize your harvest. If left untreated, the problem can spread throughout the plant, weakening it and making it harder to fix. Fortunately, you can improve the situation by inspecting the soil, adjusting your watering habits, and removing any affected bulbs.
Step 1 – Dig Out Waterlogged Shallots Immediately
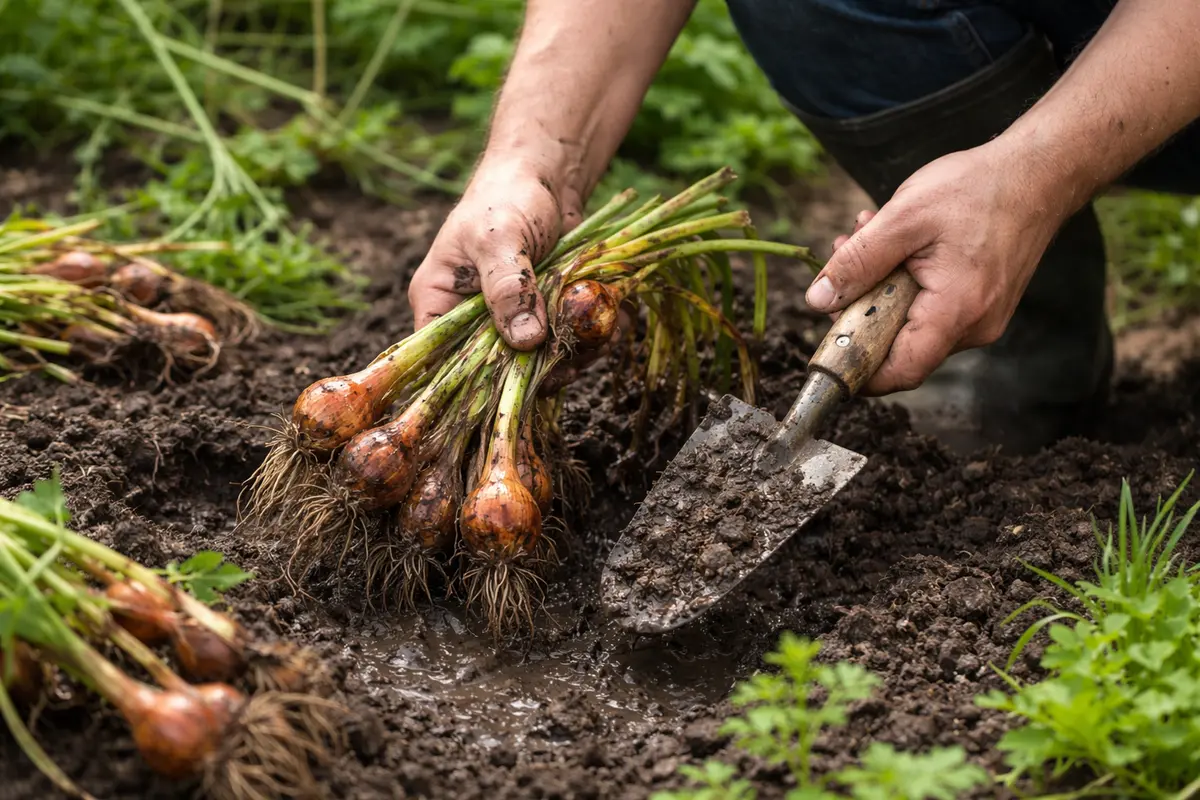
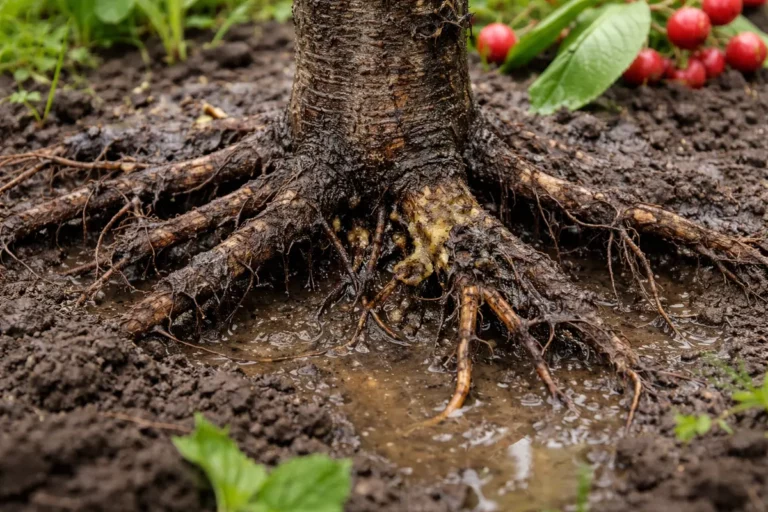
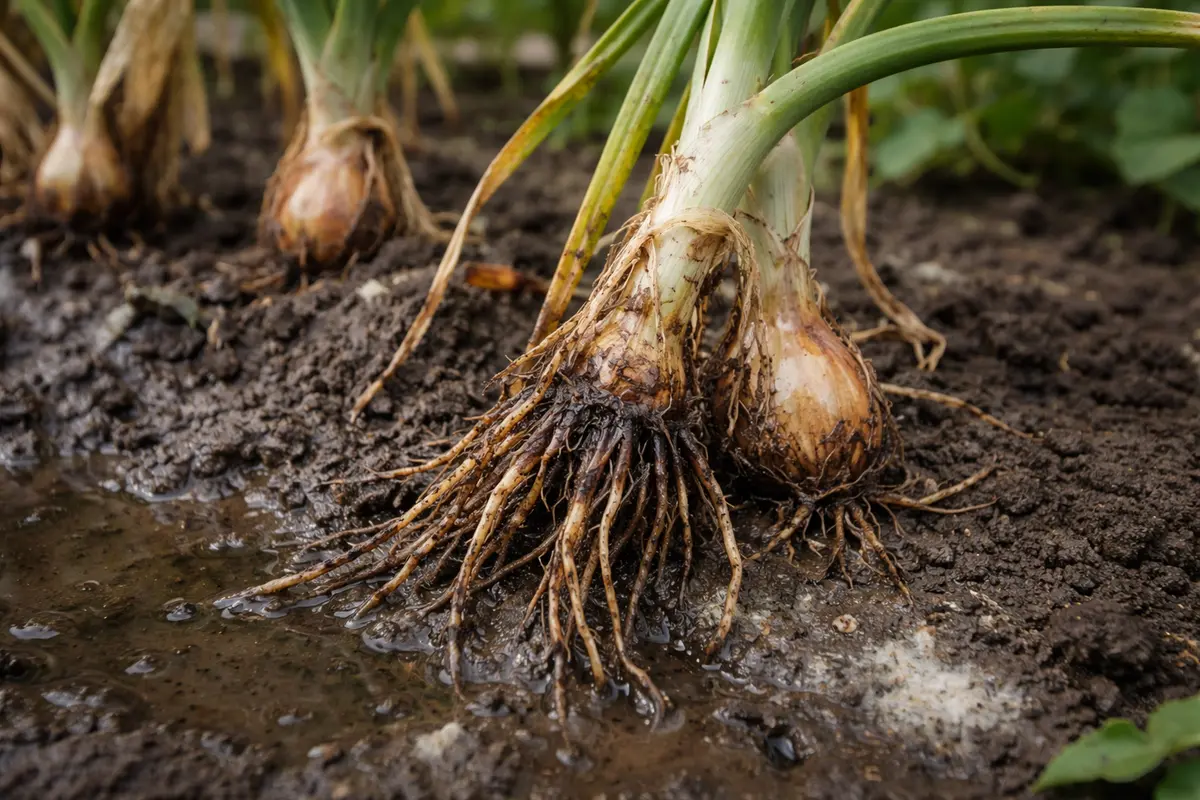
Remove the shallots from the soil and inspect their roots right away. You should see whether the roots are mushy or discolored, indicating rot and damage from excessive moisture. If the roots appear slimy and blackened, it’s a clear sign they are suffering from severe rot. Ideally, the roots should feel firm and have a light tan or white color; anything darker suggests deterioration. Aim to assess the condition within hours of noticing the problem, as the earlier the diagnosis, the higher the chances of recovery.
Immediate action is critical because root rot develops rapidly, especially in warm, moist conditions typical of early summer. Within just a few days, roots can deteriorate to the point where they become incapable of nutrient absorption. Shallots need well-aerated soil to thrive; without it, they risk succumbing to parasitic infections that flourish in waterlogged conditions. If you wait too long to assess the roots, you may find that not only are they unable to absorb essential nutrients, but the shallots themselves may also begin to wilt visibly. Watch for signs like a change in leaf color from green to yellow, which can signal further distress.
A common mistake here is not checking the roots when replanting. Many gardeners assume that pulling them gently will suffice, but this oversight allows rot to continue unchecked, leading to wasted time and effort in replanting. If you find healthy, firm roots that are still white, replant quickly into fresh soil; if visibly rotted, dispose of them immediately to prevent further spread of disease in your garden bed. This is a critical step—85% of successful recovery depends on the initial root assessment. If you see roots that are marginally rotted, consider trimming off the affected parts to salvage what healthy root structure you can. However, avoid over-pruning, as this could further stress the plant.
Step 2 – Check Soil Aeration Around Shallot Roots
Examine the soil aeration around the shallot roots by digging down about six inches and loosening any compacted soil. You should see improved soil structure, allowing air and moisture to circulate better. Use a garden fork to gently aerate the soil without damaging any remaining healthy roots. Well-aerated soil typically appears crumbly and has varying texture, which can indicate pockets of air are present. The texture of the soil should provide some resistance when probing, which indicates adequate structure.
Poor soil aeration is often to blame for root rot, trapping moisture and preventing roots from getting the oxygen they need. When roots are waterlogged, they begin to suffocate, leading to the development of pathogens that cause decay. Good drainage is essential for healthy root function, especially in soil that retains water. If your shallots are in a clay-heavy mix, it’s particularly crucial to improve aeration, as clay traps water and limits root growth. This situation creates an environment conducive to anaerobic bacteria, which proliferate in stagnant conditions. If you’re unsure whether your soil is too dense, pay attention to how long it takes for water to drain after a rain; prolonged saturation is a red flag.
If the soil has a sour smell, it often indicates anaerobic conditions, which worsen root rot. In this case, amend the soil with coarse organic matter such as perlite or sand to enhance drainage and create spaces for air pockets. Start with a mixture of 25% perlite to 75% soil and incorporate it thoroughly into the existing mix. The goal is to achieve soil that crumbles when squeezed. If the soil remains soggy and doesn’t drain well after this amendment, consider raising the height of the bed or moving the shallots to a more suitable, higher-drainage location to sustain healthy growth. You may need to look for signs such as mold or fungal growth, which suggests further issues with soil condition. If such growth is present, it indicates that pathogens might still be lingering, necessitating a more comprehensive soil amendment or replacement. Regularly check moisture levels after amendments to gauge the impact.
Step 3 – Replant Shallots to Encourage Regrowth
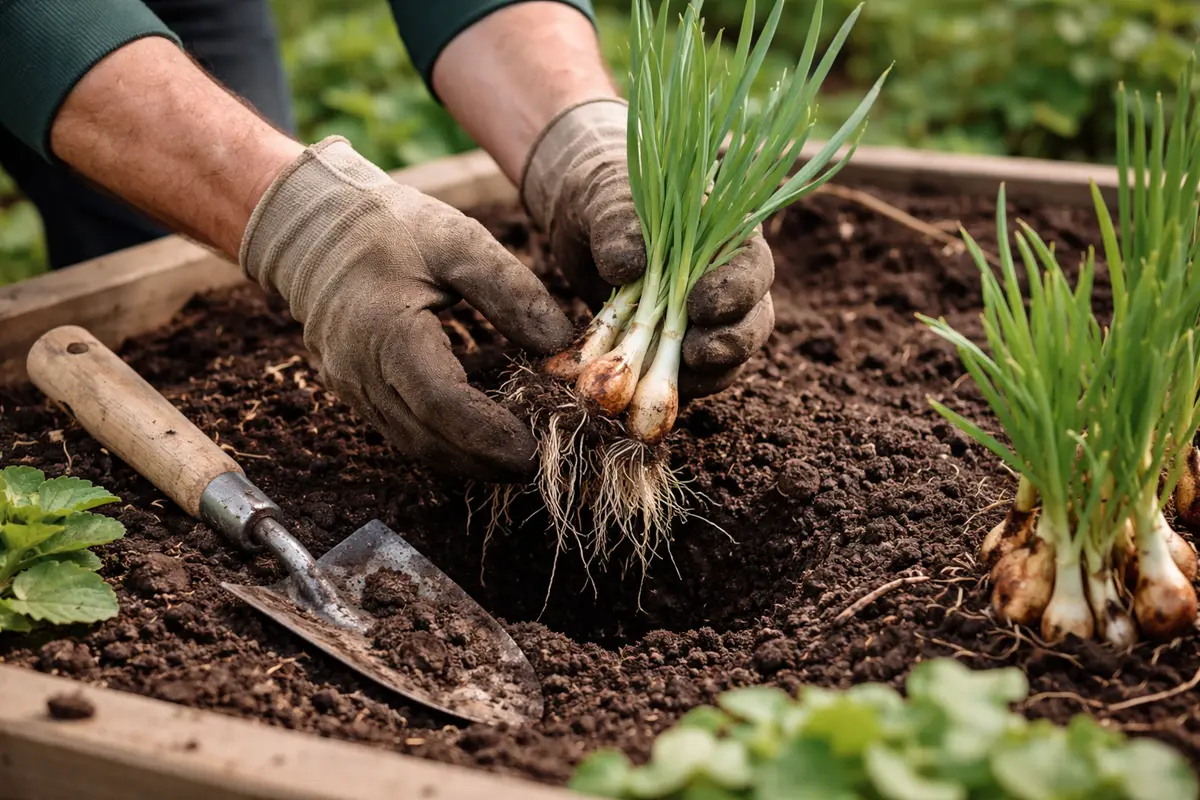
Replant the shallots in fresh, well-draining soil. Healthy roots will start to establish themselves once they’re given an opportunity to recover. Ensure the new planting area has been enriched with compost, which adds needed nutrients and helps retain the right amount of moisture. The fresh compost should be mixed thoroughly into the new soil to create a balanced medium that can sustain growth without holding excess moisture. Aim for a ratio of 50% compost to 50% soil to enhance both nutrition and drainage.
When you replant, you’re giving the shallots a chance to thrive in a new environment. Fresh soil not only contains essential nutrients but also offers the right moisture balance, allowing roots to breathe effectively. After replanting, you should start to observe signs of recovery, such as healthy leaf sprouting within a week or two as they adapt to their new conditions. Keep your watering light during this initial phase, as too much moisture will promote decay. Monitoring their growth is essential since a rapid resurgence of green shoots indicates that the plants are successfully reestablishing themselves. If the leaves fail to green within this period, investigate soil conditions again.
A mistake many gardeners make during recovery is overwatering the newly planted shallots out of concern for rot returning. To avoid this, water only sparingly until you observe fresh roots emerging or green shoots sprouting, which are key indicators that the plants are regaining strength. The surface should feel dry before any new watering; a good practice is to stick a finger about an inch into the soil to check moisture levels. If they remain overly wet, roots will struggle to regenerate, leading to repeated failure. Also, be alert to any wilting that may suggest too much moisture remains locked in the soil, calling for another inspection. The primary goal during this period is to strike a balance between keeping them moist enough to support recovery without inundating them.
Step 4 – Water Shallots Sparingly in Humid Conditions
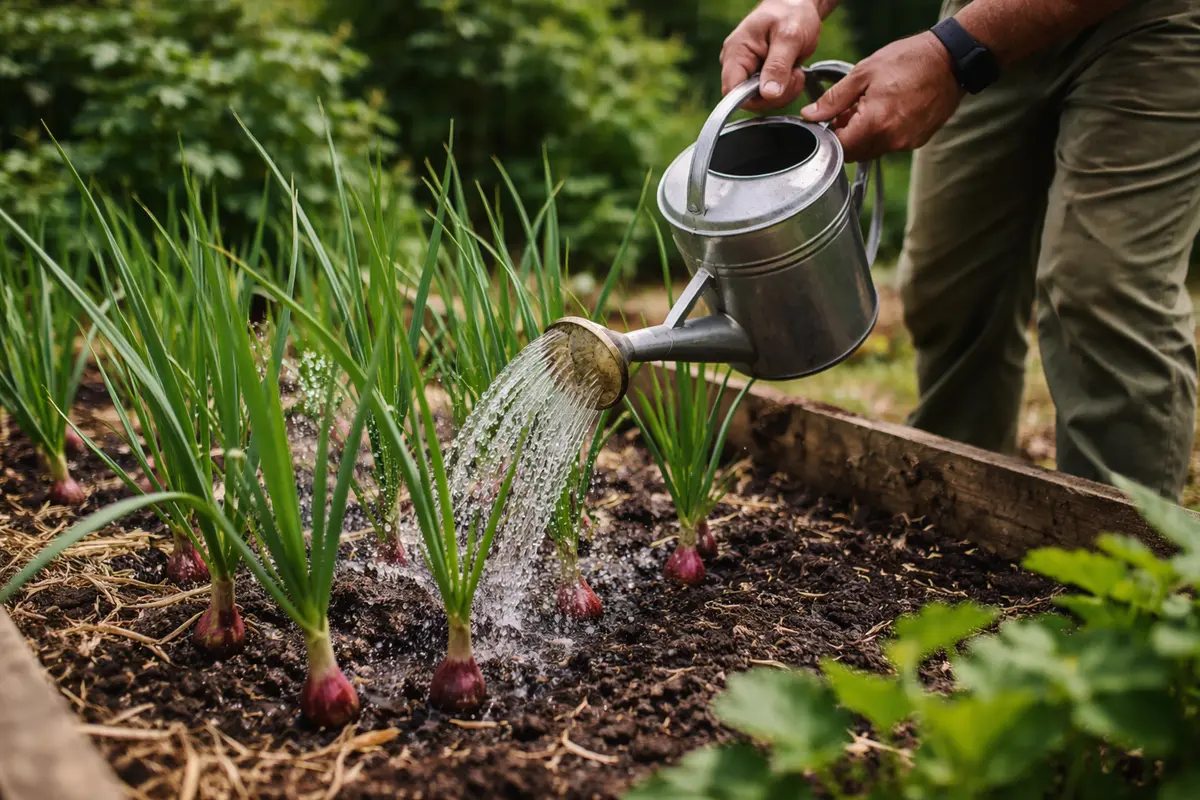
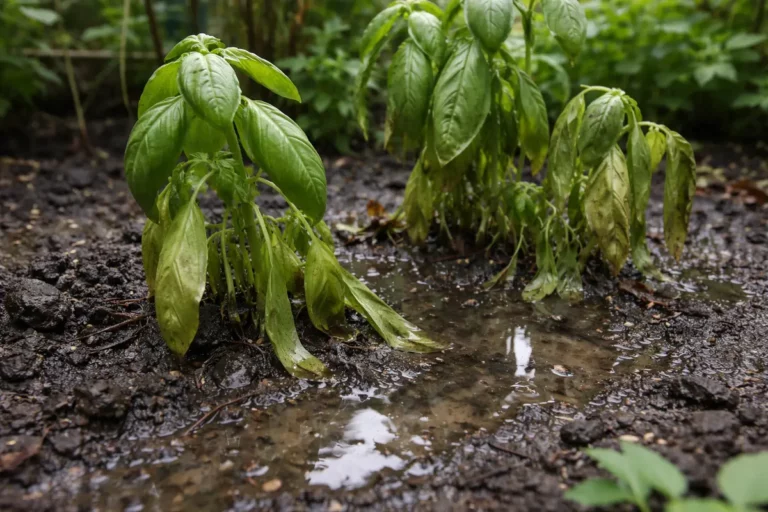
Water the shallots sparingly, especially during humid conditions. Consistent light moisture encourages stronger root development without promoting the conditions for root rot to reappear. It’s important to keep a close eye on soil moisture levels, particularly during high humidity periods, when it’s easy to overestimate the plants’ needs. If you notice that the leaves develop a shiny appearance, this can be a telltale sign that they are receiving more moisture than necessary. Generally, the top inch of the soil should feel completely dry before you decide to water again.
Humidity increases the chances of overwatering, as the moisture held in the air adds to the soil’s saturation. Shallots thrive best when the top inch of soil is allowed to dry before watering again. This method minimizes moisture retention around the roots while promoting stronger, healthier growth. To monitor this effectively, you might consider using a moisture meter to provide you with a reading before deciding to water. Logging daily readings will enable you to establish a watering pattern tailored to actual conditions instead of relying solely on habit. Ideally, check soil moisture first thing in the morning when temperatures are cooler.
During seasonal changes, such as late summer when rains are more frequent, adjust your watering schedule accordingly. You may need to check moisture levels daily and skip watering sessions if the soil is already damp to the touch. A good habit is to consider how much natural rainfall has occurred and whether the ground surface remains consistently dry. Recognizing these variations will prevent instances where overwatering might lead to a cascading effect of root-related issues. If there’s been unexpected rainfall, it’s better to err on the side of caution and delay watering, as shallots are susceptible to too much moisture. If leaf tips start turning brown, it often indicates underwatering or inconsistent moisture levels; addressing this will help maintain both hydration and overall crop health.
Step 5 – Inspect Shallots for Root Health Weekly
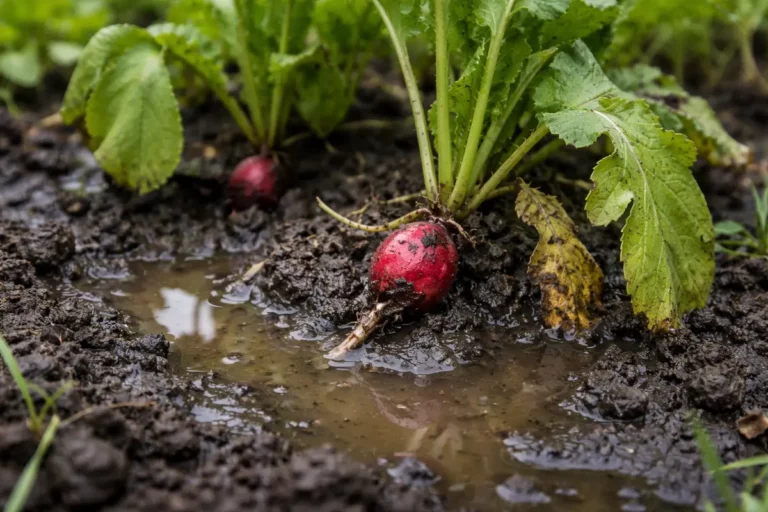
Start by checking the moisture level of the soil every few days, particularly in the early morning or late afternoon. Dig a small hole around the shallots to observe the root system; if the soil is still soggy and lacks drainage, it may indicate root rot. Be vigilant about looking for signs such as a black appearance on the roots or any lingering foul odors, which can suggest decaying matter. Recheck the soil moisture every 48 hours following any rain or water application to ensure it dries out adequately. Consistent monitoring can help prevent a repeat of root rot conditions.
A fully recovered shallot plant will show vibrant green tops that stand upright and firm, with a root system that is white and healthy instead of dark or mushy. In contrast, early signs of returning issues may present as wilting leaves that have a yellowing hue, indicating ongoing moisture problems. If the texture of the leaves feels limp or soft rather than crisp and robust, it suggests that overwatering may be reoccurring. An ideal time to assess your shallots is a few weeks after treatment, so look for consistent growth and stability in environmental conditions to ensure progress.
If the problem returns despite implementing these monitoring steps, consider replanting the shallots in well-draining soil to prevent further water accumulation around the roots. Alternatively, adjusting your watering schedule to allow for longer drying periods can help mitigate excessive soil moisture. If symptoms persist after these actions, elevate your intervention by consulting a local horticulturist or utilizing drainage aids like sand in your soil mix. Regular inspections also help you catch any recurrence of rot quickly. New growth usually indicates healthy recovery. However, if you see any yellowing leaves or if the plants wilt in between watering, it may signal returning issues. Without weekly checks, the plants may quickly revert to a stressed state, making recovery more complex and potentially increasing the likelihood of total crop failure. This vigilance enables you to react promptly, whether through modifying watering practices or enhancing soil conditions.
If rot returns, recheck the soil drainage and aeration conditions. Improving airflow around the roots by loosening packed soil or adding drainage materials can help mitigate future issues. You might need to switch to a different growing medium entirely—consider using a mix designed for bulb crops if conditions warrant it. Additionally, if you notice roots beginning to re-deteriorate, be prepared to act quickly, whether through additional amendments or transplanting to a better-draining area. Such vigilance significantly lowers the risk of severe stress impacting future growth; tackling issues early can prevent significant setbacks.
FAQ
How long will it take for shallots to recover from root rot?
Recovery depends on the severity of the root damage. Generally, if you follow the proper steps and conditions improve, you should see signs of new growth within 1-3 weeks after replanting. However, if root damage has been considerable, this time frame may extend considerably. Monitoring for growth can provide reassurance that the recovery plan is effective.
Can root rot spread to other plants in the garden?
Yes, root rot can spread through contaminated soil or water. It’s critical to prevent waterlogging and improve soil health to ensure that surrounding plants are not affected. This can mean revisiting drainage practices not only for the shallots but for nearby plants as well, to establish a healthier garden ecosystem. Frequent assessments of soil conditions and moisture levels can help mitigate risks across your planting area.
Should I remove the affected shallots entirely?
If the shallots show significant root damage, it’s best to remove them to prevent the disease from spreading. If only a few roots are affected, trimming them back may suffice, but replant in fresh soil immediately. Addressing this quickly is key; save the surrounding crops by ensuring that any remaining root structures do not foster further infections. Implementing rapid responses can help shield your garden from larger outbreaks of rot.