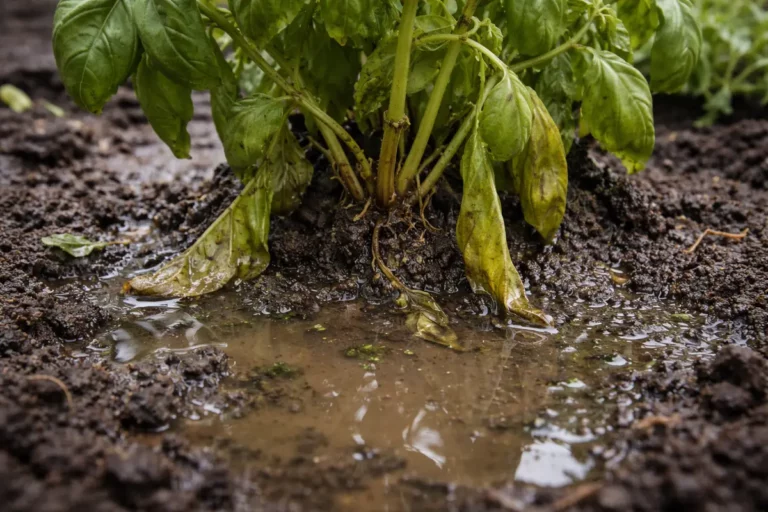
You may notice your potted herbs looking droopy and discolored after heavy watering, which is why you need to know how to prevent root rot in potted herbs after heavy watering. This condition is often indicated by yellowing leaves and mushy roots due to excess moisture hindering oxygen flow. If left unaddressed, the problem gets worse and can spread, ultimately weakening the plant; however, fixing it is possible now—just inspect the roots and adjust your watering schedule accordingly.
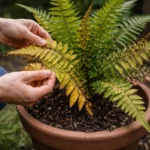
Step 1 – Trim Overwatered Herb Leaves Quickly
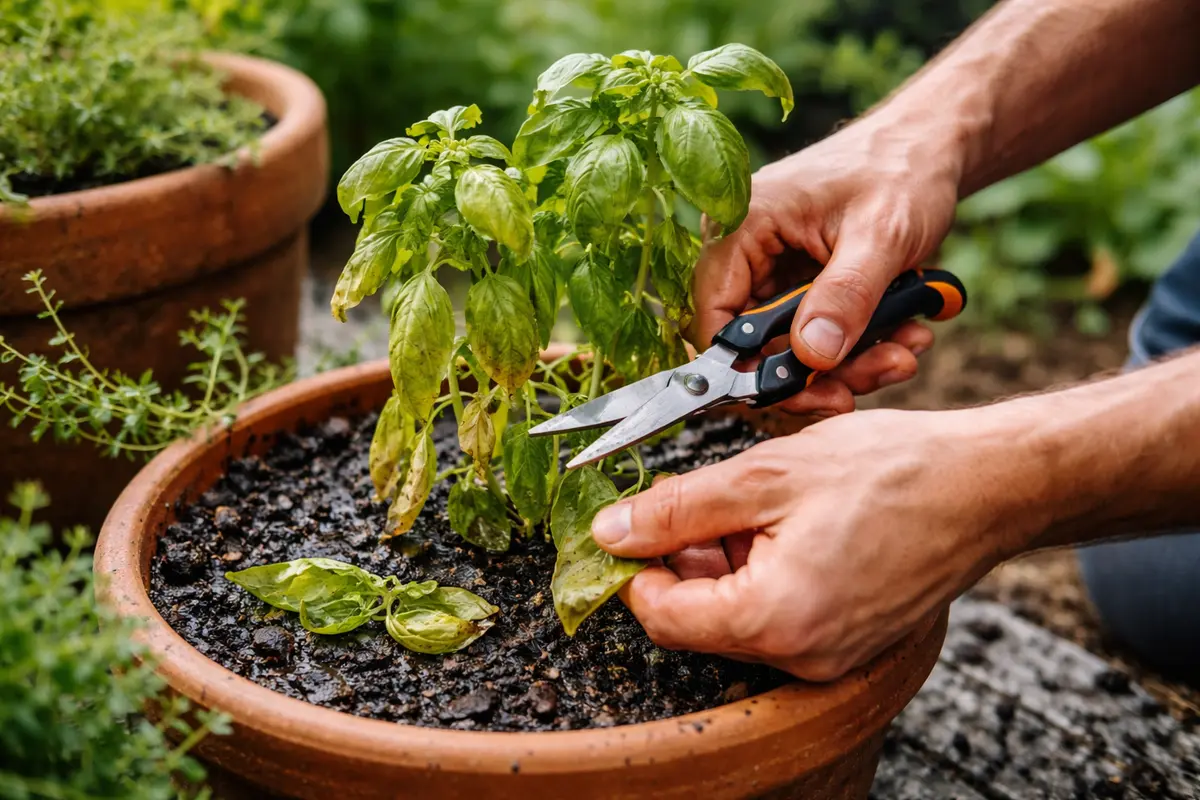
Start by immediately checking the drainage holes of your potted herbs to ensure that they are not blocked. If you see standing water at the bottom of the pot, tipping the pot gently to drain excess moisture can prevent root rot. After this action, you should notice the surface of the soil becoming drier, allowing air to circulate better around the roots.
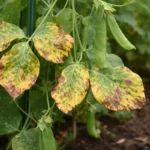
Acting quickly helps avoid the suffocation of roots due to excess moisture, which can lead to decay if left unchecked. Healthy roots breathe through tiny pores, and when these pores are saturated with water, they cannot function properly. If you observe yellowing leaves, it signals that the plant is stressed; if not addressed quickly, the roots may start to rot, leading to further decline.
A real-world scenario includes a gardener who watered their basil extensively but neglected to check the drainage; the roots began to rot within days. Instead, those who promptly confirmed drainage reported thriving herbs shortly after adjusting their watering approach. If roots feel mushy, alter your watering habits to avoid overwatering and ensure the soil dries out between waterings.
Quick removal of overwatered leaves limits the plant’s exposure to potential fungal infections, which thrive in damp environments. These infections can severely damage root systems if not caught early, leading to poor nutrient absorption. By handling the plant quickly, you minimize stress that could trigger further imbalance in water intake, helping the plant focus energy on healthy growth. As a rule of thumb, if any leaves exhibit discoloration, prioritize their removal.
A common mistake gardeners make during this stage is to delay leaf removal, allowing rotting tissue to remain and attract pests. Many assume the plant will recover on its own; however, this often exacerbates the situation, leading to a larger portion of the plant being affected. Always observe the temperature and humidity regularly; if it’s high, fungal issues will escalate much faster, making rapid action critical. For example, if you’ve been experiencing high humidity levels over several days, you should expect your plants may require attention with greater urgency.
Step 2 – Examine Potting Mix for Waterlogging Issues
Inspect the potting mix for excessive moisture by checking the top two inches for dampness. This action will reveal if the soil is waterlogged, and changes will need to be made based on your findings. The moisture level in the soil can often be underestimated; thus, an accurate assessment is key. Digging a little deeper can also provide insights; if the soil appears dry beneath the surface while the top is soggy, it’s a sure sign of poor drainage.
Heavy watering tends to cause potted soil to become saturated, which restricts oxygen access to the roots. Roots that lack oxygen will become weak and are prone to decay, leading to root rot. When reviewing the soil, if the mix feels heavier than usual or exhibits a compacted texture, it might retain too much water. Additionally, the presence of mold or a foul smell during this inspection can indicate anaerobic conditions. If you detect blackened or mushy soil, it could signal that the potted plant has been overwatered.
If the soil feels muddy or has a sour smell, it indicates anaerobic conditions. In this case, consider reworking the soil to improve drainage properties or replacing it entirely with a fresher, well-draining mix. It’s crucial to assess soil conditions regularly, especially after heavy watering, to prevent future occurrences. If you find yourself consistently battling moisture retention, it may also be beneficial to blend in additional perlite or sand, which enhances drainage and aeration in your potting mix. Using an appropriate mix that contains a blend of peat moss, perlite, and vermiculite can significantly improve water flow and oxygen retention to promote healthier root systems.
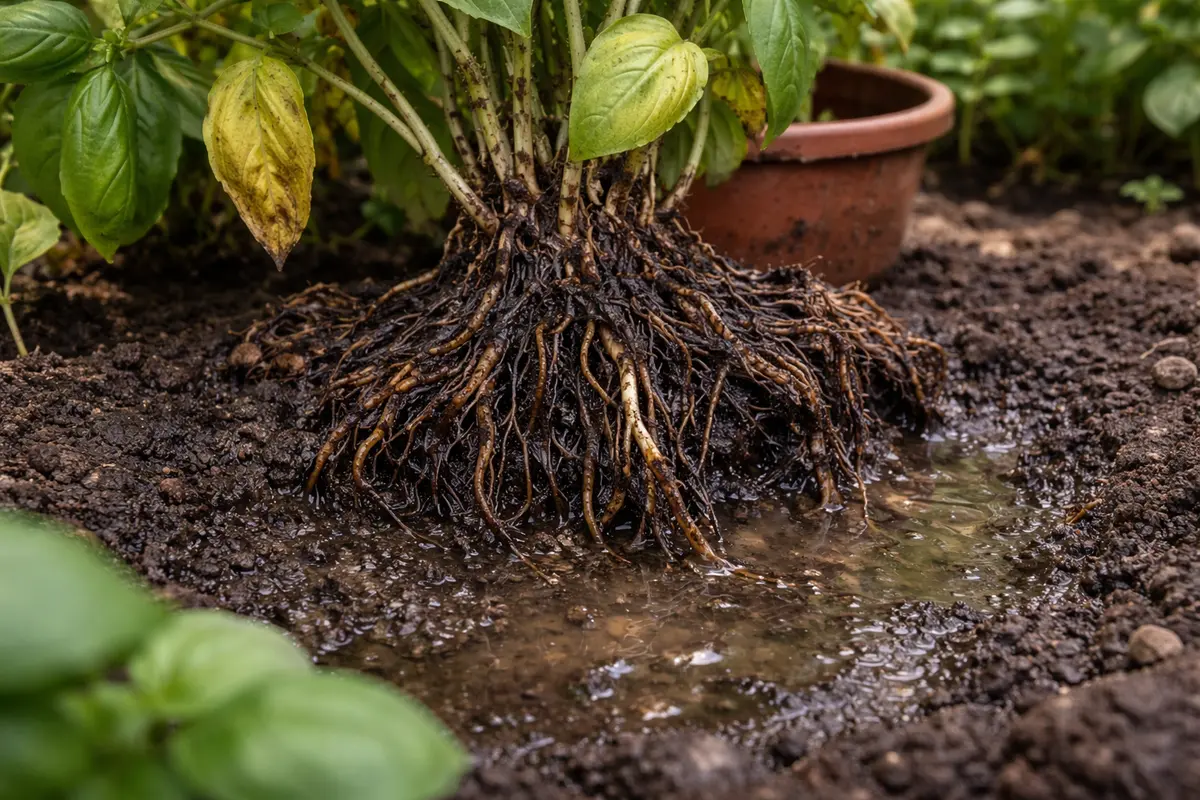
Step 3 – Repot Basil in Fresh, Fast-Draining Soil
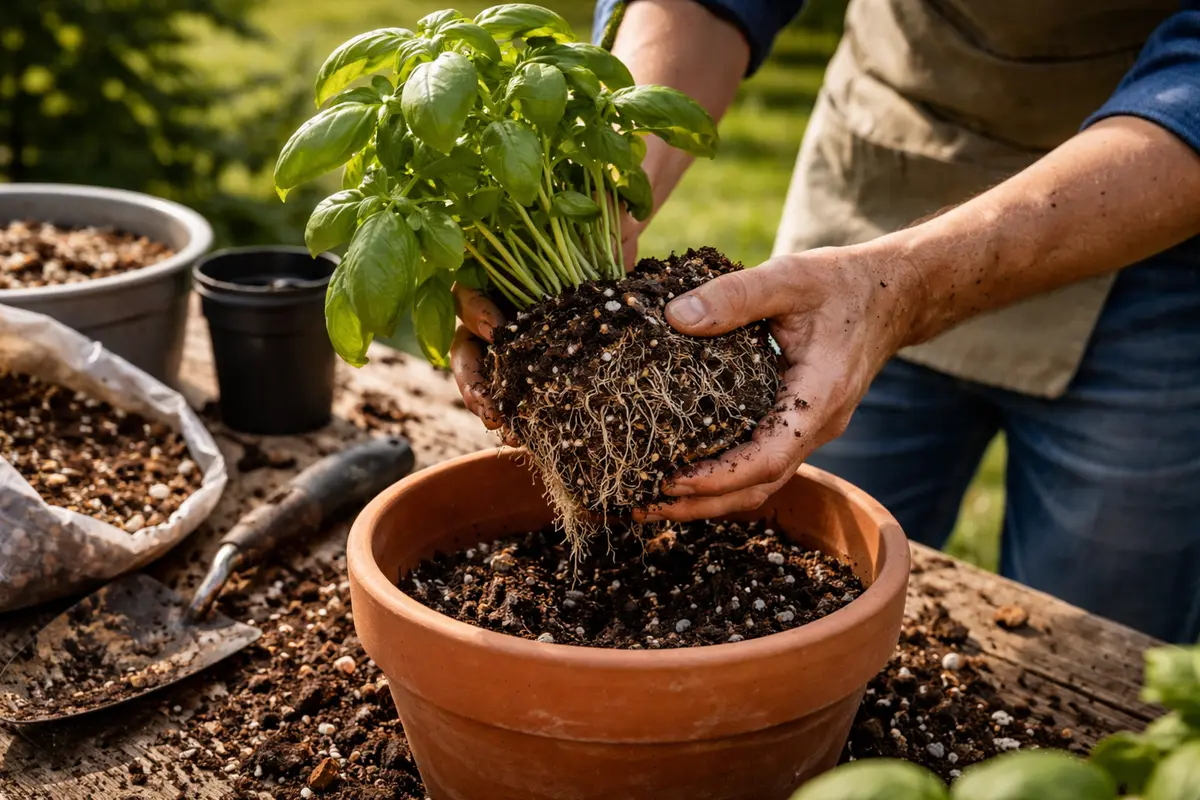
Start by carefully removing the affected herbs from their pots and inspecting the roots for mushy or darkened areas. Trim away any damaged roots using sterilized scissors, and repot the herbs in fresh, well-draining soil. In about a week, you should observe new growth emerging, indicating that the herbs are beginning to recover from root rot.
Herbs that are recovering will show changes such as the development of healthy green leaves and sturdy stems. The recovery timeline can vary; typically, you may notice improvement within 1 to 3 weeks, depending on the environmental conditions. Warmer temperatures and adequate light can speed up recovery, while cooler temperatures and insufficient sunlight may slow it down. If you see yellowing leaves persist, check for excessive moisture in the soil.
A mistake to avoid during recovery is overwatering, which can lead to further root damage. When resuming a watering schedule, ensure the top layer of soil is dry before watering again. For herbs like basil, check for wilting; if the leaves droop, it may indicate underwatering rather than root rot, so adjust your watering accordingly.
On average, herbs can take one to two weeks to show significant signs of recovery, depending on the severity of root rot. Look for new leaf growth and improved leaf texture, indicating that the roots are re-establishing and soaking up moisture. Conditions like mild temperatures and adequate light can encourage faster recovery, while cold or dark environments can slow it down considerably. If leaves are still wilting after a week, check for root damage that may need more intensive care.
Avoid overwatering during recovery; adding more water can exacerbate root rot symptoms instead of helping. Particularly, herbs like basil require well-draining soil and don’t thrive when over-fertilized or saturated. If you see yellowing leaves but not wilting, check the soil for moisture levels before applying any fertilizer or additional water.
Recovery from root rot can vary based on conditions, but generally, you can expect observable improvement in 2-4 weeks. Healthy regrowth often appears as vibrant green shoots, while slow recovery may produce yellowing leaves or stunted growth. If your herb shows no signs of new growth after a month, check soil moisture; overly wet soil can hinder timely recovery.
Avoid overcompensating with excessive water or fertilizers during recovery; both can create conditions conducive to more rot. For instance, if overwatering led to root rot, adding more water or nutrients will only exacerbate the issue. If your herbs appear droopy even after balanced watering, check for root compaction or lack of drainage in the pot.
Using a well-draining mix prevents water from pooling at the roots, thereby allowing oxygen to reach them. Fresh soil not only improves aeration but also enriches the plant with the necessary nutrients it may have lost in the previous mix. This transition period, if done correctly, can significantly affect how quickly the basil bounces back from dehydration and root issues, leading to a more robust plant with better yields. In fact, repotting can reveal buried signs of health or stress in the form of rooting behavior—if the roots are tightly coiled, it may also indicate that the plant has been confined in its pot for some time.
A common oversight is rushing the repotting process and using still-wet old soil. This can reintroduce problems related to drainage and nutrient availability. Be patient; allow the plant to adapt to its new home before watering again. If you see the plant wilting again after repotting, assess environmental factors such as light exposure and temperature fluctuations, as these can also impact root recovery alongside your watering habits. Monitor the environmental conditions for the next two weeks; if temperature drops significantly at night, it may require adjusting to a warmer spot during such fluctuations.
Step 4 – Water Thyme Only When Topsoil Dries Out
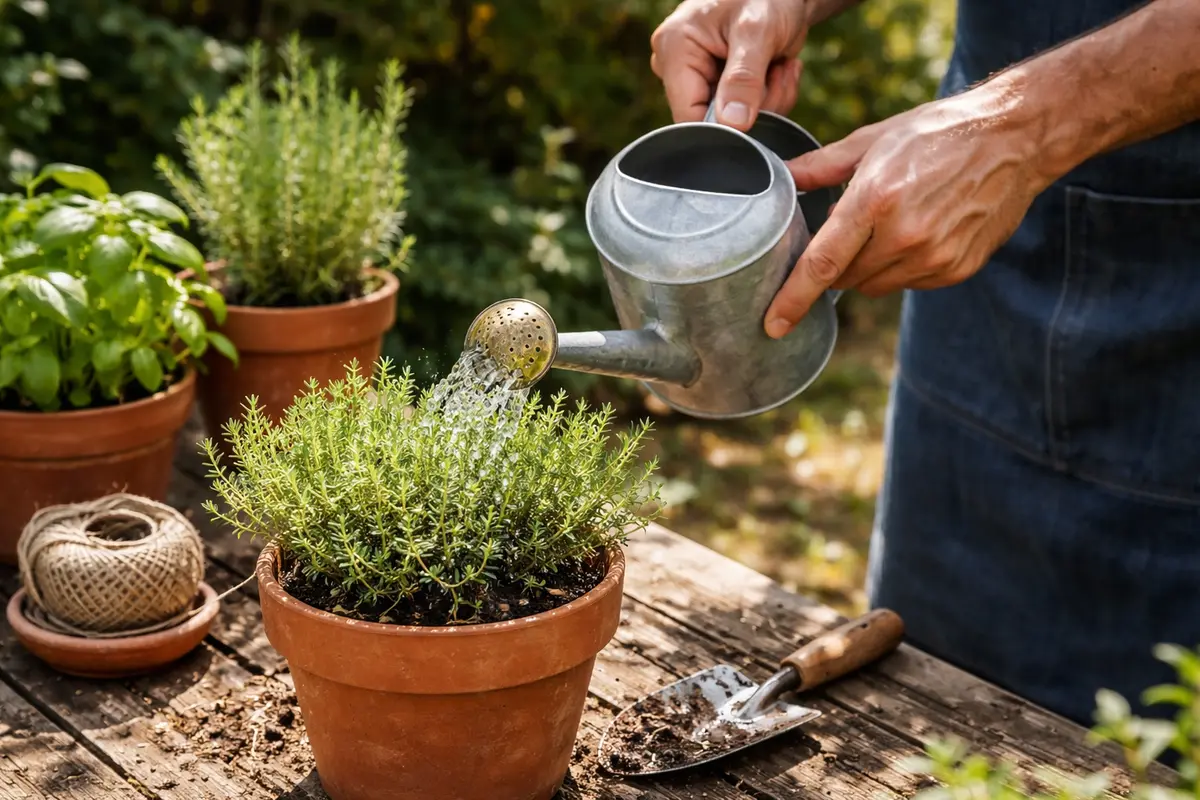
Water the thyme only when the top inch of soil feels dry to the touch. This habit will create conditions more favorable for healthy growth, minimizing the potential for root rot. Regularly checking the moisture level will give you a better insight into the plant’s needs, thus enabling better watering decisions. If the plant’s leaves appear droopy or discolored, it’s usually best to check the soil conditions before watering again.
Establishing a consistent watering routine that includes checking soil moisture helps control the dampness of the root zone. Herbs can thrive in well-aerated soil, but excessive moisture can quickly lead to root rot if not monitored. The established metric of waiting until the top inch is dry ensures that the roots retain enough moisture without becoming waterlogged. It can also be beneficial to gently loosen the soil when checking, as this can also help with aeration at the root level. In cooler months, consider reducing your watering based on observed moisture retention, as evaporation rates will be much lower.
You should also adapt your watering strategy based on seasonal changes; for example, the warmer months may accelerate evaporation rates, leading the soil to dry faster. Observe your plants regularly, as they may exhibit signs of stress such as drooping or leaf discoloration when deprived of moisture. This close monitoring will help you refine your watering approach and avoid lingering issues. Noticing the thyme developing crispy leaf edges is often a cue that the plant may be drying out. Adjust accordingly, and remember that it’s better to underwater slightly than overwater, particularly for herbs.
Step 5 – Inspect Sage Roots for Signs of Recovery Regularly
Monitor your potted herbs regularly after heavy watering, checking the soil moisture using your finger to a depth of about two inches. If the soil feels excessively damp and lacks drainage, recheck every couple of days until improvements are visible. Look for signs of disease, such as yellowing leaves or wilting, that indicate potential root rot arising from overwatering.
A fully recovered herb plant will exhibit vibrant green leaves with a firm texture, and the stems will be sturdy and upright. In contrast, early signs of root rot may include dark, mushy roots along with discolored foliage that appears droopy and soft. If you notice leaves yellowing again or a bad smell from the soil, these may signal that the rot is returning.
If you observe symptoms returning, remove the plant from its pot and inspect the roots for dark or mushy spots; cut away any affected areas with sterilized scissors if necessary. If the problem persists despite these steps, consider repotting the herbs in fresh, well-draining soil and a clean container to prevent disease recurrence.
A recovered plant typically displays vibrant green leaves and increased stability in the soil. Look for healthy firmness in the roots; soft or mushy roots indicate that the rot may not have resolved and could complicate your success. By keeping a schedule for inspection, you can track the plant’s health effectively, facilitating quicker decisions if issues resurface. Noting the increase in leaf counts and the return of color brightness is a great sign that the plant is on its way to recovery.
If you notice that the plant shows symptoms similar to root rot after following the steps, consider revisiting your watering techniques and soil moisture levels. Sometimes, persistent overwatering habits can go unnoticed. If the issue continues, it may be helpful to implement a 48-hour drying period before the next watering, ensuring the upper soil layers are adequately dried out. Adjustments might also include light exposure changes, such as moving the plant to a brighter location to encourage healthier growth during recovery, particularly as sage benefits from good light conditions. Each inspection serves not only as a health check but also as a teaching moment in fine-tuning your herb care strategy.
FAQ
How long does it take for herbs to recover from root rot?
The recovery time for herbs from root rot can vary but generally takes a few weeks if proper conditions are maintained. During this period, you should observe new shoots and firmer root structure as indicators of improvement. Keep an eye on growth rate and leaf quality as signs that the herbs are bouncing back. Factors such as light, water, and temperature continuity can really impact recovery time, so remain patient and attentive.
Can root rot spread to other herbs in the same pot?
Yes, root rot can spread to other herbs in the same pot if conditions remain favorable for the pathogen. It’s crucial to isolate affected plants and take prompt action to remove any infected roots and change the soil to prevent spreading. Taking these measures quickly will assist in safeguarding the health of the neighboring plants and allow you to reorganize the potting arrangement without risking further contamination.
Should I remove more roots if I see signs of root rot returning?
If you notice signs of root rot returning, it may be necessary to remove more of the affected roots. However, take great care not to over-prune, as the plant still needs some healthy roots for recovery. Ideally, always ensure that the remaining roots are firm and healthy to improve recovery chances; otherwise, consider consulting a professional for additional guidance. Having a specific approach and tools on hand—for example, sterilized scissors—can improve your efficiency and reduce risk during this delicate process.