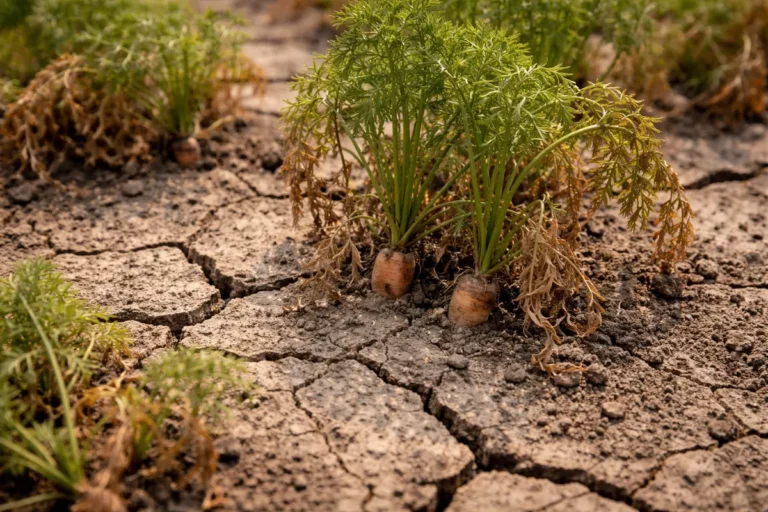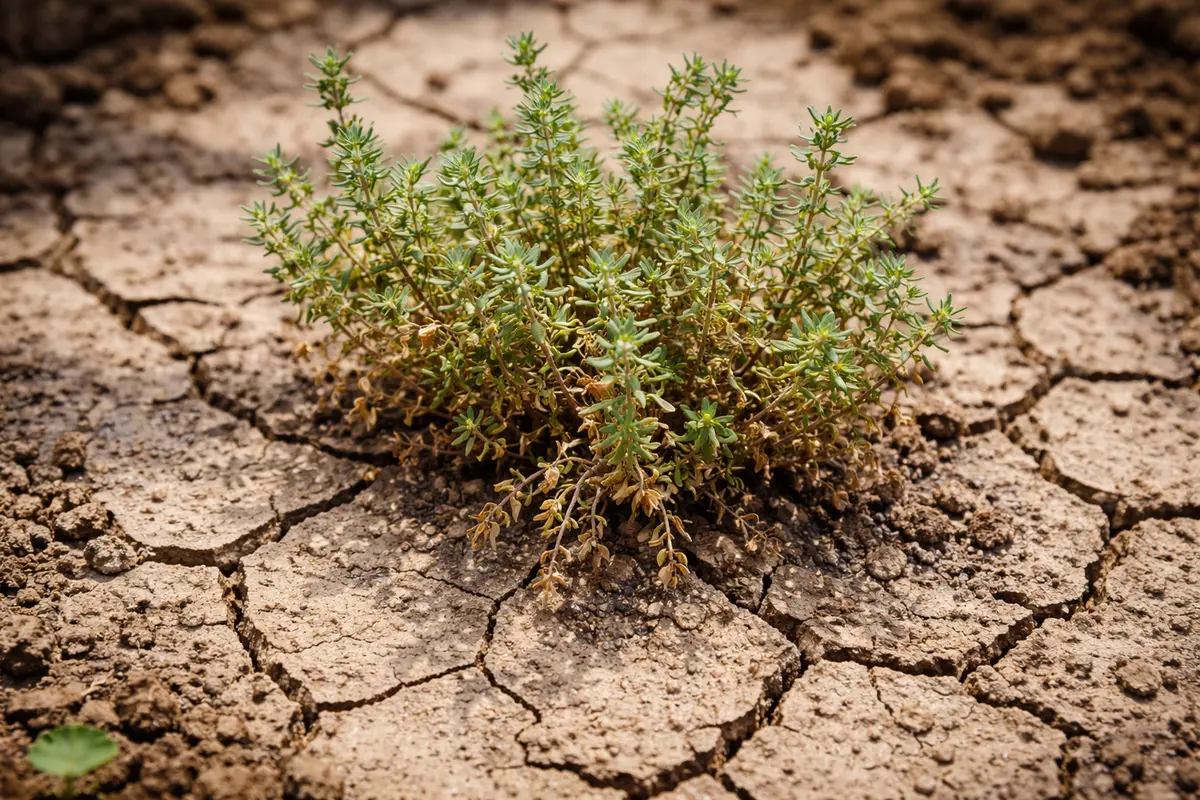
You may notice your thyme struggling under the relentless heat of summer, which is why you need to know how to fix stunted growth in thyme during drought. The plant begins to exhibit yellowing leaves and drooping stems due to inadequate moisture, hindering its natural growth process. If ignored, this stunted condition only gets worse, weakening the plant and making it harder to revive later, but fixing it is possible now—just check the soil moisture levels and adjust your watering schedule accordingly.
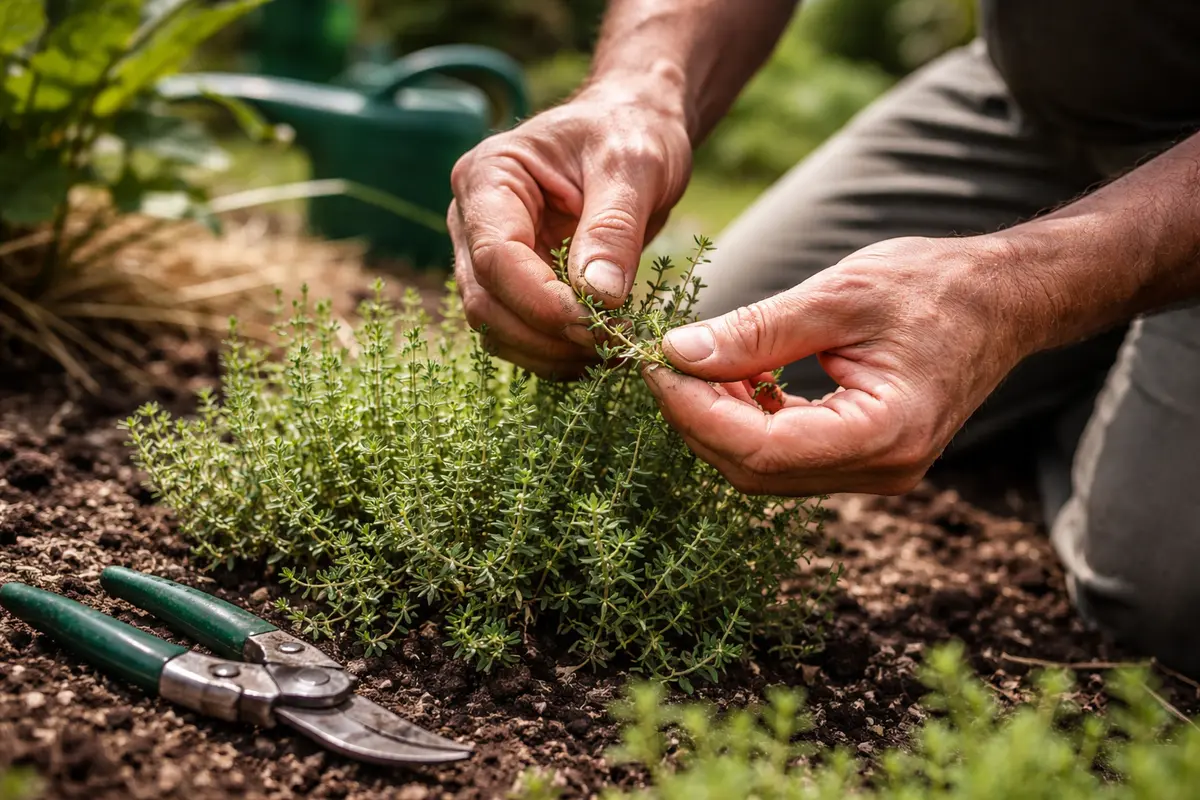
Step 1 – Water Thyme Deeply Right Away
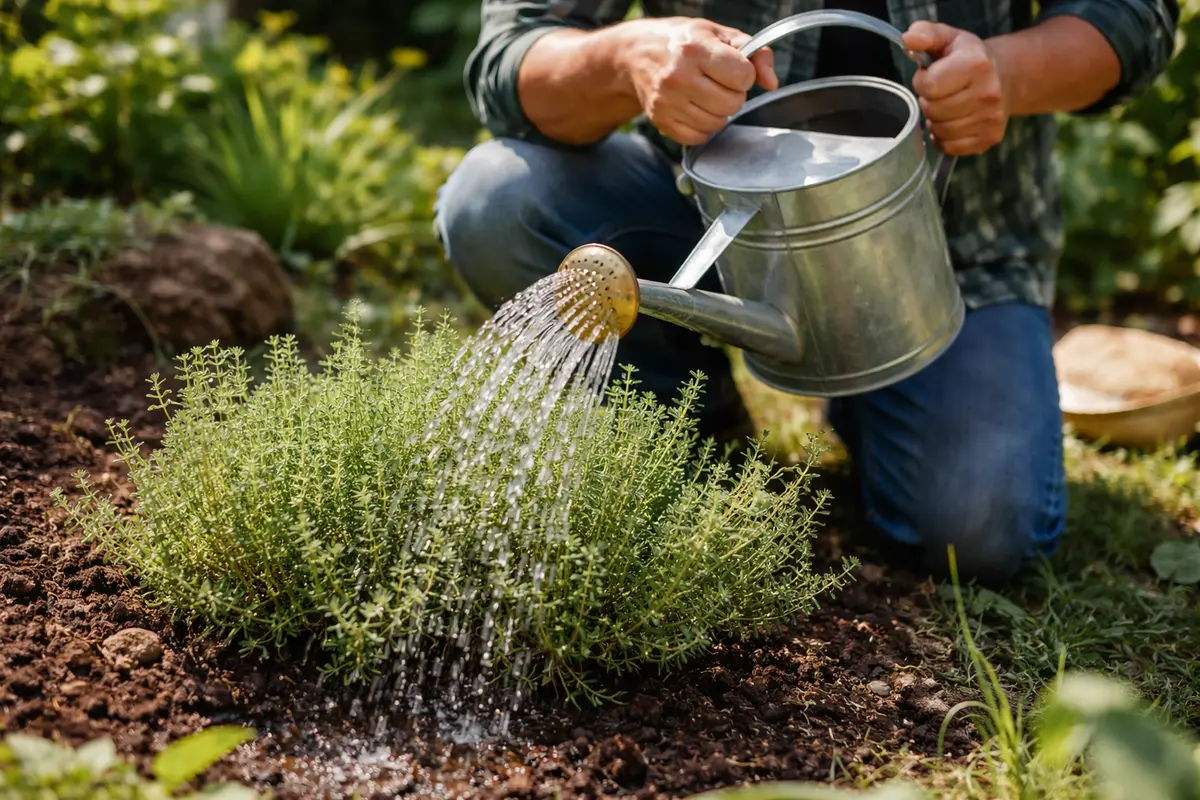
Water thyme deeply to saturate the root zone immediately. You will notice the foliage perking up within a few hours as the soil absorbs moisture. Keep the watering focused at the base of the plant to encourage deeper root growth instead of just surface moisture. To effectively deep-water, aim for saturating the soil to a depth of at least six inches, ensuring that moisture reaches the roots directly. This depth allows the water to penetrate the compacted layers of soil that might otherwise block access to deeper roots.
Watering deeply is crucial during periods of drought because thyme relies on stored moisture in the soil to thrive. The roots of thyme plants need to access this moisture to function properly, as they take in water and nutrients essential for growth. If you delay watering, the plant will continue to weaken, leaving it more susceptible to diseases and pest infestations. As you begin to see your thyme’s foliage perk up, this is a good sign that your initial watering had a positive impact, but it’s essential to maintain this hydration strategy moving forward. If the foliage does not visibly improve within five hours of deep watering, it may indicate that your plant has faced critical stress and could require further attention.
Often, gardeners make the mistake of watering only the surface of the soil or using sprays, which do not reach the root zone effectively. Instead, aim to saturate the soil until the water penetrates about six inches deep. If the foliage does not improve after watering, check your soil moisture levels next to confirm that the roots have indeed taken in enough water for recovery. If you find the soil is still hard and dry two hours post-watering, you may need to revisit your watering method altogether; perhaps adjust the watering amount or frequency. Always feel the soil with your fingers after watering; if it feels cool and moist but not muddy, you’ve likely achieved adequate hydration. If not, consider increasing your water flow or changing the application method to ensure saturation.
Step 2 – Check for Soil Compaction and Drainage
First, check the soil moisture levels around your thyme plants to determine if they are too dry. If the soil is significantly dry, water the plants deeply to rehydrate the roots, which should lead to noticeable new growth within a week as the plant starts to recover. A regular watering schedule should also include checks for soil moisture at a depth of at least four inches to ensure adequate hydration.
Thyme plants often exhibit stunted growth when their roots are deprived of moisture, causing them to become stressed and unable to absorb essential nutrients. In dry soil, the root system may struggle to maintain adequate turgor pressure, which leads to wilting and inhibited growth. If the soil feels dry on the surface, it may be even drier deeper, affecting the plant’s ability to flourish, especially if soil compaction is present. To assess compaction, gently probe the soil with a stick; if it is difficult to penetrate, compaction is likely present, impeding water absorption.
If the soil smells sour, this indicates potential root rot due to overwatering or poor drainage, which requires the opposite approach: improve drainage and reduce watering frequency to allow the roots to dry out. Alternatively, if the stems appear brown due to sunburn rather than root issues, providing some afternoon shade can help alleviate the stress on the plant. In cases of severe compaction, consider testing your soil for clay content, as heavy clays retain too much moisture, exacerbating both waterlogging and drought conditions.
Soil compaction can limit water movement and air exchange at the roots, effectively choking your thyme plants during drought conditions. Compact soil, especially in clay-heavy areas, retains too much water and prevents roots from accessing moisture efficiently. When this happens, thyme growth is inhibited, leading to stunted development, wilting leaves, and a decrease in overall health. You may notice that even after watering, the soil does not retain moisture well due to its density. Regularly aerating the soil in tandem with adding organic material can restore balance.
If the soil feels hard and dry at the surface but still appears wet below, your thyme may be suffering from waterlogged conditions. If that’s the case, check if excess moisture is lingering due to poor drainage by digging down a few inches and feeling for air pockets. Compacted soil reduces hysteresis and can lead to more severe drought stress in the future; consider using a garden fork to aerate and mix in organic matter to improve soil structure. However, be cautious as overly aggressive aeration can damage the root system; approach this process gently and strategically. Remember, improving drainage can drastically affect the survival of your thyme during dry spells, so be diligent in monitoring its conditions thereafter.
Step 3 – Test Soil Moisture Before Treating for Drought
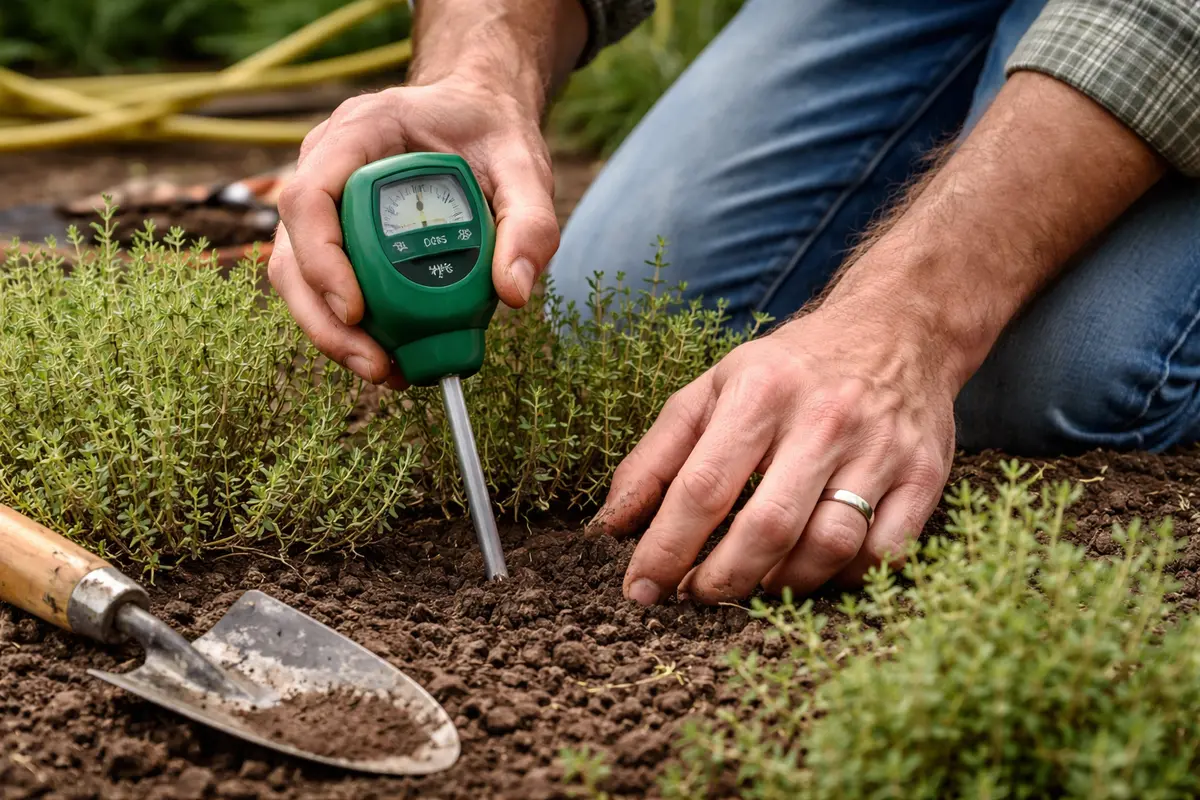
Check the soil moisture by inserting a finger or a moisture meter to gauge water levels. The confirmed results will show whether the soil is genuinely dry or still retaining decent moisture. If you feel dry soil more than 2 inches down, proceed with further steps to support recovery. Pay close attention to the texture of the soil; if it’s crumbly and falls apart easily, it likely needs immediate hydration. Additionally, if it sticks together into a ball, that could indicate it is still too wet and exacerbates compaction.
A dry surface can often mislead gardeners into believing their plants require more water, while in reality, the moisture below might be adequate. Plants can display drooping leaves even if the moisture levels are correct, often due to other factors like root suffocation or nutrient deficiencies. Distinguishing between these symptoms is vital to ensure you apply the appropriate remedies. If you see fresh signs of growth on the stems, however, it might be a good indicator that water levels are adequate. If in doubt, monitor temperature and humidity, as fluctuations can also affect plant hydration.
If the diagnosis is unclear and your thyme seems unhealthy but the soil feels damp, wait another day and repeat the moisture test. Remove any dead or damaged leaves to help improve airflow and decrease moisture loss from the plant’s surface. This step is not just about managing current symptoms but preventing further damage. If you discover that the soil remains overly wet, it may indicate that further drainage improvements are necessary to ensure your thyme’s recovery. If unsure, consider gently repotting the thyme into more aerated soil, which may allow for better drainage.
Step 4 – Add Organic Mulch to Aid Thyme Recovery
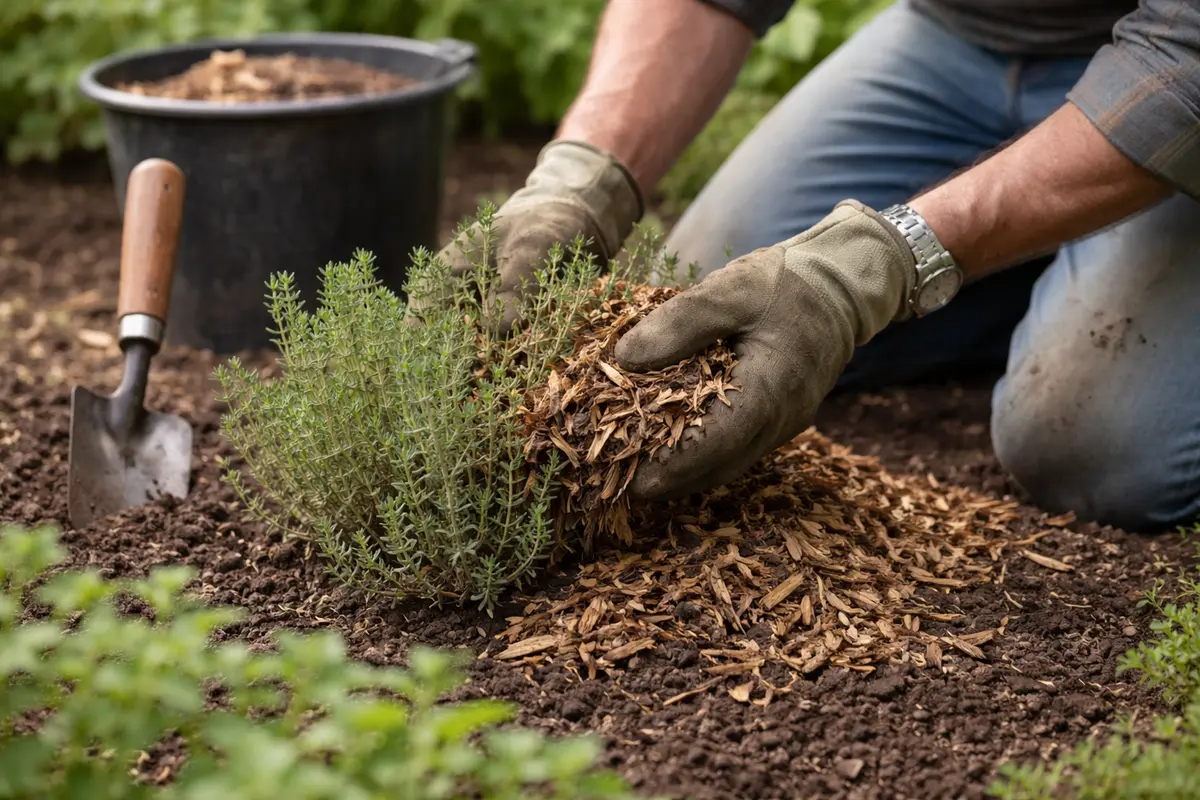
Apply a layer of organic mulch around the base of your thyme plants. You will notice improved moisture retention and reduced soil temperature over the following days, creating a more stable environment for growth. Mulch also helps prevent weeds, which can compete for the limited available resources in drought conditions. This step not only enhances the aesthetic of your garden but also promotes a healthier ecosystem surrounding your thyme. For ideal results, consider using organic materials such as straw, wood chips, or shredded leaves, each providing distinct benefits.
Organic mulch works by slowing evaporation from the soil surface and also allowing moisture to penetrate down to the root zone more effectively. As the mulch breaks down, it adds nutrients to the soil, fostering better drainage and overall health. Proper mulch application can speed up recovery time as the plant roots access consistent moisture levels, promoting new growth more quickly. Watch for the initial signs that the mulch is aiding in moisture retention, such as consistently damp soil beneath it after watering events. Maintaining this layer through dry spells ensures the roots have a stable moisture source.
One common mistake is applying too thick a layer of mulch, which can block essential moisture from reaching the roots. Aim for about 2 to 3 inches of mulch to provide both protection and moisture retention without suffocating the plants. Be observant: if you see signs of mold developing on the mulch or if the soil beneath remains too wet, this could potentially harm your thyme. Additionally, reapply mulch as necessary to bolster its effectiveness; older mulch may break down and lose its usefulness. Adjust as needed and monitor closely during recovery; mulch thickness is key for achieving desired results. Note that using non-organic mulch can impede the natural decomposition process and reduce soil nutrition.
Step 5 – Water Thyme at Base During Future Droughts
Start by mulching around the thyme plants with a 2 to 3-inch layer of organic material such as straw or wood chips to reduce moisture loss, keeping the soil temperature stable. This practice will help maintain consistent soil moisture levels, leading to healthier, more robust thyme growth. In dry conditions, be deliberate in watering directly at the base to prevent waste and ensure hydrating the roots.
Drought conditions often cause thyme to become stressed and stunt its growth due to insufficient moisture in the soil. By applying mulch, you directly address the evaporation of water from the soil surface and create a barrier against temperature fluctuations that can exacerbate dry conditions. If you notice your thyme leaves turning brown, check for soil dryness—if not mulched, the plants are more vulnerable to stress. Keeping records can help you identify periods when conditions affect your plants’ health the most.
During hotter summer months, consider refreshing the mulch layer to maintain its effectiveness, ensuring it’s not breaking down completely. Additionally, you can plant companion species that thrive in similar conditions, providing shade and reducing direct heat stress on the thyme. This dual action will bolster your prevention routine against stunted growth in thyme. Depending on the size of your garden, consider implementing drip irrigation systems or soaker hoses for an efficient watering method that continuously delivers moisture without excess evaporation. This proactive approach will keep your thyme plants thriving in adverse conditions.
Regular watering at the base prevents diseases that can arise from overhead watering, which can lead to moisture settling on the leaves. During periods of high heat or drought, thyme roots become increasingly sensitive to fluctuations in moisture. By establishing a direct watering method, you encourage the plant to develop deeper roots, enabling it to access water reserves more effectively in the future. If you notice any yellowing leaves or diminished growth, it may indicate that your watering routine requires further adjustment. Beyond adjusting frequency, be mindful of the time of day you water as evening watering can facilitate fungal issues, while early morning promotes sun exposure and evaporation.
If watering seems ineffective initially, consider the soil type. Sandy soils allow for faster drainage but require more frequent watering, whereas clay soils retain water longer. Adjust your care according to seasonal shifts; for example, sandy soils may demand daily watering in heat, while clay soil might only require watering every third day, depending on moisture levels. By consulting local soil guidelines, you can tailor your watering schedule specifically to your garden’s environment and your thyme’s needs.
Step 6 – Inspect Thyme Leaves for Signs of Improvement
Monitor the thyme leaves closely for signs of improvement, checking them every few days. You should observe new growth appearing and a change in leaf firmness, which indicates the plants are recovering. Establish a recheck schedule to gauge recovery effectively, focusing on the health of the foliage and soil moisture balance. Watching for these signs is critical, as they provide a clear measure of how successful your interventions have been.
A fully recovered thyme plant will show signs of green leaves with no browning or wilting, indicating that it can thrive again. Watch particularly for the vibrant return of color, as this signals the plant’s improved moisture uptake and nutrient access. If you see new growth on previously damaged stems, that demonstrates successful recovery and resilience against drought stress. You may also want to observe the development of side shoots, which are an excellent indicator of overall vigor. However, if new growth is sluggish or appears unhealthy, revisit the watering or drainage techniques you have implemented.
If the signs of improvement start to falter, consider restarting watering routines that proved beneficial earlier. Pay close attention to any weather changes, as these will drastically affect your thyme’s growing environment. Keeping a log of your observational findings, such as temperature fluctuations and watering times, can be beneficial to pinpoint what methods are most effective under different weather conditions. If improvement does not occur within a couple of weeks, further analysis of environmental conditions or consultation with a gardening expert may be warranted to avert exacerbating the issue.
FAQ
How long does it take thyme to recover from drought stress?
Recovery can take anywhere from a few days to a couple of weeks, depending on the severity of the drought and how promptly you implement recovery measures. When proper watering and care are provided, you should see signs of new growth within a week, meaning that your thyme is responding positively to the interventions. Consistency in care will be key during this period to facilitate faster recovery.
Will stunted thyme recover if I change my watering schedule?
Yes, changing your watering schedule to ensure consistent moisture at the root base can significantly help thyme recover from stunted growth. Proper adjustments often lead to regrowth and overall health improvement within days, especially if you are diligent about monitoring soil moisture levels. Always be prepared to adjust your strategy based on its responsiveness to the new routine.
Should I remove the affected leaves from my thyme plant?
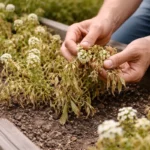
Yes, removing any dead or unwell leaves can improve airflow and encourage new growth. Trim only damaged foliage back to healthy tissue, as this helps the plant focus its energy on recovery. Regularly inspecting for signs of distress ensures that your thyme can rebound effectively. Be cautious when pruning; only remove leaves when they show clear signs of damage and always sterilize your shears between cuts to prevent disease spread.