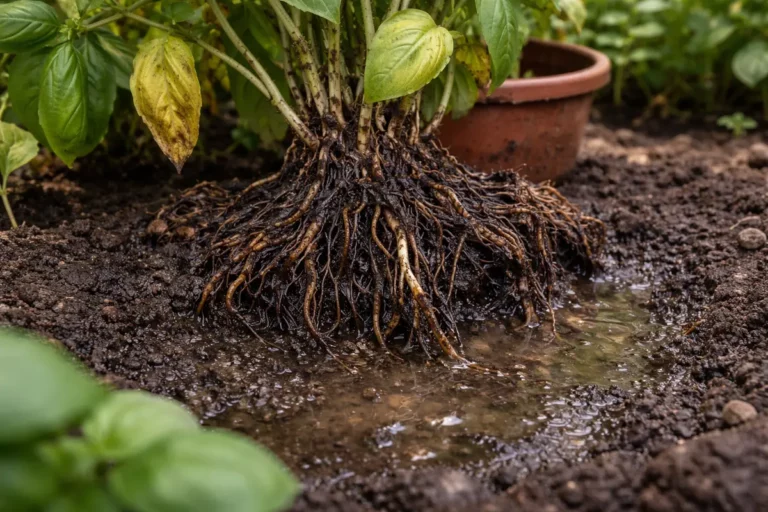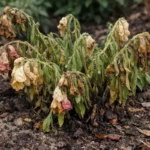
You may notice your geraniums looking droopy and discolored after heavy rain, which is why you need to know how to fix root rot in my geraniums after heavy rain. This condition occurs when excess moisture causes the roots to rot, resulting in mushy roots and wilting leaves. If ignored, the problem gets worse, weakening the plant and making recovery harder, but fixing it is possible now if you inspect the roots and adjust your watering habits appropriately.
Step 1 – Prune Geranium Roots Affected by Rot
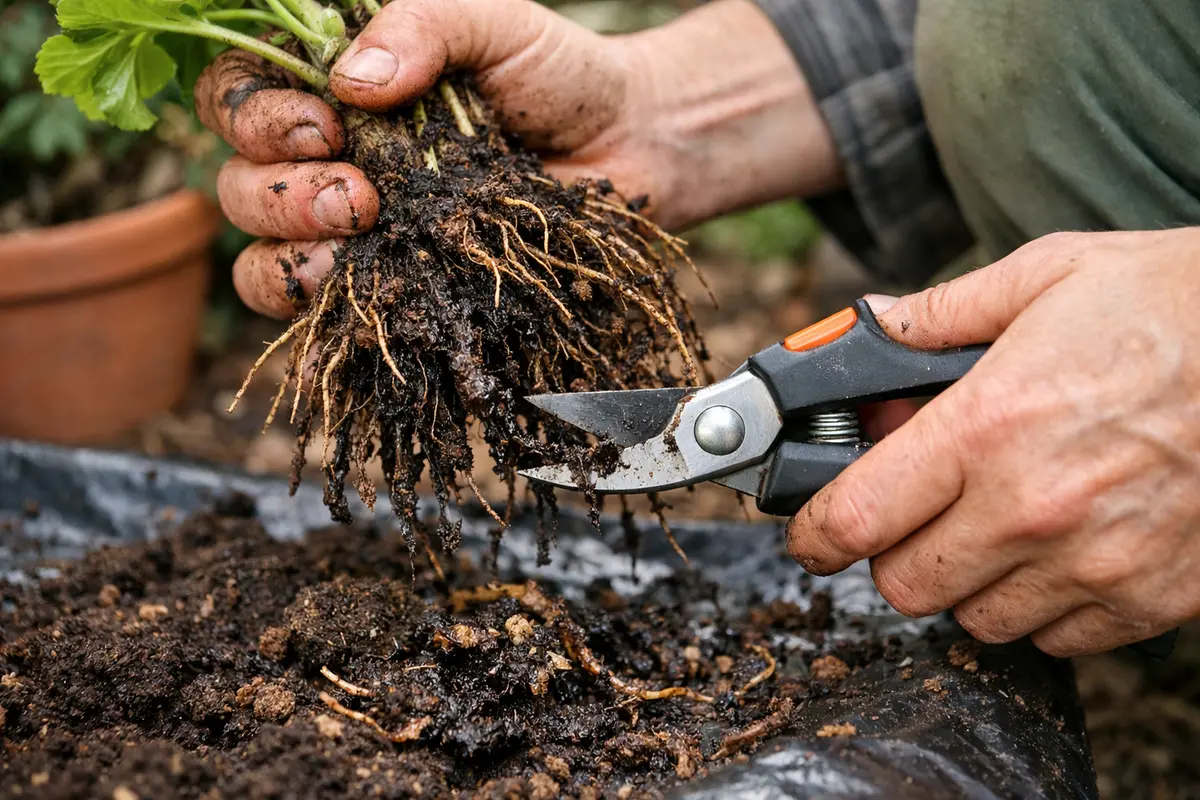
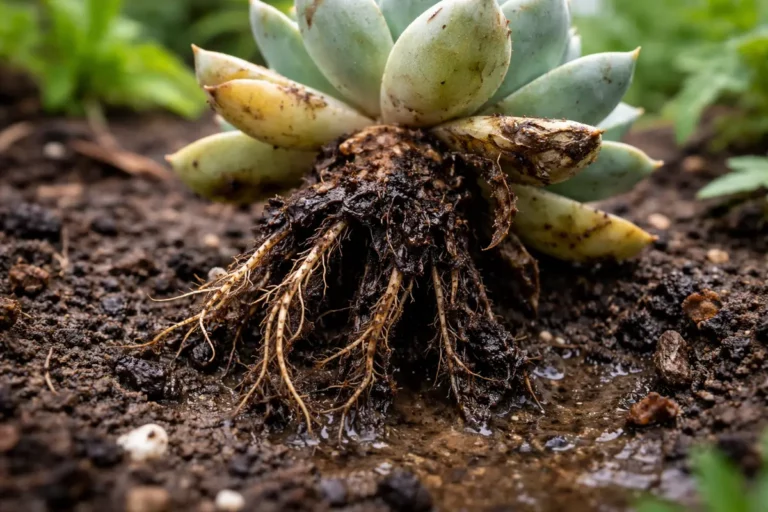
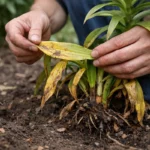
Begin by cutting away any damaged roots from your geranium plants. You will notice immediate relief as you reduce the stress on the remaining healthy roots, allowing them a chance to recover. Carefully examine the root system; if you feel any mushiness when holding the roots, this indicates damage that needs removal. When you prune back the affected roots, aim to cut at least one inch beyond any signs of rot to ensure you remove potentially infected areas. When assessing your pruning, bad roots often have a darker hue compared to healthy, firm roots, which usually exhibit a light tan or white coloration.
Pruning the affected roots is crucial because it helps to limit the further spread of rot. Healthy roots need good airflow and moisture balance to function properly. Removing rotting roots will stop the decay from creeping into previously healthy roots, allowing for better nutrient uptake as the plant stabilizes. You will often see a halt in leaf drop and an increase in vigor within a few days once the damaged roots are removed. As new shoots emerge, a healthy root system should support visible growth, with leaves regaining their firm texture.
Timing is vital here; acting quickly to prune affected roots within 24 hours of noticing symptoms makes a significant difference. One common mistake is to remove only the visibly rotten parts without checking the depth, which can leave smaller infected roots untouched. If you see soft, mushy roots alongside healthy ones, be thorough in your pruning efforts by removing all affected areas. Check the soil as well; excess moisture can lead to recurrence, so having the right conditions set is crucial. If pruning does not seem to improve the plant’s condition within a few days or doesn’t stop further wilting, consider reevaluating the extent of decay and consult for soil or environmental factors affecting growth.
Step 2 – Check for Waterlogged Soil Under Geraniums
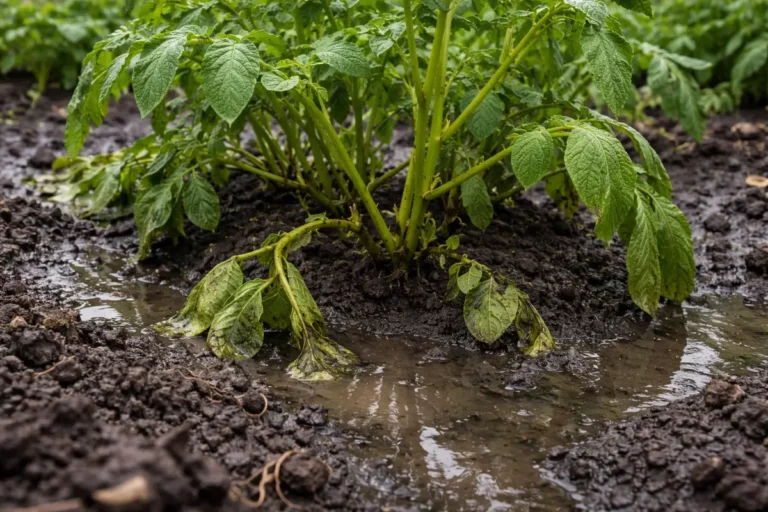
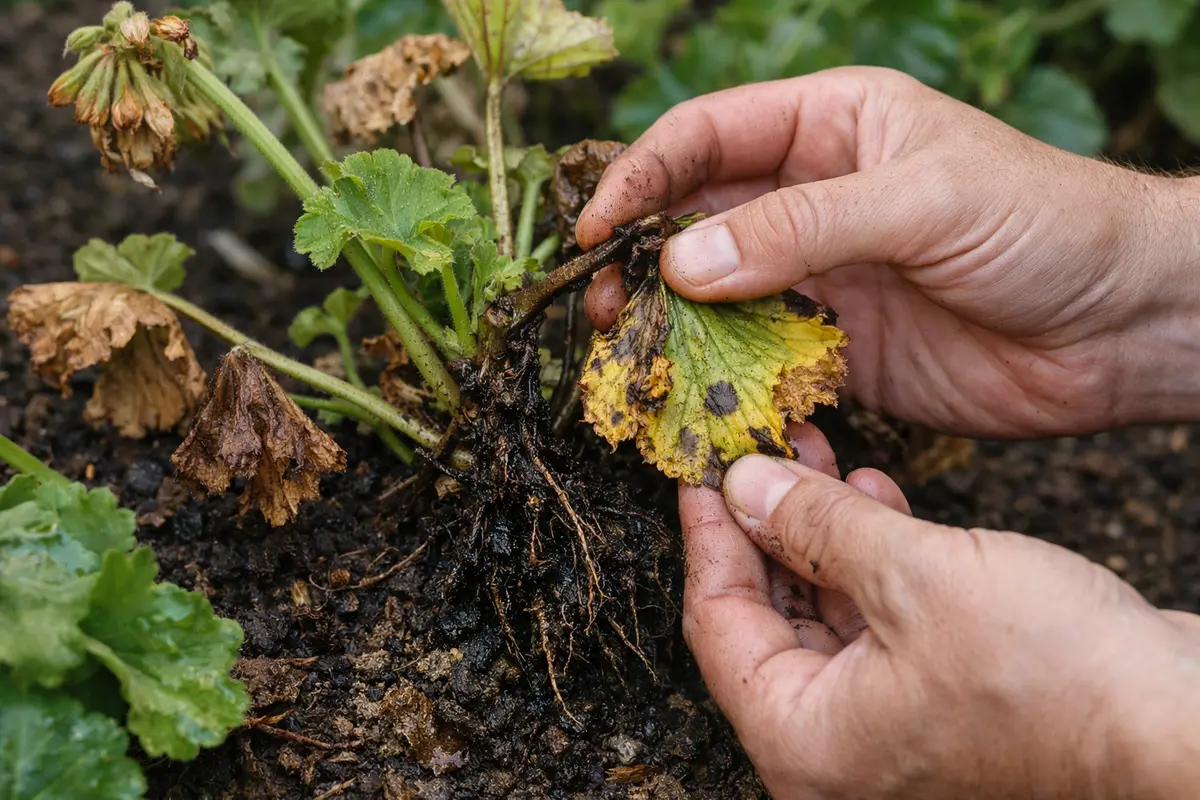
Inspect the soil surrounding your plants for excessive moisture. You should see if the soil is soggy or waterlogged and notice if water pools at the bottom of the pot. Dig slightly into the soil with your fingers; if it clings to them and feels overly moist, your geraniums are likely sitting in water that is suffocating their roots. Using a moisture meter can provide precise readings, showing when the soil is overly saturated.
Waterlogged soil indicates poor drainage, which is often the root cause of root rot. When water does not drain properly, it creates an anaerobic environment where beneficial microorganisms cannot survive. Instead, harmful fungi thrive, leading to rot. Healthy roots require oxygen, and if soil remains saturated for too long, they can’t absorb nutrients, causing the plant to show visible distress. Start by tilting the pot slightly to see if water drains out; this can help determine how badly the soil is affected. If no water seems to exit, or if the water returns quickly after draining, a repotting may be necessary.
If the soil emits a foul, sour smell, it’s a sign that anaerobic bacteria are present, and improving drainage becomes essential. Conversely, if the soil is just damp but well-drained, you may not have a root rot issue. If the soil remains soggy despite drainage, consider upgrading to a potting mixture that includes more perlite or sand, as this can aid in water movement. Additionally, check drainage holes to ensure they aren’t blocked, or repot in a container with proper drainage if needed. Regularly inspecting drainage systems in pots can prevent future build-up, particularly after heavy rains, where excess water may accumulate.
Step 3 – Replant Geraniums in Fresh, Well-Draining Soil
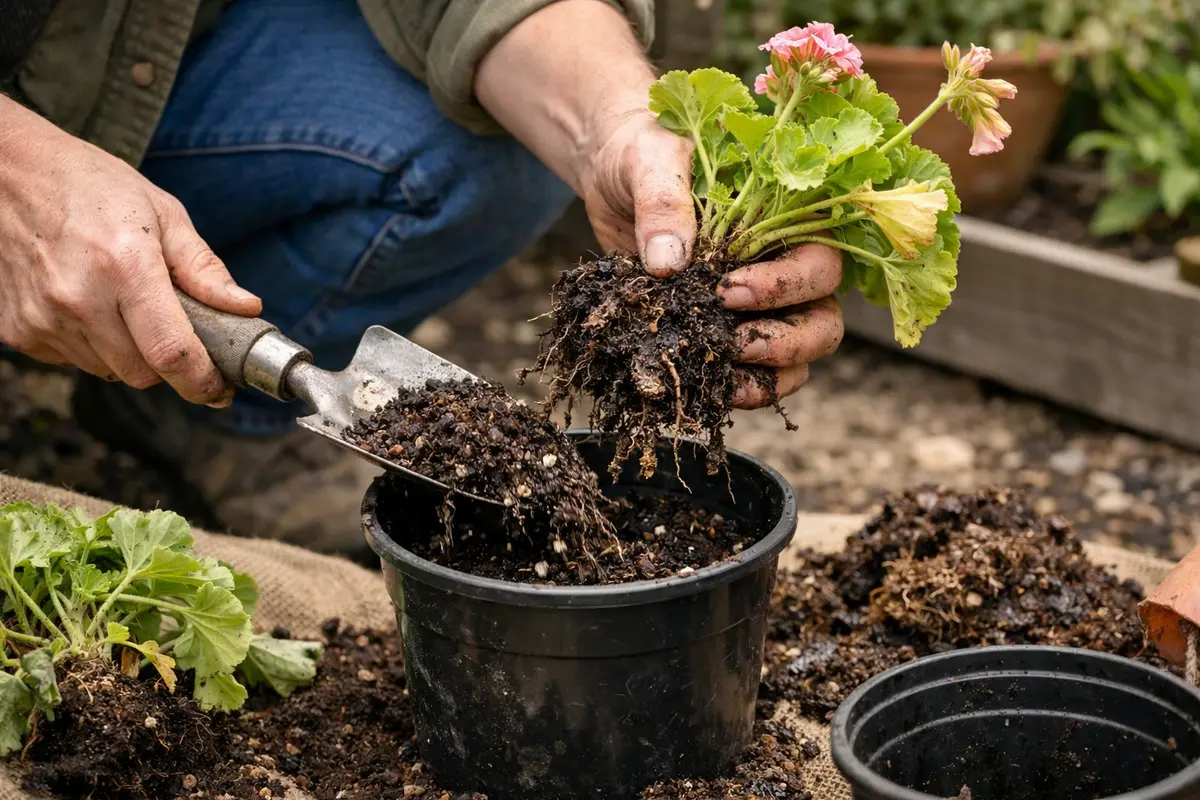
Remove your geraniums from their current pot and replant them in fresh, well-draining soil. You will see improvement in overall stability and a decrease in wilting over the next few days as the roots acclimatize. When replanting, loosen the roots gently without breaking them and place them in a clean container to further minimize infection risks. Include drainage layers at the bottom of the pot to prevent water from sitting around the roots, ensuring you put rocks or gravel arranged strategically to assist with drainage.
Using fresh soil allows the plant to access new nutrients while also ensuring good drainage, which is crucial in preventing future occurrences of root rot. Geraniums thrive in well-aerated soil that allows excess moisture to escape quickly. Ensure to use potting soil mixed with perlite or sand to enhance drainage capabilities. The combination not only improves air circulation around the roots but also helps absorb excess moisture more effectively. If a heavier soil mix is unavoidable, make sure to mix in coarse materials to facilitate drainage and keep the roots ventilated.
A common mistake during this recovery phase is to fertilize immediately after replanting, which can overwhelm still-stressed roots. Wait about two weeks to allow the plant to readjust. If your geraniums don’t show signs of improvement within a week or two—such as perking up leaves or developing new growth—evaluate your watering habits. It may be necessary to check the root health again if multiple signs persist, as this could indicate incomplete removal of infected roots or lingering soil pathogens. If in doubt, reassess the need for changing the growing container or adjusting light conditions to ensure proper stress recovery.
Step 4 – Water Geraniums Sparingly During Rainy Seasons
Start by ensuring your geraniums are planted in well-draining soil and that containers have adequate drainage holes. By improving drainage, you will prevent excess water from accumulating around the roots, significantly reducing the risk of root rot.
Heavy rain often saturates the soil, creating conditions ideal for root rot. When soil remains wet for prolonged periods, oxygen cannot reach the roots, leading to decay. By planting in sandy or loamy soil and using pots with proper drainage, you mitigate these conditions and promote aeration, discouraging root disease.
In the rainy season, consider using mulch sparingly around your plants to regulate moisture levels during brief dry spells. If the rainy season continues, check the drainage once a week and elevate containers if necessary to prevent water accumulation.
Overwatering is a common mistake that damages many geraniums, particularly after prolonged rain. The soil’s moisture level should be allowed to dry out completely between waterings to prevent conditions that facilitate root rot. Being vigilant about this schedule will help protect your plants from stress, ensuring the roots receive adequate air and are not trapped in moisture. Adjust your routine if you notice your geraniums demonstrating signs of stress, such as wilting or drooping. Consider using a moisture retention gauge for precise balancing, especially in periods of inconsistent rainfall.
The environmental conditions can vary; for example, cooler temperatures paired with high humidity may require further reduction in watering. Watch the weather closely and adjust your practices accordingly. Ensure pots have adequate drainage holes to allow excess water to escape easily, particularly in regions prone to heavy rainfall. If necessary, consider elevating pots with blocks or stones to improve drainage and air circulation, minimizing the likelihood of remaining moisture in localized areas. If conditions are consistently humid, reassess the potting mix, as some soils retain moisture longer than others; aim for a mix that allows quick drying to avoid excess saturation.
Step 5 – Inspect Geraniums for New Rot Signs Weekly
Start by regularly monitoring your geraniums following heavy rain. Check for signs of wilting leaves or a soft, mushy texture at the base of the stems, which indicate root rot due to fungal activity. Observe the soil moisture; if it remains excessively wet for more than a few days, recheck the condition of your plants every 48 hours to assess any changes in their health.
A fully recovered geranium exhibits firm, vibrant leaves and a sturdy stem, without signs of yellowing or decay. In contrast, early indications of root rot returning include brown, droopy leaves and a noticeable soft texture at the roots. If your geranium leaves appear wilting yet the stems remain firm, check for overabundance of moisture in the soil.
If root rot symptoms persist despite your best efforts, consider transplanting the geraniums into fresh, dry soil after trimming away any affected roots. Ensure the new potting mix has excellent drainage, and if issues continue, escalating to a fungicide treatment may be necessary to combat persistent fungal pathogens.
Visually, a fully recovered plant will exhibit firm leaves and vibrant colors, contrasting sharply against previous yellowing and droopiness caused by rot. As your geraniums thrive again, you should detect fragrant blooms appearing. Over time, as the plant regains strength, new growth should appear, giving you assurance of its recovery. If your inspection shows an increase in firmness and the absence of odor, you are likely on the right track. Initial growth may be slow, but visible improvements indicate that the conditions are favoring recovery.
If your inspections reveal any signs of return, such as blackened tissue or sour smells, take immediate action to prune affected areas once more. Should the situation persist after implementing the previous steps, consider repotting the plant in a sterilized container to eliminate any lingering pathogens. A thorough assessment of soil health and potential pathogen presence is critical to preventing cycle reoccurrence, tempering future environments for success. Following up with preventative treatments, such as soil sterilization or fungicides, may also help dissuade re-infection if issues arise frequently as seasons change.
FAQ
How long does it take for geraniums to recover from root rot?
Recovery time for geraniums can take anywhere from a few weeks to a couple of months. It largely depends on how quickly the underlying issues of moisture and root infection are resolved, so consistent monitoring and care are essential. Regularly inspecting plant conditions and adjusting care routines will help hasten recovery.
Can root rot spread to other plants?
Yes, root rot can spread to other plants if the same contaminated soil is used or if water from an infected pot splashes onto healthy plants. Keeping your tools and pots clean, along with properly managing your watering practices, can help prevent this issue. Quarantine any affected plants until you are certain the problem is resolved to minimize any cross-contamination.
Should I remove all affected roots immediately?
Yes, promptly removing all visibly affected roots is critical for your plant’s long-term health. Leaving any parts of infected roots can lead to a reinfection, making it essential to ensure thorough pruning before replanting. Make sure to also check and adjust growing conditions to reduce the risk of recurrence. Consider adopting a preventative approach in your gardening, such as incorporating soil amendments that encourage fast drainage and healthy root respiration.