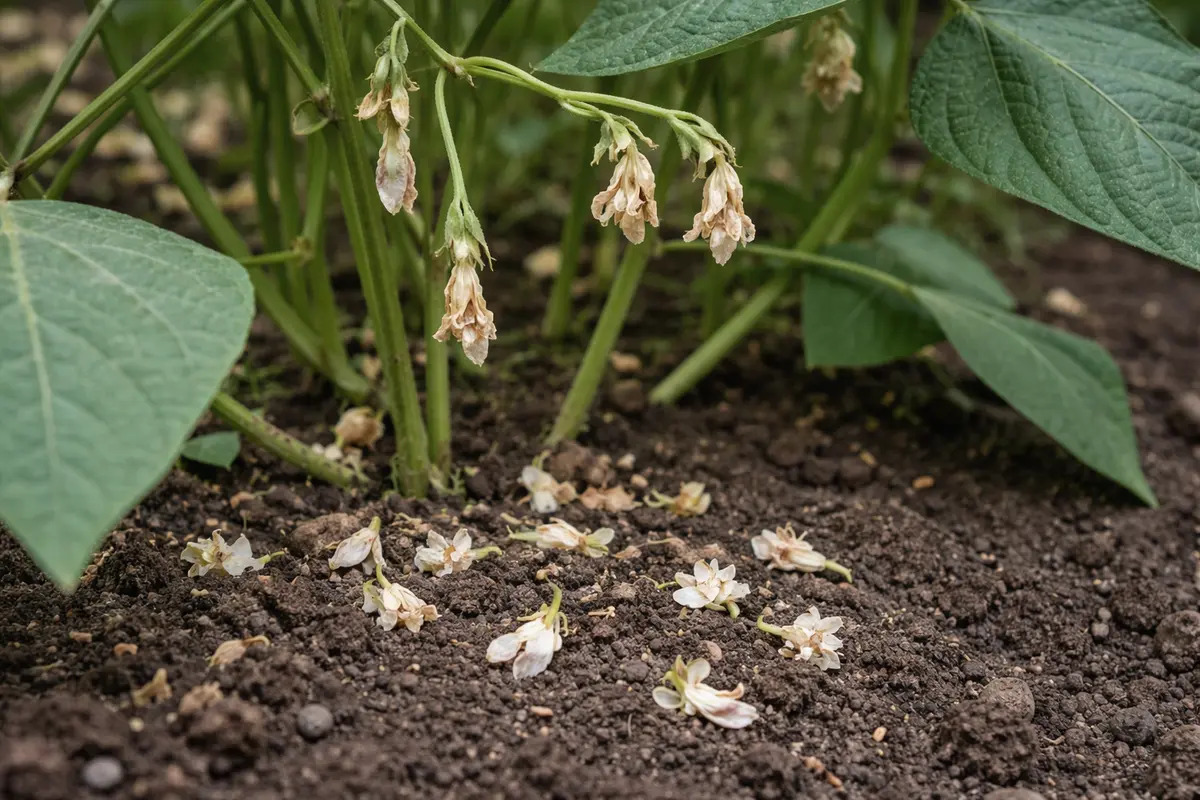
You may notice your bean plants struggling to bloom during the hot summer months, which is why you need to know why are my bean plants not flowering during summer. Symptoms such as wilting leaves and stunted growth can indicate underlying stress factors that hinder flowering. If left unaddressed, these issues can worsen and lead to more damage, but fixing them is possible now by checking for pests, adjusting water levels, and improving soil conditions.
Step 1 – Inspect for Pests on Bean Plants
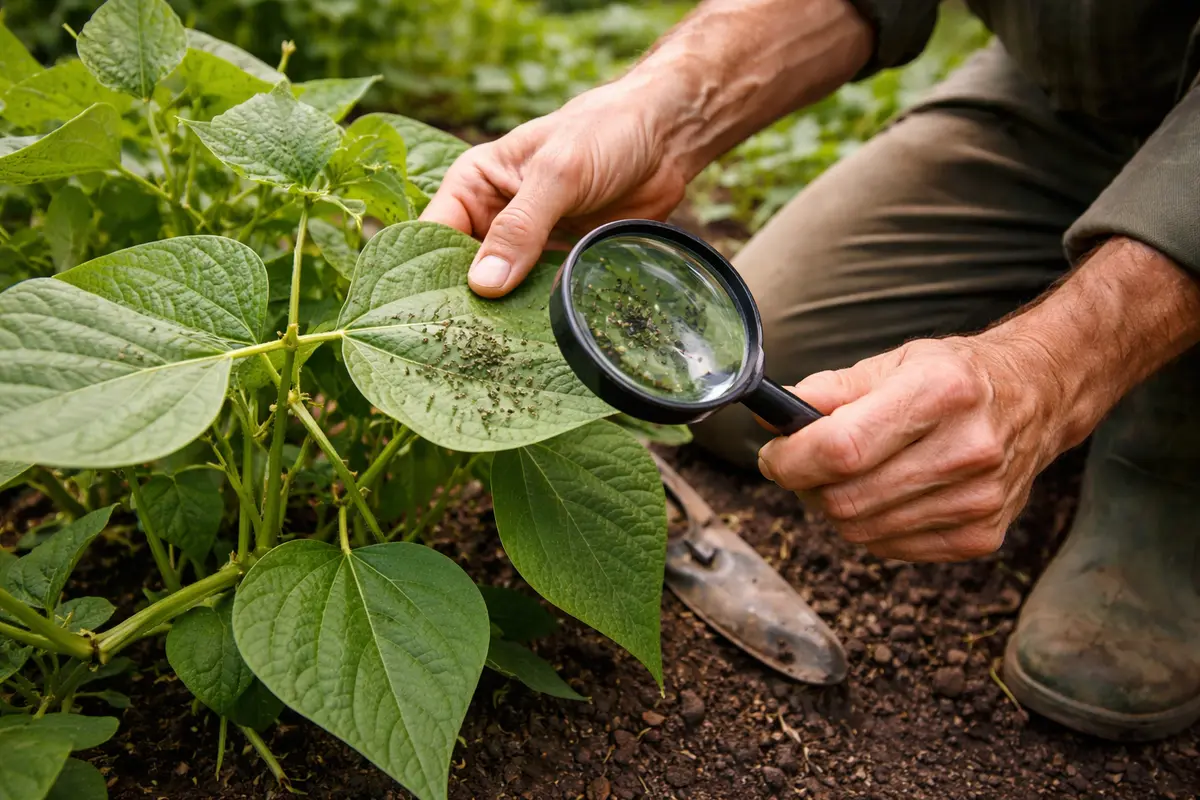
Inspect the leaves and stems of your bean plants for any signs of pest infestation immediately. You should notice the absence of small holes, webbing, or creepy crawlers on your plants after this check. Promptly identifying or eliminating pests helps to maintain plant vitality—if you see any visible signs of pest damage, take action quickly. The sooner you take this step, the better, as many pests reproduce rapidly and can damage your plants extensively within days. If you delay, populations may explode, leading to substantial plant stress that can stunt growth and reduce flowering.
This inspection is essential because certain pests, like aphids and spider mites, can decimate the plant’s ability to absorb nutrients and perform photosynthesis. Aphids suck sap directly from the plant, weakening it and diverting energy away from growth and flowering processes. When pests attack, plants divert energy from flowering to survive the attack. If left unchecked, this can lead to complete leaf loss and significantly interfere with your harvest, rendering even the most well-tended plants ineffective at blooming. In severe cases, pest infestations may result in the total collapse of your plants, as they struggle to divert energy to recovery rather than growth.
Many gardeners overlook this critical step and instead focus on the soil or watering, thinking that’s where the problem lies. However, if a spider mite infestation goes unnoticed, repairs might require more significant intervention, such as pesticide application or even replacing severely infested plants. Importantly, when checking for pests, do not just look for visible insects; inspect the underside of leaves where pests often hide and check for sticky residue, which indicates their presence. If you find pest eggs, immediately treat the entire plant, as these will hatch and exacerbate the issue if ignored. Be vigilant; a high population of spider mites, for instance, can be missed if you don’t inspect diligently, and their tiny size can easily go overlooked.
Step 2 – Determine Nutrient Deficiencies Affecting Flowering
Start by checking the soil moisture content around your bean plants; if it’s too dry, water them deeply. Within a few days, the increased moisture should encourage flowering as the plant becomes better hydrated and energized for reproductive growth. If the soil remains unresponsive after watering, investigate further for underlying nutrient issues.
Beans require consistent soil moisture to activate their flowering process because dry conditions can impede nutrient uptake by the roots. When the soil is parched, the plant prioritizes survival, diverting energy from flowering to maintaining its vegetative parts, causing the absence of blooms. If the soil is moist yet the plants remain non-flowering, it could indicate an issue with nutrient levels or soil composition—soil that is too compacted can prevent roots from accessing the nutrients they need. In contrast, overly sandy soil may drain moisture too quickly, leading to drought-like conditions even after watering.
If the soil feels compacted and lacks aeration, consider loosening it to improve root access to nutrients and air, which can stimulate flowering. Use a hand trowel or garden fork to aerate slightly without damaging roots—an important practice to encourage overall plant health. Conversely, if the soil is inundated or smells sour, check for drainage issues as overwatering can lead to root rot and hinder flowering instead. Signs of root rot may include a mushy feel to the roots or a bad odor emanating from the soil. In this case, correct drainage immediately to prevent further damage.
Nutrients like nitrogen, phosphorus, and potassium are critical for flowering plants. When any of these nutrients are in short supply, you will observe stunted growth, small leaves, and poor flowering. Nutrient deficiencies create an environment where plants cannot develop properly, as they rely on these core nutrients for energy and growth. If you consistently notice poor growth patterns, it may be time to take a soil sample for testing to identify specific nutrient deficits. Your observation of retarded growth patterns and degraded leaf health should be a prompt to act immediately.
Step 3 – Apply Fertilizer to Encourage Flower Growth
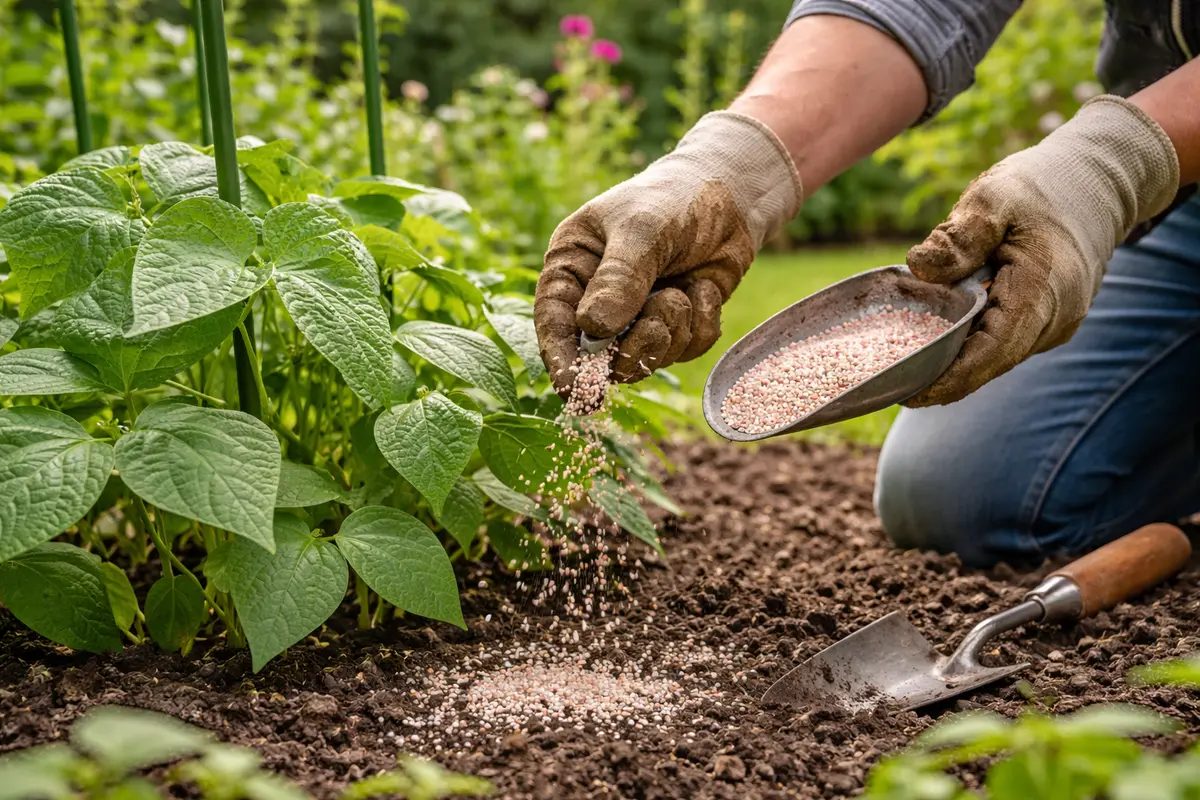
Apply a balanced fertilizer specifically designed for flowering plants to replenish nutrient levels. After application, within a couple of weeks, you should begin to see new, vibrant green shoots emerge and perhaps the initial signs of flower buds forming. This step gives the plants the extra nutrients they need to thrive; without this critical supply, they may remain static or continue to decline. Ensure you follow the manufacturer’s instructions carefully, as over-application can lead to burned roots.
Fertilizers contain essential nutrients that support plant development, including a mix of nitrogen for growth, phosphorus for root and flower development, and potassium for overall plant health. Using a water-soluble fertilizer might lead to a quicker response time compared to granular options, but be careful with the application. Fresh blooms are a clear indication that your plants are recovering from their deficiencies and regaining strength, showing healthier foliage and less leaf drop. In this transformation phase, watch for any sign of wilting or discolored leaves, as these can indicate fertilizer burn, a common issue resulting from misuse. If you notice the new leaves curling or turning brown, you may have applied too strong of a concentration.
A common mistake many gardeners make is over-fertilizing, thinking it will speed up recovery. However, this can lead to root burn and nutrient leaching into the surrounding soil. If you notice the soil looks overly dry or if new growth appears burned, reduce the fertilizer dose immediately and consider flushing the soil with water to alleviate nutrient buildup. Regular checks for signs of over-fertilization should be conducted every few days after application, helping you catch these issues before they escalate. Setting a reminder a week post-application to reassess the plant’s condition can also help track their progress effectively.
Step 4 – Water Beans Consistently During Hot Summer
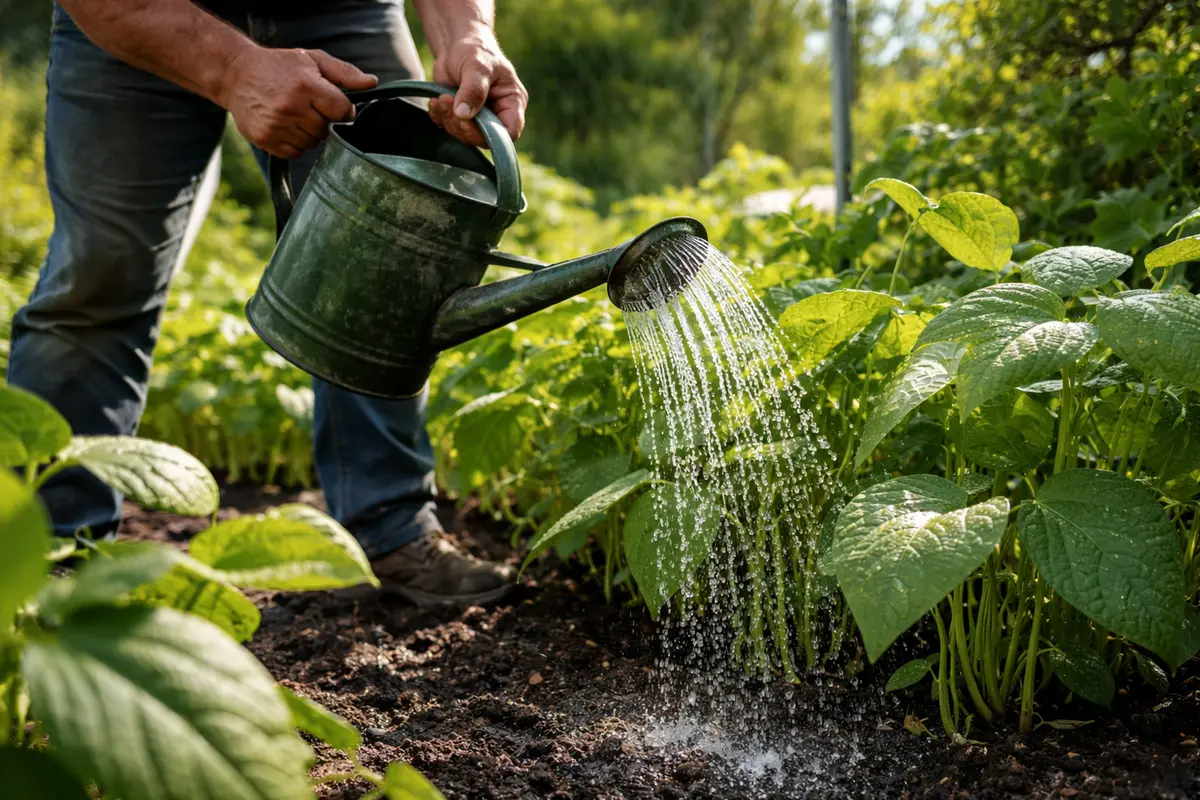
Water your bean plants consistently, aiming for at least 1 inch of moisture each week. As you monitor moisture levels, you should see the soil maintaining an even moisture consistency—use a rain gauge to measure the rainwater accumulation accurately, if possible. Providing sustained watering helps alleviate any stress the plants may face during hot summer days. This consistency is essential not only for hydration but also for facilitating proper nutrient uptake. A lack of water can lead to bud drop, directly impacting flowering potential.
Beans are particularly sensitive to drought conditions, which can lead to blossom drop. When the soil is too dry, the plant cannot take up water, resulting in wilting or dropping blossoms before they can develop properly. You must ensure that the soil remains adequately moist, particularly during significant heat episodes when evaporation rates increase. Regular, deep watering encourages robust root growth, aiding the plant in thriving in warmer temperatures. Use mulch around base plants to maintain soil moisture and reduce evaporation, especially during peak summer heat.
Timing is crucial; on especially hot days, check the soil moisture every few days. One common pitfall is watering too shallowly, leading to surface moisture but leaving the deeper root zone dry. If you’re unsure if this is happening, you can stick your finger about an inch into the soil—if it feels dry, continue to deep water. If you notice that watering isn’t producing the expected results, check if the drainage is adequate: compacted soil may hold water but fail to saturate it below the surface. Additionally, if you come across any hard pans within the soil, those should also be broken up to improve water penetration. If autumn rains start too early, consider reducing watering applications as the seasons change to avoid waterlogging, which can lead to root rot.
Step 5 – Check Bean Vines for Flower Signs Weekly
Start by checking your bean plants for signs of stress such as wilting leaves, curled foliage, or discoloration. Observe the environment; excessive heat or insufficient moisture can hinder flowering. Recheck these conditions frequently, aiming to monitor at least once every few days to catch any rapid changes.
A fully recovered bean plant boasts vibrant green leaves and abundant blossoms, indicating health and vitality. In contrast, if the leaves are starting to wilt again, particularly at the edges, and flowering does not resume, this points to a possible return of stress. If one plant exhibits these signs but others remain healthy, focus on adjustments for the affected plant.
If flowering issues return despite your efforts, consider providing shade during the hottest parts of the day or increasing watering frequency. Escalate by testing soil pH levels or checking for pests that could be affecting plant performance. If the problem persists, consult a local extension service or garden expert for tailored advice.
During these weekly inspections, look for consistent leaf firmness and green color as your main indicators of health. Recovered plants will display strong, plump stems and vibrant leaves, signaling that your interventions are effective. Noticing when the leaves start to curl or turn yellow again is crucial; such symptoms indicate something else is amiss, often tied to nutrient levels or pest issues. Early detection here can save weeks of recovery time. You may want to document changes in a garden journal, noting abnormal conditions or setbacks.
If you notice a return to stress symptoms, such as leaf discoloration or a lack of bloom, consider revisiting previous steps to reassess soil health or pest conditions. Monitoring the watering pattern closely is especially vital; if stress signs arise but watering seems adequate, reevaluate your soil nutrient levels to ensure they are suitable. This proactive approach can prevent recurring issues for healthy summer growth. Each observation session should ideally end with you noting any changes, ensuring you track the effectiveness of your measures over time. If after these repeated checks there’s no sign of flowering at all, you might need to consult with a local extension office for additional support.
FAQ
How long until I see flowers after correcting nutrient deficiencies?
Typically, you can expect to see flowers appear within 2-4 weeks after correcting nutrient deficiencies with appropriate fertilization. The recovery time may vary based on the original health of the plant and environmental conditions affecting growth. Additionally, keeping consistent moisture throughout this period can also accelerate the flowering process; ensuring that your watering aligns with nutrient application can synergistically enhance recovery.
Can pests spread rapidly causing flowering issues?
Yes, pests can proliferate quickly under favorable conditions, leading to severe damage in a short time. If you notice any visible infestations, treating them right away is essential, as they can hinder flowering and overall plant health. Early intervention is paramount; some pests can double their population within a week, turning a manageable situation into a severe threat almost overnight. Checking your plants multiple times a week during peak summer is vital to stay ahead of potential infestations.
Should I remove any damaged parts of my bean plants?
Yes, removing damaged leaves and stems can help the plant conserve energy and focus on new growth and flowering. Trim back any parts that show significant pest damage or disease. Make sure to prune cleanly with sterilized tools to prevent introducing pathogens into healthy tissue. Proper disposal of the cuttings is also crucial to prevent spreading pests or diseases, ensuring that your remaining plants remain robust and less vulnerable. Observe the remaining plant once the trimming is complete; if it shows signs of recovery, you’ve likely made the right decision.