You may notice your once-lush hanging ferns wilting during hot days, which is why you need to know why are my hanging ferns wilting during hot days. This wilting often occurs due to insufficient moisture, causing the leaves to droop and exhibit signs of stress. If ignored, the condition worsens, leading to reduced vigor and potential death of the plant. However, by taking immediate and specific actions such as watering deeply, checking light exposure, and adjusting humidity levels, you can help your ferns recover and thrive.
Step 1 – Water Wilting Ferns Immediately
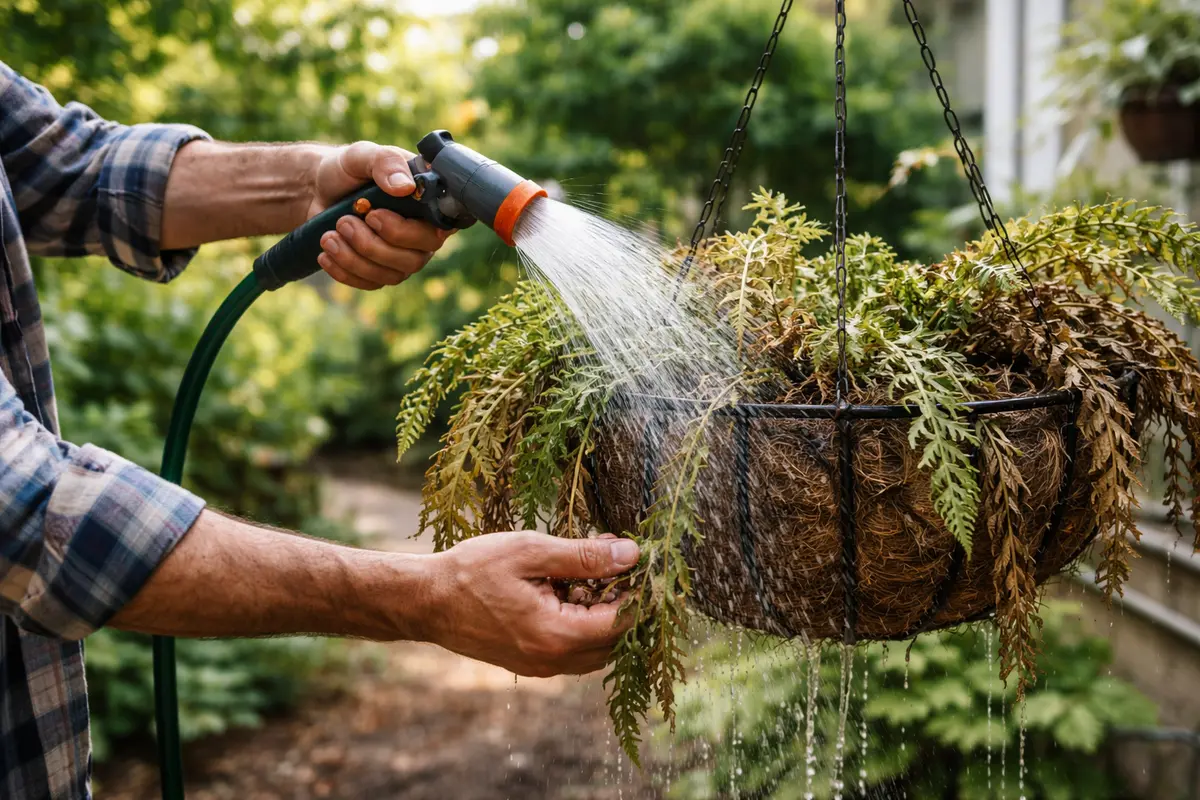
Water the ferns deeply to quickly revive them. Within a couple of hours, you should see the leaves perk up significantly as they absorb the much-needed moisture. Begin by applying enough water so the soil becomes saturated; aim for at least twice the volume of the pot size in water, allowing for thorough saturation without over-soaking. Ensure the excess drains through the pot’s holes. This encourages the ferns to absorb moisture effectively, reversing signs of dehydration. Specifically, if you are using a standard hanging pot with a volume of 1 gallon, pour in at least 2 gallons of water to ensure sufficient wetting.
Hanging ferns are highly sensitive to heat and dry soil, especially during the peak summer months. If the soil is overly dry, it can lead to rapid moisture loss through transpiration, causing the plant to wilt. Acting fast by watering prevents the plant cells from losing turgor pressure, which is crucial for maintaining their structure and firmness. After watering, the soil should be evenly moist for at least several days, allowing the plants to recover fully before subsequent watering is necessary. If, after a few hours, you observe that the top layer of soil remains dry and the leaves droop, it indicates insufficient watering or drainage issues, prompting the need for deeper soaking. The appearance of crisp, yellowing leaf edges signifies a need for immediate hydration.
A common mistake at this stage is to lightly mist the ferns instead of providing a thorough soaking. Misting may refresh the leaves temporarily, but it does not supply the deep hydration that roots require to recover. Ideally, using a soaker hose can minimize surface evaporation while ensuring deep penetration. If, after a few hours, the soil moisture remains inadequate, inspect the pot for drainage issues, such as blocked holes, which could lead to root rot. If you find that the soil is compacted or has formed a crust, gently work it loose with your fingers or a tool before watering to encourage better drainage and absorption. Remember, a thorough soaking should result in water actively draining from the drainage holes; if not, adjustments in watering technique may be necessary.
Step 2 – Check Temperature Stress in Hanging Ferns
First, check the soil moisture level of your hanging ferns. If the soil feels dry, it’s crucial to water the plants thoroughly until excess water drains from the bottom. Watch for signs of recovery within a day or two as the fronds begin to perk up again. If the soil is moist but the ferns are still wilting, this indicates a potential problem with root health or drainage. Be vigilant; considering the average recovery time can vary with environmental factors, take the time to observe and note any changes.
When temperatures rise, the roots may struggle to absorb enough water, leading to wilting effects. This is especially prevalent during hot days when evaporation rates are elevated; both the soil and the plant tissue can dry out quickly if not provided adequate hydration. For example, if daytime temperatures soar beyond 30°C (86°F), especially combined with low humidity, wilting may occur rapidly. If the soil smells sour or has a soggy texture, it may signify overwatering or root rot. In this case, reduce watering frequency and consider repotting the ferns in fresh, well-draining soil to restore proper root function. Conversely, if the soil retains moisture despite limp fronds, inspect the foliage for pests, such as spider mites or aphids, that could cause similar symptoms.
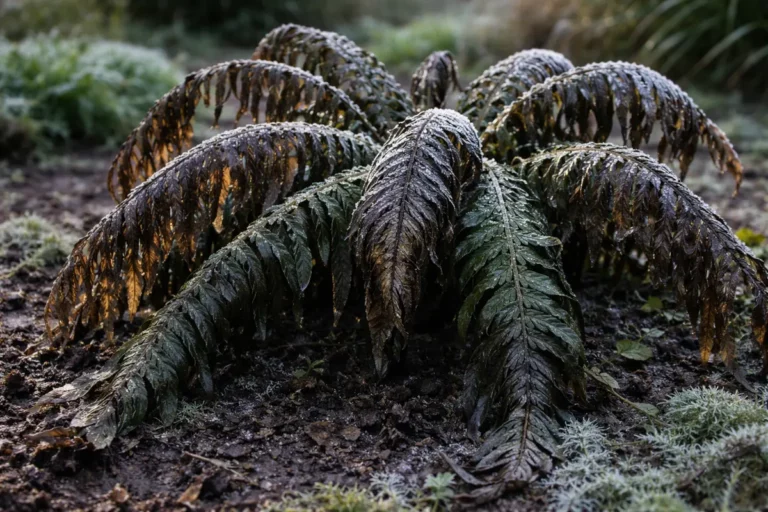
High temperatures cause rapid water evaporation from the soil, leading ferns to dehydrate in a short period. Leaves turning yellow or brown along the edges are signs indicating risk of permanent damage, while stiff and brittle leaves suggest further distress. For example, touching the leaves and finding that they feel more fragile or dry indicates that your ferns are in real trouble. Should leaves crumble under pressure, your ferns are in dire need of recovery methods. Recognizing these symptoms early will drastically improve your ferns’ chances for a full recuperation, especially during peak heat.
If the temperature around your ferns exceeds 30°C (86°F) for prolonged periods, consider relocating them to a partly shaded area. Direct exposure may not be sustainable for certain ferns. Monitor humidity levels closely; if the air is excessively dry, typically below 40% humidity, significant leaf stress will be observed. To combat this, use a humidity gauge to assess moisture within the air; a reading above 50% is generally ideal for most varities of ferns. If humidity drops too low, consider misting your ferns or using a pebble tray to increase moisture in the air around them. Adding water to a tray of pebbles can help create localized humidity as it evaporates. Optimizing this microenvironment for ferns will be crucial in times of heat stress.
Step 3 – Feed Ferns to Aid Recovery from Heat
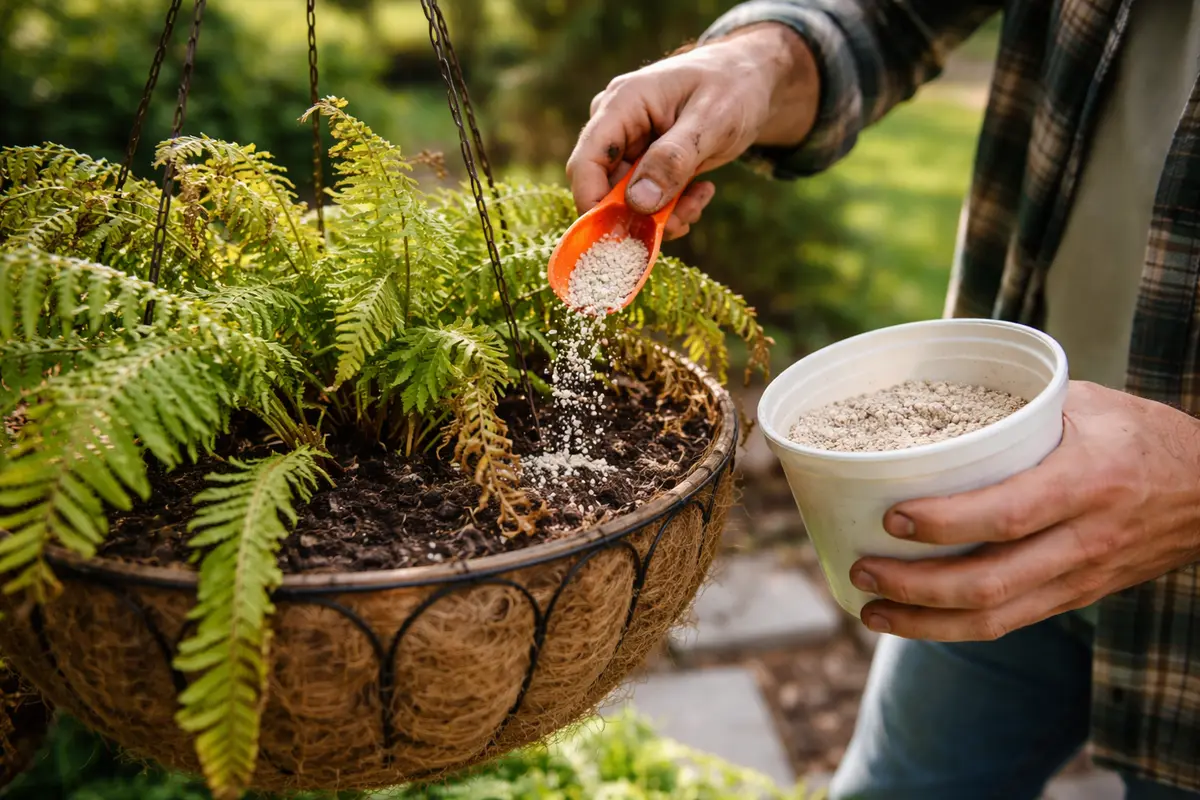
Apply a diluted liquid fertilizer to your ferns to encourage recovery after heat stress. You should notice new growth within a week, indicating that the plants are bouncing back. The ideal ratio for a liquid fertilizer is usually one part nutrient to four parts water; this dilution prevents overwhelming the roots with excess nutrients while promoting efficient uptake. For instance, if recommending 1 tablespoon of fertilizer, mix it into 4 tablespoons of water to ensure it’s gentle on the delicate root systems.
Providing nutrients through fertilizer helps replenish essential elements that the plants need during recovery. Healthy ferns will present fresh, vibrant green leaves, signaling that the roots are revitalizing and absorbing the necessary nutrients. Regular fertilizing, especially during the growth season when light levels are high, supports the plant’s strength and resilience against environmental pressures, allowing them to flourish under changing conditions. By scheduling fertilization every two to four weeks during the growing season, you can establish a routine that fosters continuous health and growth.
A common mistake during this recovery phase is over-fertilizing, which can further stress the ferns. If after fertilization, you observe new foliage turning brown or dying back, it may indicate that the plants are receiving too many nutrients or that the soil does not drain well. To mitigate this, watch for any signs of tip burn or browning in younger leaves; these are indicators of nutrient toxicity. If you notice signs of over-fertilization, such as a white salt crust forming on the soil surface or leaf scorch, immediately flush the soil with plain water to leach excess nutrients from the root zone. Effective flushing can involve pouring water through the pot until it flows freely from the bottom. Regular monitoring of the plants’ response to fertilizer applications will help fine-tune feeding practices over time, ensuring the ferns’ needs are consistently met without excess.
Step 4 – Inspect Fern Leaves for Signs of Stress
Start by checking the moisture level in the soil of your hanging ferns every morning during hot days. Observe the leaves for signs of wilting or browning—both indicate a need for water. Recheck this moisture daily, adjusting your watering schedule as necessary if the temperature remains high.
A fully recovered hanging fern displays vibrant, lush green fronds that feel firm to the touch and stand upright. In contrast, early signs of the problem returning include leaf edges turning brown and a drooping appearance, where fronds feel limp and soft instead of resilient. If not firm and green, check for dry soil or poor drainage.
If the wilting persists despite adequate watering, consider relocating your ferns to a shaded area during the hottest part of the day. If this doesn’t improve the situation, escalate by inspecting for root rot or pests that may damage the plants, requiring potential repotting or treatment.
A fully recovered fern will display firm, upright leaves with a rich color, indicating regained vitality. However, if any signs of wilting return, such as limp fronds or faded colors, reassess watering frequency or environmental conditions. Recognizing specific trends, such as observing a particular time of day when the ferns look more vigorous, can provide insights into their care needs. Noticing these fluctuations allows for timely intervention, ensuring the plants receive adequate care.
If symptoms do not improve within a week, inspect the roots for signs of rot or disease. Healthy roots should appear firm and white; brown or mushy roots indicate rot often caused by excessive moisture or poor drainage. This contrast is critical; if after thorough watering the roots still feel soft or squishy, immediate action needs to be taken. If you find root rot, immediately adjust your watering practices or switch to a more appropriate soil mix that offers better drainage. This situation often occurs when ferns are left sitting in saucers full of standing water, suffocating the roots and leading to further distress. Proper potting involves using a potting mix formulated for ferns that offers aeration. If significant root rot is detected, you may need to prune damaged roots and repot the ferns in fresh, well-draining soil to encourage recovery. If the root damage is extensive, propagating healthy cuttings from the surviving foliage may be the best path forward.
FAQ
How long do I need to water to see improvements in my ferns?
You should see noticeable improvements within a few hours of deeply watering your hanging ferns. Under favorable conditions, such as moderate humidity, renewed leaf turgidity and firmness can occur shortly after watering. New growth can manifest within about a week; however, it might take longer under extreme heat stress or if the soil has been neglected. Always monitor the soil moisture afterward to maintain the most optimal conditions for recovery.
Can wilting spread to nearby plants?
If your hanging ferns are wilting solely due to heat stress, the risk of spreading any issues is generally low. Wilting in this case is primarily a response to environmental conditions and not typically indicative of disease. However, consistently high temperatures combined with improper watering routines can negatively affect nearby plants, making vigilance essential. Conduct regular assessments of all plants’ watering schedules during heat spells to avoid widespread stress across your garden. This proactive approach will help catch potential issues before they escalate.
Should I remove the affected leaves from my hanging ferns?
Yes, removing damaged or excessively wilted leaves can aid in encouraging healthier growth and improving airflow around the plant. However, be cautious and ensure remaining leaves are healthy to avoid causing further stress to the plant. Trimming back dead or dying fronds helps conserve the plant’s energy, allowing it to focus on new growth and recovery. Implementing this practice routinely, especially after major environmental stress, compels the fern to efficiently use its resources. Regular maintenance that includes the removal of any dead leaves encourages an environment favorable for new fronds to develop, resulting in an overall healthier appearance for your ferns.