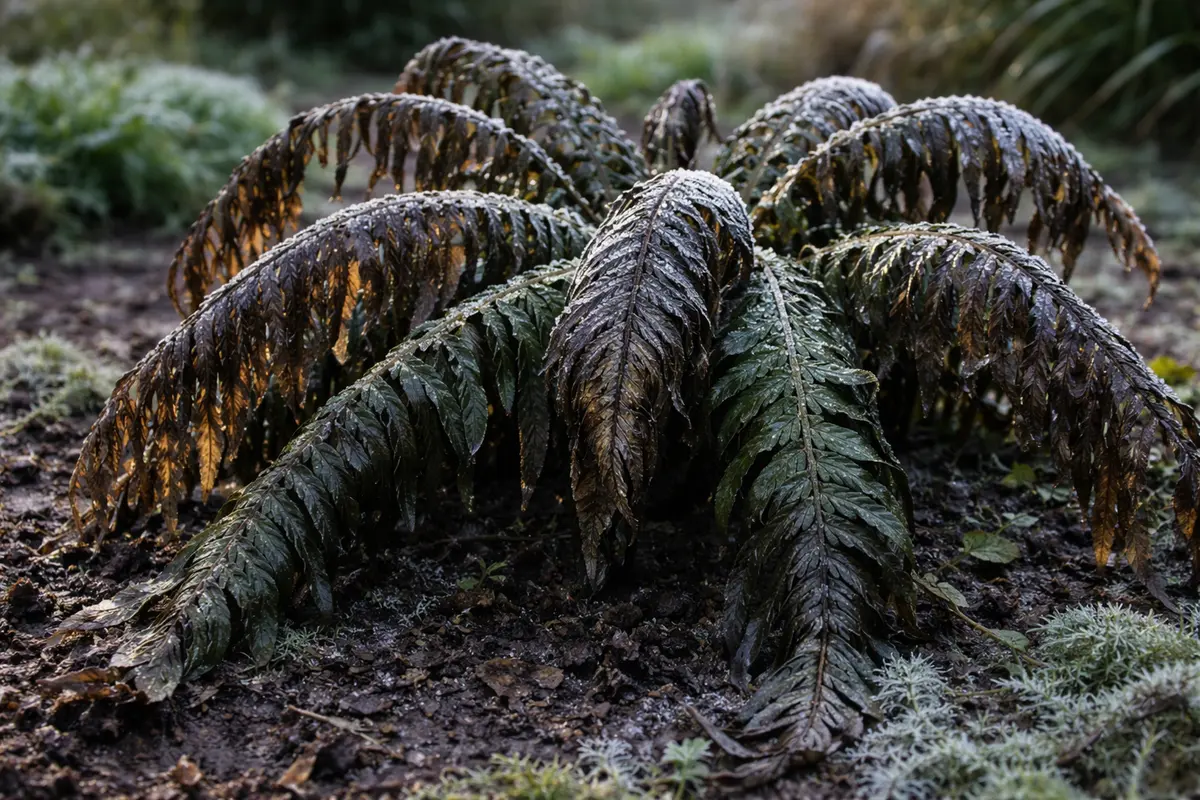
You may notice your ferns looking particularly sad and drooping after a recent cold snap, which is why you need to know how to fix drooping ferns after a cold snap. This wilting often occurs when the fronds are unable to recover from the sudden drop in temperature, leading to damage in their delicate tissues. If left unaddressed, the condition gets worse, weakening the plant and affecting its overall health; however, fixing this issue is possible now—just check for damaged fronds and adjust their watering needs. Stay vigilant and monitor your ferns to help them bounce back to their lush glory.
Step 1 – Trim Back Drooping Fern Fronds Immediately
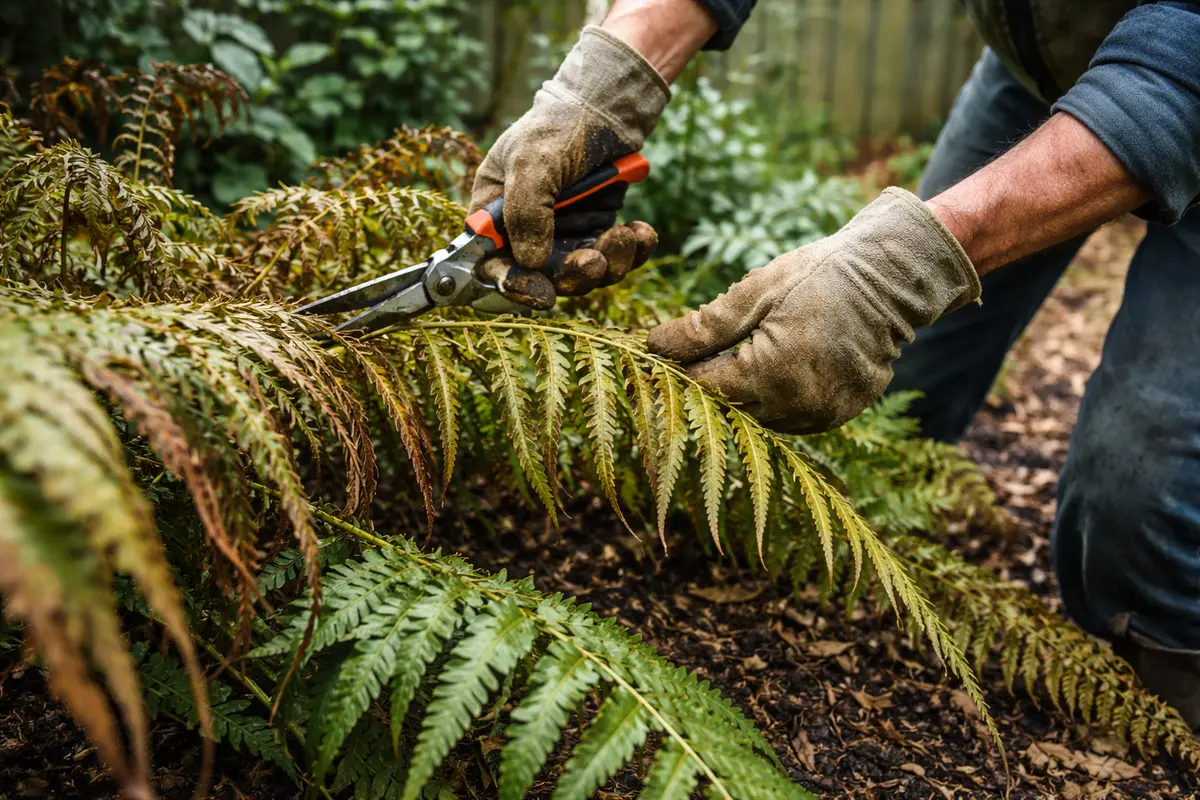
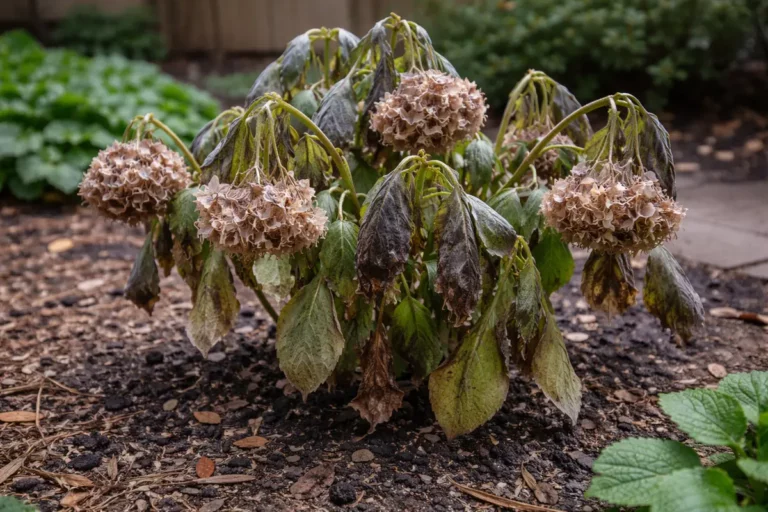
Start by carefully inspecting your ferns for any signs of frost damage. Look for brown or blackened fronds that indicate the cold has affected their tissues. Immediately trim away any visibly damaged parts to prevent the spread of decay and help the plant redirect energy towards healthier fronds, which should begin to perk up within a few days.
Acting quickly is crucial because ferns have delicate cellular structures that can suffer permanent damage if not addressed promptly. When a fern droops, it often indicates that cells in the fronds are losing turgor pressure due to cold stress. If the damage is severe and left untreated, it could lead to complete dieback, leaving you with a plant that may struggle to recover in the future. If you notice discoloration spreading, you should intensively check for root rot or other hidden damage. Keeping soil too wet for too long often shows up first as drooping ferns after overwatering when roots.
For instance, a gardener who waited too long to remove damaged fronds found that their ferns suffered major setbacks, eventually leading to patches of dead tissue across the plant. Conversely, another gardener promptly trimmed their ferns, and within a week, they were thriving again. A common error is to mistake wilting for a need for water instead of checking for frost damage first; if the fronds are mushy and black, you should focus on trimming and inspecting rather than watering.
Acting fast is essential because damaged fronds can be gateways for disease and rot. When fronds droop or turn yellow, it often indicates the plant is struggling, and delaying action may lead to irreversible harm. For instance, neglecting this issue allows bacterial or fungal infections to take hold, exacerbating the damage beyond the visible fronds. By pruning these parts, you allow the plant to redirect energy into new growth, enhancing its overall health. This can typically be observed within a few days as the healthy fronds begin to appear more upright and vibrant. Conversely, if healthy fronds are left on a weak plant, they may become increasingly stressed and eventually succumb to rot, especially if the fronds appear overly wet or leathery.
A common mistake is to delay trimming, believing that the fronds may recover on their own. This often results in prolonged stress on the plant and leads to more extensive damage as the fronds deteriorate further. For instance, if fronds are left until they turn completely brown, the fern may require twice as much energy to recover, resulting in weak re-growth. Additionally, leaving dead fronds intact can create a breeding ground for pests and diseases that could spread to the healthy portions of the plant. Always prioritize cutting back any visibly damaged fronds to promote quicker recovery. If you notice black tips or lesions starting to form, addressing this issue rapidly can make a significant difference in the plant’s overall health.
Step 2 – Assess Cold Damage to Ferns Carefully
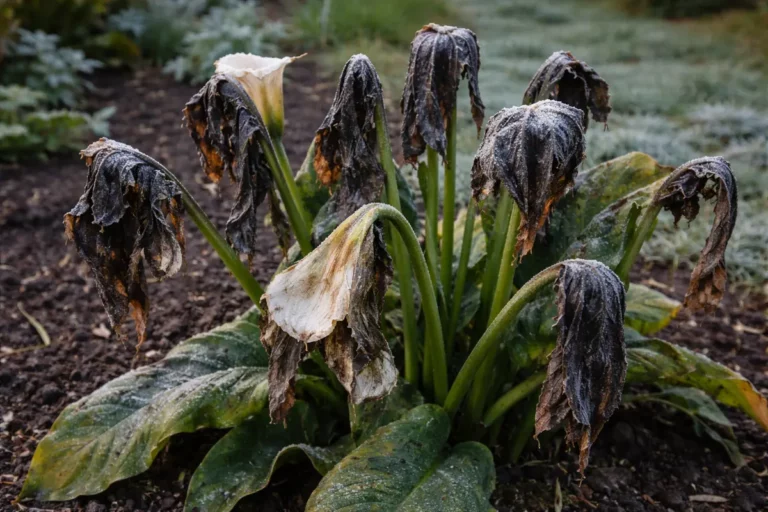
Inspect the ferns for signs of cold damage; look for discoloration, soft spots, and even changes in the texture of leaves. Observing these symptoms will help determine the extent of the damage and whether the plant can still recover. Pay close attention to fronds that feel mushy or exhibit a change in color; this can indicate internal damage that could threaten the entire plant. Conducting this assessment will give you a clear understanding of what needs urgent attention in your recovery efforts.
Cold snaps can cause the plant’s cell structure to collapse, leading to mushy or translucent leaf areas. This happens when the water inside the cells freezes and expands, rupturing the membranes, making the cells less able to transport nutrients and water. To address the root cause, carefully assess the fronds and interior parts for signs of decay or rot. If the fronds appear brown or black and feel limp, this indicates severe damage requiring prompt intervention. Conversely, a few green fronds that are limp may still pull through with appropriate care; those can continue photosynthesis until further damage occurs.
If you notice a sour smell from the soil, it indicates rot, and it’s essential to repot the fern in fresh, dry soil to prevent further decline. On the other hand, if the fronds merely appear limp but retain a vibrant green color, they may still recover with proper care. To maximize recovery potential, consider isolating the plant in a well-ventilated area to reduce humidity and further risk of mold. Remember, monitoring for any signs of mold or fungal growth on both the plants and the soil can help in taking timely corrective measures. If left unchecked, issues like root rot can spread and deteriorate the plant further, making recovery increasingly difficult; an early intervention here is critical for a successful revival. A well-timed assessment after cold damage can enhance recovery strategies significantly.
Step 3 – Water Ferns Generously to Aid Recovery
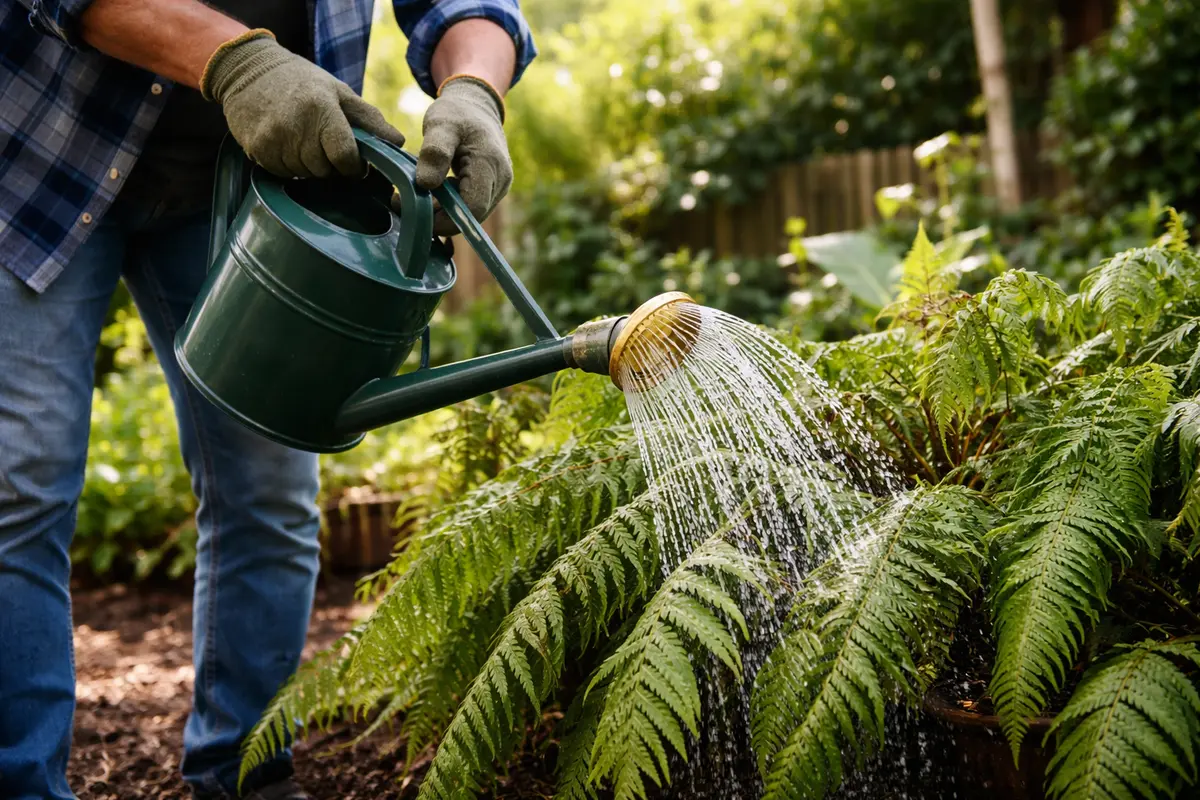
Water the ferns generously to ensure deep soil saturation. Within a few hours, you should notice the leaves beginning to perk up as the plant absorbs moisture. Check to ensure that water reaches the root zone, as ferns need consistent moisture to recover effectively. This is particularly important because the cold snap can leave the soil compacted, limiting its ability to retain water. To check soil moisture, stick your finger about an inch into the soil; if it feels dry, it’s time to water. If you notice the top layer remaining dry for an extended period, it may be an indication that the roots are not absorbing moisture adequately.
Proper hydration revitalizes ferns post-cold snap by reintroducing lost moisture levels within the cells. Ferns thrive in evenly moist soil; thus, ensuring adequate water helps promote recovery. If the soil feels dry an inch below the surface, this indicates that the roots require immediate help to regain their moisture levels. Conversely, if water pools on the surface rather than percolating down, this may signal compacted soil that requires amendment. For consistent care, you may consider using a moisture meter to guide your watering frequency effectively, ensuring that you prevent both over- and under-watering.
However, it’s crucial to monitor moisture levels closely. Over-watering can lead to root rot, especially if the plant was severely weakened. A simple way to avoid this is to adjust your watering regimen based on climate conditions; hot, dry weather may require every 2 days, while cooler temperatures might extend that to every 5–7 days. Schedule regular, light watering every 3–4 days, checking that the soil does not become overly soggy or dry to sustain their recovery momentum while preventing recurrence of any issues. One way to confirm adequate hydration is to ensure that the top layer of soil feels just slightly damp to the touch. If the fronds regain a bright green hue after a week but still droop slightly, this may indicate the need for a more consistent watering regimen, such as moving to a daily light misting, to restore their resilience significantly.
Step 4 – Check for New Growth on Ferns Weekly
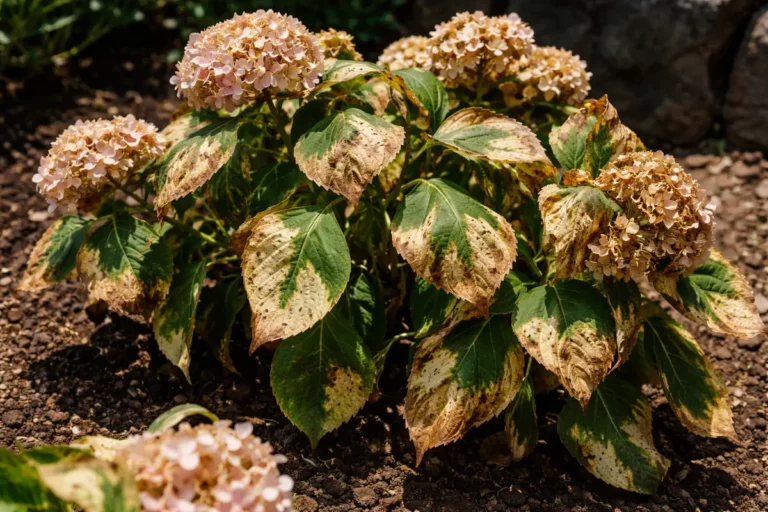
Check the ferns for signs of new growth every week. You should observe fresh, green leaves beginning to unfurl if recovery is progressing well. Regular monitoring allows you to quickly gauge the effectiveness of your recovery efforts, adjusting care as needed. Healthy ferns will exhibit bright, firm fronds unfurling gradually, which is a positive indication that the plant is regaining strength. If the new fronds are small and thin or display yellowing, this could indicate ongoing stress from prior damage, and more adjustments or interventions may be necessary.
Monitoring weekly allows gardeners to assess whether the ferns are rebounding from the cold damage effectively. If fresh fronds are developed and show a lustrous green hue, this is a solid indicator that recovery is underway. Conversely, if this improvement is not visible after a week or two, it may suggest underlying issues that still need addressing. Look out for additional symptoms such as stunted growth or browning edges, which could indicate pest infestations, insufficient light, or nutrient imbalances. If the fronds continue to present with issues such as slow growth or signs of further drooping, it could indicate that the plant is either still adjusting to its environment or succumbing to secondary symptoms of stress.
If you notice a return of droopiness or browning on new leaves, consider adjusting your watering schedule or assessing light exposure for better conditions. Remember to look for signs of grazing surfaces or sticky residues on leaves, which may indicate pest problems requiring treatment. In persistent cases, where recovery seems to stall beyond acceptable limits despite following these steps, consulting with a gardening professional may be beneficial. Over time, it’s vital to remain vigilant about environmental changes, such as increased direct sunlight, which can stress recovering ferns further. Sudden changes in their care, like shifting from shade to full sun exposure, can also worsen their condition dramatically. Making quick adjustments can be key to successfully navigating their recovery after a cold snap, allowing the plant to thrive rather than just survive.
FAQ
How long will it take for ferns to recover after a cold snap?
The recovery process for ferns can take anywhere from a few weeks to a couple of months, depending on the extent of the cold damage and adjustments made in care. Regular care—including appropriate watering and timely trimming—will speed up this recovery process. You may notice a significant difference in vigor within the first two weeks if the plant is well-cared for and the conditions are favorable. The timeline largely varies according to the plant’s initial health and the conditions it’s provided during recovery, meaning some ferns may rebound swiftly while others lag behind due to systemic issues such as pest infestations or poor soil conditions.
Can cold damage spread to other nearby plants?
Yes, if the affected ferns develop mold or rot as a result of cold damage, it can spread to other nearby plants. Regularly checking the affected plants and maintaining good hygiene can help mitigate this risk. This includes ensuring that your watering practices do not saturate the surrounding soil excessively, as this can contribute to overall moisture levels that favor disease spread. Moist conditions underwater or unsanitized tools can transfer pathogens, so it’s vital to utilize clean equipment and monitor the moisture levels around all your plants closely. Ensuring that tools and pots are sanitized during handling can further prevent the cross-contamination of disease between plants and should become a standard practice when moving from one plant to another.
Should I remove all affected parts of the fern?
Only remove fronds that are severely damaged or show signs of rot. Healthy and slightly droopy fronds may still recover, so assess the plant condition carefully before deciding to remove all affected parts. If fronds appear brown and mushy but display green color, it’s wise to hold onto them, as they can still assist with the photosynthesis process. These fronds contribute to energy recovery, so balance your approach by minimizing the removal of potentially valuable foliage. A careful balance in trimming can promote recovery rather than hinder it, ensuring you do not rob the plant of its photosynthetic assets too quickly.