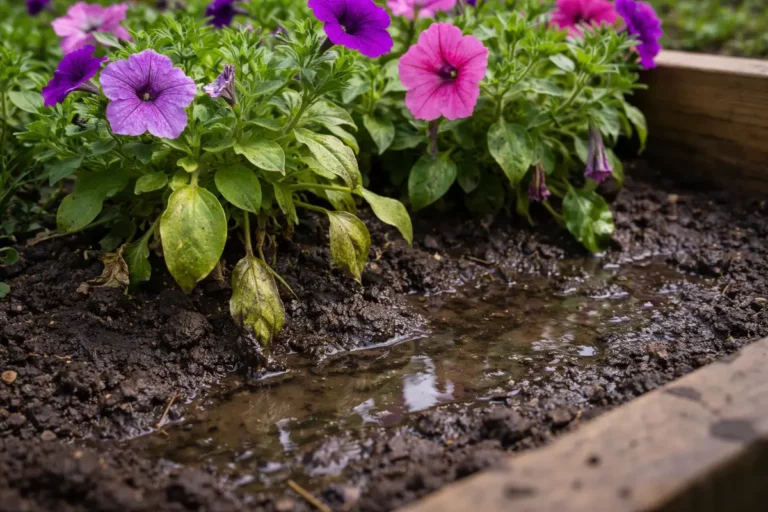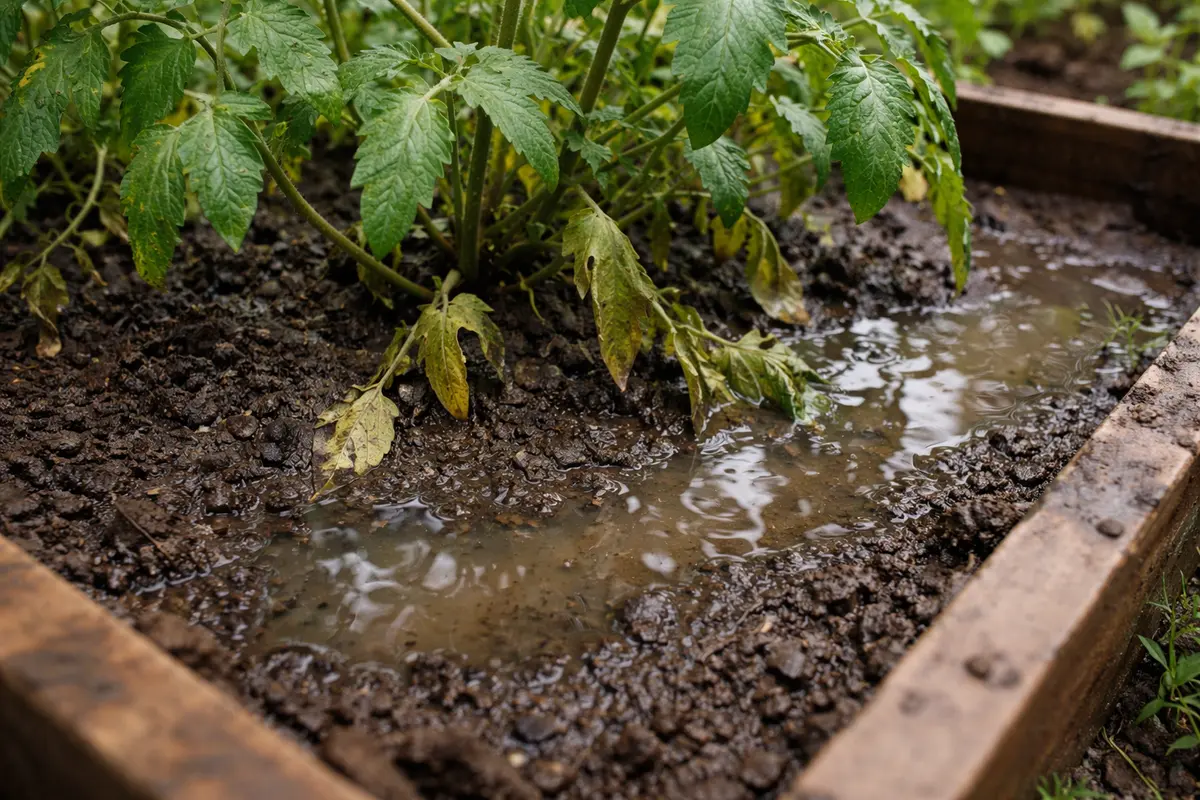
You may notice your plants wilting or developing mushy roots after heavy rains, which is why you need to know how to fix poor drainage in raised beds during heavy rains. Excess water can lead to root rot and yellowing leaves, compromising the health of your plants. If ignored, the problem gets worse and can lead to more damage, but you can improve the situation now by adjusting the soil composition and increasing drainage options.
Step 1 – Dig Trenches to Redirect Water Flow
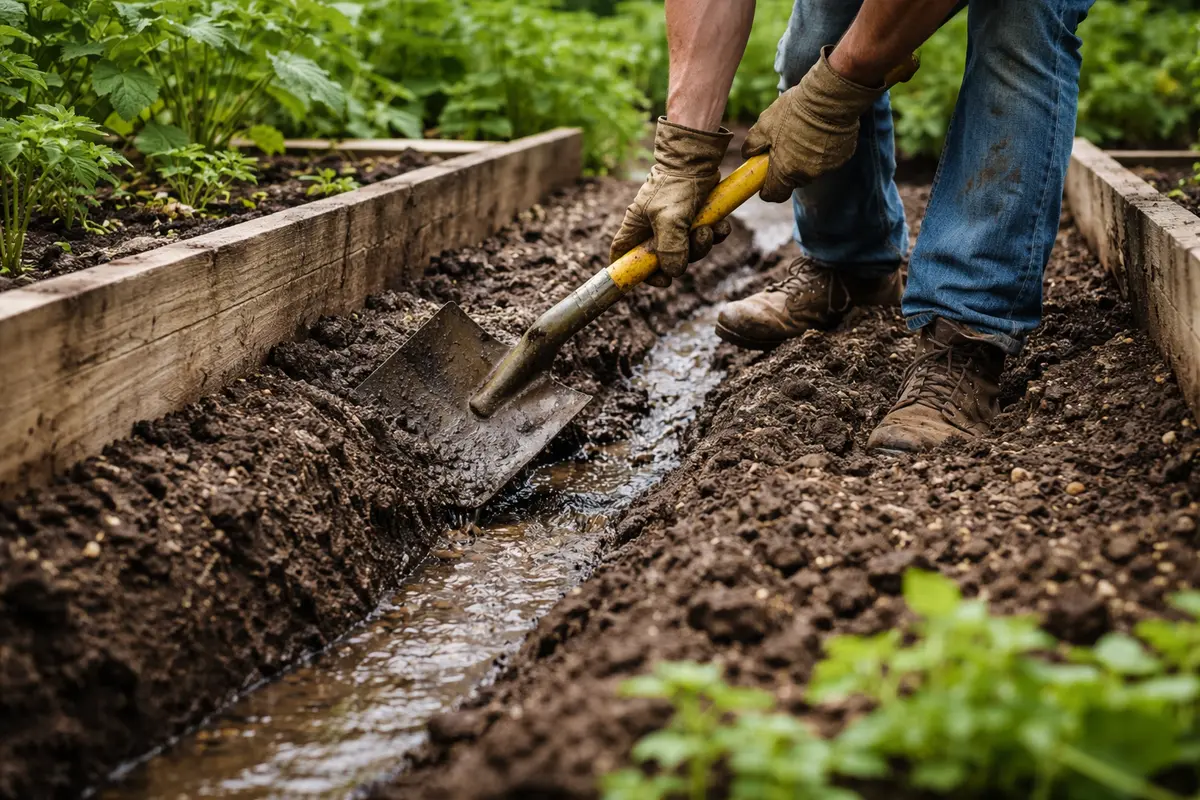
Start by digging trenches around your raised beds to redirect excess water flow. You will notice a reduction in standing water around the plants as the trenches improve drainage. This action immediately creates pathways for water to escape, preventing further saturation of the soil. Aim for a trench approximately 6 inches deep and 12 inches wide to allow sufficient space for water to flow away from the roots.
Digging trenches modifies the drainage pattern, preventing water accumulation that can overwhelm the roots. If left unaddressed, excess moisture may lead to anaerobic conditions in the soil, which suffocates roots and encourages pathogens like root rot to thrive. Taking swift action is critical; procrastinating on drainage solutions can worsen root stress and negatively impact overall plant health. Ensure the trenches are sloped away from the bed at a gentle 1% grade to effectively guide water away.
Many gardeners neglect this crucial step, often adhering to the habit of allowing raised beds to retain water. For example, if heavy rain occurs and water isn’t redirected promptly, plants may exhibit yellowing and wilting. Inadequate drainage can also necessitate complete replanting if waterlogging continues. If the trenches do not seem to alleviate the issue after heavy rainfall, check if adding gravel to the trenches improves water flow.
Step 2 – Assess Raised Bed Drainage Issues
Start by checking the compactness of the soil in your raised beds. You’ll see improvement in water drainage, reducing puddling and allowing roots to access oxygen and nutrients more effectively.
This issue arises because compacted soil creates dense layers that block water movement, leading to stagnant conditions. In contrast, well-aerated soil promotes drainage and supports healthier root systems. If the soil remains soggy after your initial assessment, check the depth of your raised bed and look for any impermeable materials obstructing proper drainage.
If the soil appears waterlogged despite aeration, incorporate organic matter like compost to improve structure and interstitial space for better drainage. If the area continues to show dryness, consider the possibility that too much sun exposure is causing excessive evaporation, and applying a mulch layer might be beneficial.
Compaction is the leading cause of poor drainage in your raised beds. It traps water, leading to root suffocation and causing stress or decay in plants. Compare this to a well-aerated situation where water flows freely, allowing roots to thrive. If anaerobic conditions are suspected, indicated by a foul odor, amending the soil with compost is crucial for enhancing structure and drainage.
When analyzing soil texture and smell, a sour or mucky odor suggests water retention issues. To combat this, continue enriching the soil with organic matter such as compost, and if the texture is sticky or heavy, consider adding sand or grit to aid in infiltration.
Observe the moisture levels within the soil; if it feels excessively compacted, water cannot permeate effectively, which can stifle root growth. In scenarios where the soil is loose but still exhibits pooling, it may indicate a high clay content which severely hampers drainage. If roots are suspect, further investigation into root health and structure may be necessary.
If, after these measures, the soil continues to emit a sour smell, this is a clear indicator of poor aeration; in such cases, consider installing drainage tiles or expanding the raised bed to improve flow. Conversely, if plants show signs of wilting despite routine watering, inspect for pests that might be compromising root health, mimicking poor drainage symptoms.
Waterlogged conditions can be a symptom of compacted clay, inadequate drainage material, or the design of the raised bed itself. The presence of mold or a lingering sour smell can indicate that roots are struggling to absorb nutrients due to oxygen deprivation. At this point, it’s essential to correctly identify poor drainage issues to prevent further stunted growth.
If the soil shows puddling while drainage materials seem intact, this could point to roots obstructing flow. For those with clay-heavy soil, a more aggressive tactic such as incorporating organic amendments (like compost or perlite) may be essential for improving aeration. Immediate action in addressing soil moisture prevents plants from entering a stressed state. If soaking conditions persist, you might need to re-evaluate the raised bed’s location; sites with inherently poor drainage may require significant adjustments.
Step 3 – Amend Soil to Recover From Excess Water
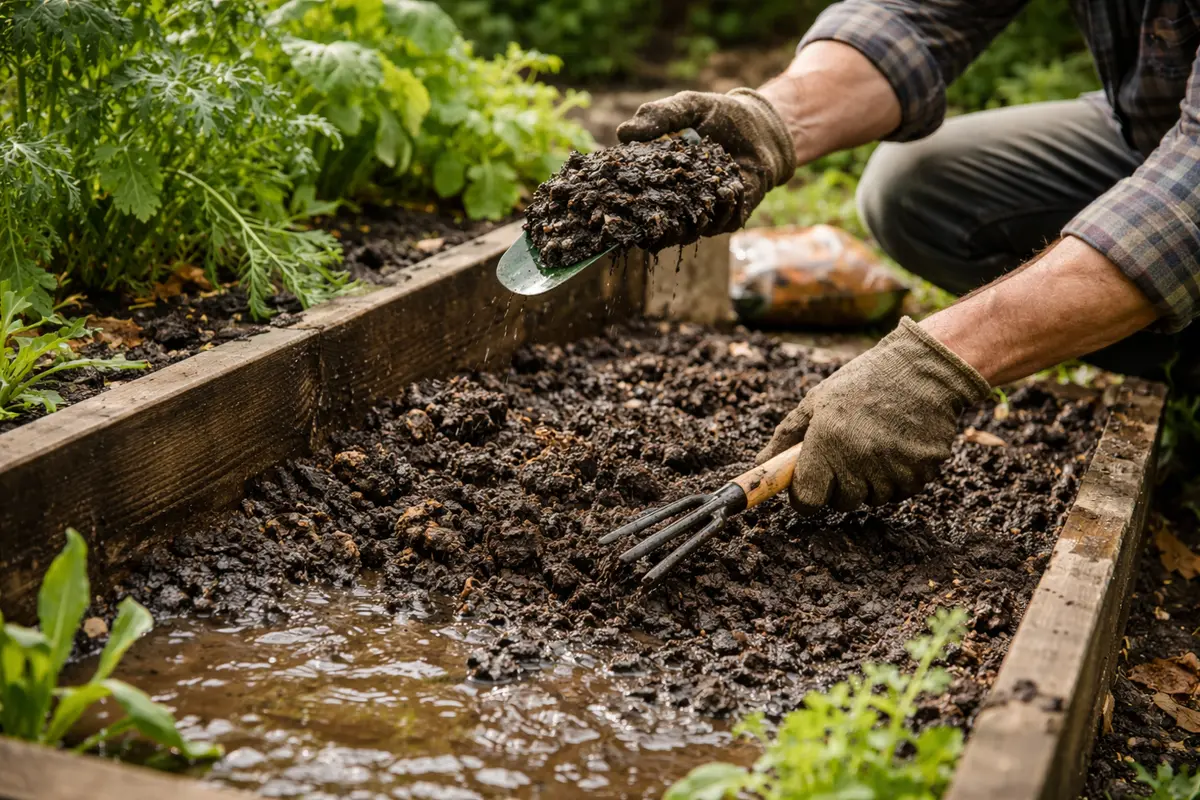
Begin by amending the soil with organic materials, such as compost or perlite, to enhance aeration and reduce compaction. Within days, you should notice improved soil structure, as water starts to drain more effectively and plants begin to perk up.
Monitor your plants over the next week for signs of new growth, which indicates they are recovering and absorbing nutrients properly. New green shoots should start to emerge, reflecting a positive response to the changes you’ve made. If you see stagnant growth with yellowing foliage, this may suggest a continued issue with root health. Cool, moist conditions can slow recovery; conversely, warm, sunny weather generally promotes faster regrowth. If recovery does not progress within ten days, check for possible root rot or other underlying issues.
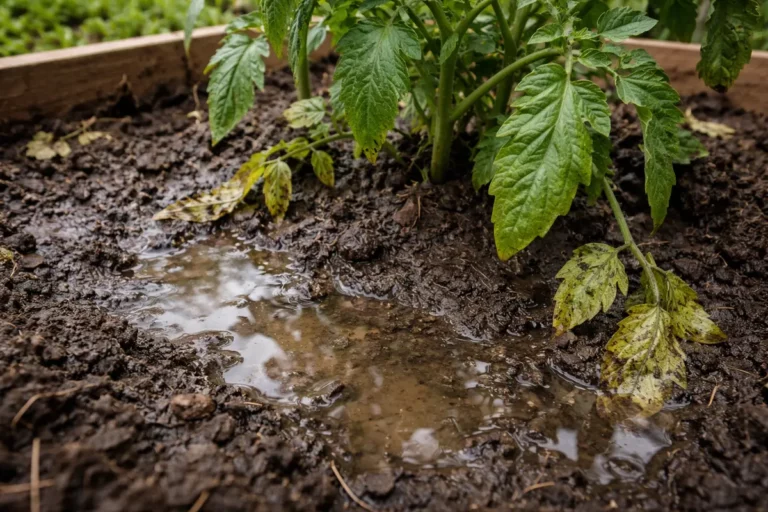
Avoid over-fertilizing, which can stress your plants further. Also, be mindful of your watering practices; for instance, ensure that plants like tomatoes, which thrive in less moisture, have a drier period between watering to support strong root systems. If you don’t see improvements, closely monitor moisture levels to adjust your watering schedule accordingly, ensuring it aligns with the needs of your plants.
The entire recovery process may take several weeks, and observing plant behavior will be crucial. Look for heightened growth activity indicated by vibrant new foliage. If you notice persistently wilting or yellowing leaves, this signals that the initial drainage problem may not be fully resolved. Favorable warm temperatures and sufficient sunlight are critical for recovery, while cooler, damp weather may impede the process. If the soil remains difficult to penetrate, check for compaction, as this can further hinder root access.
During recovery, resist the urge to widely increase water and fertilizer applications, as this may lead to root rot or nutrient overload. Ensure that conditions are suitable for your plants; for example, tomatoes may struggle if overwet in cooler conditions. If browning appears, reassess soil moisture and adjust watering practices accordingly.
Amending your soil encourages microbial activity, enhancing its overall health and structure. Expect new root activity to manifest within a week, showcasing the recovery from previous water stress. Consistently evaluate soil density; if it seems too compacted, consider adding sand or gypsum, especially beneficial for increasing drainage in clay-heavy soils. Regular feedback in the form of new growth will be your best indicator of success; if new growth fails to appear, a soil pH test might reveal additional nutrient deficiencies impeding recovery.
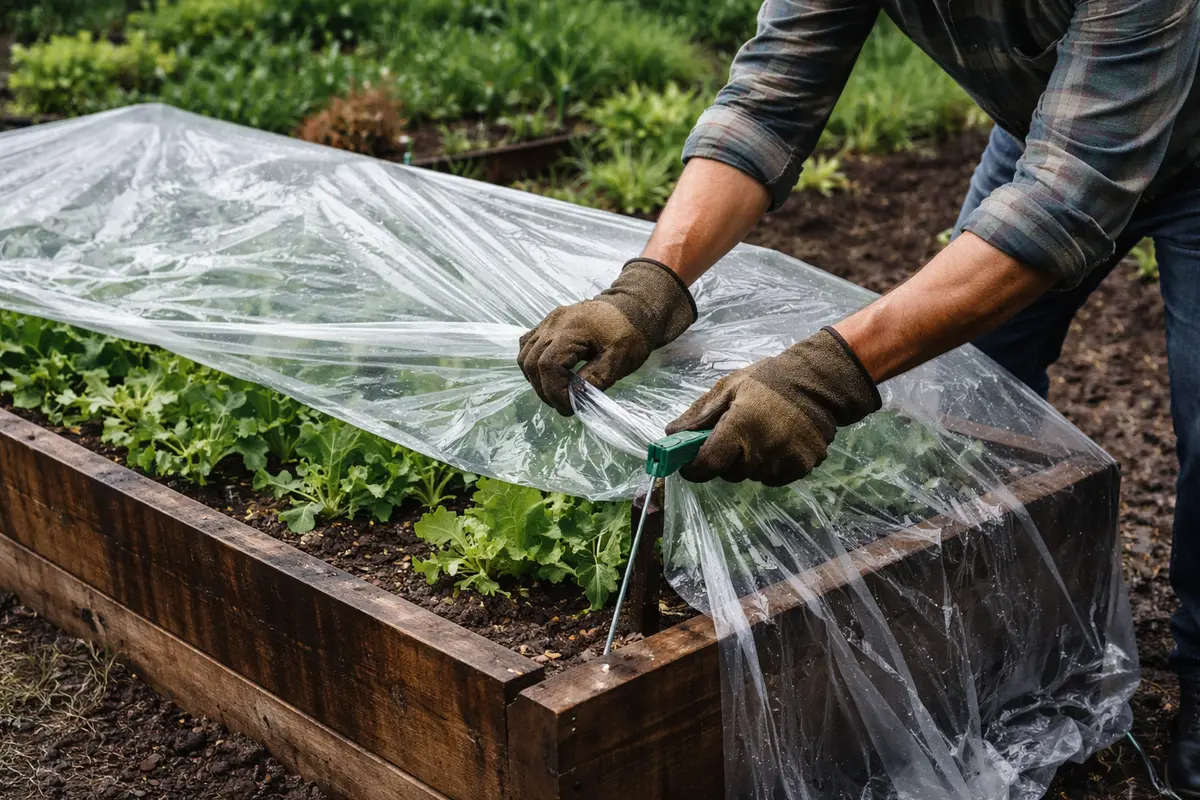
Step 4 – Cover Beds to Shield From Heavy Rains
Start by installing an adequate layer of coarse gravel or crushed stone at the bottom of your raised beds. This will significantly improve drainage and prevent water from pooling during heavy rains, ensuring your plants are less likely to suffer from root rot or waterlogged soil.
Heavy rains often saturate the soil, exacerbating drainage problems that occur when the soil becomes compacted or when organic material breaks down, creating inefficient drainage paths. By adding a gravel layer, you create a permanent foundation that allows excess water to flow freely, reducing the likelihood of these adverse conditions recurring. If you notice your garden bed remains soggy, check for compaction and consider aerating the soil to improve drainage.
From here, monitor the drainage efficiency throughout the spring and fall months when rain patterns shift. If you experience particularly heavy downpours, consider adding additional layers of organic mulch on top of the soil to absorb some excess moisture and reduce surface runoff into the bed. This dual approach can help enhance the overall effectiveness of your drainage system during varied weather conditions.
Heavy rainfall saturates the soil, causing roots to drown and restricting essential oxygen. By adding gravel, you create a barrier that slows down the water’s movement while allowing excess moisture to drain away. If you notice persistent waterlogging even after this change, check the elevation of your raised bed, as improper positioning can exacerbate drainage issues.
During the dry season, it’s beneficial to check the gravel layer and remove any accumulated silt or debris that could hinder drainage functionality. Establishing a routine of cleaning this layer every few months ensures continued efficacy and prepares the raised bed for heavy rains ahead.
Heavy rainfall often saturates the soil, leading to poor aeration and increased water retention in your raised beds. By establishing a drainage pipe system, you’re addressing the root cause of water accumulation, which can be exacerbated by compacted soil or inadequate soil composition. If your raised beds remain soggy even after rainfall stops, evaluate whether soil compaction is an issue.
During the rainy season, regularly check and clear your drainage pipes of debris to maintain effectiveness. Additionally, consider incorporating a layer of coarse gravel or sand at the bottom of the raised beds to enhance drainage further. If you find that water still pools, reevaluate the slope and positioning of your raised beds to ensure proper runoff.
By covering the beds, you protect the soil from being beaten down by heavy raindrops that can compact it. The covers act as a barrier between the rain and the soil, reducing the risk of waterlogging and enabling your plants to thrive. Maintaining this protective routine during peak rainy seasons is vital in preventing reoccurring drainage problems. If covers appear to be trapping too much humidity and causing leaf mold, consider using breathable fabric that allows for airflow.
During the rainy season, consider using lightweight tarps or row covers that can easily be removed for light rains but provide adequate protection during heavier showers. If covering the beds consistently leads to plants lacking sunlight, be prepared to remove the covers quickly or use more breathable materials. Neglecting this step risks exacerbating drainage issues that you’ve already remedied, undoing your hard work. Be mindful of the weather; if severe storms are predicted, double-check that the covers can withstand strong winds without blowing away.
Step 5 – Inspect Soil Saturation After Storms
Monitor the moisture levels in your raised beds after each heavy rainfall event. Look for signs of pooling or overly saturated areas to assess whether adjustments are necessary. Recheck every 2-3 days following significant rain to gauge the success of your drainage improvements.
For the next check, observe the soil texture; healthy soil should feel moist yet not overly wet, indicating proper drainage. If the soil appears soggy or spongy, this could signal that the drainage issues have returned, necessitating further action. A healthy root system will show signs of firm growth, while persistent yellowing leaves or wilting plants suggest that problems may still be lurking below the surface. If you detect a moist, spongy texture instead of a crumbly one, consider additional drainage enhancements.
If the same drainage problems arise, evaluate your current drainage system. You might need to add more gravel layers beneath the surface or improve soil aeration to facilitate better drainage. Should these issues persist despite your best efforts, consulting a landscaping professional may be necessary to develop tailored solutions for your specific raised bed design. Taking proactive measures before plants exhibit distress can save time and resources in the long run.
FAQ
How long does it take plants to recover from poor drainage?
Plants may start showing signs of recovery within a week of addressing drainage issues, such as new growth or greener foliage. However, full recovery depends on various factors, including plant type, environmental conditions, and the extent of previous damage. After addressing drainage, monitoring for signs of root respiration will be key to understanding your plants’ recovery speed.
Can heavy rainwater cause root rot in raised beds?
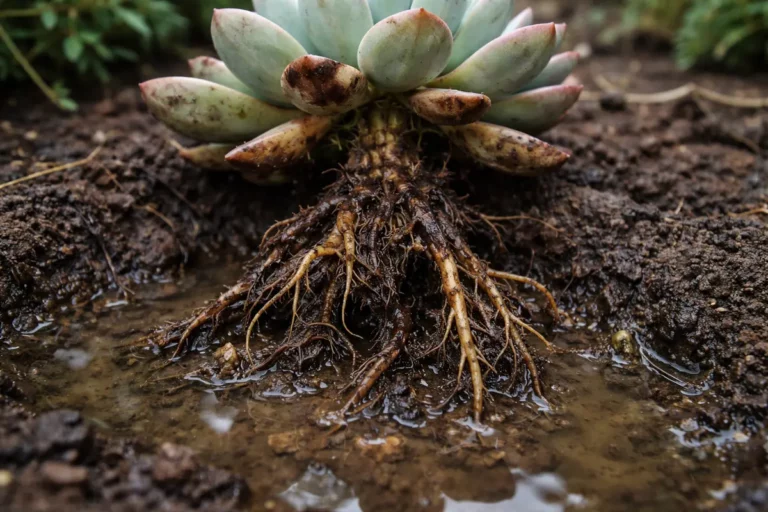
Yes, heavy rain can lead to root rot if excess water collects around the roots for too long. Maintaining proper drainage and soil aeration is crucial in preventing this condition, which can severely damage or kill plants. If left untreated, root rot can spread, affecting even apparently healthy plants nearby.
Should I remove plants from my raised beds during heavy rains?
Removing plants is not typically necessary but can be helpful if you anticipate excessive waterlogging. Monitor the plants; if you see signs of distress or serious saturation, relocating them temporarily can minimize damage. Transplanting during heavy rains is not ideal, and potential root disturbance could worsen their condition.