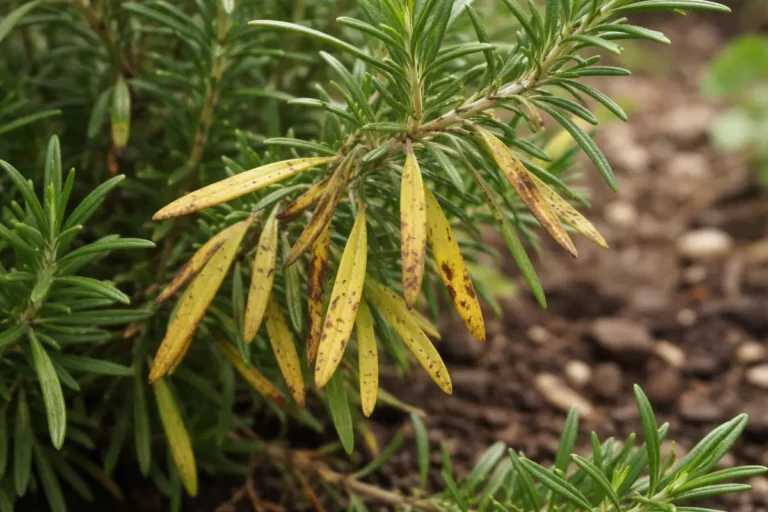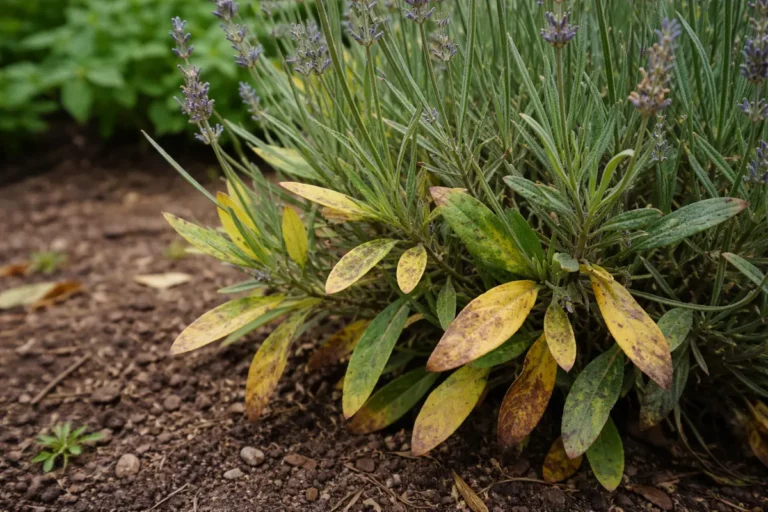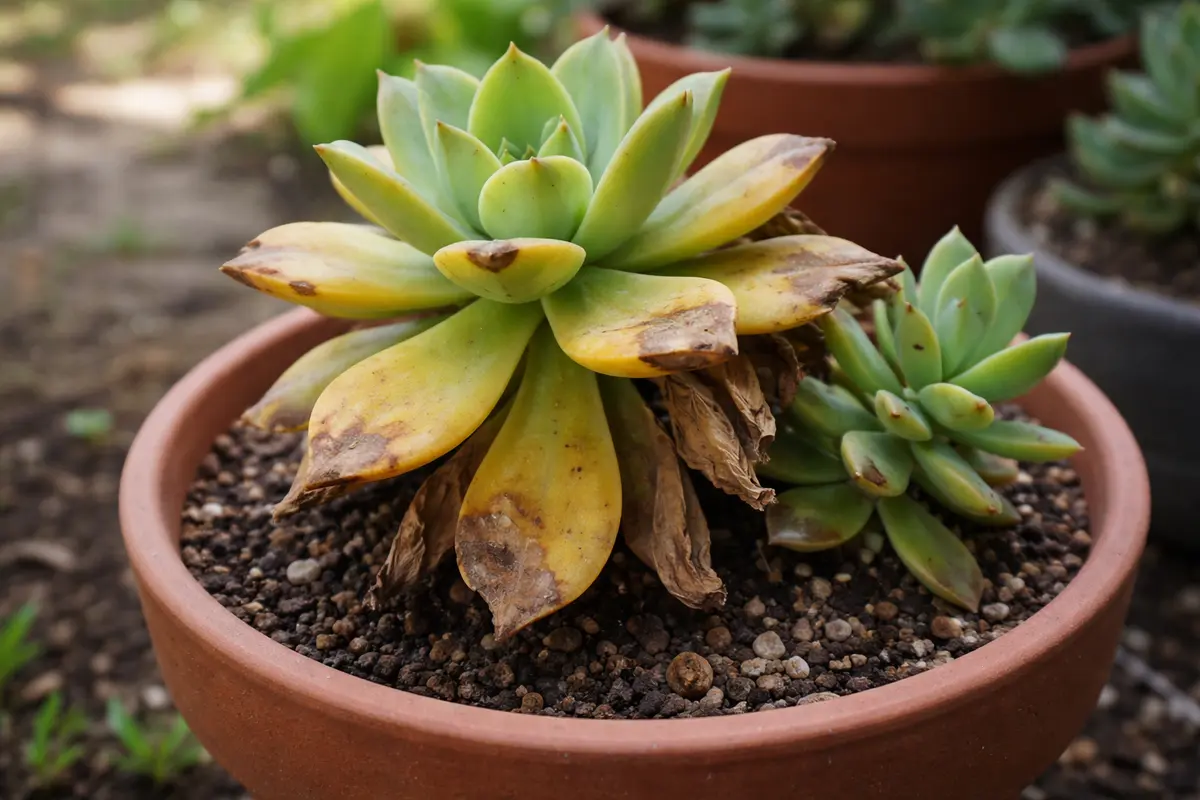
You may notice your potted succulents showing signs of distress with their leaves turning yellow during the summer heat, which is why you need to know how to treat yellowing leaves on potted succulents during summer. This yellowing often indicates overwatering or inadequate light, leading to declining health and potential leaf drop. Ignoring the issue can lead to more damage and weaken the plant, but fixing it is possible now—simply check your watering routine and adjust the light exposure for optimal growth.
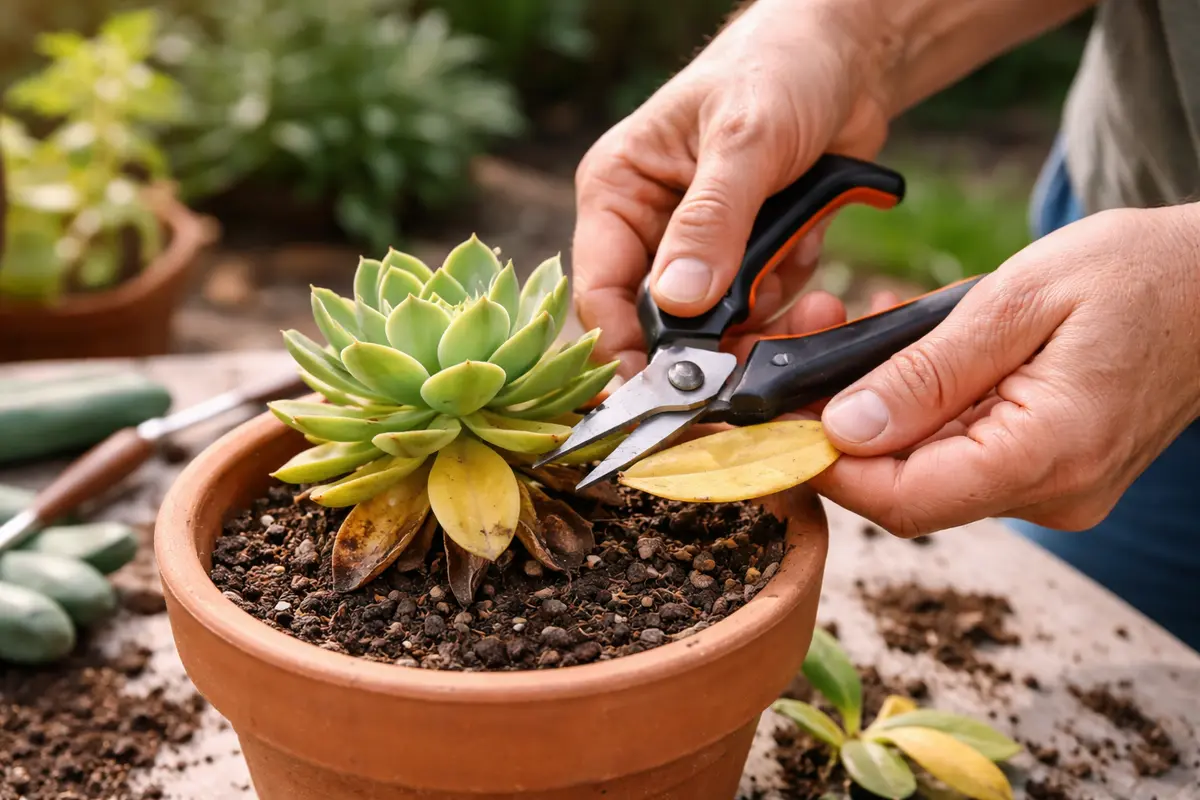
Step 1 – Trim Ailing Succulent Leaves Promptly
First, move the potted succulent to a location with filtered light, away from harsh direct sunlight. This adjustment should lead to a noticeable reduction in further yellowing, as the plant begins to recover from excessive light exposure that can cause leaf stress.
Acting fast is crucial because succulents are particularly sensitive to rapid changes in their environment. If yellowing leaves are left unchecked in intense heat, the plants may begin to dehydrate, leading to root rot if the situation worsens. The biological stress from light intensity can interrupt photosynthesis, further exacerbating the yellowing if not addressed promptly.
For example, a gardener who delayed moving their succulent lost half the plant within a week, while another who acted immediately only saw slight yellowing that quickly reversed. A common misstep is watering the plant after yellowing occurs; if the leaves begin to droop, check the soil moisture level before adding water to avoid more stress.
Acting quickly is crucial, as potted succulents with yellowing leaves often indicate waterlogged soil leading to root rot. By addressing this issue promptly, you help prevent further decay and restore the plant’s ability to take up nutrients. If you delay, healthy roots may continue to succumb to fungi, resulting in a more severe die-off and potentially irreversible damage. If you notice crispy edges along the leaves instead of yellowing, check for underwatering instead of root rot.
For example, a gardener once ignored yellowing leaves until they noticed their entire succulent had wilted and shriveled. They had simply overlooked the importance of root inspection, leading to the plant’s demise. A common mistake at this stage is assuming that changing sunlight conditions is the sole culprit, neglecting to check for root health as a primary factor.
Acting quickly to trim the affected leaves is crucial because these leaves can cause stress on the plant, drowning out the healthy parts and impacting its overall health. Succulents, particularly in summer heat, can lose their resilience if damaged leaves remain intact, inhibiting growth and creating a pathway for pests to invade. Regular maintenance combats weakness and prevents the spread of potential issues. Be sure to use sharp, sterilized scissors to prevent infection from any bacteria that might enter through the cut, as dirty tools can introduce new problems. After trimming, clean the scissors with rubbing alcohol to ensure no residues linger for future uses.
Many gardeners mistakenly delay the removal of unhealthy leaves, thinking the plant will self-correct. However, allowing yellowing leaves to remain can lead to further deterioration, affecting the plant’s energy levels and making it more susceptible to additional stressors. If a leaf is yellowing, it is best to remove it completely to prevent the issue from worsening. Acknowledging this need for immediate intervention strengthens the overall plants and contributes to longer-lasting health. After trimming, observe the cut areas for any signs of disease, as this can signal a deeper issue with your succulent’s health. If you notice brown spots starting to appear on the remaining healthy leaves, it’s a sign to reassess care conditions immediately.
Step 2 – Assess Soil Overwatering Issues for Succulents
First, check the soil moisture level by inserting your finger about an inch deep into the soil. If it feels dry, thoroughly water the succulent until excess drips from the drainage holes, and ensure the pot has proper drainage to prevent root rot. Within a few days, you should begin to see the yellowing leaves recovering and firming up.
The yellowing of leaves often results from underwatering, which leads to inadequate moisture supply for essential physiological processes in the plant. When the roots are too dry, they struggle to transport water and nutrients effectively, leading to chlorosis, or yellowing of the leaves. In contrast, overwatering can suffocate roots, causing yellow leaves due to rot, highlighting the need for proper moisture management.
If you notice a foul odor coming from the soil, it likely indicates root rot caused by overwatering, and you should repot the succulent in fresh, dry soil to help revive it. Additionally, if the leaves appear shriveled but not yellow, check for underwatering, as that may require a different watering routine to restore healthy hydration levels.
Overwatering succulents is one of the most common causes of yellowing leaves. When the soil retains excessive moisture, the roots become deprived of oxygen and begin to suffocate. This situation becomes exacerbated in warmer weather, where intense sunlight can dry the leaves while the roots remain in soaked conditions, facilitating the yellowing and wilting process. In cases where waterlogged soil persists, the roots can start to rot, which will require significant intervention such as root pruning or even repotting if the problem has progressed. If you notice a mushy consistency at the base of the stems, it’s critical to act fast; rotten roots can lead to the plant’s demise if left untreated.
If your succulent’s soil appears wet and emits a foul odor, replace it with fresh, well-draining potting mix. Ensure your pot has adequate drainage holes to allow water to escape. Using a potting mix specifically formulated for succulents, which often includes components like pumice or sand, can help maintain a balance that prevents water retention. If the plant seems limp despite good moisture levels, soil that is too dense may cause the roots to struggle. Adjusting the potting mix to include perlite or sand can improve drainage and prevent future problems. Always break up compacted soil to promote aeration; this is especially vital if the succulent has been in the same pot for an extended period. Regularly inspecting drainage holes for blockages can also avert water retention issues before they escalate. If roots are found to be rotting, consider cuttings to propagate new plants or salvage any healthy remaining roots.
Step 3 – Rehydrate Succulents to Reverse Leaf Yellowing
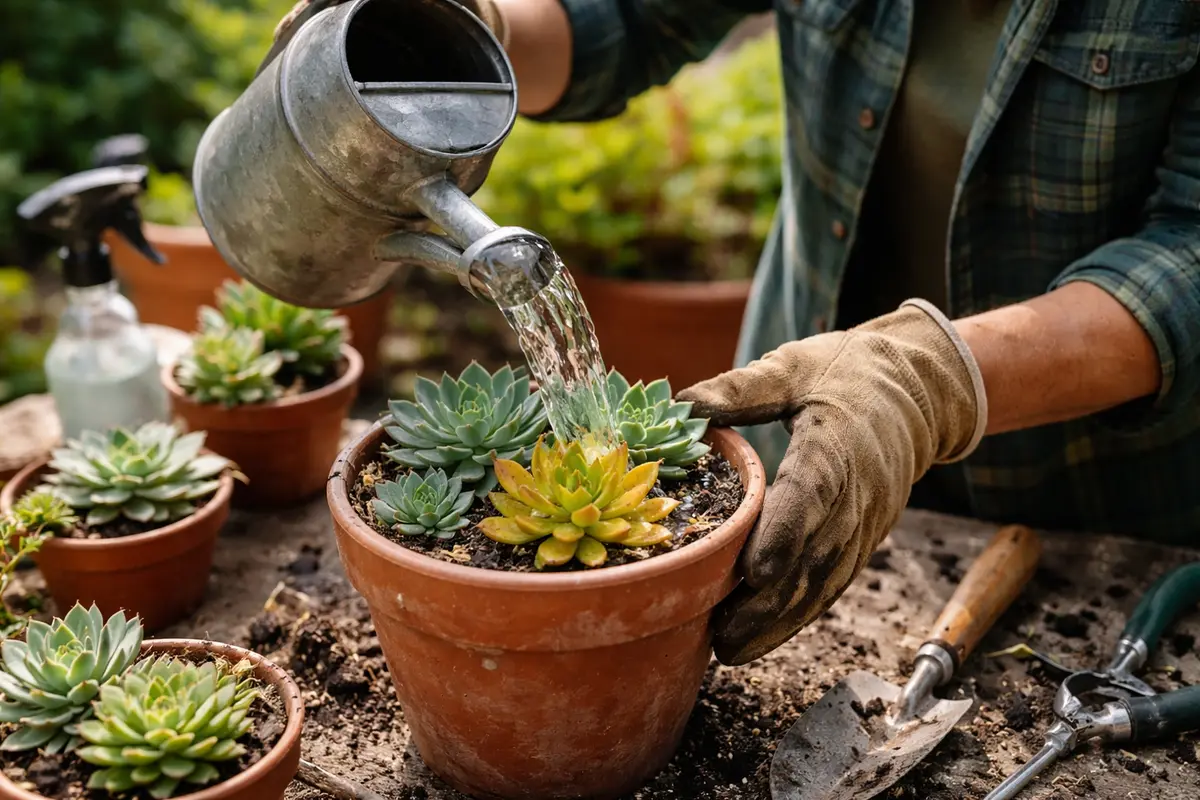
Start by adjusting the watering schedule to allow the soil to dry out completely between waterings; this action directly targets root rot that causes yellowing leaves. Within a week, you should see an improvement, with the leaves regaining a healthier hue. To prevent future yellowing, water only when the top 2 inches of soil feel dry and ensure your pot has adequate drainage.
Yellowing leaves typically result from overwatering or inadequate sunlight. The recovery timeline can vary, but signs of improvement often appear within 7 to 14 days when the root system stabilizes and the plant responds to proper conditions. If you notice persistent yellowing even with adjusted watering, check if your succulent is receiving enough sunlight, as low light conditions can also lead to leaf discoloration.
A common mistake during the recovery phase is watering too soon after seeing initial signs of improvement; this can reverse progress and cause further stress. For severe cases of yellowing, consider re-potting the succulent into fresh, dry soil to reduce moisture content and further advance healing. If the leaves remain yellow despite these adjustments, check for pests or diseases, as they can also contribute to leaf decline.
Rehydration plays a critical role in the recovery of succulents showing signs of yellowing. Allowing the soil to dry out completely before watering again gives the roots a chance to absorb moisture and replenish the plant’s cells. If the soil remains damp, it’s likely that the roots are not absorbing water efficiently, leading to ongoing yellowing. Establishing a consistent watering routine that responds to temperature and humidity conditions leads to a healthy balance where overwatering is avoided, and nutrients can flow through effectively. Using a moisture meter can further assist in determining the ideal watering frequency, ensuring that your technique adapts to the unique needs of your plants. Alternatively, you can also weigh your pots; lighter pots indicate it’s time to water.
A common mistake that many gardeners make while attempting to recover their plants is to water them too frequently. Excess watering compacts the soil and limits the oxygen available to roots, aggravating the yellowing. It is vital to check the soil moisture with a finger. If the top 1-2 inches feel dry, it’s time to water. Adjusting your routine based on the weather — watering less when temperatures are cooler and more when it’s sweltering — can greatly enhance recovery efforts and decrease the number of yellowing leaves in the future. Be cautious of a sudden increase in watering frequency if the humidity in the environment rises; stagnant water can be just as harmful as dry soil. If initial watering yields little improvement, consider adding a diluted liquid fertilizer to provide a nutrient boost, but avoid fertilizing stressed plants until a recovery is evident, as excessive nutrients can lead to further yellowing if the plant is not absorbing them correctly.
Step 4 – Watch for New Yellowing Signs Post-Treatment
Monitor your succulents closely for fresh signs of yellowing following your treatment. Starting every few days, assess the plants to see if new yellow leaves develop or if existing leaves continue to recover. If you observe new yellowing after treatment, it might indicate underlying problems that have not yet been addressed — such as pests, disease, or continued irrigation errors. Inspecting both the top and the underside of leaves can reveal pest issues that may not be immediately visible from above.
Your initial observation should include whether the leaves are regaining their firmness and color or if any new yellowing occurs. A clean, healthy appearance indicates recovery, while persistent yellowing or further spreading signifies the plant still faces challenges that need addressing. Make sure that the environmental conditions, including adequate light exposure and air circulation, are optimal for your succulent. If you note yellow leaves appearing in clusters or if the yellowing spreads from the base, it could indicate a more serious infestation or root issue that requires urgent attention, such as soil replacement or pest control measures.
If yellowing returns despite these remedial measures, consider revisiting your watering schedule or potting conditions. It may signify that the habitat needs changes, such as improved light levels or ventilation. For succulents, adequate light can prevent etiolation, which also ties back to leaf health. Escalate your treatment approach swiftly for best results to avert significant setbacks. A gradual realignment with their ideal growing conditions fosters resilience; this may include moving pots to areas with indirect light or enhancing airflow through the use of small fans in overly humid conditions. If, after several weeks, the situation has not improved, consulting a local gardening expert or a professional may provide alternative insights aimed at saving your succulents.
FAQ
How long does it take for succulents to recover from yellowing leaves?
Recovery from yellowing leaves often takes a few days to a couple of weeks, depending on the underlying cause and how quickly actions are taken. Visible signs of recovery, such as firmness and color returning to the leaves, indicate progress. Keep in mind that drastic environmental changes may slow recovery, so maintaining consistent care is essential to promote optimal growth.
Can yellowing leaves spread to other parts of the plant?
Yes, yellowing leaves can indicate underlying stress that may affect neighboring areas of the plant. If the issue is not addressed, it could lead to yellowing in other leaves or even spread to adjoining plants. Therefore, it’s essential to treat the problem at its root to prevent the entire plant’s health from declining, particularly if you notice other foliage beginning to discolor.
Should I remove all yellow leaves immediately?
It’s best to remove yellow leaves as soon as you notice them to prevent stress on the plant. However, if a leaf is still firm and greenish near the base, you may leave it on until it begins to decay or affect the whole plant. Regular checks ensure you catch any new yellow leaves in their early stages, creating an environment that supports new growth while discouraging the spread of potential diseases. Be vigilant about removal, as procrastination in trimming can lead to more extensive infestations or diseases.