You may notice your shallots showing signs of distress after heavy rain, which is why you need to know how to prevent root rot in shallots after heavy rain. The plants can start exhibiting yellowing leaves and mushy roots due to excess moisture that suffocates them. Ignoring these symptoms can lead to further damage that weakens the plant, but fixing the issue is possible now if you check the drainage and reduce watering where necessary.
Step 1 – Remove Excess Water Around Shallots
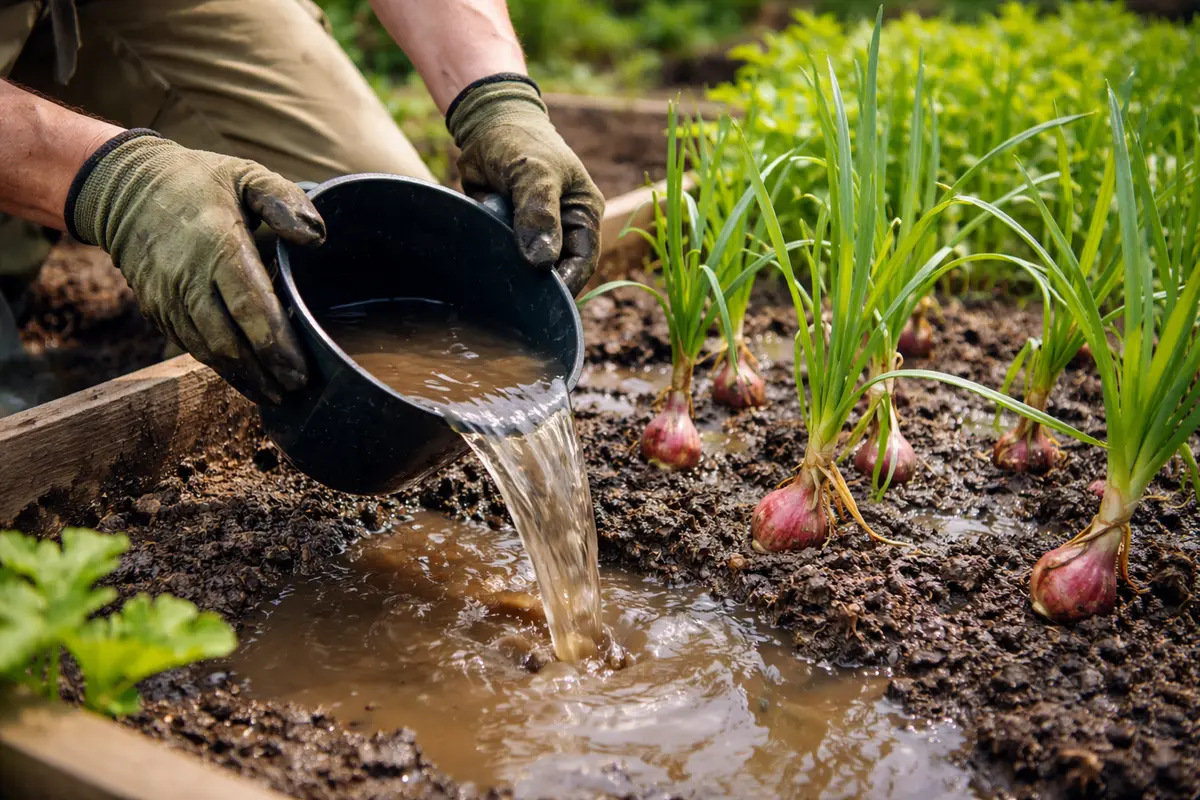
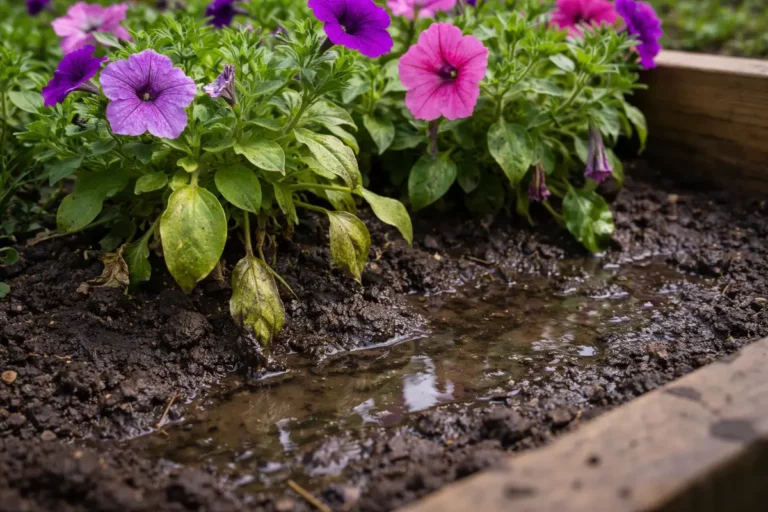
Begin by physically removing standing water in the area surrounding your shallots. You will see immediate improvement in soil moisture levels, which may help to reduce stress on the plants. Following a heavy rain, soil saturation can create an environment conducive to root rot, where shallots struggle for the oxygen necessary to thrive. Ensure you act within the first 24 hours after heavy rainfall to enhance the effectiveness of this step.
Shallots are particularly vulnerable to excess moisture, as they require well-draining soil to flourish effectively. When the soil is consistently wet, oxygen levels in the root zone decrease, inhibiting nutrient absorption; this leads to yellowing leaves and wilting. By removing excess water using a shovel or a drainage tool, you can quickly enhance the plant’s access to essential nutrients. If possible, try to aerate the soil slightly as you work to facilitate drainage, as compacted soil can cause water to pool more significantly around the roots.
A common mistake gardeners make at this stage is not acting promptly to clear excess water, assuming the soil will drain naturally. In areas with compacted soil or heavy clay, water can linger for days or weeks, increasing the risk of root rot. Ensure you inspect the ground directly after heavy rainfall—where soil turns muddy or pools are visible—to mitigate long-term damage and promote health. If you find that excess water reaccumulates quickly, it might indicate deeper drainage issues that need addressing. Keeping a portable pump nearby during the rainy season can expedite this process significantly.
Step 2 – Diagnose Soil Drainage Issues in Shallots
First, check the drainage around your shallots by digging a small hole near the root zone. If the soil is waterlogged and does not drain well, amend it immediately with organic matter like compost or well-rotted manure, which will improve aeration. You should see surface water begin to recede within a few hours after drainage improvements. Regular soil testing for drainage quality can also guide you on when to take action.
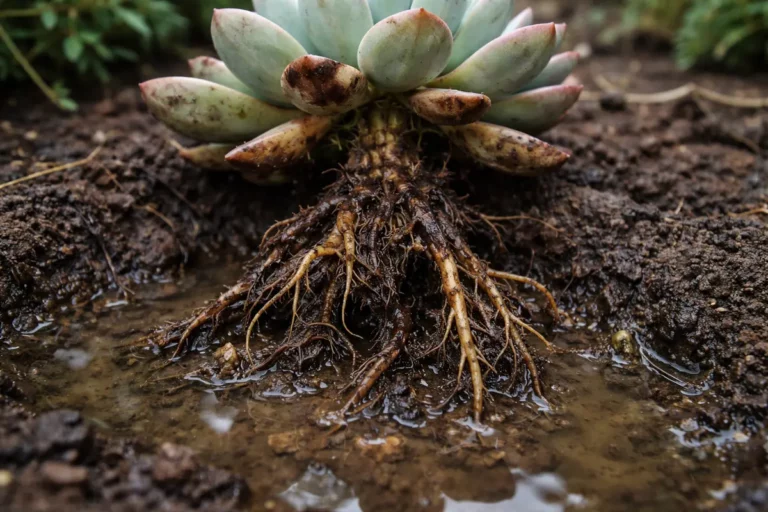
When soil is consistently wet, the oxygen supply diminishes, leading to anaerobic conditions that promote root rot pathogens. Shallots exposed to these conditions exhibit yellowing leaves and stunted growth compared to those planted in well-drained soil, which remain vibrant and healthy. If you notice your shallots wilting despite wet soil, check for compacted roots instead. The contrast will be stark; while healthy plants adjust and thrive, those suffering from root complications display additional symptoms of disease like darkening stems.
If the soil smells sour or has a slimy texture, remove the affected shallots immediately and treat the area with fungicide to control any existing pathogens. Conversely, if your shallots appear healthy but are still wilting, inspect for root conflicts or pest infestations that may be affecting their ability to uptake water. In particularly persistent cases, consider creating a drainage trench away from the shallots to channel excess moisture in rainy conditions to protect the root systems.
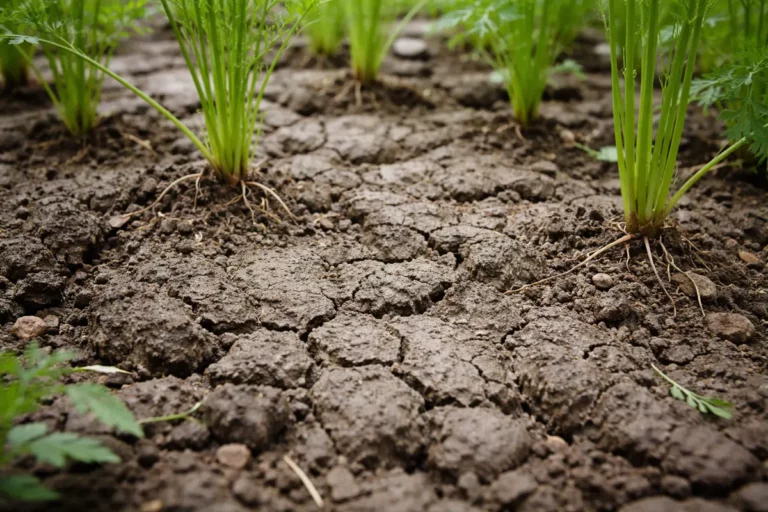
When soil drains poorly, the shallots’ roots suffocate and become susceptible to pathogens that lead to root rot. It is essential to assess the soil composition; if it appears dense and clumpy, it may be inhibiting drainage. Improving drainage through amendments, such as sand or organic matter, allows water to flow more freely. Alternatively, a soil test can provide insights into nutrient levels and pH balance that may also impact drainage. Take note that if soil pH is consistently high or low, remediation can take a while to show improvements, requiring further patience.
If after inspection the soil smells sour or feels mushy upon touch, promptly consider implementing additional corrective measures. This may include creating drainage ditches or utilizing raised beds, as these can effectively redirect excess water away from your shallots. Conversely, if the soil feels dry and crumbly despite standing water issues, it may require an assessment of nearby irrigation practices to ensure you’re not overwatering. Identify these contrasts to lead a successful recovery effort, as excessive moisture from irrigation can compound soil issues from rain.
Step 3 – Fertilize Shallots to Assist in Recovery
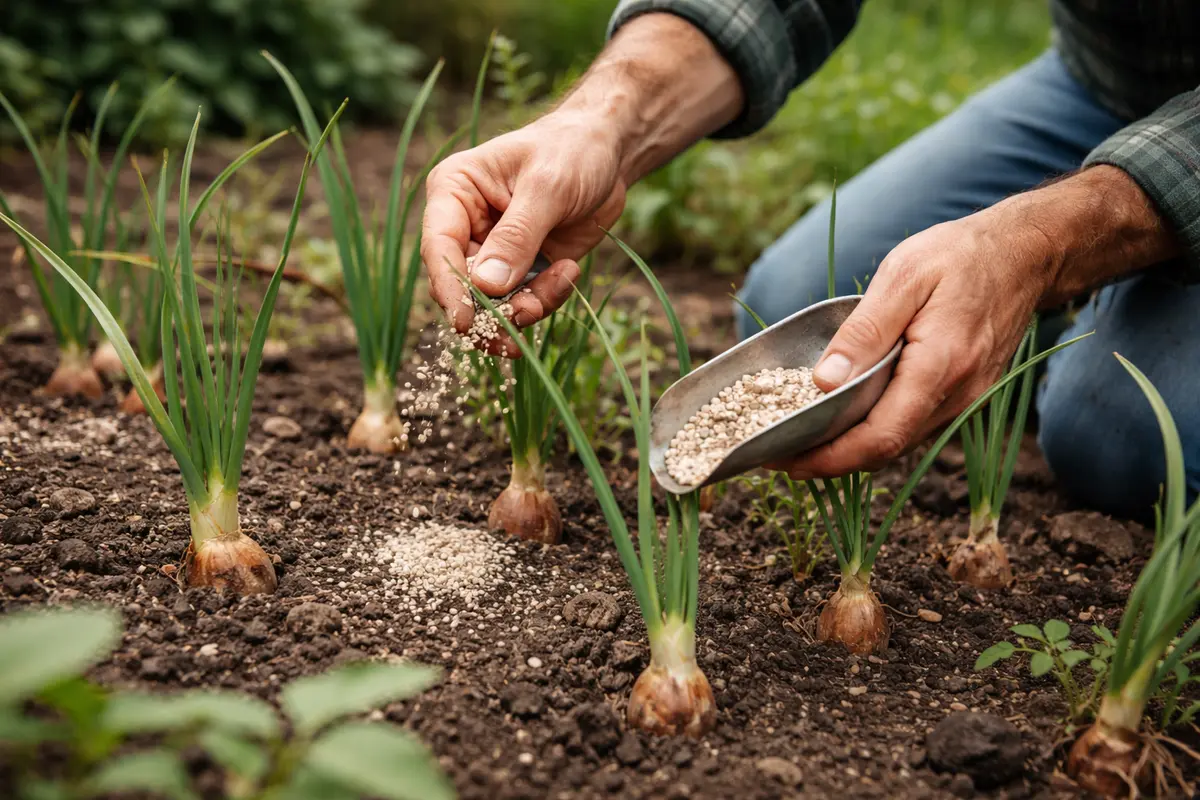
Apply a balanced fertilizer to support recovery in your shallots following water removal and drainage adjustment. You should see new growth and a return of vibrant color in the leaves within a couple of weeks. Fertilizers help restore necessary nutrients that may have leached away due to high moisture levels; however, correct timing of application matters significantly. It’s best to wait until you see signs of improvement in the water levels before proceeding with fertilization.
After heavy rain, essential nutrients like nitrogen can become depleted in saturated soils, leading to further stress on the plants. Fertilizers supply these nutrients, enhancing recovery while promoting robust growth. When applying fertilizer, opt for a slow-release variety that offers nourishment over an extended period, allowing the plants to absorb nutrients as they recover. Always check the product label for specific timing and amounts to avoid nutrient overload that can occur with incorrect usage; over-fertilization may stress the plants further.
A vital mistake to avoid during this recovery phase is over-fertilizing, which can lead to nutrient burn and further stress. If the soil feels overly moist or the weather remains cloudy, hold off on fertilization until drainage issues are adequately addressed. Encouraging growth too quickly can lead to leggy, weak plants vulnerable to further stresses, particularly in fluctuating weather conditions. It is prudent to monitor the moisture levels in the soil before applying additional nutrients, ensuring the shallots remain in a balanced environment. Pay close attention to the response of your plants for 7–14 days post-fertilization to ensure they are able to utilize the nutrients effectively.
Step 4 – Create Better Drainage for Future Rain
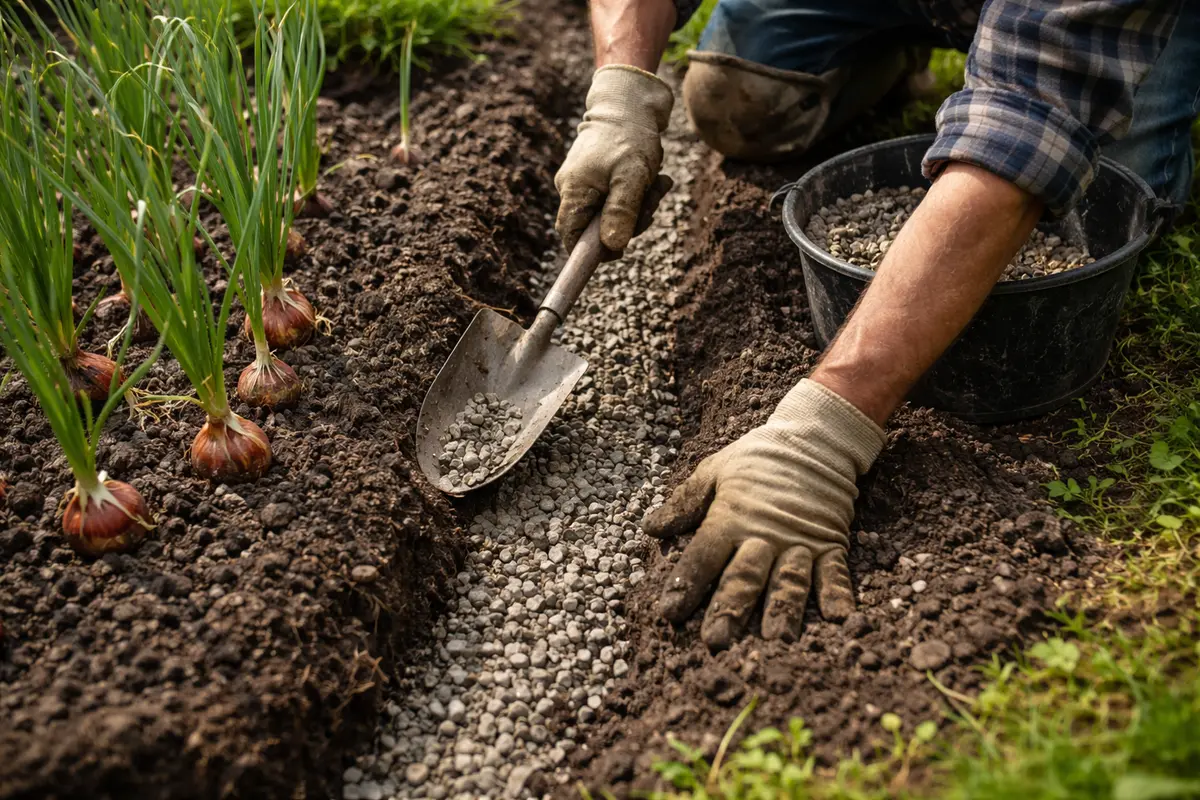
Start by planting shallots in well-draining soil and elevate their beds if necessary, which will help prevent water accumulation. You should notice stronger root systems and healthier shallots resistant to excess moisture. If the shallots are currently in the ground, improve drainage practices immediately to prevent them from succumbing to wet conditions during the next rain event.
Excess moisture often triggers root rot, particularly after heavy rain, due to the anaerobic conditions in soggy soil. By ensuring proper drainage through soil elevation and aeration, you eliminate the stagnant water that fosters fungal growth responsible for root rot. If your shallots appear yellowing and wilting despite dry conditions, check for underlying drainage issues—poor drainage will often become apparent during periods of excessive rain. Actively monitor weather forecasts and water levels to gauge the potential for standing water.
During the rainy season, apply mulch that allows airflow but retains moisture, helping to balance moisture levels in the soil. Organic mulches such as straw or wood chips are ideal; while they keep moisture levels stable, they also allow for water drainage through the layers. If temperatures fluctuate significantly, monitor the moisture levels more closely and adjust your watering routine to maintain consistency; note that even a small amount of added moisture can compound existing drainage issues after heavy rainfall.
Attuned drainage practices address the environmental conditions that pave the way for root rot. Soil amendments improve water retention capabilities while promoting better air circulation around the roots. Ensuring that your planting site allows water to flow freely will significantly help mitigate future issues attributable to saturated soil. You can also consider installing perforated drainage pipes or a French drain system if your garden consistently suffers from flooding after heavy rain. Additionally, various contouring techniques, like creating a slight slope or berm around your garden beds, can help divert excess water during storms.
In case of regular heavy rain in your region, monitoring and maintaining drainage solutions like installing a French drain may be necessary. You may find that building a contour bed or barrier elevates shallots effectively against future flooding, which can drastically improve their health in subsequent seasons. Seasonal considerations should dictate the frequency with which you revisit these improvements, especially leading into wetter months. As soil conditions evolve, remain proactive in maintenance to safeguard your shallots, ensuring that amendments and structures remain intact and effective, adjusting as necessary to the upcoming weather patterns.
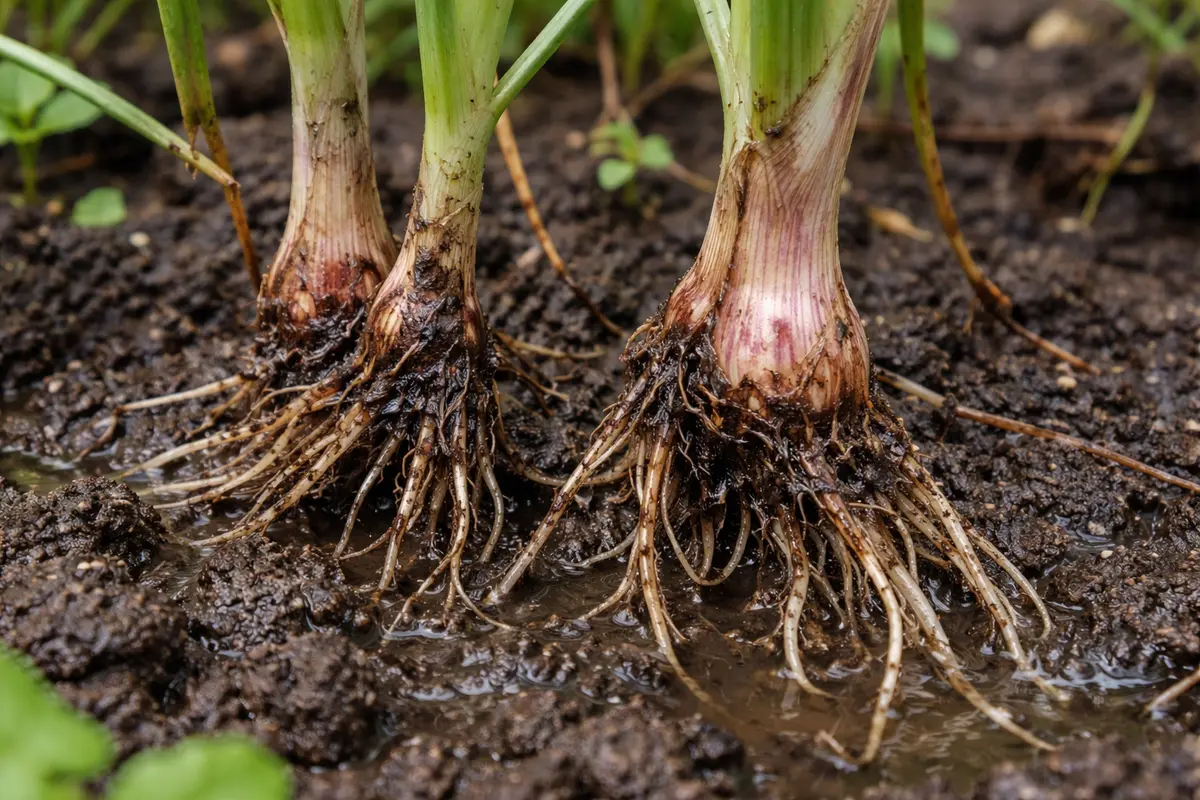
Step 5 – Inspect Shallot Bulbs for Softness Weekly
Next, check your shallots for signs of disease following heavy rainfall by examining the soil moisture and plant responsiveness. Look for yellowing leaves, mushy roots, or a foul smell emanating from the soil. Repeat this monitoring process every few days to catch early symptoms before they worsen. Early diagnosis is key; flagging issues such as soft bulbs or damp soil regularly can save your crop.
A fully recovered shallot plant will exhibit deep green leaves with a firm, healthy root system. In contrast, early signs of disease return may include leaf wilting without drooping or fuzzy gray mold at the base of the plant. If you observe dark, water-soaked lesions on the bulb, check for excessive moisture around the root zone as a possible trigger. Establishing a checklist for inspections can enhance your assessment; mark locations of any soft bulbs or discoloration for follow-up.
If signs of disease return despite preventative measures, remove affected plants immediately to prevent further spread. Treat the remaining shallots with a fungicide specifically designed for root rot, and improve drainage in your garden beds to reduce moisture accumulation. Additionally, it can be instructive to note whether certain areas of the garden are more prone to waterlogging and adjust your planting accordingly over time. If issues persist, consider rotating your crops or amending the soil with organic matter to enhance fertility and drainage.
During inspections, healthy shallots exhibit solid bulbs without any soft or darkened patches. If you detect softness or rot upon inspection, this could indicate a developing rot issue, and addressing the problem immediately is critical for preserving plant integrity. Cultivating a habit of weekly checks fortifies your ability to catch any emerging issues before they escalate. Consider documenting your findings in a garden journal for accurate tracking and identify trends for better decision-making in crop management. Look for subtle signs, such as discoloration around the base or roots shifting from firm to squishy, noting even slight differences can yield important information.
Should you find the bulbs softening despite following the previous steps, consider escalating your inspection process. This could mean digging deeper to investigate the root system for any hidden rot or pests that may have taken hold. Additionally, if any irregularities are noted, it may be time to implement an organic fungicide or consider preventive measures for soil health. If you repeatedly encounter issues of widespread rot that compromise your crop, seeking advice from a local agricultural extension office can provide tailored strategies specific to your area and growing conditions. Remember that addressing signs of trouble promptly is key to maintaining the health of your shallots, and involving a professional for help may become necessary if symptoms worsen significantly.
FAQ
How long does it take for shallots to recover from root rot?
The recovery time for shallots after experiencing root rot can vary, but you may start to see signs of improvement within 2 to 4 weeks. Factors like soil conditions, temperature, and care measures all play significant roles in recovery. Additionally, keeping a close eye on watering practices and soil drainage can expedite the process. Regular updates on the overall health of your plants through continuous monitoring helps in adjusting care protocols as needed.
Can root rot spread to other plants nearby?
Yes, root rot can spread to nearby plants, especially if they share the same soil or are planted closely together. If left unchecked, the pathogens causing root rot may proliferate, affecting the health of adjacent plants. Maintaining good hygiene practices such as cleaning tools and ensuring proper drainage can help reduce the risk of spread, and isolating affected plants until symptoms are resolved can provide further protection.
Should I remove the affected shallots entirely?
You may need to remove affected shallots if they show severe signs of rot, such as soft, mushy bulbs or an overwhelming number of unhealthy leaves. However, it’s advisable to first assess whether there are still signs of life before uprooting them. If you see any healthy bulbs or foliage, it may be worth allowing them to recover with proper care instead. Ensure that you support remaining shallots with improved drainage practices to bolster their chances against rot and promote recovery.