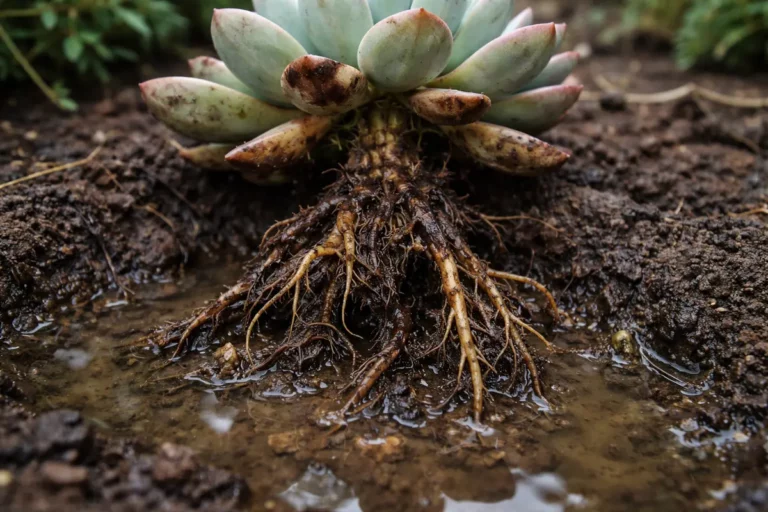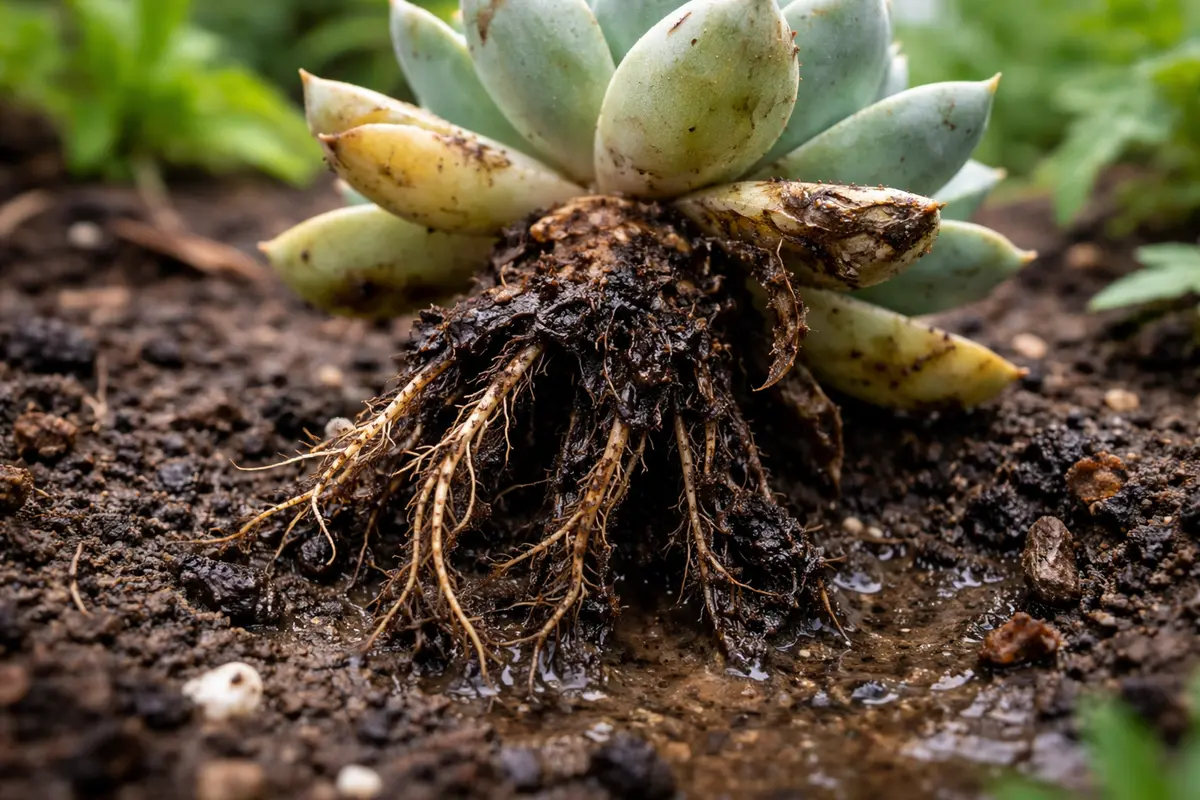
You may notice your succulent’s leaves turning mushy and discolored after heavy rain, which is why you need to know how to treat root rot in succulents after heavy rain. This condition often results from excess moisture in the soil, leading to rotting roots and eventually causing the plant to decline. If left unchecked, the problem only gets worse and weakens the plant significantly, but fixing it is possible now—just check the roots and remove any affected areas to promote recovery.
Step 1 – Trim Succulent Roots Affected by Rot
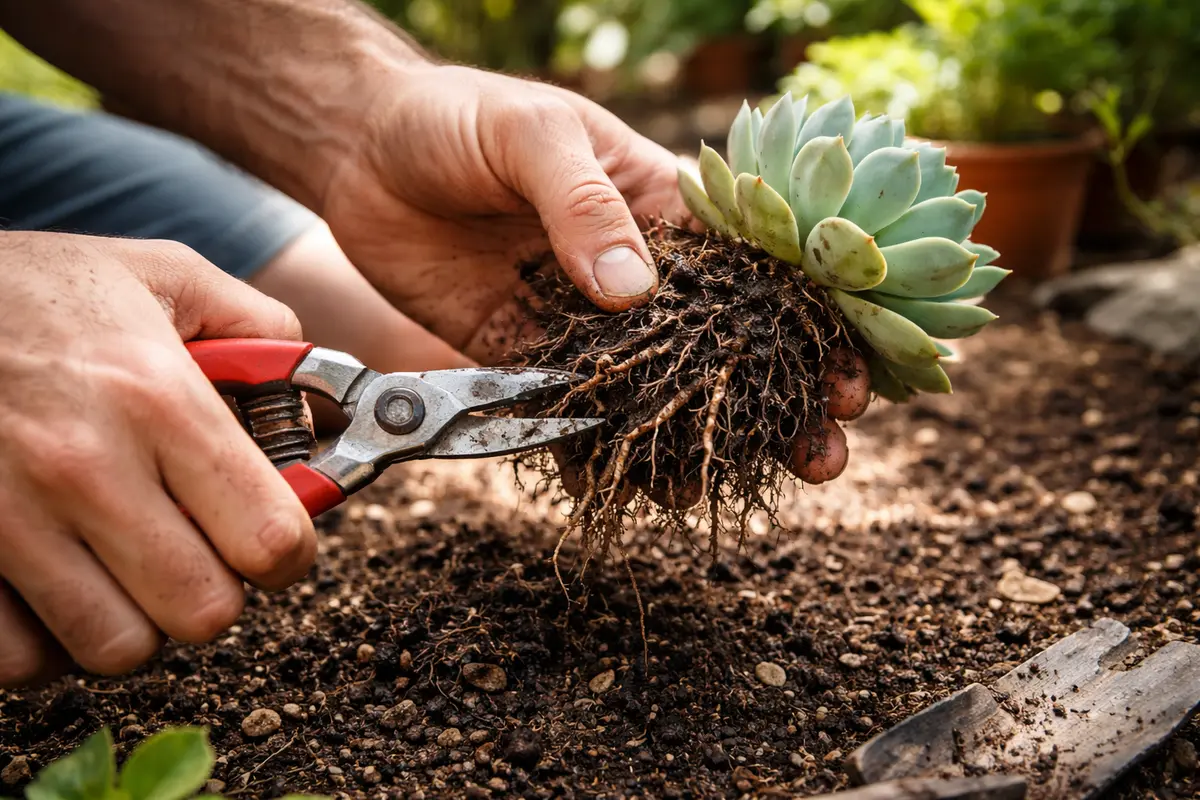
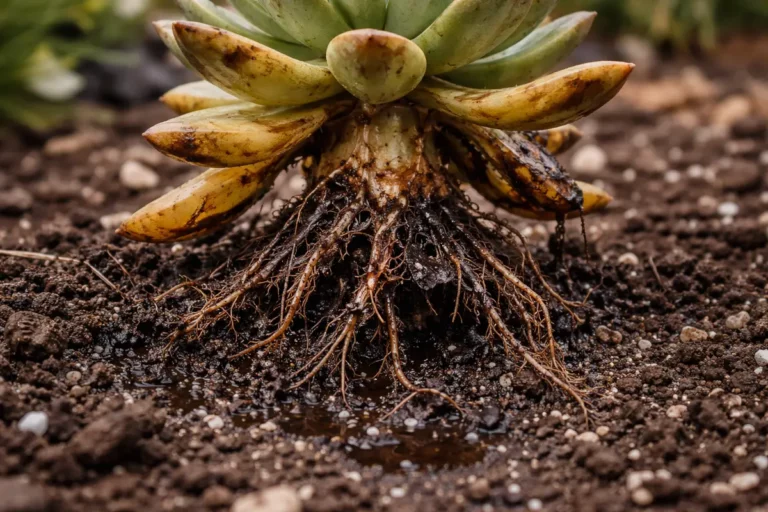
First, remove the affected succulent from its pot and inspect the roots for any signs of rot, which will appear dark, mushy, or discolored. Cut away the rotten portions with sterile scissors, ensuring the remaining roots are firm and healthy. After trimming, allow the plant to sit in a dry, airy environment for a few hours before repotting in fresh, dry soil.
Acting quickly prevents further decay, as succulents can suffer irreparable damage when root rot sets in. If left untreated, the plant’s vascular system can become compromised, leading to the spread of rot throughout the root system and stunted growth. If the roots feel slimy or emit an odor, root rot is likely present, while firm roots indicate a plant under stress but not yet rotting.
Consider a scenario where a gardener left their succulent in wet soil for too long before acting, resulting in complete loss of the plant. Timing is critical; succulents can bounce back quickly if treated early, while delays might necessitate a total replacement. If not experiencing root rot, check for overwatering or poor drainage conditions that could lead to similar issues.
Trimming rotten roots quickly is crucial because it helps limit rot’s progression, which can quickly affect the plant’s overall health. Healthy roots are essential for nutrient absorption; if you leave any compromised root segments, they can transmit the rot back to healthy areas, effectively undermining your efforts. It’s recommended to look for roots that are dark, soft, and mushy as indicators of rot. After trimming, you may notice a darker or softer root texture indicative of rot, which will contrast significantly with the robust structure of healthy roots. Ensuring none remain can mean the difference between recovery and further decline.
A common mistake gardeners make at this stage is cutting only a small portion of the rot rather than removing all affected areas. For example, if you leave even a tiny piece of a compromised root, the rot can resume its destruction and potentially bring down healthy roots. Early intervention affects recovery timing significantly; if you notice issues after heavy rain, deal with the roots promptly to maximize their chance for full rehabilitation. If, afterward, you still notice signs of rot on the tips of roots when checked within a few days, it’s a signal to go back and trim deeper into the root system. If roots appear black or emit a strong, unpleasant odor, you’ll need to intervene decisively.
Step 2 – Investigate Soil Saturation for Root Issues
Inspect the soil moisture levels immediately after noticing root rot. You will observe whether the soil is overly saturated and retaining excessive water. By checking moisture levels, you can identify if immediate drainage improvements are necessary to restore healthy conditions for your succulents. This can be evaluated by sticking your finger into the soil about an inch deep; if it feels wet and dense, rather than crumbly, remediation is needed. A moisture meter can assist in detecting damp conditions beyond surface levels.
Understanding the moisture retention in your soil is vital because overly wet conditions directly exacerbate root rot. Saturated soil reduces oxygen availability, starving roots that need a well-balanced moisture level to function properly. Succulents thrive in well-draining conditions, and if your current mix retains too much water, it raises the likelihood of future rot issues. If you detect a moisture level that remains consistently high for more than 48 hours after rain, consider prompt corrective action. Healthy soil should feel loose and allow for air circulation that encourages drying within a day.
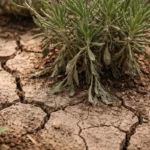
If you find the soil is not drying out within 24 hours of heavy rain, it may be time to repot. Soft, saturated soil often indicates a need for a more suitable mix, like cactus soil that promotes fast drainage. Additionally, if you notice a sour smell while inspecting, it’s a signal to act quickly, as this can indicate fungal growth which necessitates immediate corrective action. Establishing better drainage solutions, such as adding pumice or perlite to the soil mix, will enhance its permeability, allowing excess water to flow through more effectively. If the soil has a heavy, clay-like consistency, consider amending with coarse grit to improve aeration.
Step 3 – Transplant Succulents into Dry Soil Mix
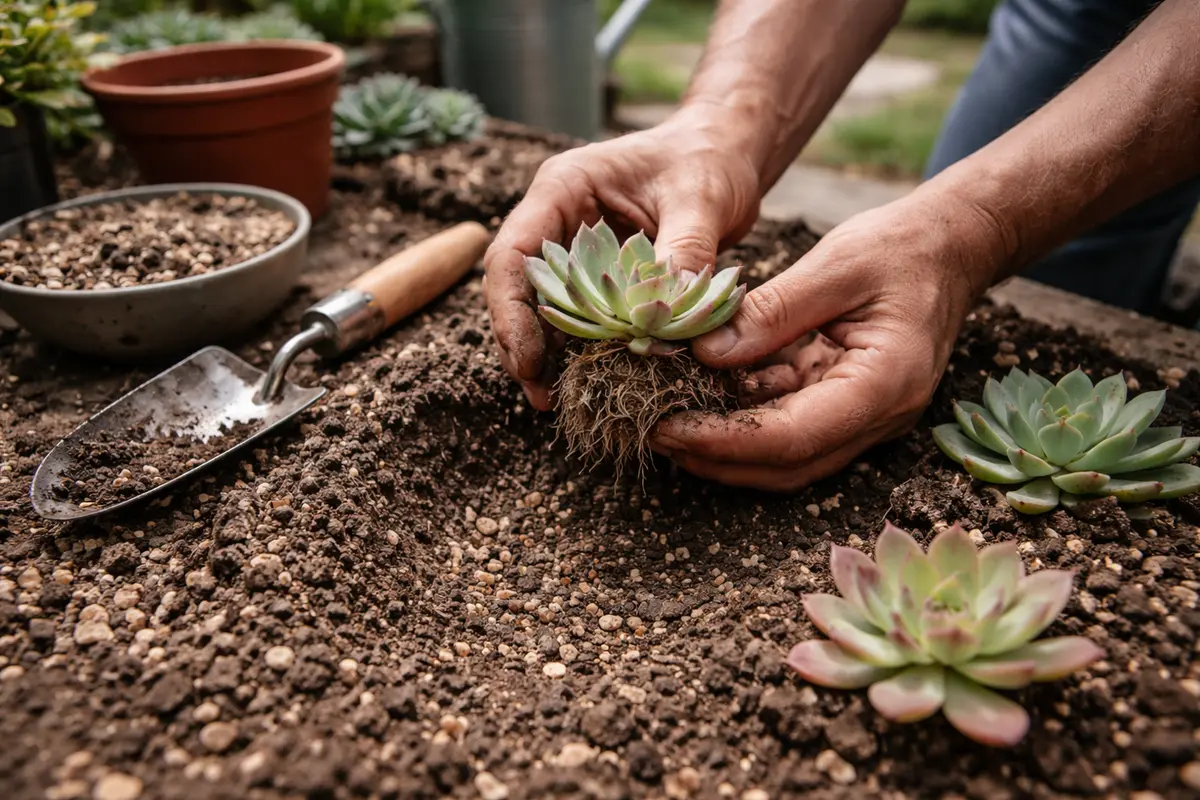
Start by repotting your succulent in dry, well-draining soil and removing any rotting roots. Check for signs of recovery such as new growth at the leaf tips or a change in leaf color from yellow back to green. Within a few weeks, you should also notice the soil drying out more quickly, indicating improved root function.
Recovery from root rot can take varying amounts of time; in optimal conditions, like warm temperatures and bright indirect light, visible recovery might occur within 2-4 weeks. Healthy regrowth typically includes firm leaves and a vivid color palette, whereas persistent drooping or discoloration suggests the rot may not be fully resolved. If roots remain black and mushy, check for proper airflow around the plant, as excessive humidity can slow recovery.
Be careful not to overcompensate with water or fertilizer, as this can further stress the plant during recovery. Many succulents thrive on minimal intervention, so delaying fertilization until new growth appears encourages stronger roots. If leaves turn brown instead of green, check for remaining unhealthy roots instead of increasing watering frequency.
The recovery timeline for succulents following root rot can vary depending on the extent of damage and environmental conditions. Healthy regrowth typically manifests as vibrant new leaves or offsets, emerging from the soil over a few weeks. Warmth and bright indirect light can speed recovery, while too much moisture or low light conditions may hinder progress; if the plant appears to stagnate, check the soil moisture again.
A critical mistake during recovery is overwatering, as it can lead to further rot. While some nutrients can support regrowth, over-fertilizing young sprouts can damage fragile roots; wait until the plant shows significant improvement before reintroducing fertilizer. If yellowing persists despite dry soil, check for pests that could be stressing your succulent.
Transplanting is a crucial recovery step because it reduces the stress of waterlogged soil while introducing fresh nutrients. After relocating your plants into dry soil mix, they are more likely to establish healthy growth patterns. Without a proper mix, roots struggle to access necessary oxygen and nutrients, complicating their recovery. In ideal conditions, the soil should feel loose and should not retain moisture for long periods, which will help roots begin generating new growth within a few days. Aim to position the succulent slightly above soil level to promote airflow around the stem.
A common mistake to avoid during recovery is over-fertilizing the soil immediately after transplanting. Succulents require minimal nutrients during this period; excess fertilizer can create additional stress and lead to further root damage. Watching for new growth or firming leaves indicates a successful transition; if these signs don’t appear within a week, it’s critical to investigate the moisture levels again. If the soil still appears soggy, reassess both the soil composition and the drainage conditions before considering fertilization. Once settled, refrain from fertilizing for at least a month to let roots acclimate.
Step 4 – Water Succulents Sparingly in Wet Seasons
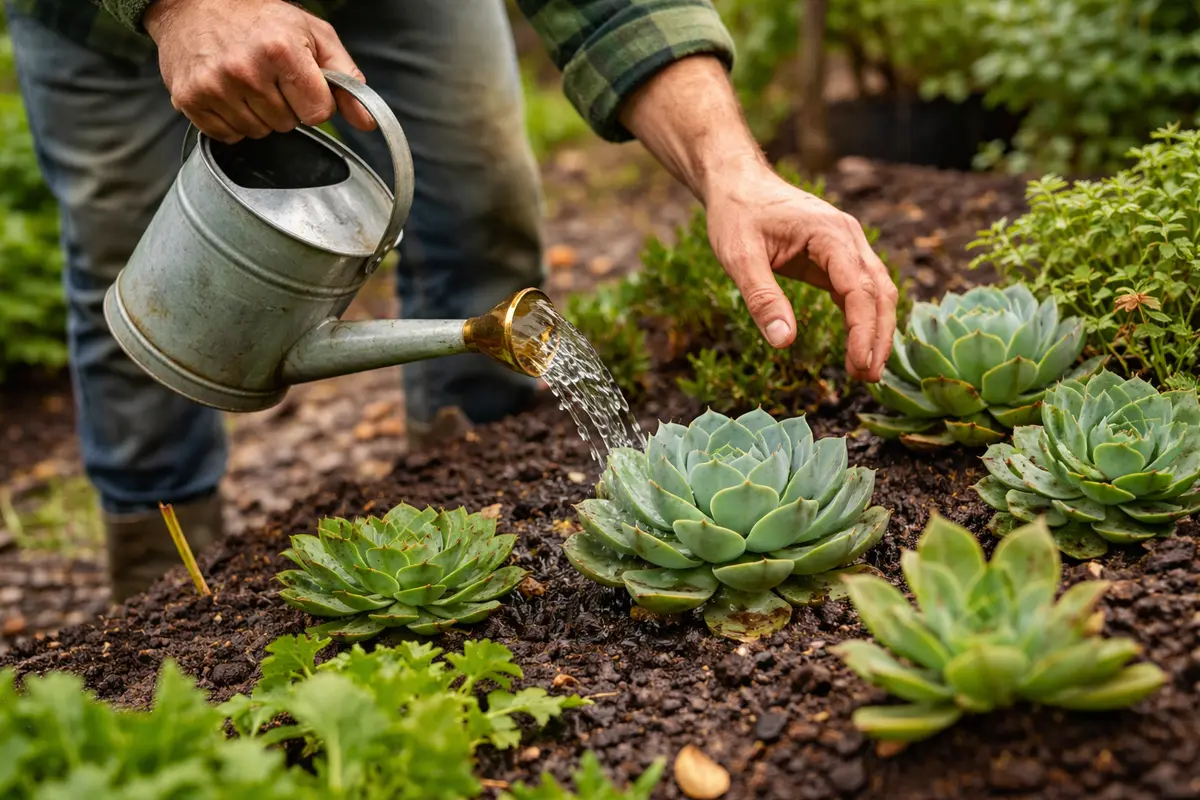
Water your succulents sparingly, limiting their exposure to moisture during wet seasons. This will help solidify a habit of monitoring soil conditions closely, significantly lowering the chances of recurrence. Establishing a routine of minimal watering can prevent reoccurring root rot. Monitor the moisture level of the soil meticulously, as overwatering can quickly negate the progress made during recovery. Following the transplant, allow the soil to dry out completely before rewatering to a depth of at least 2-3 inches.
Preventing overwatering is essential, especially in periods following heavy rainfall. Succulents thrive best in dry conditions, and maintaining a watering schedule that aligns with the seasonal weather prevents them from sitting in overly moist environments. Avoiding water on the leaves also promotes airflow, significantly reducing humidity around the plants. It’s often helpful to use a moisture meter to avoid guesswork; this device provides a quick and easy assessment of soil conditions. Regular checks on established plants can help you learn their unique water needs over time, tailoring your approach based on observed behavior.
As a seasonal variation, consider adjusting your watering schedule based on the actual moisture levels of the soil rather than a fixed weekly pattern. This flexibility allows you to cater to any changes in weather conditions or seasonal patterns. For instance, if rain is forecasted for the week, plan to skip your regular waterings to prevent excess moisture. Strongly consider delaying any deviations from a learning schedule until the soil is entirely dry, at least 2-3 inches deep, to ensure it’s not retaining unwanted water. Create a log of watering days to help with tracking moisture against weather conditions, contributing to a more informed routine.
Step 5 – Inspect Foliage for Signs of Recovery Weekly
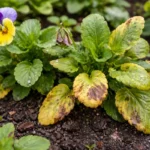
Start by checking your succulent every few days for signs of recovery or distress. Look for plump, firm leaves, which indicate that water absorption is returning, or discolored, mushy areas that may signal a relapse in root health. Schedule these inspections weekly to ensure that any issues are addressed promptly.
A fully recovered succulent showcases vibrant, resilient leaves that feel smooth and firm, while early signs of root rot re-emerging include leaves turning limp and a wrinkled texture. If you notice dark patches at the base of the stem contrasting with lush upper foliage, this indicates a problem with the roots. If leaf tips start to shrivel, check the soil moisture; overly wet soil could be the culprit.
If root rot symptoms return despite following the treatment steps, consider repotting the succulent in fresh, dry soil to prevent further issues. This measure allows you to refresh the growing medium while promoting aeration around the roots. If problems persist, it may be time to assess environmental factors such as light and drainage to ensure optimal growing conditions.
A fully recovered succulent should show signs of perky, vibrant leaves and healthy growth patterns. If you observe that the leaves are still wilted or turning yellow, the root rot may still be present beneath the surface, or the plant might be suffering from other issues like insufficient light or nutrient deficiencies. For example, inadequate sunlight exposure could impede overall recovery, often presenting as pale or etiolated growth. This is frequently more pronounced in varieties with dense foliage, which require sufficient light to maintain sturdy growth frames.
If any signs of distress appear, consider re-evaluating your watering routine and soil conditions. If problems persist even after following all previous steps, it may be necessary to consult a gardening professional for assistance or explore deeper root issues. Making adjustments based on visual feedback helps ensure continued plant health. Knowing when to seek external guidance can save valuable time; if yellowing spreads to healthy foliage, that’s a clear indication that something larger is at play and potential fungal presence should be evaluated.
FAQ
How long will it take for my succulents to recover from root rot?
Recovery can take anywhere from a few weeks to several months, depending on the severity of the rot and the care provided. Make sure to monitor your plants closely and look for new growth as an indicator of healing. If you see growth emerging around three weeks post-treatment, that’s a positive sign of revitalization.
Should I remove all affected leaves from my succulents?
Yes, remove any leaves that show signs of damage or rot. This helps channel energy back into the healthy parts of the plant, promoting faster recovery. Any leaf that feels mushy or discolored should be cut away to help prevent potential spread to unaffected areas.
Will my succulents recover if they have root rot?
Yes, as long as proper care is given following treatment. If you take immediate action to correct the environment and monitor your plants, they can rebound well. However, if the roots are severely damaged or if you notice consistent symptoms, professional intervention might be needed to assess viability.