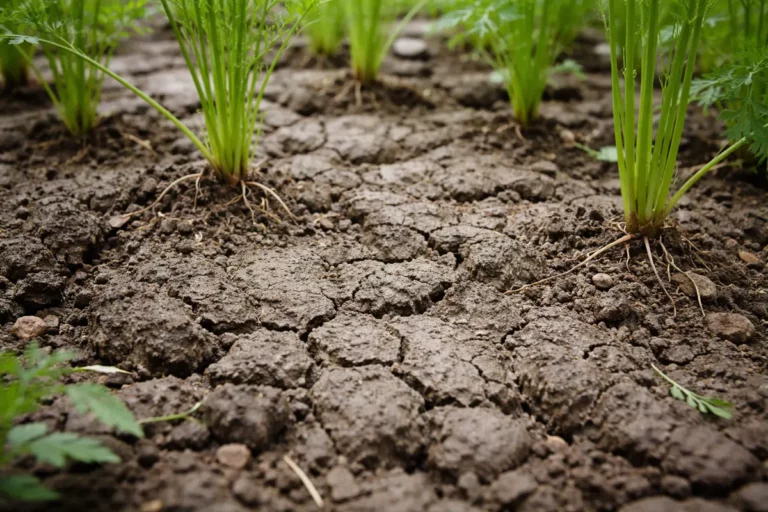
You may notice your indoor plants showing signs of distress, such as wilting leaves and mushy stems, particularly after heavy flooding, which is why you need to know how to fix root rot in indoor plants after flooding. This condition occurs when excess moisture suffocates the roots, leading to damage that presents through yellowing and drooping foliage. If ignored, root rot can spread throughout the root system, leading to more damage, but fixing it is possible now if you inspect the roots, cut away any rotting sections, and improve drainage in the soil.
Step 1 – Trim Off Rotted Roots Immediately
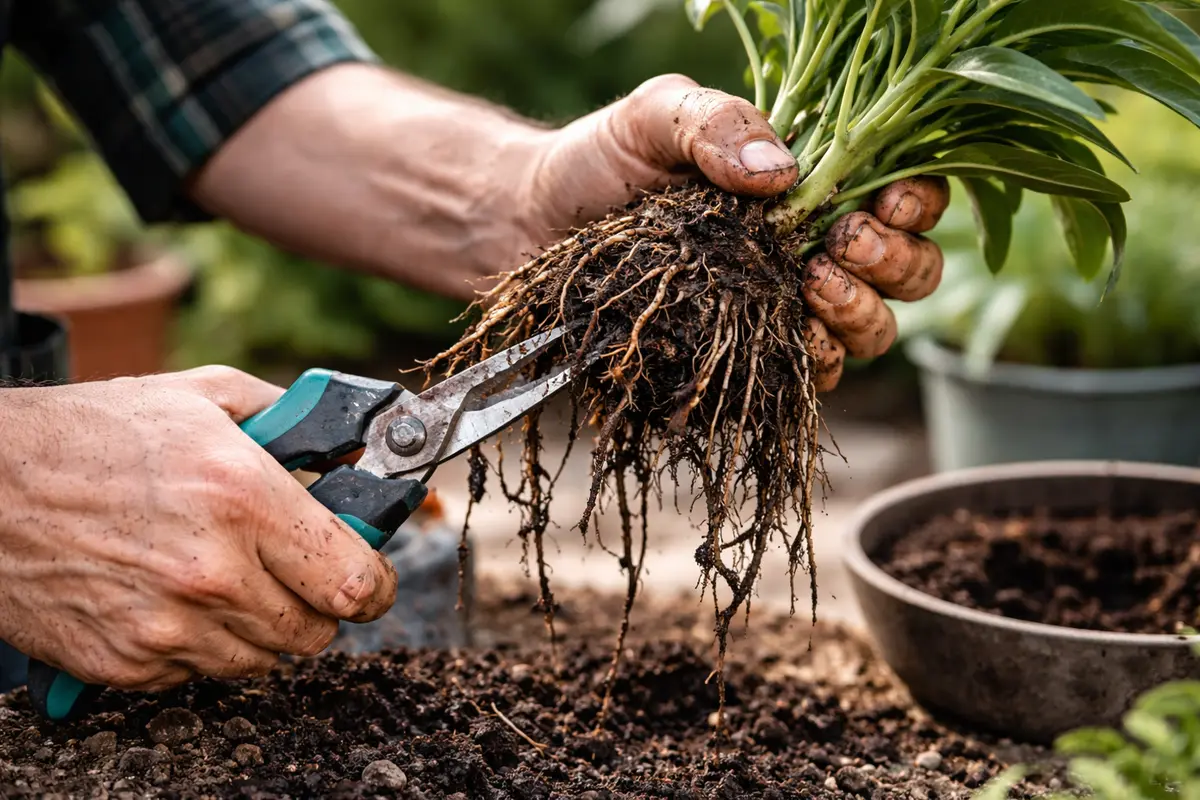
Start by gently removing your indoor plant from its pot to assess the roots. Trim away any dark, mushy root sections with sterilized scissors, ensuring to leave only healthy, firm roots intact. Within a few hours, the soil should begin to dry out and you may notice a slight reduction in moisture around the remaining roots.
Acting fast is crucial because root rot can quickly lead to plant death due to anaerobic conditions in the soil. When roots sit in waterlogged conditions, they begin to suffocate and decay, causing a lack of oxygen uptake. If you delay, the healthy roots could also start showing signs of rot, such as yellowing leaves or stunted growth, which are indicators of oxygen deprivation.
A common mistake gardeners make at this stage is re-potting the plant without addressing the wet soil issue first. For example, one gardener lost a beloved ficus by not removing all the waterlogged soil, thinking the new pot would solve the problem; however, the damp soil persisted, leading to further root decay. If you notice a foul smell or blackened roots, it’s time to assess the entire soil condition—you may need to change it entirely.
Acting quickly is essential because, in flooded conditions, root cells face oxygen deprivation, leading to anaerobic respiration and tissue breakdown within hours. This biological process accelerates decomposition, marking the plant for rapid decline if not corrected. If flooding goes unaddressed, the plant may display yellowing leaves within days, while a plant treated promptly will stabilize and start to show signs of recovery, like an improved texture in the roots.
Anecdotal evidence suggests that a gardener who addressed flooding immediately saw their plant bounce back within a week compared to another who waited too long ended up losing theirs completely. Many gardeners fail to realize that allowing the soil to remain overly wet for extended periods increases the risk of fungal infections that can be detrimental to the plant’s survival.
Taking swift action is crucial because damaged roots can continue to decay, releasing toxic substances into the soil that can harm healthy roots. Whenever roots sit in saturated conditions for too long, they become vulnerable to pathogens and begin to rot. This rapid degradation can spread to other parts of the plant, making recovery more challenging. Leaving damaged roots in place increases the chances of reinfection, stalling recovery and leading to further decline.
Many gardeners often delay this initial step and miss the early signs of root rot confusion, thinking that leaves will bounce back alone. A common mistake is to hope that wilting leaves will recover without addressing root problems directly. Acting quickly can make a significant difference, and early intervention can often reverse initial damage. If a plant is too far gone—even a quick trimming may not save it, so keep an eye on those roots!
Step 2 – Evaluate Soil Saturation and Drainage Issues
Check the soil’s moisture level and assess drainage by feeling it with your fingers. You should notice the soil’s texture becoming less soggy or waterlogged after this evaluation. If the soil remains gunky or too wet, it’s a clear sign that drainage is insufficient.
When the soil feels excessively muddy or compacted, it indicates that water is not draining effectively, which contributes to root rot. A plant’s root system needs aeration to absorb oxygen and nutrients, and overly saturated soil blocks these processes, leading to decay. If the roots cannot breathe, they will begin to rot and lose their ability to uptake essential nutrients. If not addressed, these conditions can create a breeding ground for harmful fungi and bacteria that thrive in moisture.
If the soil remains waterlogged and doesn’t improve after adjusting your watering habits, it may be time for drastic action. Observe if the soil remains damp even days after watering—this points toward chronic issues that necessitate repotting. If you detect a sour smell, it signals anaerobic conditions—repotting into fresh, well-draining soil is a necessary alternative for a healthy recovery. Over time, untreated soggy soil can lead to a complete system failure in the plant, preventing any recovery.
Step 3 – Test the Soil for Root Rot Confirmation
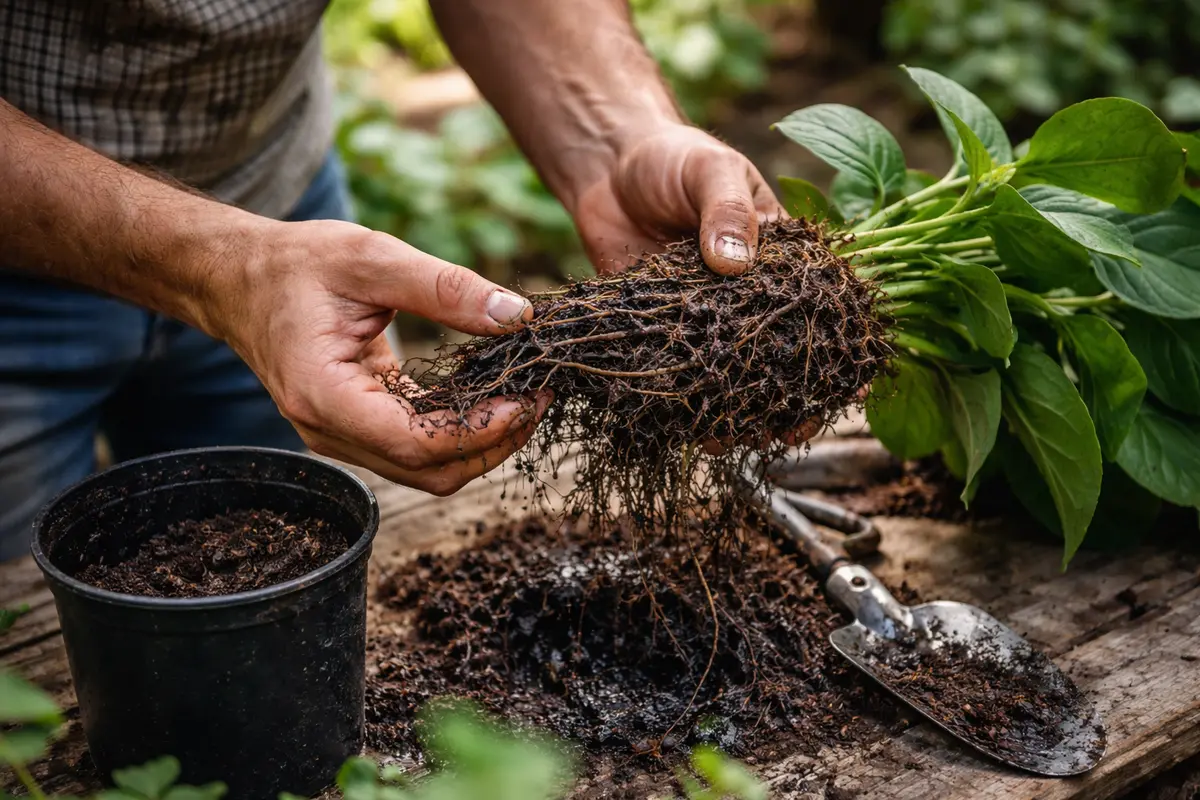
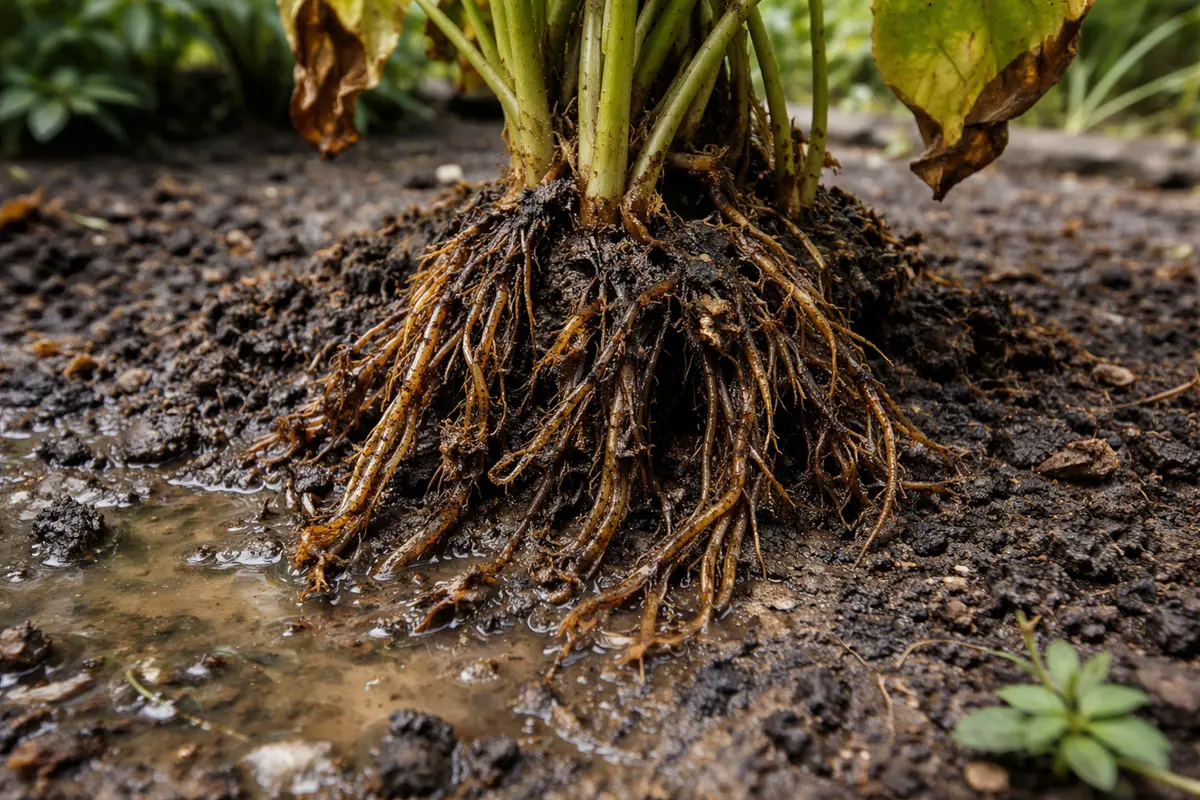
Start by thoroughly inspecting the root system of your indoor plant for signs of root rot after flooding. Look for dark, mushy roots that have a foul odor; these are indicators of decay resulting from excess moisture. Healthy roots should be white or light tan and firm to the touch.
Distinguish root rot from overwatering by checking the texture of the root system. While both issues can cause wilting, overwatering leads to soft yet firm, waterlogged soil, whereas root rot presents reeds of slimy, dark, and often foul-smelling roots. If root tips are brown and mushy, it confirms decay; however, a slightly discolored root that remains firm could signal overwatering instead.
If uncertain about the diagnosis, proceed with a secondary observation period. Allow the plant to dry out thoroughly and observe the roots for any changes over a week. If the condition worsens, or if the symptoms of decay remain unchanged, then root rot is likely the underlying issue that needs addressing.
Root rot can be confused with other issues like overwatering or pest damage. Unlike pests, which might manifest as visible insects or webbing, root rot will show signs primarily in the texture of the roots and the overall state of the soil. A plant suffering from overwatering may appear lethargic but will still have relatively firm, pale roots, whereas root rot will present visibly decayed roots and a foul odor from the soil. If the roots are beginning to turn yellow, check for pest presence instead.
If you remain uncertain about the diagnosis, allow the plant to sit for a few days to observe any changes in its top growth and leaf color. During this observation period, monitor for signs such as wilting leaves or a sudden decline in vitality, which can help confirm if root rot or another issue like thirst is occurring. If symptoms persist, proceed with the recovery methods specific to root rot.
Healthy roots typically appear white or light tan and firm in texture. In contrast, rotten roots feel slimy and exude a foul odor—a clear indication of the presence of root rot. If you find a mix of healthy and unhealthy roots, you may be able to save the plant by removing only the damaged portions. An important observation is that roots suffering from overwatering can quickly lead to issues like yellowing leaves and stunted growth. Pinching the root can help identify its firmness—softness suggests irreversible damage.
If you are unsure about the diagnosis, consider conducting a wait-and-see approach for a day or two after making adjustments. This is where many gardeners misjudge the severity; they often fail to monitor changes and leap to conclusions. If the plant worsens or shows no signs of recovery, be prepared to take more severe actions, such as repotting or replacing the soil—a necessary escalation if initial signs of decay are stubbornly present.
Step 4 – Repot Plant in Fresh, Well-Draining Mix
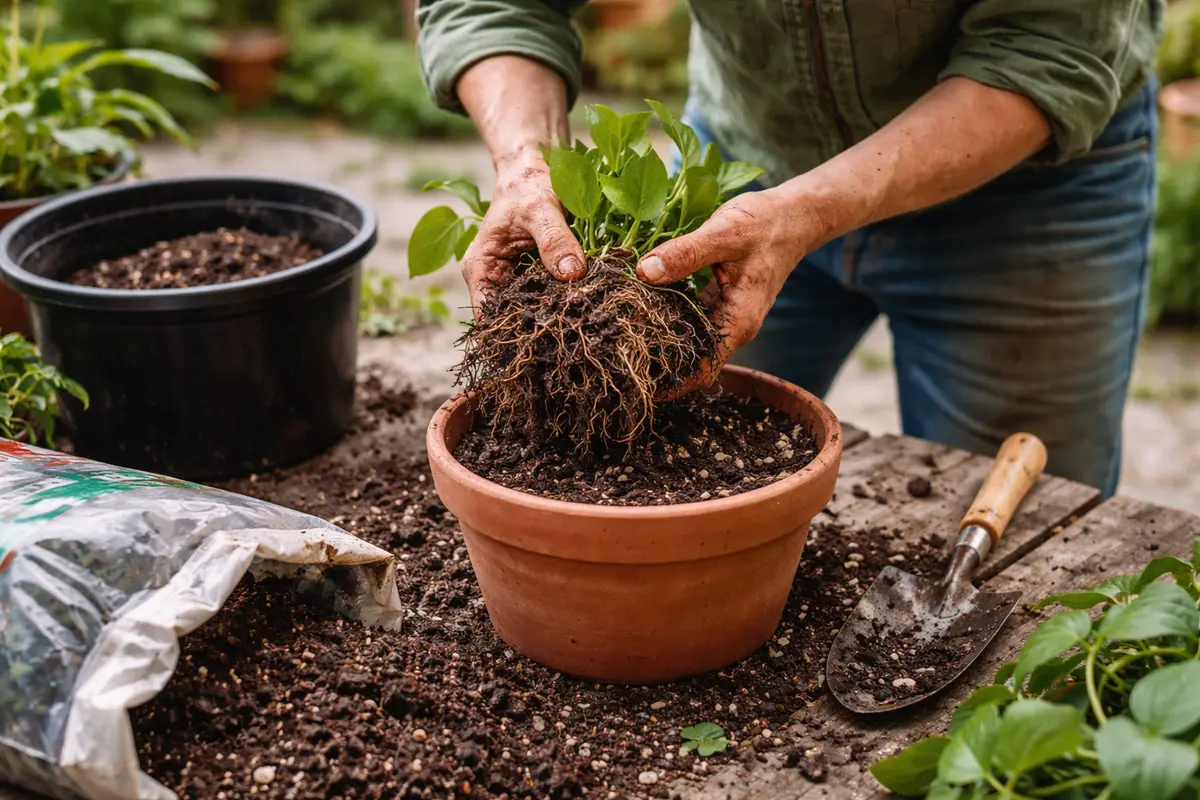
First, remove the plant from its pot and inspect the roots closely. Prune away any mushy, dark roots and place the plant in fresh, dry potting soil. After a few days, look for firming of the remaining roots and new leaf growth, indicating the plant is stabilizing.
Recovery timelines vary significantly; some plants may take weeks to show signs of improvement, while others recover in just a few days. A healthy plant will exhibit vibrant, new foliage and visibly growing roots. Keep the plant in a warm, well-lit area, but avoid direct sunlight, which can hinder regrowth.
Avoid overwatering during this recovery phase; it’s a common mistake that can lead to further root rot. Instead, check the moisture level in the soil before watering, ensuring it dries out somewhat before the next watering. If you notice yellowing leaves despite this adjustment, check for pests that may be stressing the plant.
Replanting is essential not just for providing fresh nutrients, but also it helps eliminate pathogens that may still be present in the old soil. Establishing a favorable environment with new soil creates conditions ripe for recovery. After transplanting, water the plant lightly, ensuring that the soil remains moist but not soggy. Too little water can shock the roots more, backtracking your recovery efforts.
A common mistake during this process is overcompensating with fertilizer, thinking it will speed up recovery. This usually occurs due to impatience for growth. Be cautious; too much fertilizer can damage newly transplanted roots, causing more stress and decay. It’s best to wait until you observe new growth before introducing any additional nutrients, usually when leaves appear firm and vibrant, indicating that the root system is functioning again.
Step 5 – Water Only When Soil Is Dried Out
Water your plant only once the top inch of soil feels dry to the touch. This simple yet effective practice helps create a moisture balance and will significantly reduce the risk of recurrence of root rot. Regular checks of soil moisture, several times a week, will clarify the best watering schedule.
Frequent over-watering often leads to root rot, especially after plants have suffered from flooding. By allowing the soil the chance to dry out properly, you provide the roots with adequate oxygen and prevent the growth of root-rotting pathogens. Feel for slight resistance when inserting a finger into the soil; resistance indicates enough moisture is retained. It is beneficial to use pots with drainage holes to ensure excess water can escape, preventing puddling at the bottom where roots sit.
A seasonal variation to this watering routine is especially critical in winter, as plants tend to need less moisture. This often trips up many indoor gardeners when they neglect to adjust their schedule based on observable signs of dormancy and water requirement change. Make sure to check the moisture level regularly and adjust accordingly; during the growing season, soil may dry out quicker than in dormancy, and this careful monitoring can prevent future root damage.
Step 6 – Inspect Leaves for Signs of Recovery Regularly

Start by monitoring the soil moisture level in the pot after flooding. Check the top inch of soil daily; if it’s still wet, delay watering further. Observe the plants for any signs of yellowing leaves or wilting during this period, and recheck soil moisture every few days to see if it has normalized.
A fully recovered plant typically shows vibrant, green leaves and sturdy stems, contrasting sharply with early indicators like browning leaf tips or mushy stems that signal the return of root rot. If the roots are healthy, they will be firm and white, but if they start to blacken or become squishy again, it’s time to take action. Check for moisture retention too — dry soil combined with wilting might indicate damage is recurring.
If signs of root rot return despite previous measures, consider repotting the plant in fresh, well-draining soil immediately. Remove any affected roots and allow the plant to dry out for a few days to limit moisture around the roots. If problems persist, elevate your intervention by consulting a plant specialist or considering adjusting environmental factors such as light and humidity.
Healthy plants will show bright green leaves and may even exhibit new growth within weeks after proper care. Conversely, yellowing or browning leaves can indicate that root rot is still affecting the plant or that another issue has arisen, such as pest infestation or nutritional deficiency. Keeping a close watch allows you to quickly address emerging symptoms, starting with adjustments in light, soil, or water availability as needed.
If the problem persists despite following all steps, consider escalating your approach by consulting with a local gardening expert or horticulturist to dig deeper into environmental factors or plant-specific care requirements. In some cases, if numerous leaves begin dropping off, it suggests that root rot has returned or is progressing; in such cases, immediate re-evaluation of root conditions becomes necessary.
FAQ
How long does it take for indoor plants to recover from root rot?
After addressing root rot, you should see signs of recovery within a few weeks. New leaf growth and improved color typically indicate progress; however, full recovery may extend to 4-6 weeks depending on the plant’s health and environmental conditions. Persistent observation can differentiate between recovery and potential new issues.
Can root rot spread to other plants in my home?
Yes, root rot can easily spread to nearby plants if pathogens are present in the soil or water. It’s critical to quarantine any affected plants to avoid cross-contamination and remove all contaminated soil or materials before touching others. Avoid using the same tools or watering sources until everything is sanitized to prevent spreading the issue.
Should I remove all affected roots immediately?
Yes, you should remove all visibly rotten roots when you first notice the problem. Leaving any infected tissue can hinder recovery and result in a resurgence of root rot. A cautious approach ensures that all sources of rot are eliminated so that the healthy tissue can effectively restore the plant.