You may notice your tomato plants showing signs of distress after heavy rain, which is why you need to know about fixing yellowing leaves on tomato plants after heavy rain. This yellowing often indicates overwatering or nutrient deficiency, leading to problems like wilting or leaf drop. If left unattended, the situation can worsen, weakening the plant and making recovery more difficult, but fixing it is possible now by checking soil moisture and adjusting your watering schedule.
Step 1 – Trim Yellow Tomato Leaves Promptly
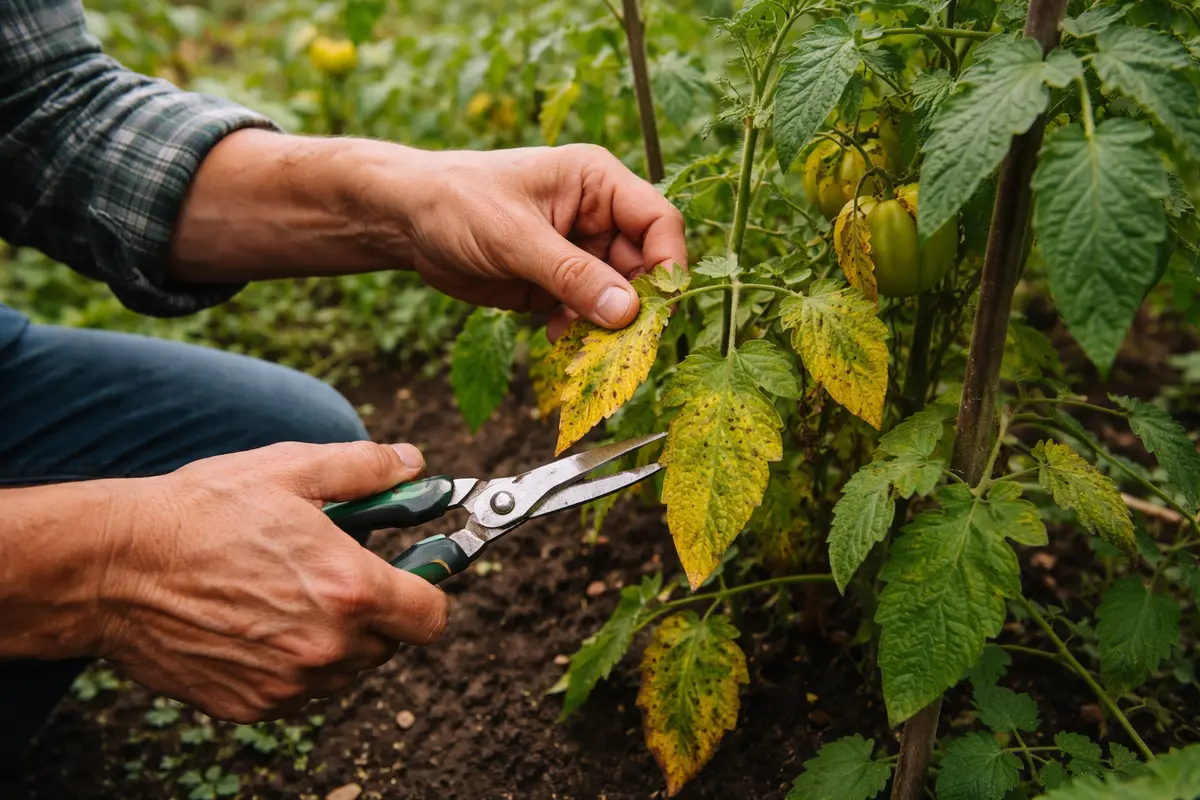
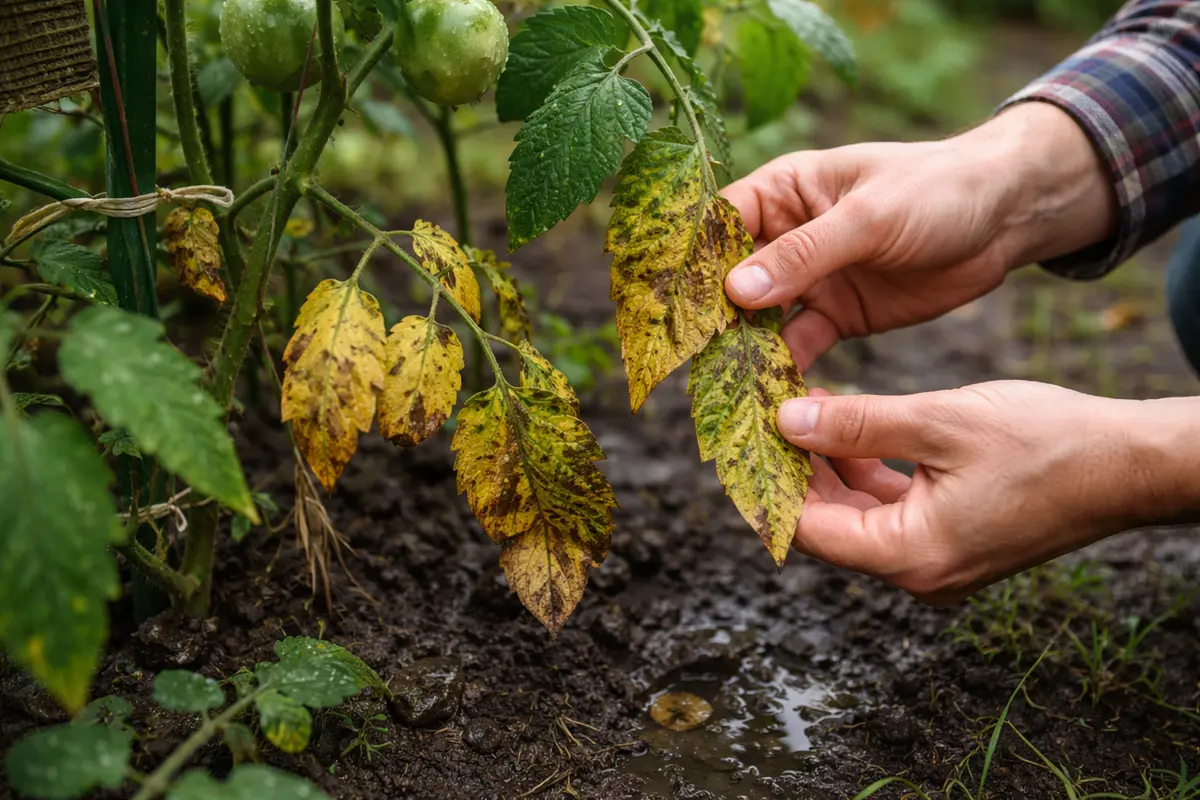
Begin by trimming away any yellowing leaves immediately. You will notice a reduction in overall stress on the plant within a day or two, as remaining healthy leaves can focus on photosynthesis and growth. Removing these leaves also prevents the potential spread of disease, a common problem during wet conditions. Pay close attention to how quickly other parts of the plant respond; if you spot new growth appearing within a week, it indicates successful energy redirection, which is critical to overall plant health. If the yellow leaves have progressed to a deeper shade, they can harbor pathogens, and the longer they remain, the more likely the plant will suffer from an infection.
Yellowing typically occurs because unhealthy leaves cannot contribute to the plant’s energy needs, and if they remain on the plant, they can become a breeding ground for diseases. For instance, if you don’t cut away diseased foliage, they might attract pests, which can further jeopardize the plant’s health. Cutting them off allows the plant to redirect its energy towards producing new, healthy foliage. Beyond reducing disease risk, it’s also crucial for maintaining good air circulation, as stagnant air can promote fungal infections. Observe the airflow around the plant; a well-trimmed plant should have an open canopy, allowing breezes that help speed up drying and lessen fungal growth risk. If you notice excessive moisture buildup on the foliage due to poor air circulation, consider adjusting your spacing between plants to improve airflow.
A common mistake at this stage is to remove leaves without inspecting the rest of the plant or the soil condition. For example, if you focus solely on trimming without addressing root health, new growth might still struggle. Check for remaining yellow leaves or wilting in other parts of the plant; this may indicate further stress requiring attention. Additionally, consider the timing of your trims; cutting too aggressively immediately after heavy rains might shock the plant further. You want to ensure that any trims are done at a pace matching the plant’s recovery. Frequent interruptions to the photosynthetic process, even by well-intentioned trimming, can lead to further stress.
Step 2 – Diagnose Waterlogged Soil Issues
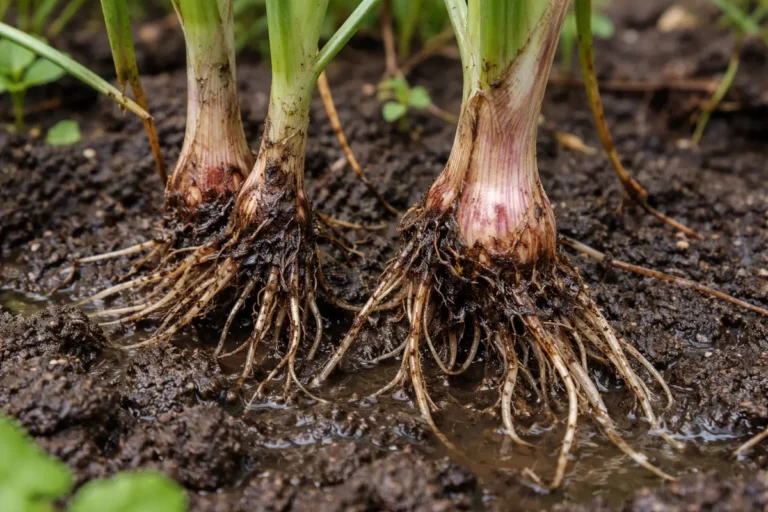
Inspect the soil moisture levels to diagnose potential waterlogged conditions. If the soil feels overly wet or smells sour, you should observe that the plant stems appear firm and healthy after correcting any drainage issues. Conversely, if the stems are mushy or exhibit blackening, it could indicate root rot has set in, which is a critical matter that requires immediate action. Checking the soil moisture helps you understand the urgency of the situation—if it’s compacted and holds water, recovery efforts will need more focus. Often, if the surface feels dry, deeper levels could still remain saturated, indicating a potential drainage problem that you need to address.
Waterlogged soil deprives roots of oxygen, leading to yellowing leaves as the plant struggles to intake necessary nutrients. Identifying the level of moisture is crucial; you can perform a simple test by digging a few inches down into the soil. If it’s muddy or doesn’t crumble in your hands, that suggests inadequate drainage. Conversely, if the upper layer is dry but deeper soil remains waterlogged, you may need to alter your watering routine. If water sits on the surface or forms puddles, that is an immediate sign that corrective drainage measures need to be implemented. This might mean replanting in raised beds or increasing drainage capacity through compost or perlite amendments, especially for clay-heavy soils that retain water excessively. You could also consider integrating drainage tiles around the planting area if the problem persists season after season.
If the soil is too dense, mixing in organic matter like compost can improve aeration. If roots are exposed and healthy, but they remain in overly moist soil, consider lifting the plants or amending with sand or perlite. Pulling plants from overly saturated soil can be risky if done improperly, as you stretch or damage roots; take care to lift them gently and maintain as much soil as possible around the roots. When replanting, ensure you do so at the same depth as before, as planting too deeply can also create problems with moisture retention. This step is critical to ensure that the plants receive enough oxygen to thrive and reduces the risk of fungal diseases caused by prolonged wet conditions. If your soil texture remains a concern, investing in a soil moisture meter can provide accurate readings, allowing for more precise watering adjustments and alerts when saturation reaches problematic levels.
Step 3 – Feed Tomatoes with Balanced Nutrients
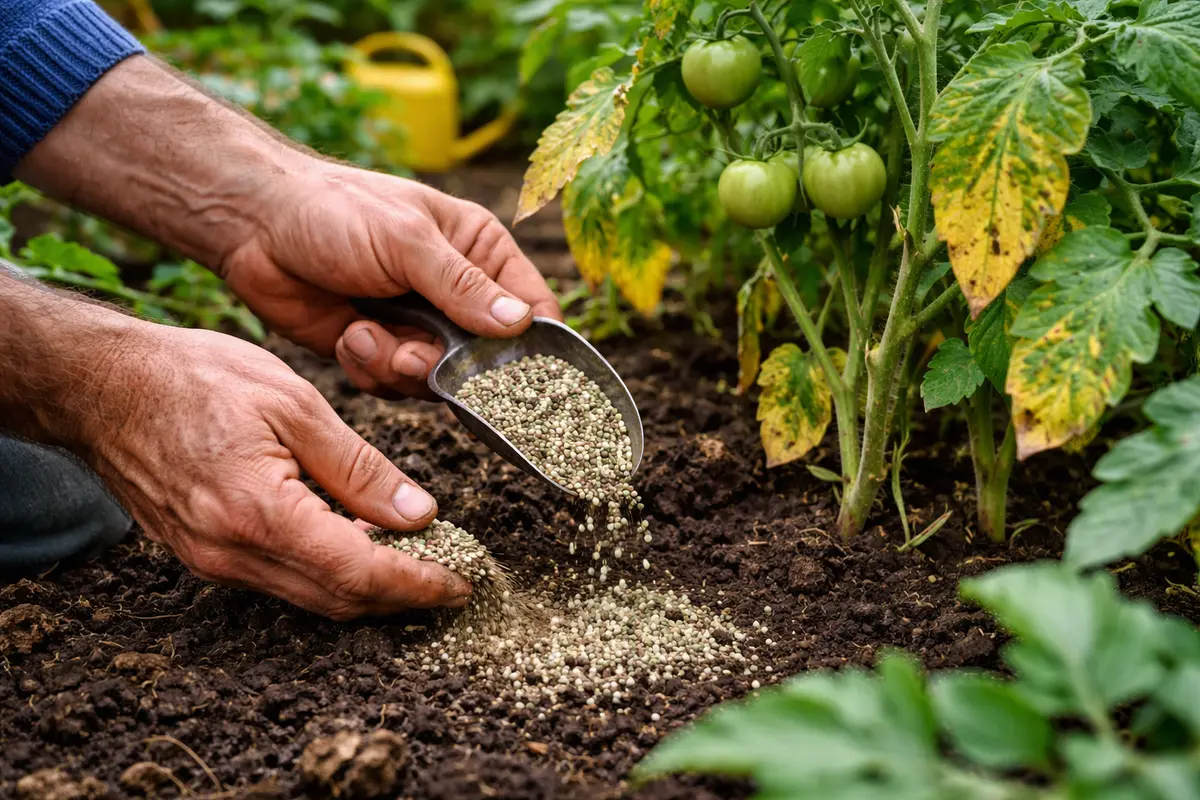
Apply a balanced organic fertilizer to support recovery from stress. You should start observing healthier leaf color and overall vigor within one week as the plants begin to absorb essential nutrients. Quick-release fertilizers are beneficial for stressed plants, allowing them to recover more effectively. Consider products that are specifically formulated for tomatoes, as they often include micronutrients that promote flowering and fruiting, which are crucial for the plant’s lifecycle. If the fertilizer is not well mixed into the soil, plants near the surface may absorb only minimal nutrients, denying them the essential elements they require.
Nutrient deficiencies can arise when rainfall washes away important minerals or overwhelms the soil’s capacity to retain nutrients. Feeding your tomato plants reintroduces necessary ingredients like nitrogen, phosphorus, and potassium, which boost growth and aid in recovery from the stress caused by waterlogged conditions. Additionally, if your soil is particularly sandy or you see evidence of leaching, which means nutrients are carried away from the root zone, this could drastically reduce nutrient content, underscoring the need for timely fertilization after heavy rain. Be mindful, if you aggressively water immediately post-fertilization without allowing time for nutrient bonding, this could wash out fertilizers, failing to impact plant health positively.
A typical error in this step is over-fertilizing, which can burn the plant roots and exacerbate existing issues. Liquid fertilizers can absorb more quickly than granular ones, making them a better choice for stressed plants, but they require careful application to avoid oversaturation. The balance here is crucial; too much fertilizer can result in ‘fertilizer burn,’ where the edges of leaves turn brown and crispy due to root damage. Apply fertilizers in cooler parts of the day to prevent nutrient burn. Moreover, applying fertilizer before heavy rains can wash away these nutrients, leaving plants deficient once again. Aim to apply fertilizer after a good soaking rain but also only after ensuring that your plant’s drainage is sufficient to prevent further problems. Always dissolve the fertilizer in water before application, ensuring better absorption and preventing potential root contact which can cause further stress.
Step 4 – Look for Improvements After 7 Days
Start by checking the tomato plants within 24 hours after heavy rain. Observe the foliage closely, particularly the lower leaves where yellowing typically begins. Look for signs of waterlogging or fungal issues, as these can contribute to leaf yellowing. Recheck the plants again in three to five days to note any changes or further yellowing in the leaves. Identifying the signs of recovery early can dictate your next steps moving forward. If you notice that more leaves are yellowing or wilting, even after addressing watering and feeding, this could indicate either a deeper nutrient deficiency or an underlying disease process starting to develop.
A fully recovered tomato plant shows lush, vibrant green leaves without any yellowing, particularly along the stems and undersides. In contrast, if the problem returns, look for signs of wilting or a slightly brittle texture on the leaves that were previously affected. If the leaves remain firm and green, the plant is likely recovering well; if not, be sure to examine the soil for excess moisture or other factors that might not meet the plant’s needs, such as a formulaic deficiency. Noticing any stunted growth or change in leaf size during this observation phase can signal that the plant is still stressed, necessitating another round of troubleshooting. Use a notebook to jot down observations for reference on what has helped or worsened the plant’s condition over time.
If yellowing returns despite following the care steps, consider adjusting the watering routine to prevent waterlogging, ensuring the soil has good drainage. Alternatively, apply a balanced fertilizer formulated for tomatoes to replenish nutrients lost from heavy rainfall. If these actions do not lead to changes after another week, consulting a local agricultural extension office may provide additional insights tailored to your region’s plant health challenges. Observing plant responses meticulously will enhance your understanding of the dynamics at play, allowing you to adapt your methods as needed. Always question if new issues, such as pest infestations, appear concurrently; this could reflect problems such as stress-level fatigue that make the plant more susceptible to infestations. Maintain a record of what changes occur after interventions to guide future approaches more effectively.
FAQ
How long will it take for my tomato plants to recover from yellowing leaves?
Recovery from yellowing leaves can take anywhere from one to three weeks, depending on the severity of the stress and the effectiveness of your interventions. Regular monitoring during this time is essential to observe any changes in leaf color and new growth. It’s critical to continue observing the plants, as ongoing signs of stress, like drooping or further yellowing, might require a different approach or intensity in care. If no progress is observed after a week, consider reevaluating your fertilization approach or watering technique.
Can yellow leaves spread to healthy parts of the plant?
Yes, if the underlying issues, such as poor drainage or nutrient deficiency, are not addressed, yellowing can spread from affected leaves to healthy foliage. Prompt action, including proper pruning and nutrient application, can help mitigate this risk. Contact with diseased leaves also poses a threat; careful pruning can minimize this. A well-reviewed practice is to sterilize your pruning tools between cuts when dealing with distressed plants to prevent transferring pathogens. Implementing good cultural practices ensures that healthy parts of the plant remain vigorous and are less susceptible to infection.
Should I remove all yellow leaves immediately?
While it’s essential to remove severely yellowed leaves to improve air circulation and promote new growth, do not remove all of them at once. Target the most affected leaves initially; this allows the plant to maintain some foliage for photosynthesis until recovery signals are evident. Retaining too many leaves initially can lead to an imbalance in photosynthesis, as healthy leaves are still essential for energy production. You might also observe that gradual adjustments tend to allow for the plants to process recovery signals more effectively, which suits their natural growth cycle.