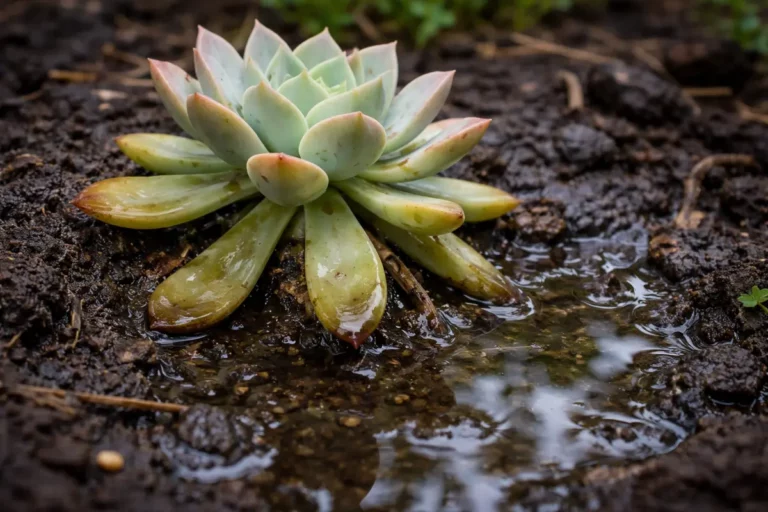
You may notice your succulent leaves starting to turn yellow and feel mushy, which is a clear sign that you need to know how to stop root rot in succulents after overwatering. This often occurs when the plant’s roots are sitting in waterlogged soil, leading to rotting and damage that can quickly spread. If ignored, the problem gets worse and can weaken the plant, making it harder to fix, but you can still act now by inspecting the roots and adjusting your watering habits.
Step 1 – Trim Off Rotting Succulent Leaves
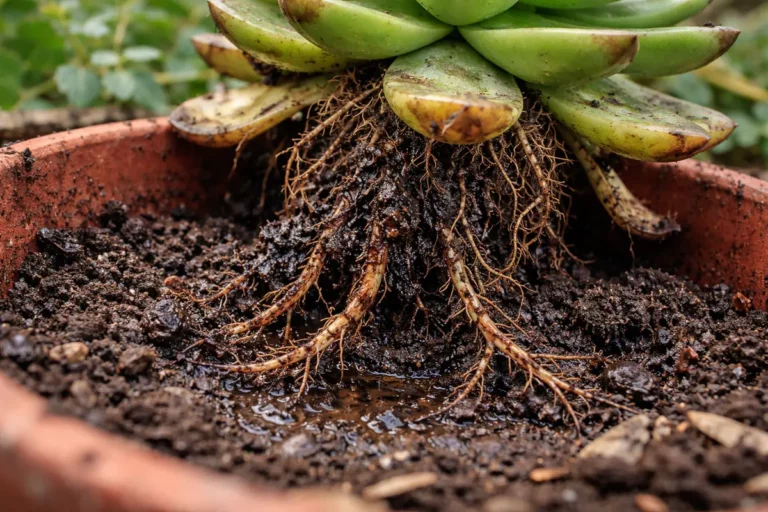
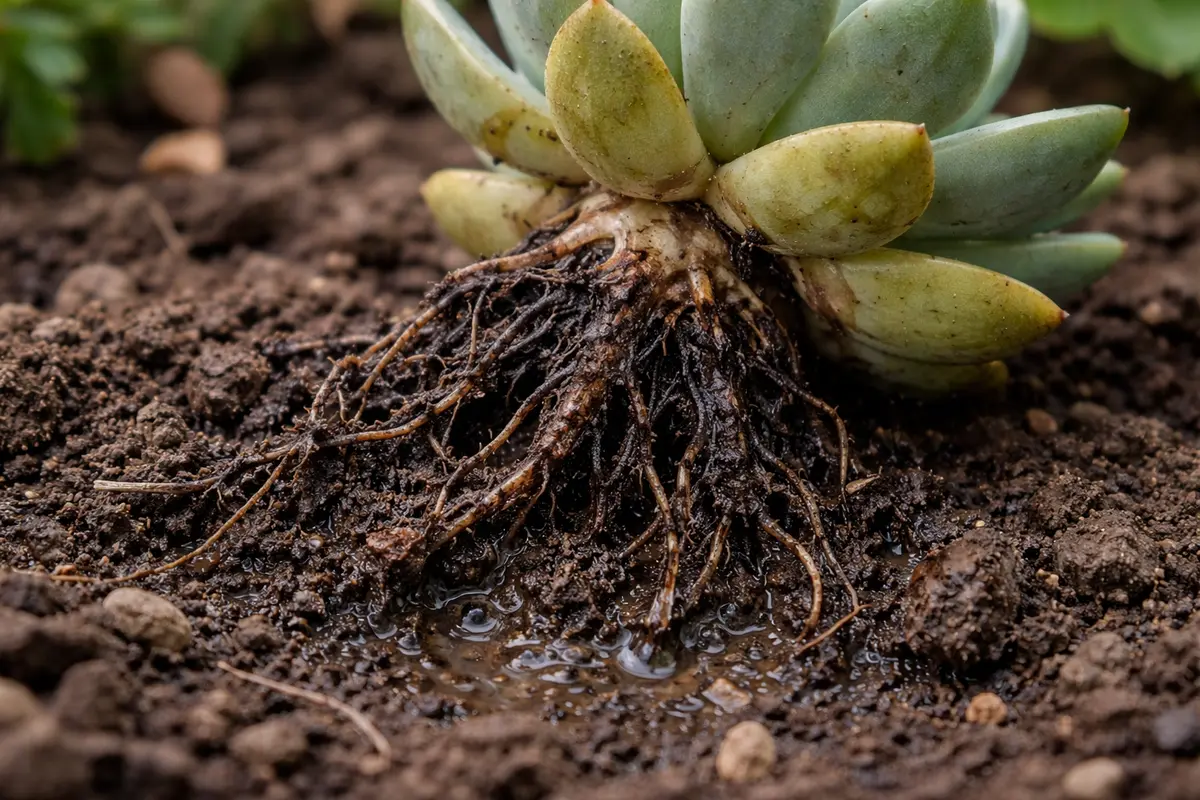
Start by removing the succulent from its pot and gently shaking off excess soil from the roots. Inspect the roots for any signs of mushiness or black discoloration, as healthy roots should be firm and white. Place the succulent aside in a dry, shaded area, allowing the roots to air dry for a few hours, and you should start noticing reduced moisture around the root system.
Acting quickly is crucial because succulents are particularly sensitive to excess moisture, which can lead to anaerobic conditions where harmful bacteria thrive. If not addressed swiftly, the cells in the plant’s roots will begin to break down, leading to irreversible decay and eventual death. Watch for a difference between a succulent with dry, firm roots and one showing signs of rot; it’s vital for survival.
In one case, a gardener waited several days to investigate a drooping succulent, and by that time, most roots had rotted away, resulting in a complete loss of the plant. Many gardeners mistakenly think they can simply add more soil to cater to overwatered plants, but this action delays essential drying and worsens the root rot. If roots feel mushy, immediately dry them out; if they remain firm, then repot them in fresh, well-draining soil.
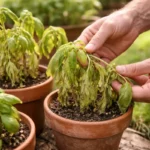
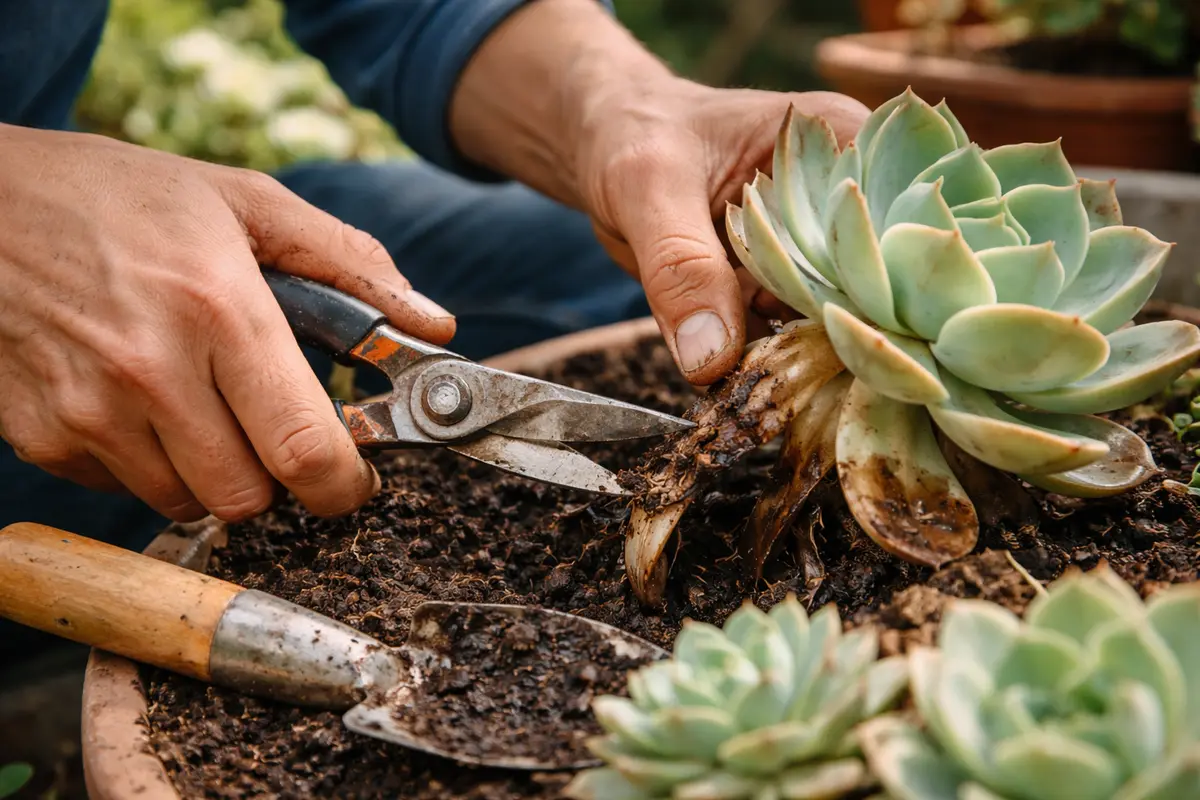
Taking quick action to trim away the rotten leaves helps protect the healthy tissue beneath. When left untreated, the rot can spread rapidly, further compromising the plant’s health and making recovery harder. In succulents, which are susceptible to moisture retention, swift action is crucial; otherwise, the underlying roots could also begin to decay. Be mindful to use clean, sharp scissors to avoid introducing further pathogens during this process. Frequent checks after rain or watering can help you catch decay early, safeguarding the remaining parts of the plant.
A common mistake at this stage is to only prune the most obvious leaves without inspecting the plant adequately. If you continue to water the plant with rotten leaves still attached, you risk further damaging it. Make sure to perform a thorough inspection, checking for any more signs of decay; if unexpected symptoms appear, you may need to halt watering entirely until the affected areas are completely addressed. If the leaves feel soft or squishy and have any discoloration beyond the initial area, they must be removed promptly to prevent further damage.
Step 2 – Investigate Soil Moisture Retention Issues
Start by assessing the soil moisture levels and drainage quality. If the soil feels overly wet, with a saturated appearance, carefully remove the succulent from its pot and inspect the root system. You should observe the roots; if they are brown and mushy, this indicates root rot, and they must be trimmed back before repotting into fresh, dry soil.
Root rot occurs when the roots are deprived of oxygen due to excess moisture in the soil, leading to anaerobic conditions. Healthy roots appear white and firm, while rotten roots are dark and mushy, unable to transport water and nutrients effectively. If the roots are severely damaged, the succulent may exhibit wilted or yellowing leaves as it can no longer support its foliage.
If the soil smells sour or has a slimy texture, it indicates the presence of anaerobic bacteria, and you must replace it entirely with well-draining succulent soil. Alternatively, if you notice that the leaves are discolored but the soil is not overly wet, check for pests such as mealybugs, which can also cause similar symptoms and require a different treatment strategy.
Inadequate drainage often leads to root rot in succulents. It’s essential to recognize the texture of the soil; if it is clay-heavy, it will retain water longer than sandy mixes. Over the next few days, continually monitor moisture levels to establish how quickly the soil dries out, enabling you to take effective corrective measures. If the soil surface remains damp for several days, it suggests a drainage issue is likely at the heart of the problem. Conversely, sandy-soil mixes promote quick drying but should be evaluated for their ability to retain moisture just enough for succulent needs.
If you detect a sour or musty smell coming from the soil, this indicates anaerobic conditions that further exacerbate moisture retention issues. In this case, consider removing the plant from its pot and allowing it to dry out before repotting in well-draining soil. If the roots are mushy or discolored, they might require additional trimming before replanting. Substituting traditional potting soil for a mix specifically designed for cacti and succulents will mitigate the risk of persistent moisture and help maintain a healthy root environment.
Step 3 – Repot Succulents in Drying Potting Mix
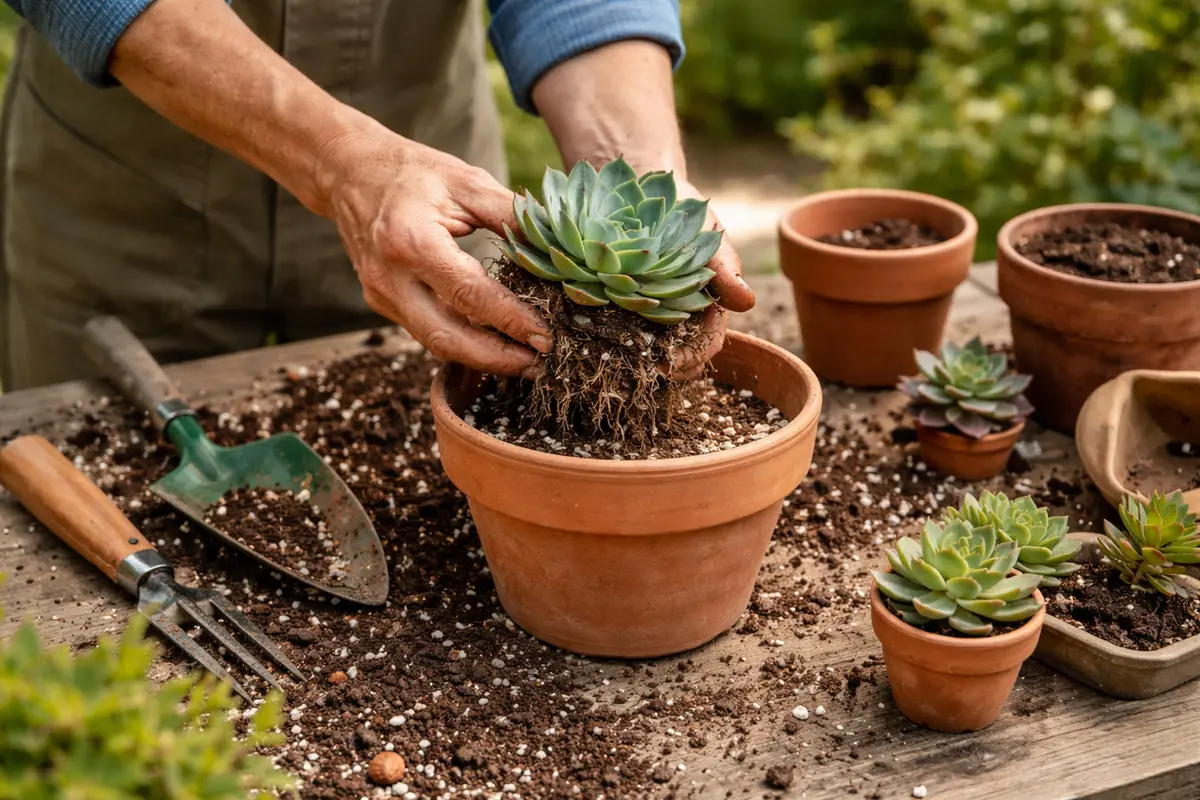
Replant your succulents in a fresh, well-draining potting mix specifically designed for succulents. This environment will allow air to circulate around the roots, helping them recover faster and preventing moisture buildup. Within a week, you may start to observe new growth and healthier leaves. Ensure your new soil contains a mix of pumice, coarse sand, and potting soil to ensure maximum drainage. The ideal soil should feel gritty and fluffy, allowing water to flow through without becoming waterlogged.
When succulents are placed in well-draining soil, it creates the right balance of moisture and air, essential for healthy root development. It helps prevent future occurrences of root rot, especially if you notice that the previous mix retained too much water. The performance of the new soil will reflect how well-suited it is for succulent growth, speeding up recovery. To further promote root acclimatization, lightly pack the soil around the roots without compacting it too tightly. Remember, a good mixture should not contain more than 10-20% organic matter.
A common pitfall during this step is overwatering the repotted succulent immediately, thinking it will aid recovery. It’s crucial to allow the new potting mix to dry out before watering again. Always check that the dry surface layer extends at least an inch deep before reintroducing water, reducing the chances of repeating the issue. Overwatering at this critical stage can lead to further rot, as the roots are already vulnerable and need to adapt to their new environment. If you’re unsure how long to wait, checking once a week is practical until you see signs of fresh growth.
Step 4 – Water Succulents Sparingly in Humid Months
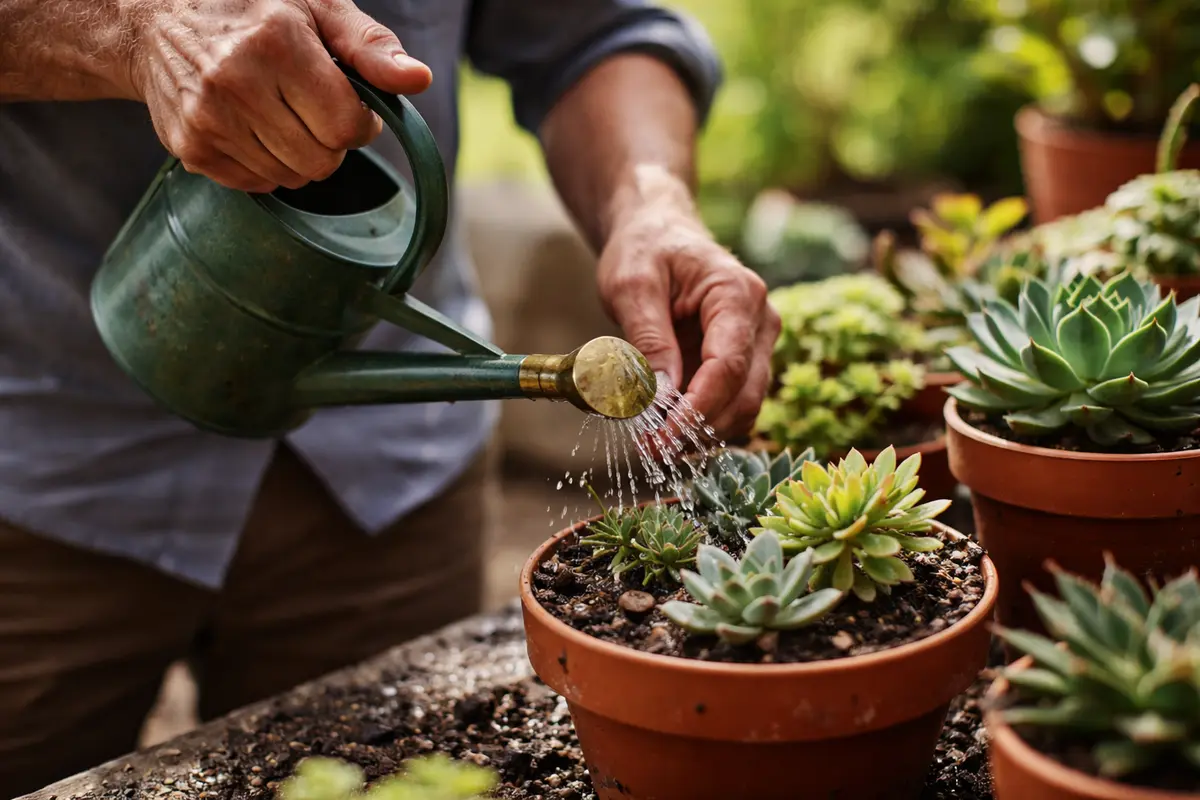
Start by ensuring your succulents are planted in well-draining soil and pots with drainage holes. This will allow excess water to escape, preventing root rot and enabling your plants to stabilize and thrive in their environment.
Overwatering often results from a combination of heavy soil and inadequate drainage, conditions that create a consistently moist environment. When using porous soils, like those specifically designed for cacti and succulents, the surface may appear dry while the roots remain unsettled, leading to root rot if left unchecked. If you notice wilting leaves along with darkening roots, check your drainage and consider re-potting.
In during rainy seasons, it’s crucial to adjust your watering schedule to match the weather. If your succulents are outdoors, consider bringing them inside during heavy rain to prevent soil saturation. Alternatively, you can add a layer of gravel at the bottom of your pots to increase drainage and help manage moisture levels.
During humid months, your succulent may not require as much watering because the additional moisture in the air can satisfy its needs. Adjusting your watering habits promotes a balanced relationship between moisture and air, limiting root rot risks. Carry out finger tests by inserting your finger about an inch into the soil; if it feels moist, it’s advisable to skip watering even if it’s been a few days since the last watering. If the topsoil feels dry but you can see condensation on the inner pot surface, consider waiting longer before adding water.
As seasons change, it’s essential to reassess your watering approach consistently. If humidity levels rise unexpectedly or if you’re using a pot without drainage holes, consider reducing water levels considerably or even suspending watering until conditions change. Observing the behavior of your succulents as seasons shift will help you notice whether they respond well to less frequent watering; this empowers you to create a customized care routine. Plants stressed during a transition period may show signs of droopiness if overwatered, causing greater stress in the long run.
Step 5 – Look for Signs of Root Recovery Post Treatment
Start by checking the moisture level in the soil every few days after reducing your watering frequency. Use your finger to feel the top inch of soil; if it feels damp, wait longer before watering again. Observe the plant’s leaves for signs of improvement, such as a firm texture, reducing discoloration, and active new growth, which should begin to appear within a couple of weeks.
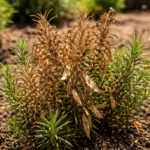
A fully recovered succulent showcases plump, vibrant leaves that feel smooth and firm to the touch, contrasting sharply with early signs of returning problems like shriveled, discolored foliage with a mushy texture. If you spot signs of yellowing or a wilting appearance returning, it indicates that root rot may be creeping back in, which requires immediate attention.
If the plant shows signs of root rot again despite following the previous steps, take it out of its pot to inspect the roots for decay and cut away any mushy areas. If the issue persists after replanting in dry soil, consider applying a fungicide specifically designed for succulents to combat any lingering pathogens.
A fully recovered succulent will boast vibrant, plump leaves that are free from mushy texture or discoloration. The soil should begin to feel drier and more manageable, indicating the effectiveness of your care regimen. Recognizing these signs will set a baseline for what healthy growth looks like and reinforce your care practices. If leaves remain limp or softer than expected, this could suggest lingering root damage that requires further observation. Keeping a dedicated plant journal can also help track your plant’s growth changes and responses.
If you notice signs of wilting or a return of soft leaves, consider further checking the root system for damage once more. Implement a fallback plan by applying a fungicide to limit fungal presence or by simply repotting again if conditions are not improving. A good practice would be to wear gloves while inspecting the roots, as this will help keep your hands clean and prevent any root-to-skin contact that might introduce contaminants. If your succulent continues to struggle despite active measures, it might be wise to consult an expert or consider professional intervention to salvage the plant’s health effectively. Each episode of recovery might reveal different challenges, adjusting your approach as necessary.
FAQ
How long does it take for succulents to recover from root rot?
Recovery time can vary, but generally, you may start to see signs of improvement within a few weeks if proper care is taken. Factors such as the extent of damage, environmental conditions, and care practices can influence recovery speed. Regular monitoring will reveal whether the plant stabilizes and begins new growth or whether further intervention is needed. Keeping conditions optimal, including light and temperature, is crucial for enhancing recovery speed, so be vigilant.
Can root rot spread to other plants in the vicinity?
Yes, root rot can spread if contaminated soil is shared among plants or if water collects and moves between containers. It’s crucial to separate affected succulents and ensure proper care practices to prevent cross-contamination. Removing any displaced soil and cleaning the pot thoroughly will safeguard neighboring plants. In cases where root rot is a common issue, consider isolating all newly acquired plants for a couple of weeks to eliminate disease risk before integrating them with existing plants.
Should I remove all affected parts of the succulent?
Removing all visibly damaged leaves and stems is recommended to prevent any rot from spreading to healthy parts. A careful assessment of the roots should also be made to trim away any unhealthy tissue. While this aggressive approach may seem harsh, it significantly improves the plant’s chances of survival. A thorough inspection allows you to evaluate the extent of the problem effectively and decide if further pruning is necessary to avoid future setbacks; some trimming can even encourage new growth.