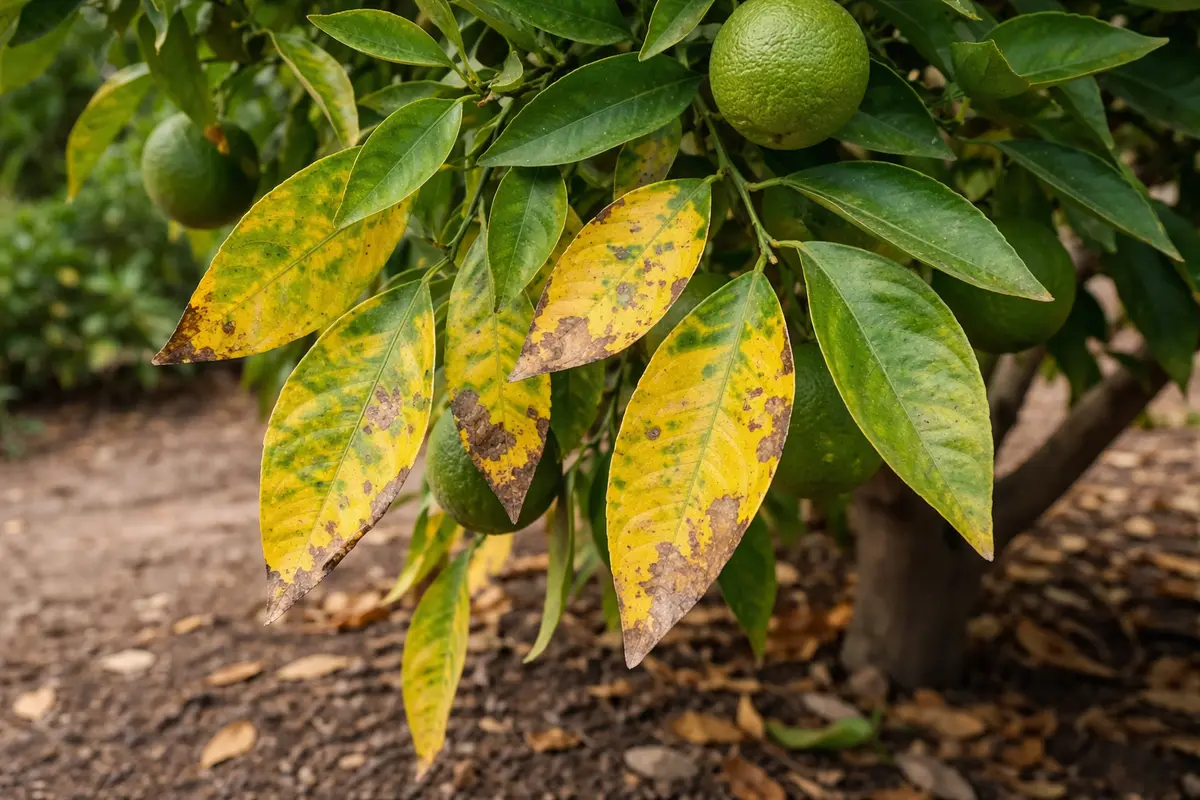
You may notice that during the heat of summer, the vibrant green leaves of your orange tree are beginning to turn a distressing yellow, which is why you need to know why are my orange tree leaves turning yellow in summer. This yellowing is often a sign of stress caused by issues such as nutrient deficiencies or overwatering, leading to potential leaf drop and overall plant damage. If left unaddressed, the situation only gets worse, weakening the plant and setting it back, but you can easily fix it now by checking your watering habits and adjusting the soil’s nutrient levels.
Step 1 – Inspect for Pests on Orange Trees
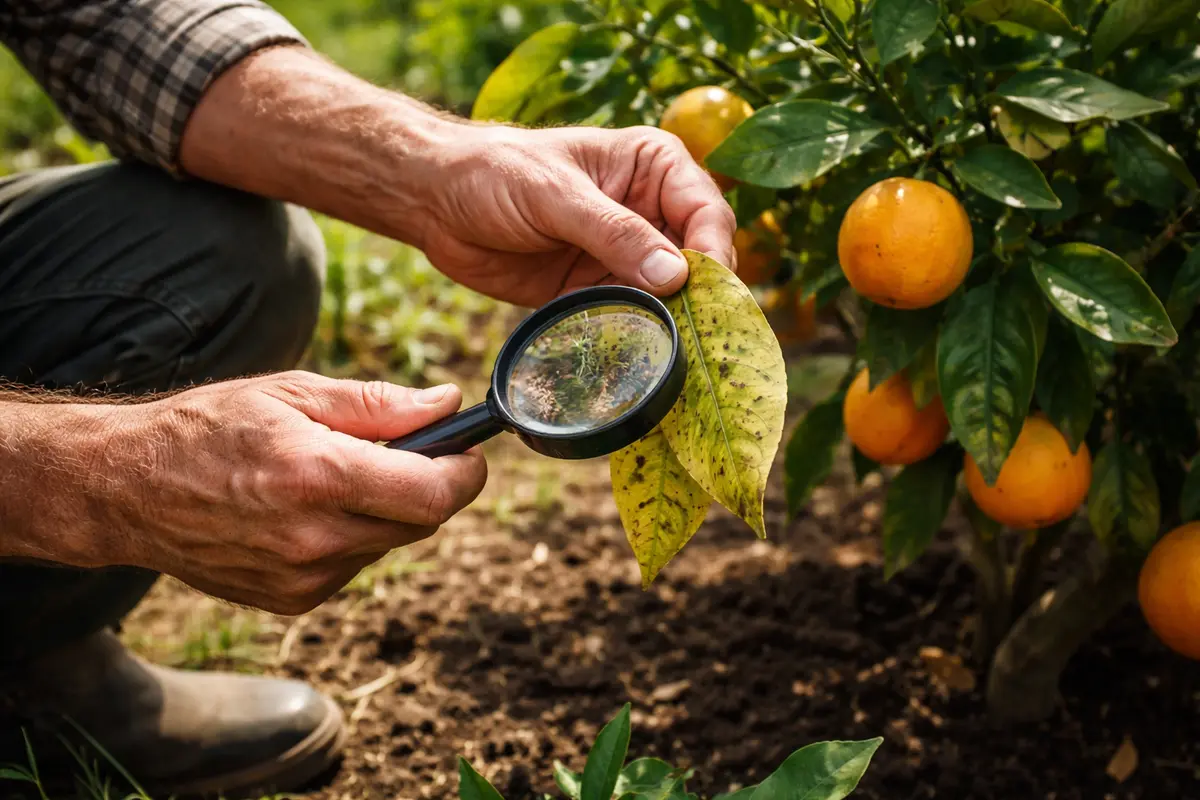
Start by inspecting the leaves and stems of your orange tree for any visible pests such as aphids, spider mites, or whiteflies. Look closely at the undersides of the leaves and along the stems, as these areas are common hiding spots. You should see a reduction in the number of pests within a day of treatment if you employ the correct methods. Consider inspecting your tree in the morning when the pests are most active.
Immediate inspection is crucial because certain pests, like aphids or spider mites, can rapidly inflict damage, causing the leaves to yellow and drop off. These insects feed on the sap of the leaves, which disrupts the tree’s ability to synthesize chlorophyll effectively. For example, if you notice stippling on the leaves or webbing under the leaves, it indicates spider mite presence. The absence of these webs and stippling marks after treatment suggests effective removal. By identifying and addressing the pests quickly, you minimize the risk of widespread damage to the tree’s health.
A common mistake gardeners make is waiting too long to check for pests, thinking that the tree will recover on its own. If left unchecked, pests can reproduce quickly; for instance, aphids can double their population in just a few days, leading to more significant leaf yellowing. If you find pests at this stage, move to apply an insecticidal soap or neem oil to control them. Always ensure to coat both sides of the leaves thoroughly, as pests may hide out of sight. Additionally, consider using a strong jet of water to wash pests off the tree if infestations are not severe, ensuring to repeat this washing every few days to prevent re-infestation.
Step 2 – Check for Nutrient Deficiencies in Soil
First, check the soil moisture level around your orange tree. If the soil feels dry more than a couple of inches down, water the tree thoroughly and observe the leaves; within a week, you should see an improvement in their color and overall vitality.
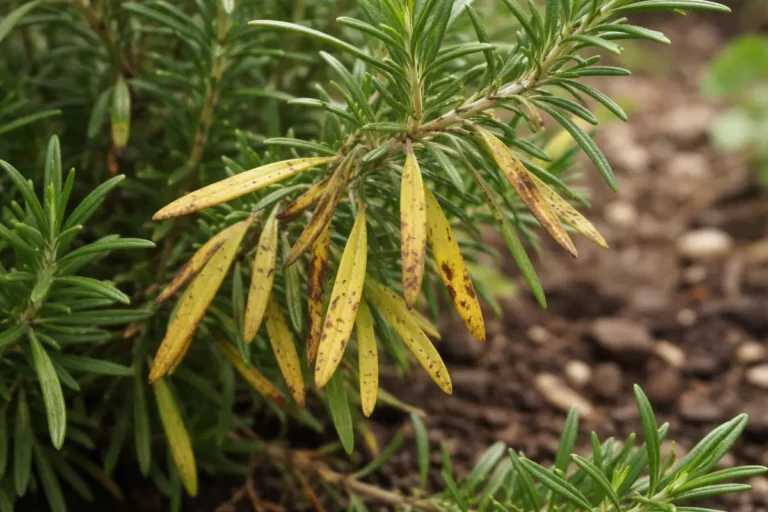
The yellowing of your orange tree leaves often indicates a nutrient deficiency, particularly nitrogen, which is crucial for leaf development. In nutrient-poor soil, the roots struggle to absorb essential minerals, leading to chlorosis; thus, the leaves lose their vibrant green and turn yellow. If you notice stunted growth alongside the yellowing, this suggests an even more severe nutrient imbalance.
If you detect a sour smell from the soil, it may indicate root rot due to overwatering, which requires immediate attention. In this case, stop watering and improve drainage by amending the soil with organic matter. Alternatively, if the yellowing is accompanied by tiny black spots, check for pest infestations that demand a separate treatment approach.
Nutrient deficiencies, particularly nitrogen, magnesium, or iron, can lead to yellowing leaves, a condition known as chlorosis. Using a soil test kit will help you identify which nutrients are lacking. For instance, if the soil test reveals low nitrogen levels alongside yellowing leaves, it directly points to a nutrient problem. The yellowing occurs because the plant lacks the essential nutrients needed for chlorophyll production, thus affecting photosynthesis. Realistically, correcting these deficiencies can lead to noticeable improvements in the tree’s foliage and overall health in just a few weeks.
If you discover low nitrogen levels, immediately use a balanced fertilizer with a higher nitrogen content, applying it according to package instructions—typically, a rate of about 1 to 1.5 pounds per 100 square feet. Conversely, if magnesium is the issue, Epsom salt can be an effective solution, with a common application rate of 1 tablespoon per gallon of water every four to six weeks. Be cautious, as both deficiencies can present similar symptoms, so identifying the precise nutrient problem is crucial for effective treatment. Over time, closely monitor the recovery of the foliage by looking for gradual greening, which may take several weeks. If greening does not occur within a month, consider retesting the soil as deficiencies might extend beyond nitrogen or magnesium.
Step 3 – Feed with Citrus Fertilizer for Recovery

Apply a slow-release citrus fertilizer around the base of your orange tree, ensuring it is evenly distributed in the root zone. You should see new growth within a few weeks, indicating a good recovery. Generally, apply about 1/4 cup of fertilizer for smaller trees and up to a cup for larger ones, but always refer to the fertilizer label for guidance. It’s best to fertilize in the morning when the soil is moist.
The fertilizer is rich in nutrients specifically designed for citrus trees and can support their unique growth needs. Once nutrients are introduced into the soil, the roots will start to absorb them, promoting healthier leaves and faster recovery from stress. This targeted feeding can help mitigate existing deficiencies and stimulate fresh growth. If the nutrient levels were low, this immediate action can lead to noticeable green regrowth within a matter of weeks. Regularly observe the tree for any enhancements in leaf color and overall vitality.
A common mistake is to over-fertilize, thinking that more is better. Over-fertilizing can lead to a buildup of salts in the soil, which can damage roots and hinder recovery. For example, signs of over-fertilization include leaf burn, where the edges of leaves turn brown and crispy. Ensure to follow package instructions and monitor the condition of your tree after fertilization. If yellowing reappears or salt crust develops on the soil surface, it’s essential to leach the soil by thoroughly watering once to flush out excess salts. Reviewing the application rates and timing may prevent these mistakes, thus promoting healthy nutrient uptake.
Step 4 – Water Smartly to Avoid Leaf Yellowing
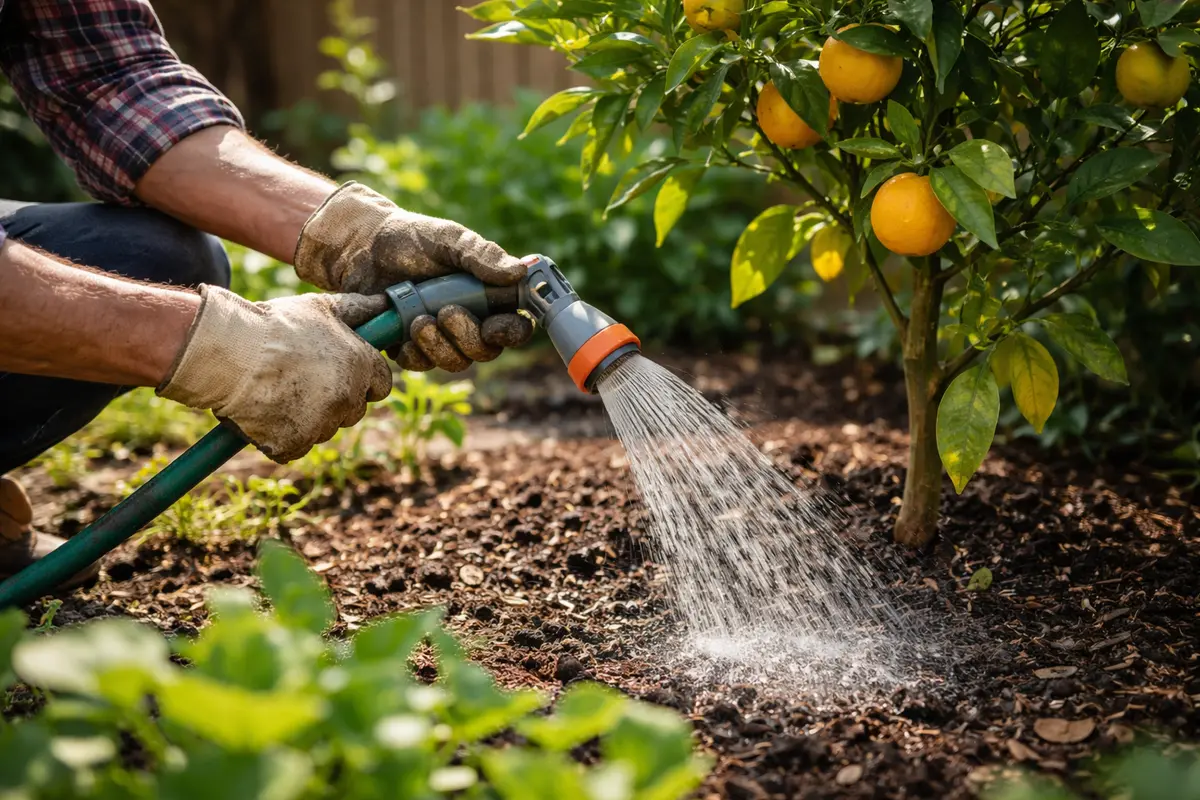
First, check your orange tree’s soil moisture and ensure it is consistently damp but not waterlogged. Adjust your watering schedule to keep the soil evenly moist; this will lead to greener leaves instead of yellowing.
The yellowing leaves often indicate water stress caused by either too little or excessive water. If the tree dries out completely between waterings, it can lead to stress and yellowing. Similarly, overwatering can suffocate roots, resulting in similar symptoms. Implementing a consistent watering routine mitigates stress caused by these fluctuating soil moisture levels.
In summer, increased temperatures can accelerate soil drying, so adapt your watering frequency based on heat and humidity levels. For areas experiencing extreme heat, add a layer of mulch around the tree’s base to help retain moisture and regulate root temperature.
Proper watering practices are vital for tree health, particularly in summer heat. Overwatering can cause root rot, leading to yellow leaves due to poor nutrient uptake, while underwatering stresses the tree, causing it to yellow as well. Make sure to check that the top 2-3 inches of soil are dry before providing water. A handy tip is to stick your finger into the soil; if it feels moist, wait a few more days before watering. This method can prevent both extreme dryness and excessive moisture accumulation, allowing for balanced hydration.
In hot conditions, adjusting your watering routine to deep, less frequent doses is critical. For example, during peak summer months, watering once a week might suffice rather than daily sprinkling, which can lead to shallow root development. This could be counterproductive, resulting in weak trees that rely on regular surface watering. Consider using a drip irrigation system to ensure even moisture distribution or employing a moisture gauge to monitor the soil moisture levels accurately. This way, you will thrive in maintaining optimal watering practices.
Step 5 – Watch Leaves for Fresh Yellowing Signs
Start by examining your orange tree’s soil moisture and nutrient levels to pinpoint potential issues. Check the soil about six inches deep; if it feels dry, water thoroughly, ensuring the base of the tree is hydrated. Observe the leaves closely—if they begin to green up within a week, your watering was likely insufficient. If not, consider assessing your fertilization routine next.
A fully recovered orange tree will display vibrant, deep green leaves, and new growth should be apparent, with a smooth texture. In contrast, early signs of the problem returning include a dull yellowing hue and a rough texture on the leaves, often accompanied by a lack of new shoots. If you notice drooping leaves with a pale yellow color, check for signs of overwatering or root rot.
If yellowing persists despite corrective actions, consider testing the soil for nutrient deficiencies or pH imbalances, as these can hinder recovery. If nutrient imbalances are evident, amend your soil with the appropriate fertilizers. Should yellow leaves continue appearing after adjustments, consult a local extension service for further diagnostic support.
A fully recovered orange tree will display vibrant green leaves and new growth. If yellowing begins to reappear, it could suggest that issues have not been fully resolved, whether it’s pests, nutrient levels, or watering practices. Identifying these signs early can help prevent a return to the original problem. If any leaves retain a pale color or appear shriveled compared to the surrounding healthy foliage, it’s time for a more in-depth assessment. Textures should feel firm and healthy; limp or crunchy leaves indicate stress.
If the yellowing does return, consider reassessing your care routine. First, inspect every leaf and stem for new pest infestations or retest your soil for nutrient deficiencies. If issues persist even after addressing these aspects, consider consulting a local agricultural extension office for professional advice. Ignoring any signs of returning yellowing can put your tree at risk of declining health, and escalating the situation may require advanced treatments or a change in care routine, such as introducing systemic insecticides or professional fertilization strategies.
FAQ
How long does it take for yellow leaves to recover?
After addressing the underlying issues, such as pests or nutrient deficiencies, it can take about two to three weeks for noticeable recovery in leaf color and health. Regular monitoring during this period will help you assess the effectiveness of your interventions, and consider rechecking your fertilization and watering schedules for any further adjustments.
Can yellow leaves spread to other trees?
Yes, if the yellowing is due to pests or disease, there is a risk that it can spread to nearby trees. Ensuring good sanitation practices, such as cleaning up fallen debris and isolating affected trees, can help prevent spread. Also, make sure to treat all trees in the vicinity if any signs of pests or diseases are present.
Should I remove the yellow leaves from my orange tree?
Yes, removing yellow leaves can improve airflow and reduce pest habitats. However, only remove leaves that are severely affected, as some yellowing may indicate the plant is struggling rather than a total loss. Observe if the yellowing affects new growth as well, which may suggest a more systemic issue that requires immediate attention. If leaves appear less symptomatic after removal, it may improve overall tree vigor.