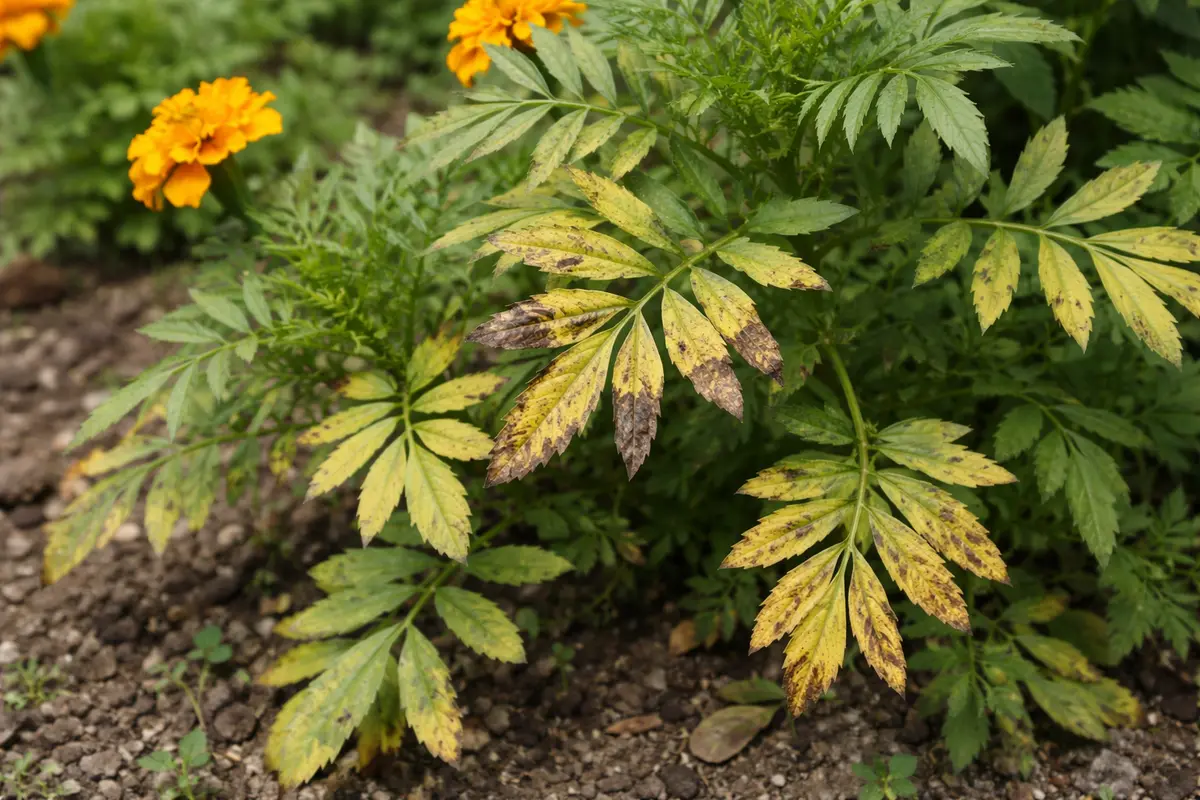
You may notice that your marigold plants are under the stress of summer heat when you start seeing signs like leaf drop, which is why you need to know why are my marigold leaves turning yellow in summer. This yellowing can occur due to insufficient water or nutrient deficiencies, leading to wilting and damage in the leaves. If left unaddressed, the problem gets worse, weakens the plant, and could ultimately lead to more damage, but fixing it is possible now—just inspect your watering routine and adjust nutrient levels as needed.
Step 1 – Inspect Marigold Leaves for Pests
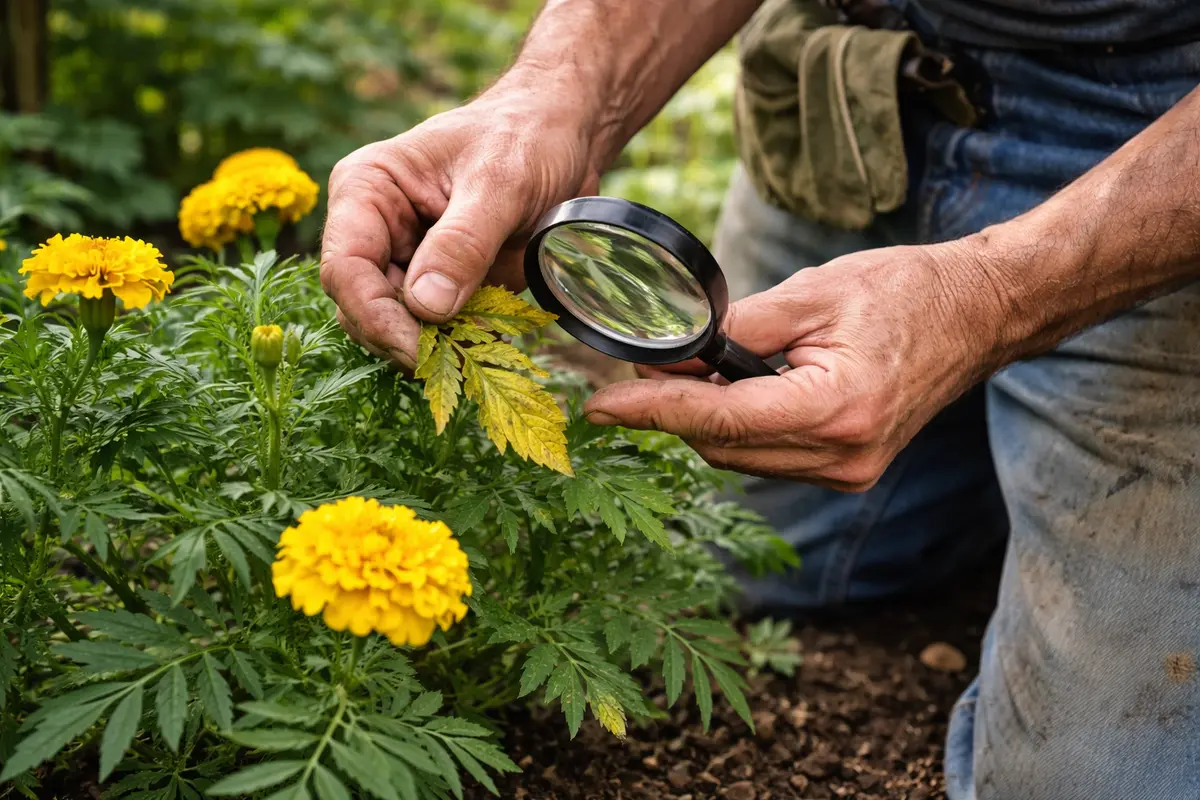
Start by inspecting the undersides of your marigold leaves for pests such as aphids or spider mites. You will likely find tiny insects or webbing that can confirm their presence within minutes. Early detection is vital as these pests can multiply quickly and exacerbate leaf yellowing. If you see clusters of small green or black bugs clinging to the leaves or fine webbing on the branches, it’s time to act. Use a magnifying glass to closely examine the leaves; aphids can be very small and easy to overlook.
Marigolds are prone to aphids, which extract sap from leaves and lead to yellowing. If left untreated, the damage can extend throughout the plant, much worse than the initial signs you observe. Continuing to monitor your marigolds is crucial, especially as warm weather makes pests more active. Regular checks can help you catch infestations before they balloon into a more severe problem, particularly important during the peak of summer. If you notice sticky residue known as honeydew on your leaves, it’s a clear indication of aphids or another sap-sucking pest.
A common mistake gardeners make at this stage is overlooking small infestations. Many wait until the problem becomes severe, resulting in significant leaf damage. If you don’t see evidence immediately, check again after a few days, as pest populations can grow rapidly under favorable conditions. This can be particularly true if humid weather is present, leading to increased pest reproduction rates. It’s better to catch an issue early; for example, one aphid can lay dozens of eggs within a week, which can lead to a full-blown outbreak and significant crop damage within a very short period.
Step 2 – Determine Nutrient Deficiency in Marigolds
First, check the soil moisture levels surrounding your marigolds. If the soil feels dry and crumbly, thoroughly water the plants until the soil is evenly moist, which should cause the leaves to perk up and regain their vibrant color within a few days.
When marigold leaves turn yellow, it often indicates a water-related issue, such as drought stress. Inadequate moisture leads to a lack of proper nutrient uptake by the roots, which manifests in the yellowing of leaves. In contrast, if the soil is soggy, this may signal root rot caused by overwatering, preventing the roots from absorbing essential nutrients effectively. If the soil feels dry and crumbles easily, check that the roots are not damaged or blocked.
If the soil smells sour, indicating possible root rot, stop watering immediately and consider repotting the marigolds in fresh, well-draining soil. Another cause of yellowing leaves could be nutrient deficiency; if the yellowing begins between the veins, check if you’ve applied fertilizer recently. Adjust your feeding schedule accordingly to restore vigor.
Nitrogen is essential for vegetative growth, and a deficiency leads to chlorosis, or yellowing leaves. When marigolds lack nitrogen, the plants cannot produce sufficient chlorophyll, which is necessary for photosynthesis. This deficiency leads to decreased growth and a weaker plant overall, making it more susceptible to pests and diseases. Therefore, providing adequate nitrogen right at the beginning of the growing season is crucial to support lush foliage. A well-nourished plant also demonstrates a better ability to recover from other stresses, such as temperature fluctuations.
If your test indicates low iron levels, consider applying chelated iron to the soil, which improves nutrient uptake. Applying the correct amount of iron as per package instructions ensures you avoid oversaturation, which can lead to other deficiencies. However, if the soil shows an adequate nutrient level yet the yellowing persists, check other factors like watering and drainage to ensure they’re not impacting nutrient absorption. Poor drainage, for instance, can block roots from accessing essential nutrients even when they are present in sufficient quantities, leading to continued yellowing. Additionally, keep an eye on pH levels in your soil, as overly acidic or alkaline conditions can also hinder nutrient uptake even if amounts appear adequate.
Step 3 – Water Thoroughly to Revive Marigold Plants
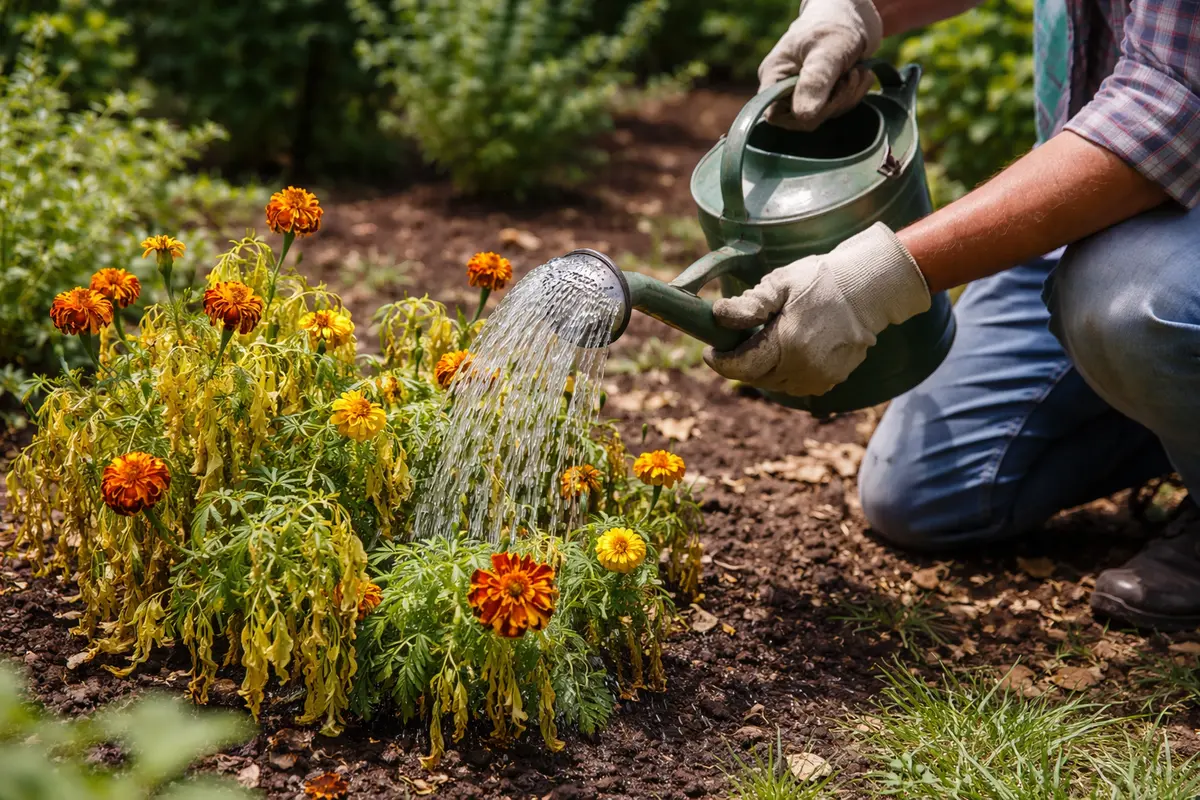
Water your marigolds deeply, ensuring the soil is moist to a depth of at least six inches. You will start seeing perkier leaves and more vibrant colors within a few days as the plants rehydrate and resume their growing patterns. Deep watering encourages strong root growth and helps prevent further stress during heat spells. Aim to water early in the morning, as this will allow your marigolds to absorb moisture before the hottest part of the day, promoting resilience against daytime heat stress.
Marigolds prefer well-draining soil; if the roots have been sitting in dry soil, it restricts their ability to absorb essential nutrients. Proper hydration ensures the marigold’s cellular structure is maintained, preventing additional yellowing and leaf drop. Look for more robust foliage after watering, as recovery signs become evident within 24 to 48 hours. If the soil is extremely dry, consider applying water until the surface is soaked and then allowing it to drain to ensure saturation. However, be vigilant and observe if the recovery is consistent; sporadic watering can lead to a somewhat opposite effect.
A common mistake during this recovery phase is overcompensating by watering too frequently. Overwatering can lead to root rot, an entirely different problem that also causes yellow leaves and wilting. Ensure the top inch of soil is dry before watering again to maintain a healthy moisture level. If you note soggy soil or a peculiar smell around the base of the plant, you may need to reduce your watering frequency considerably, as these are clear signs that overwatering could be occurring. If root rot sets in, the plant may need to be removed and replaced, as it can be challenging to reverse this condition once established.
Step 4 – Keep Soil Nutrient-Rich During Hot Weather
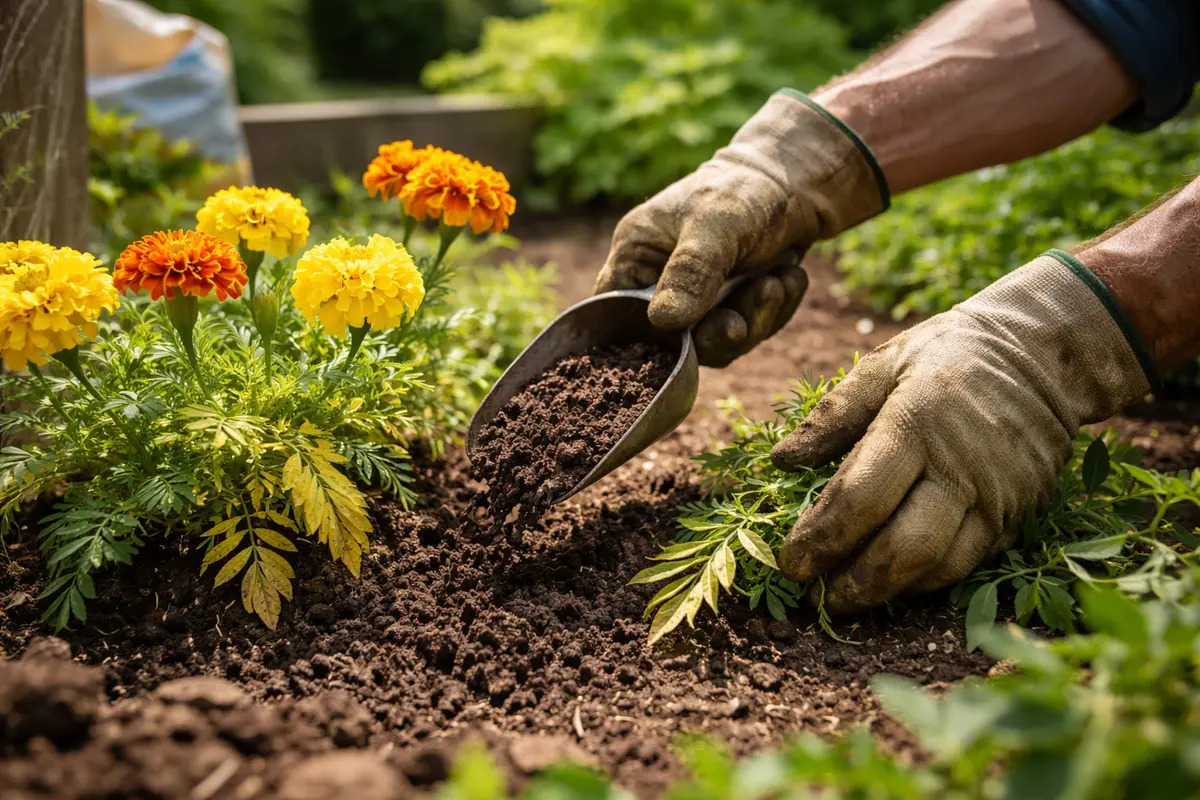
Apply a balanced fertilizer with micronutrients to maintain soil health, particularly during hot weather. You will notice a gradual improvement in the leaf color and overall plant vigor as the nutrients support growth during the stressful summer months. Regular applications will help lock in essential minerals that marigolds require for optimal health. This includes applying a slow-release fertilizer every 6 to 8 weeks, giving the plants a stable food supply that supports their extended growing season.
Hot weather can cause soil nutrients to leach away quicker than usual, leading to deficiencies. A consistent fertilization routine enriches the soil, supports healthy foliage, and helps the plants combat stressors. Observe if leaves start to regain their color after fertilization, as this is a good indication that the plants are effectively utilizing the nutrients. As the temperature rises, this proactive approach ensures marigolds have the nutrients they need to thrive in harsh conditions. Using organic compost as mulch can further support nutrient retention and protect the plants from extreme temperatures, which can severely deplete soil moisture.
Consider mulching around your marigolds with organic matter to help retain soil moisture and temperature. In the peak summer months, the soil can dry out quickly, leading to fluctuating moisture levels that stress plants. A layer of mulch around the base of your marigolds not only helps with moisture retention but also aids in regulating soil temperature; it keeps roots cool during intense heat. This practice will also suppress weeds, which compete for nutrients and highlight the benefits of maintaining strong, healthy marigolds. If you use straw or wood chips for mulch, ensure you maintain a thickness of at least two to four inches for effective moisture retention.
Step 5 – Check Marigold Foliage for New Yellowing Symptoms
Recheck your marigolds every few days for further yellowing or new symptoms after implementing these solutions. Look for fresh growth and deep green color on previously affected leaves, which indicates recovery. Timely checks allow you to catch any signs of trouble early, preventing severe setbacks. Keep an eye out not only for yellowing but also for any wilting, as these can indicate persisting issues that need further attention.
A well-recovered marigold should exhibit vibrant green leaves that feel firm and healthy to the touch. Conversely, if leaves begin yellowing again or new ones show symptoms, it’s indicative that underlying issues may still be present, such as lingering pests or nutrient imbalances that were not addressed fully. Regular monitoring helps maintain your plants’ health and keeps further yellowing at bay. If you observe spotty discoloration or curling leaves, these are clear indicators of stress, possibly requiring immediate corrective action or treatment.
If the yellowing persists even after your interventions, it may be time to reassess conditions such as soil drainage and sunlight exposure. Poor drainage can lead to root rot, while too much sun can burn marigold leaves. If your marigolds are situated in full sun for too long, consider relocating them to a shadier spot during the hottest part of the day if discoloration continues despite your best efforts to remedy issues. In severe cases, bringing in a professional to evaluate the environmental conditions might be warranted if you continue to see no improvements despite your best efforts.
FAQ
How long will it take for my marigolds to recover from yellowing leaves?
Typically, you can expect the marigolds to show signs of recovery within 3 to 7 days after addressing issues like watering and nutrient deficiencies. New growth should appear green and healthy, indicating that the plant is bouncing back. However, if conditions such as pest infestations or poor soil persist, recovery may take longer, complicating the overall health of the plants if not addressed in a timely manner.
Should I remove yellow leaves from my marigolds?
Yes, it’s advisable to remove heavily yellowed or damaged leaves to allow the plant to focus its energy on healthier foliage. This removal helps improve airflow and can prevent the spread of diseases that might compromise other parts of the plant. Make sure to use clean, sharp scissors to avoid introducing any pathogens when trimming leaves, as clean cuts minimize further stress on the plant and promote healing.
Can yellow leaves spread to other plants in my garden?
While yellowing leaves in marigolds can indicate specific issues like nutrient deficiencies or pests, it doesn’t directly spread to other plants. However, pests that cause yellowing can move to other plants, so it’s essential to address any infestations promptly. Keeping surrounding plants healthy and well-spaced can also assist in minimizing the risk of pest transfers; this is especially important within dense floral arrangements or garden layouts.